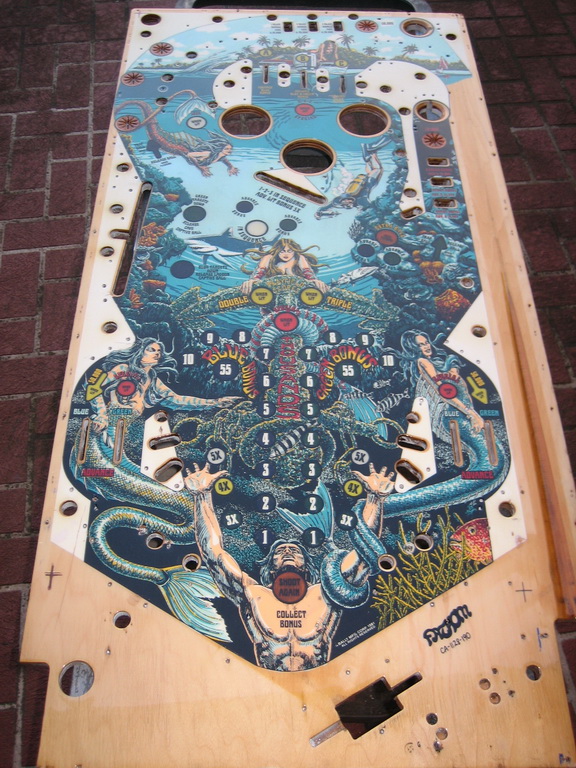
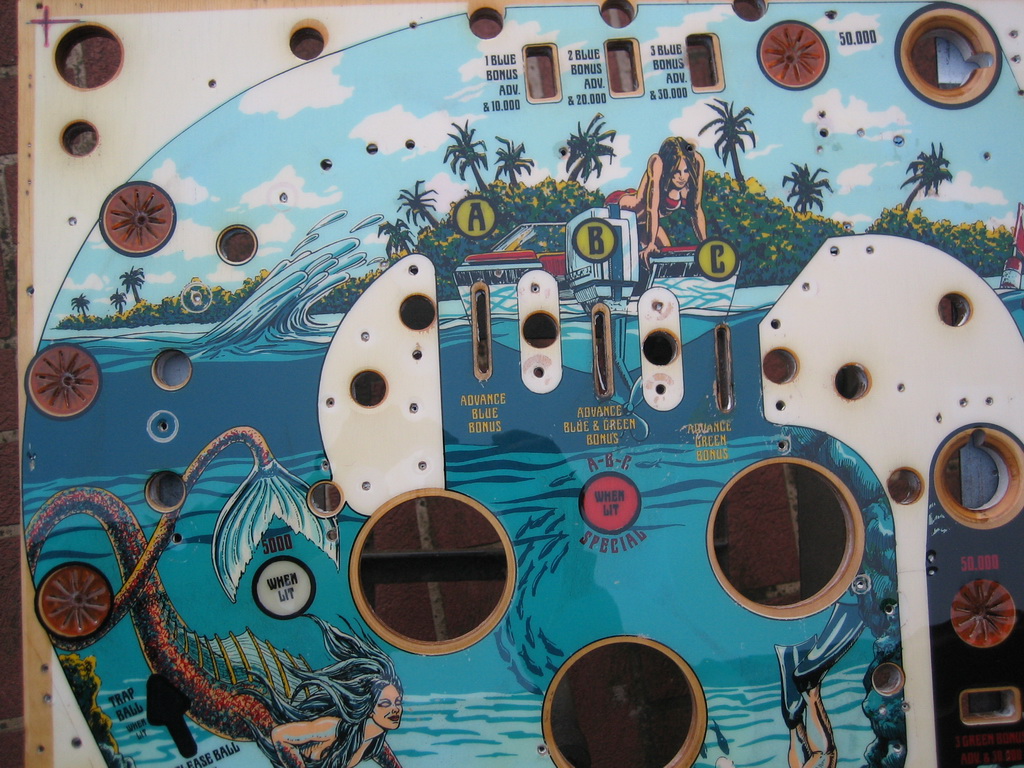
Author Topic: Bally Fathom Restoration  (Read 4319 times)

0 Members and 1 Guest are viewing this topic.

Offline tura67

  • Trade Count: (0)
  • ***
  • Forum Posts:
  • Holland / the Netherlands
Re: Bally Fathom Restoration
« Reply #45 on: May 06, 2011, 09:41:26 AM »

Love the coin door inserts ..... just where exactly do you think this pin came from?  I don't recognise this currency.
Netherlands, Europe
http://en.wikipedia.org/wiki/Dutch_guilder


Confirmed! Gulden is dutch for guilder, which used to be the dutch currency before the Euro.
Pins: SS, T2, LOTR           Gone: Dr Who

Offline Strangeways

  • Pinball Restoration is my passion
  • Administrator
  • Trade Count: (+9)
  • *****
  • High Score Initials:
  • Forum Posts:
  • Melbourne
  • ABN 68 283 634 461
    • Ride The Boney Beast
Re: Bally Fathom Restoration
« Reply #46 on: May 25, 2011, 10:19:33 AM »

More cabinet and board work. The power supply board was removed from the machine and rebuilt. One BR had been changed in the past, so I replaced both with new ones. I replaced the diodes and the 25 Ohm 5W resistor which measured out of spec. I replaced the fuses and gave it a good clean.


Mounted on the plate and connected to the transformer.


Finally installed into the cabinet. Prior to testing, I set the jumpers to 240V and installed a new power cable and plug. I tested the voltages (without load) and they are in within spec. The lower cabinet is basically completely done exept a couple of repairs which will be covered later.


The headbox

I previously removed all the wiring, cable manangement and brackets. All the connectors are checked, and none need to be replaced. The entire internals are washed (even the PCB standoffs!). Here's a picture of the empty head cleaned.


The front section is also cleaned. I removed the display brackets and clean them properly, screws and hardware are buffed. I'll replace the globes later - I leave the old globes in place to prevent water etc from entering the sockets.


So here is where I'm at. The Power supply board and solenoid driver has been rebuilt. The displays, lamp driver, MPU and S&T board are next. All the boards are in EXCELLENT condition, so not much will require total rebuilds.


Slow progress, but it is bloody cold in Melbourne !
Aussie Pinball - Proud to be Australia's Premier Pinball Forum

http://www.australianpinballrestorations.com.au/

http://www.rtbb.com.au/catalog/

We carry the largest range of NEW Ramps in Australia

Offline Strangeways

  • Pinball Restoration is my passion
  • Administrator
  • Trade Count: (+9)
  • *****
  • High Score Initials:
  • Forum Posts:
  • Melbourne
  • ABN 68 283 634 461
    • Ride The Boney Beast
Re: Bally Fathom Restoration
« Reply #47 on: June 07, 2011, 11:02:22 PM »

Playfield Restoration

The "Fun" bit. I was pleased the mylar or contact was easy to remove, as I can improve this playfield. Yes - it will take A LOT LONGER to clean and reassemble, but I wanted to remove that HORRIBLE ball swirl and clearcoat the playfield. The first step is to total clean the playfield and use Magic Eraser and alcohol. This will take HOURS and I need to be careful because there's a lot of ball swirl marks, and the old clear is thin and chipped around the inserts. So here is the first 8 hours - yes - and I've only done half the playfield. But the patience has results !

Here's a picture without the flash to compare. Left side is untouched, right side has been cleaned and scrubbed with Magic Eraser.


Close up - I've cleaned the right side, and you can see the difference already.


Top section - again, one half done and the colours are still very clear. If I wipe the area with Novus 2, it really brings out the colors. That's what I'm hoping the clearcoat will do !


Here's some snaps with natural light. Still plenty of owrk to be done. Fathom is one of the more difficult restores to do as there are so many parts. The playfield will take at least another week of cleaning.


.. and the highlighted section in natural light.


My hands ache and my head spins ! Back to the EM !

Anyhow, this will take time, but it will be worth it in the end.

Aussie Pinball - Proud to be Australia's Premier Pinball Forum

http://www.australianpinballrestorations.com.au/

http://www.rtbb.com.au/catalog/

We carry the largest range of NEW Ramps in Australia

Offline Steve2010

  • Trade Count: (+11)
  • *****
  • Forum Posts:
  • Sydney
Re: Bally Fathom Restoration
« Reply #48 on: June 08, 2011, 09:26:38 AM »
Yes - it will take A LOT LONGER to clean and reassemble, but I wanted to remove that HORRIBLE ball swirl and clearcoat the playfield. The first step is to total clean the playfield and use Magic Eraser and alcohol. This will take HOURS and I need to be careful because there's a lot of ball swirl marks, and the old clear is thin and chipped around the inserts. So here is the first 8 hours - yes - and I've only done half the playfield. But the patience has results !

Ball swirl is just plain yuck – when it accumulates over the years, it just sucks the vibrant look out of a PF.  And it can be an absolute pain in the arse to remove.  I have had great results on a few of my machines so far, and you are spot on – it just takes hours to do.  And you need to be very careful doing it – in a few places I went too far, and started to remove paint – crap!  Always need to remind myself to check the ME every now and then for ANY sign of paint on it.  I have found through my (limited so far) experience with ME that you do need to apply a fair amount of pressure, because getting the ball swirl out can take alot of effort.

The results you have attained here just simply speak for themselves – left and right side, amazing.  It can be tempting to give up with it after spending so much time on it, but when you get the results, you know it’s worth it! ^^^

Offline ktm450

  • Trade Count: (+1)
  • ******
  • High Score Initials:
  • Forum Posts:
  • Geelong, Victoria
Re: Bally Fathom Restoration
« Reply #49 on: June 08, 2011, 04:16:36 PM »
Looks great so far mate, will be a beautiful PF when finished and CC'd

Offline Greg

  • Trade Count: (0)
  • ******
  • Forum Posts:
  • Melbourne
    • rtbb.com.au
Re: Bally Fathom Restoration
« Reply #50 on: June 08, 2011, 04:39:05 PM »
had a look at this Sunday when at Nino's , this is going to come up very nice by the time the playfield is finished
and the pics don't really do the work Nino's already put in to it justice, who ever ends up with this is going to be a lucky person.
http://www.rtbb.com.au/catalog/
We carry the largest range of NEW Ramps in Australia

Offline Strangeways

  • Pinball Restoration is my passion
  • Administrator
  • Trade Count: (+9)
  • *****
  • High Score Initials:
  • Forum Posts:
  • Melbourne
  • ABN 68 283 634 461
    • Ride The Boney Beast
Re: Bally Fathom Restoration
« Reply #51 on: August 18, 2011, 11:22:30 PM »

BIG PLAYFIELD UPDATE

I spent HOURS removing the ball swirl and came very close to removing the paint when I breached the factory varnish (clearcoats were not used THEN as we know it today). It became frustrating as I really wanted the playfield to be as best as I could manage. Even cleaning it with Novus 2 was not good enough.

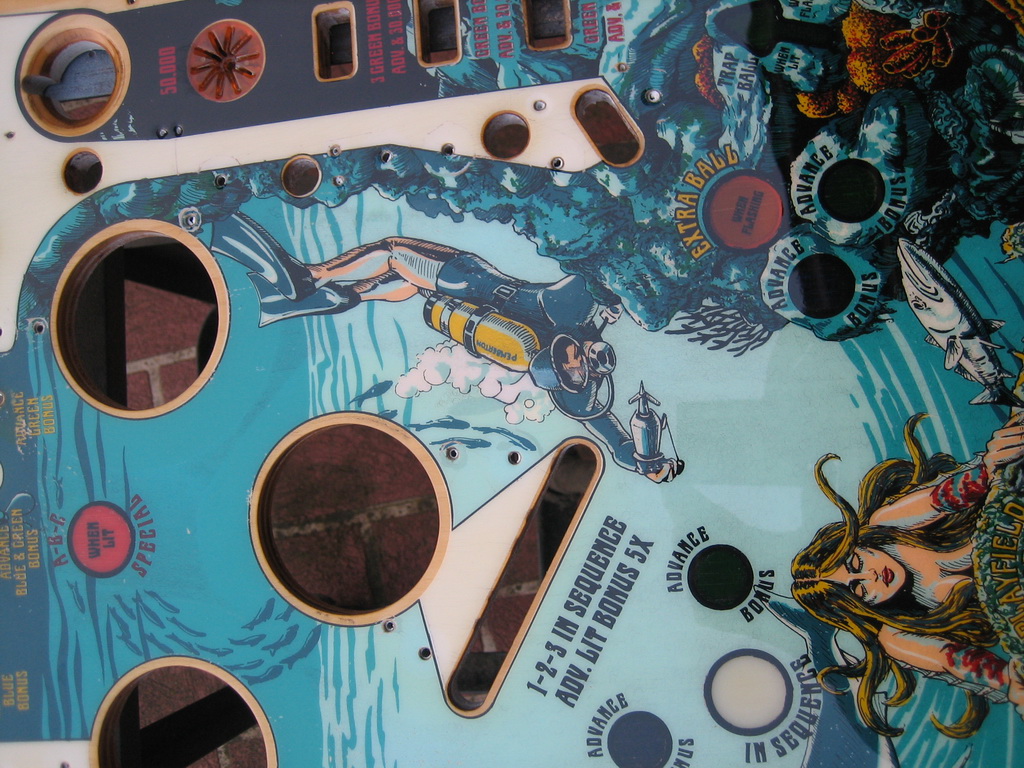
I originally wanted to attempt the clearcoat process based on the success I had with the clearcoat on the Aces High and Buccaneer. But that was onlt is smaller areas - not an entire playfield. While I toyed with the idea, I did some touch ups around some areas (especially some damage around the diver on the right hand side of the pop bumpers) and I repainted all the inserts.

I spent a lot of time procrastinating  !@#

I then approached a friend of mine with a proposal to clearcoat this playfield (professionally), and if it did not work out, then I'll accept the consequences. So I have my playfield touch up work sealed under a clearcoat. What could possibly go wrong ??


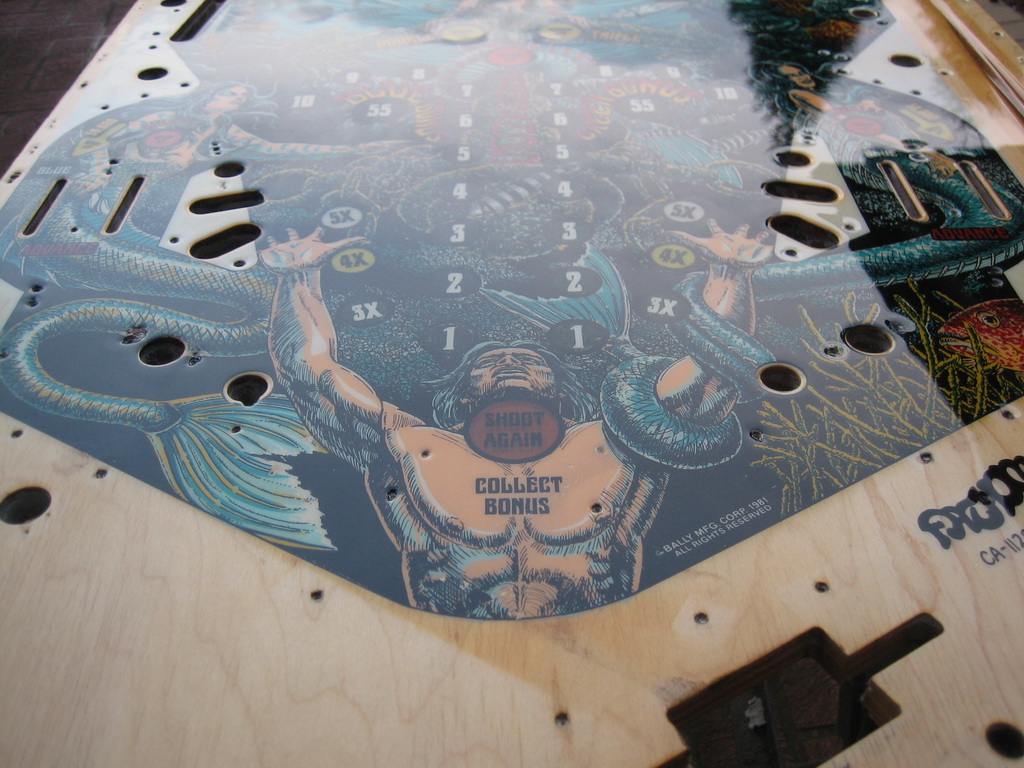
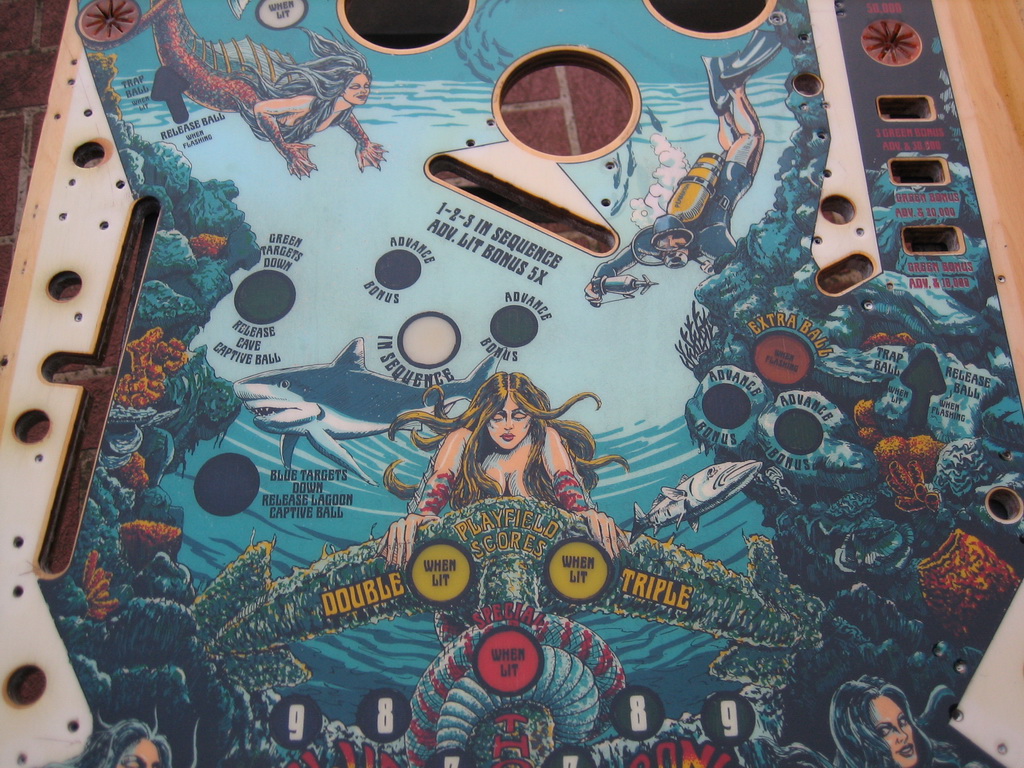
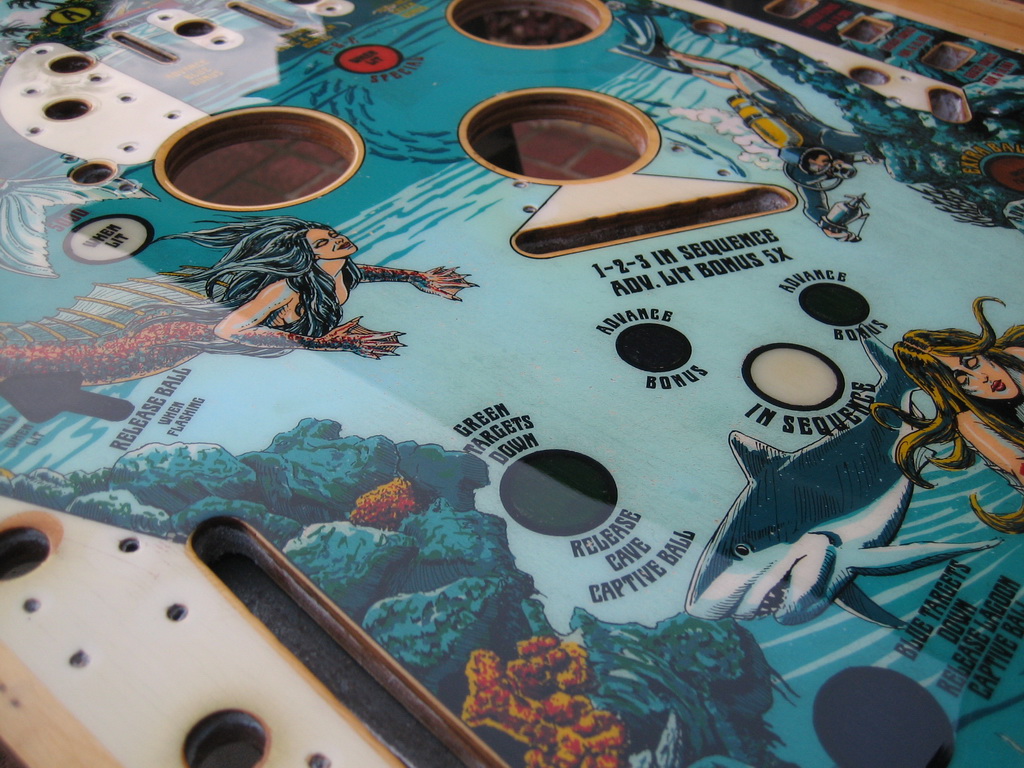
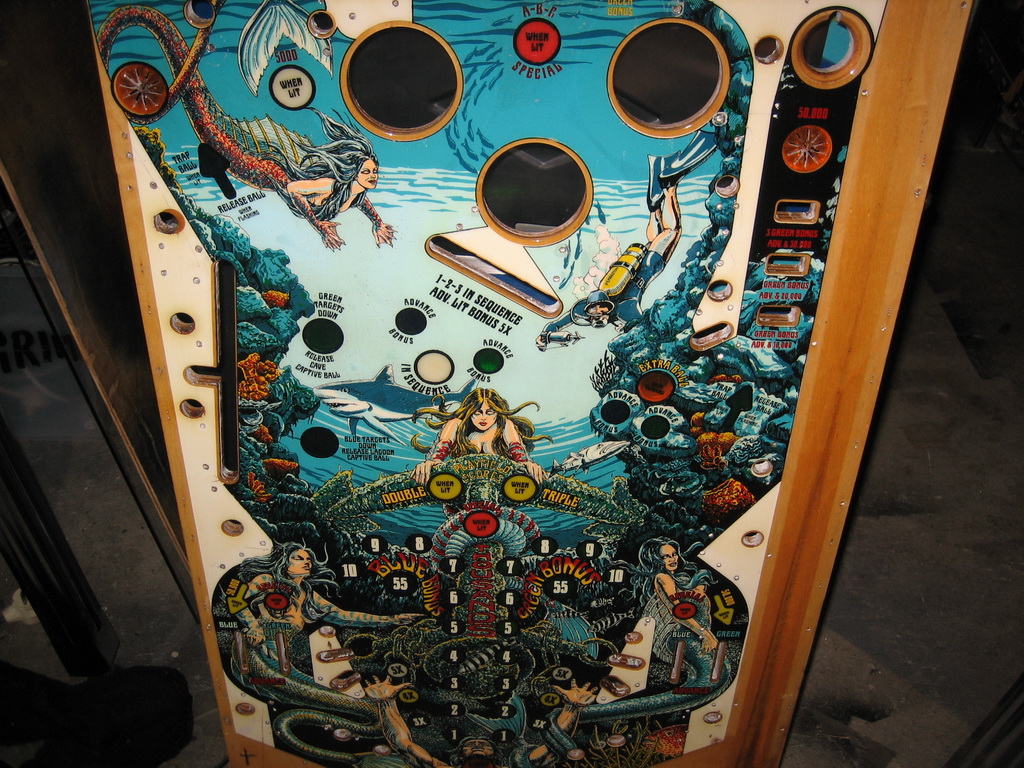
Here are the results. I would like to say that the result FAR exceed my expectations, even though the clearcoater dude STILL thought it could be better - I could not be any happier than I am today. Enough dribble, let the pictures do the talking !


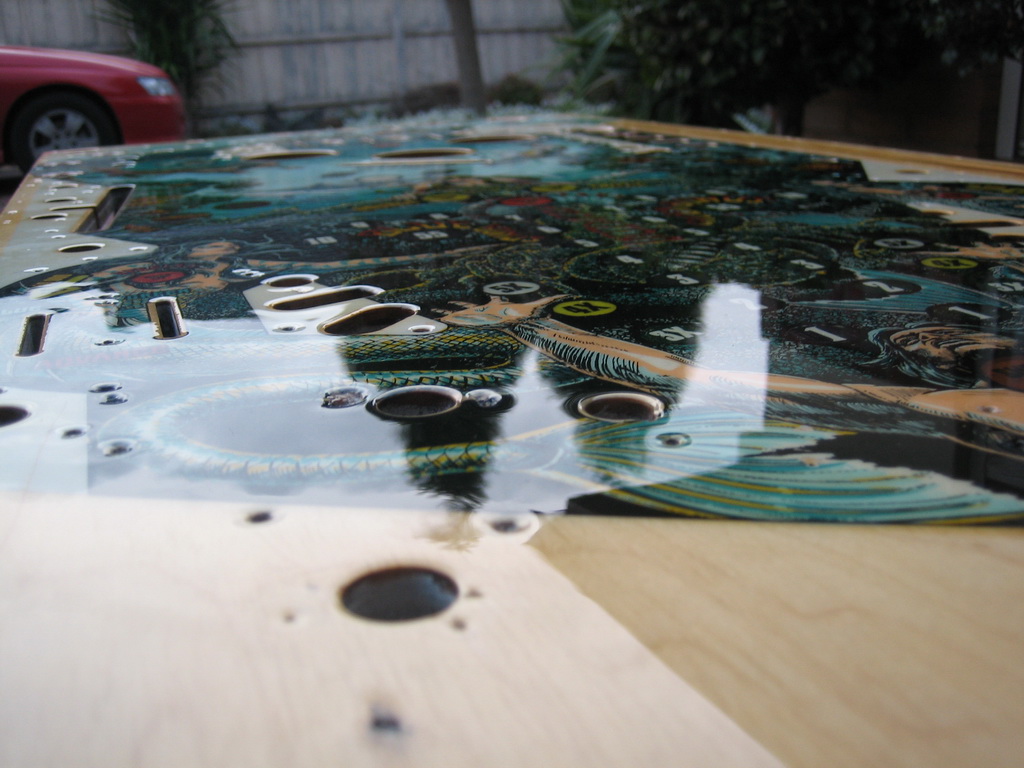
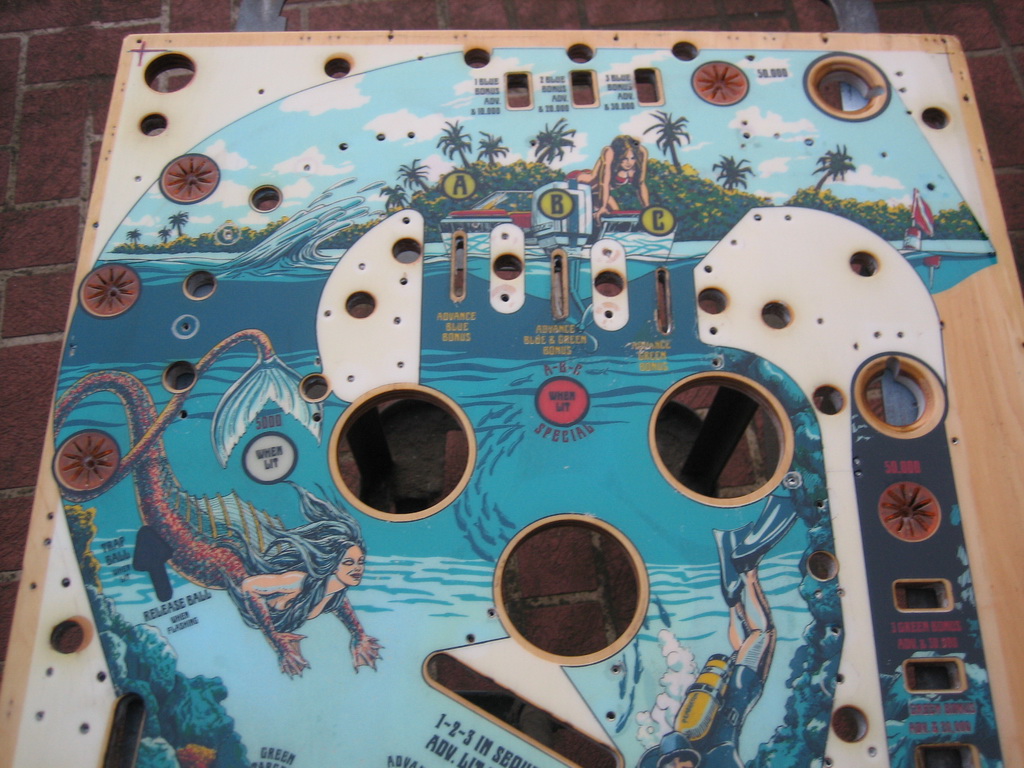
The Ball swirl is ALMOST un-noticeable - the clearcoat is so smooth, it removed the fine edges and added depth to the areas that were affected.


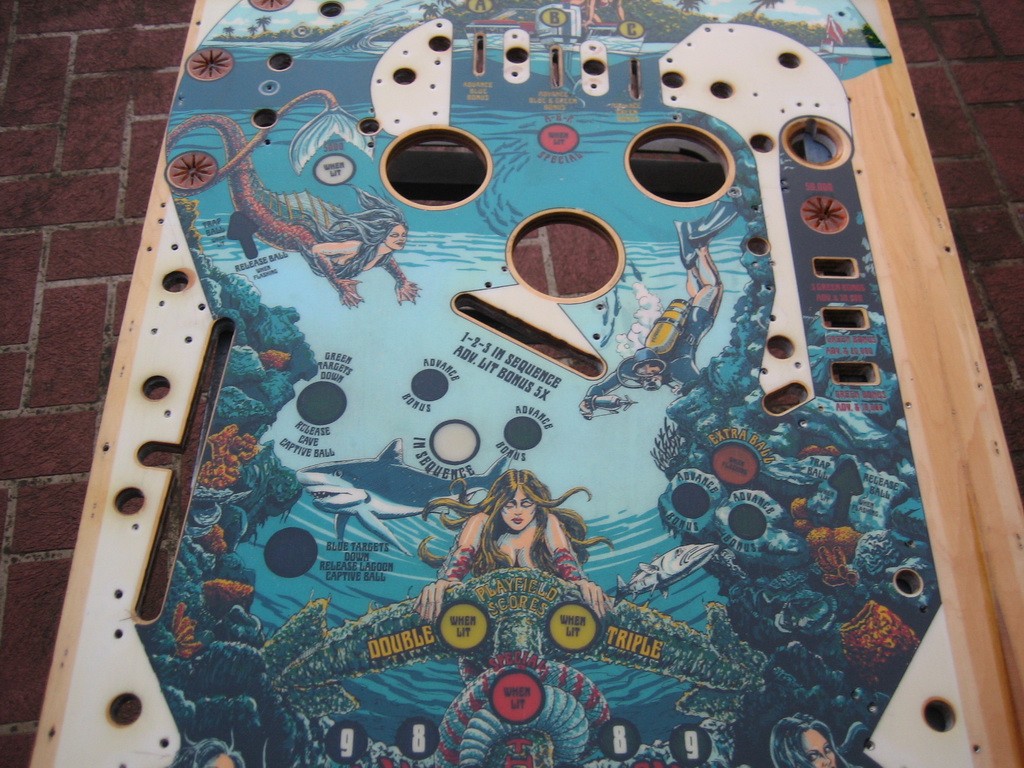
This pictures was taken indoors with the flash on ;


I have to wait 2 weeks for it to cure properly before re assembly.

The clearcoat was "risky", but due to the abilty of the "clearcoater dude", it has been a complete success. A risk well taken, and the results are stunning. The depth of the colors within the artwork are pronounced and the finish is not too glossy - which it what I expected. The playfield is like a sheet of glass.

Now I can finally move forward with this restore !

 ^^^


Aussie Pinball - Proud to be Australia's Premier Pinball Forum

http://www.australianpinballrestorations.com.au/

http://www.rtbb.com.au/catalog/

We carry the largest range of NEW Ramps in Australia

Offline Ballywannabe

  • Trade Count: (0)
  • *****
  • Forum Posts:
  • Perth
Re: Bally Fathom Restoration
« Reply #52 on: August 18, 2011, 11:51:46 PM »
Hi Nino

that turned out really well - it is amazing how the clearcoat can bring the colours back to life ^^^

Now you just have to restrain yourself and let it cure before reassembling!

cheers
Ian

Offline Olivia_jason

  • Trade Count: (+2)
  • ******
  • Forum Posts:
Re: Bally Fathom Restoration
« Reply #53 on: August 18, 2011, 11:55:07 PM »
could i ask what type of paint do you use to clear pf? how do you tell what type of paint is on a playfield? does it very from maker to maker or era? im guessing wrong product like a car and bam it reacts and all bad? because like car acrylics, anamels, and 2pak paints can cause problems.
ive been wondering what paints people use to clear pf's. looks really good when done

Offline Strangeways

  • Pinball Restoration is my passion
  • Administrator
  • Trade Count: (+9)
  • *****
  • High Score Initials:
  • Forum Posts:
  • Melbourne
  • ABN 68 283 634 461
    • Ride The Boney Beast
Re: Bally Fathom Restoration
« Reply #54 on: August 18, 2011, 11:55:13 PM »
Hi Nino

that turned out really well - it is amazing how the clearcoat can bring the colours back to life ^^^

Now you just have to restrain yourself and let it cure before reassembling!

cheers
Ian

Yes - I'm holding back very well so far - luckily I have heaps to do on the Theater of Magic  #@#
Aussie Pinball - Proud to be Australia's Premier Pinball Forum

http://www.australianpinballrestorations.com.au/

http://www.rtbb.com.au/catalog/

We carry the largest range of NEW Ramps in Australia

Offline Strangeways

  • Pinball Restoration is my passion
  • Administrator
  • Trade Count: (+9)
  • *****
  • High Score Initials:
  • Forum Posts:
  • Melbourne
  • ABN 68 283 634 461
    • Ride The Boney Beast
Re: Bally Fathom Restoration
« Reply #55 on: August 18, 2011, 11:58:05 PM »
could i ask what type of paint do you use to clear pf? how do you tell what type of paint is on a playfield? does it very from maker to maker or era? im guessing wrong product like a car and bam it reacts and all bad? because like car acrylics, anamels, and 2pak paints can cause problems

Unfortunately, this is not my area of expertise. All I know is that they are automotive clears.

For touch up work, I use Jo-Sonja paints. This seems to work well with automotive clears.
Aussie Pinball - Proud to be Australia's Premier Pinball Forum

http://www.australianpinballrestorations.com.au/

http://www.rtbb.com.au/catalog/

We carry the largest range of NEW Ramps in Australia

Offline Olivia_jason

  • Trade Count: (+2)
  • ******
  • Forum Posts:
Re: Bally Fathom Restoration
« Reply #56 on: August 19, 2011, 12:04:04 AM »
could i ask what type of paint do you use to clear pf? how do you tell what type of paint is on a playfield? does it very from maker to maker or era? im guessing wrong product like a car and bam it reacts and all bad? because like car acrylics, anamels, and 2pak paints can cause problems

Unfortunately, this is not my area of expertise. All I know is that they are automotive clears.

For touch up work, I use Jo-Sonja paints. This seems to work well with automotive clears.

if thats the case it might more than likely be 2k, so you get these painted by a car painter? is the jo-sonja a 2k paint?
im just wondering if make of machine or age of machine limits wether you can clear with 2k or not, i would have thought older machine would have used anamels, as anamels where used on almost everything in the 60s, which would mean 2pak would be bad news, but i am no pinball expert, so it is something i am interested as if its ok to 2k a playfield, ill be doing some painting, but id want to sure before i do it, lol,

Offline humpalot

  • Trade Count: (0)
  • *****
  • Forum Posts:
  • NSW
Re: Bally Fathom Restoration
« Reply #57 on: August 19, 2011, 12:34:12 AM »
The playfield looks great, give me a nice original over a repro any day.

Offline Steve2010

  • Trade Count: (+11)
  • *****
  • Forum Posts:
  • Sydney
Re: Bally Fathom Restoration
« Reply #58 on: August 19, 2011, 09:59:25 AM »
Nino, phenomenal result!!!  Of all the restoration images of yours that I've looked at, this would have to be at or near the top.  Great result .... looking forward to the rest of it.

Offline goodolddays

  • Trade Count: (0)
  • ******
  • Forum Posts:
  • Riverstone NSW
Re: Bally Fathom Restoration
« Reply #59 on: August 19, 2011, 11:42:17 AM »
PF looks excellent Nino.  ^^^ Certainly an amazing amount of detail in the artwork too.
I need more room ! and more $$$