Author Topic: el_timbo's Funhouse Restoration...  (Read 4968 times)

0 Members and 1 Guest are viewing this topic.

Offline el_timbo86

  • Trade Count: (+1)
  • *****
  • High Score Initials:
  • Forum Posts:
  • Geelong, Victoria
    • Hot Rodded Pins
el_timbo's Funhouse Restoration...
« on: February 19, 2010, 10:32:19 PM »
Hey guys,

Well here goes my first attempt at restoring a Funhouse pinball machine. After seeing all of the great restorations here, and after trawling through endless helpful posts trying to gain as much info as

possible - i decided it was time to try it out for myself.

Funhouse has always been one of those machines that really stood out to me as a one-of-a-kind type game that truly embodies everything that i personally look for in a pinball game. When you walk up to this

machine, you are instantly drawn to Rudy's head, and you find yourself wondering, what does he do...? The game has some really nice flowing shots, and some difficult ones too; coupled with an interesting

ruleset makes for a really addictive machine.

Gameplay aside, i love the art package that has been put together for this game. John Youssi is my all time favorite pinball artist, and the way he captured that errie Funhouse feel (both on the playfield

and the cabinet) - is truly a work of art.


ANYWAYS, enough of the rambling - time to get on with the project. I will be documenting the build in parts, as i think this will help keep the information flowing rather than showing simply my progress. If

i break the project up into parts, i can give some insight into what i did, and what i wouldnt do again etc. I'll start first with refinishing the cabinet.


=PART 1=

-THE CABINET-

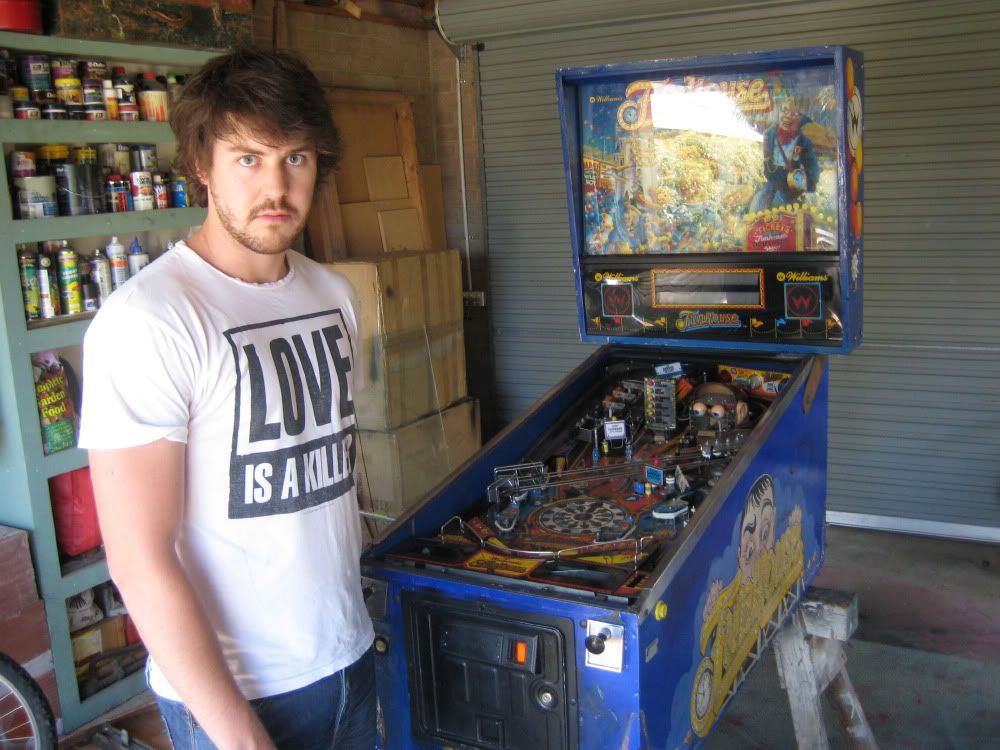
When i got the game, it was looking pretty tired. The machine was filthy to say the least, and had numerous cabinet repairs due to people vandalising it out on location.
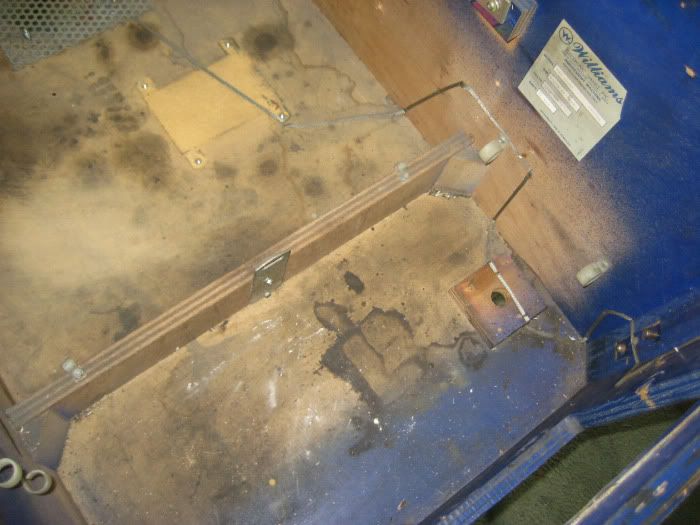
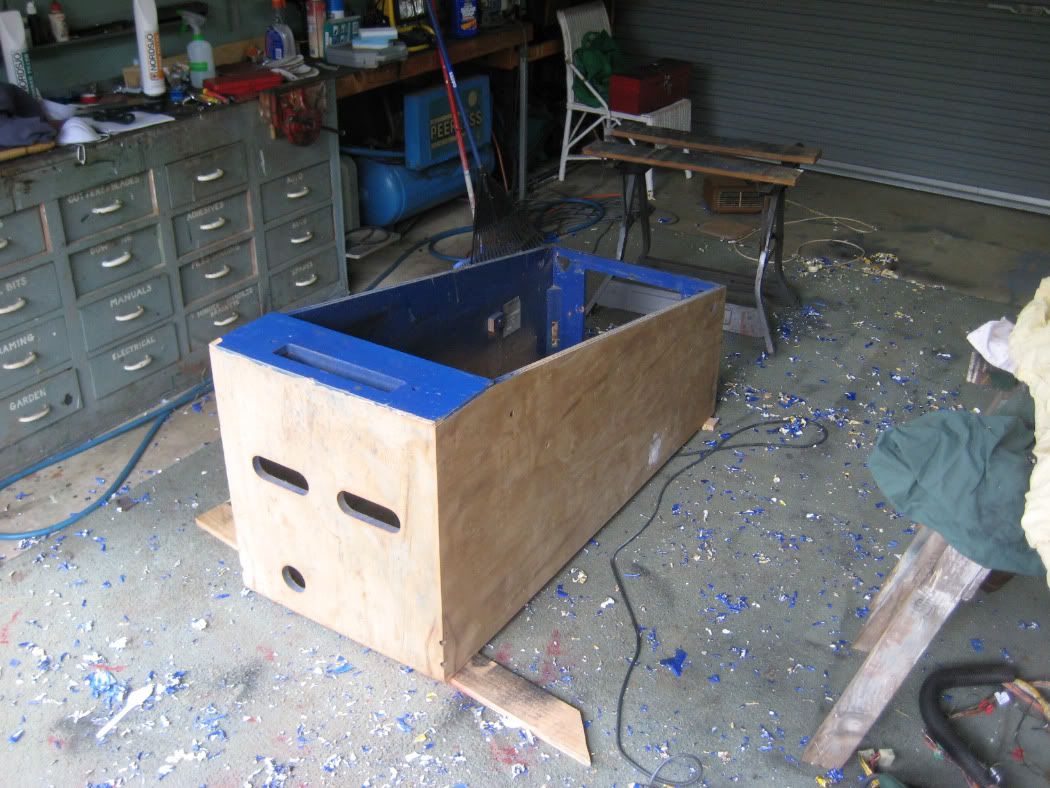
The floor of the cabinet was black with soot and grime, and even had boot prints in it (is this common!?). The legs had eaten away the cabinet corner edges, and the early Williams leg brackets had chewed up

the braces inside.

Picked the game up...


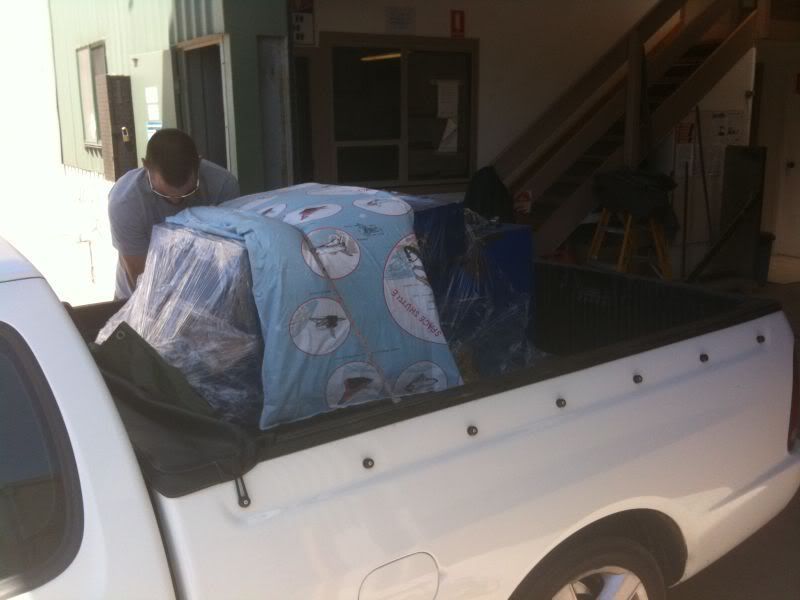
Boys and their new toys...


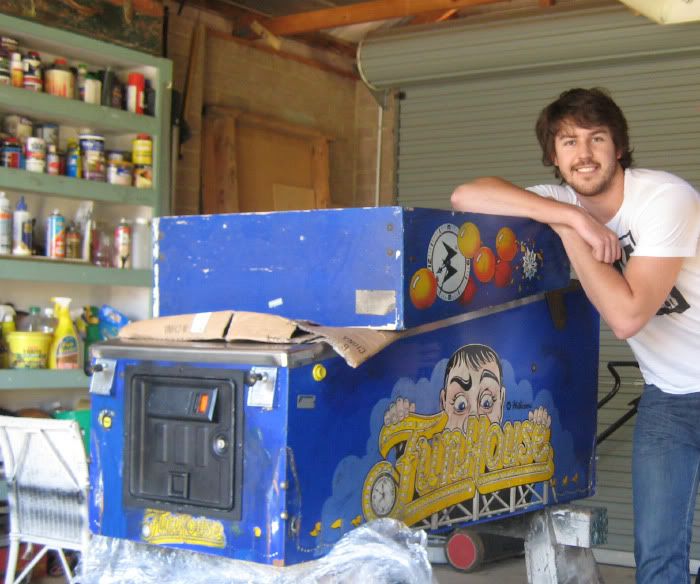
Upon closer inspection...


The realisation that i have a TONNE of work ahead of me...
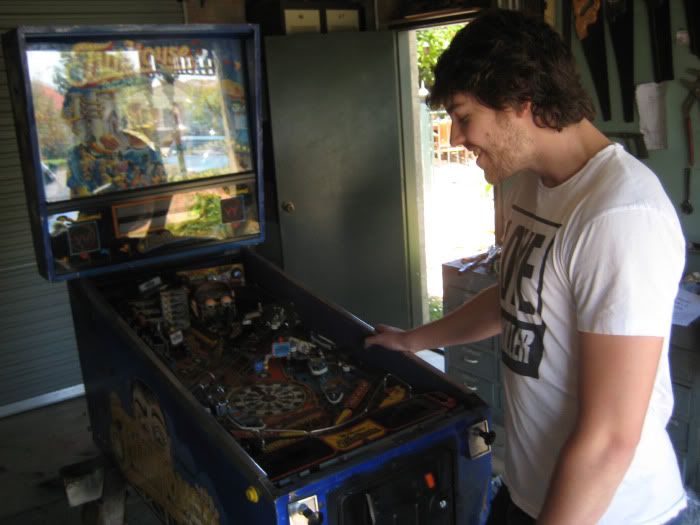

We continue on...


The backbox was the same deal - chewed up and mangled corners, vandalised with peoples initial carvings, and touched up with brushed on navy blue paint...

Once i had the machine playfield free (including all looms, transformers, buttons, p-clips etc) i could have a really good look at what i needed to do...

After assessing the machine, i made a checklist of what i needed to repair, and replace. I bagged up everything as i removed it, labelled and photographed where the part belonged. I also kept a log book,

which i used basically to document the steps taken; with the intention of simply reversing the process during reassembly.

The first thing i did was strip the cabinet decals. These came off with the help of a heat source and scraper. Once removed, repaired areas were much more visible, and i found that patched areas were 'fixed'

with a weak timber filler (not a 2 part hardener). At this point i also ripped out the worn out old grounding braid.

Stripping the decals...


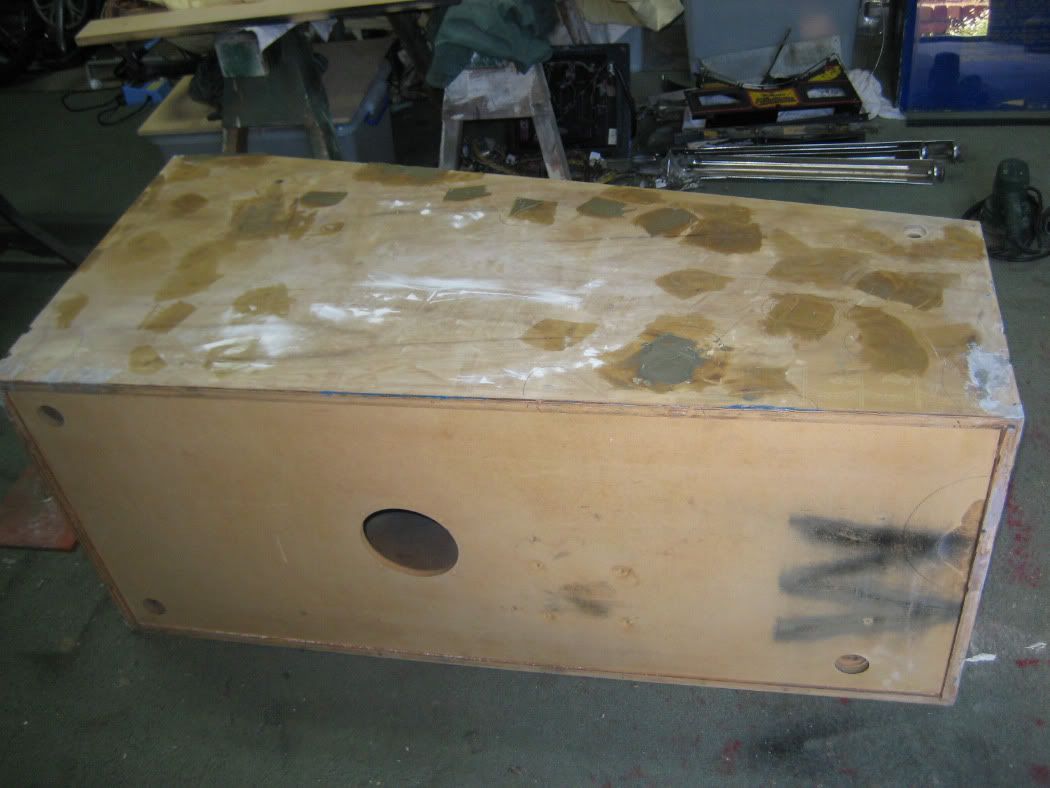
I removed the timber filler, and re-patched damaged areas with Sellys Plasti-Bond. I also filled the grain of the cabinet with this too. It is quite good to work with - given you add the right amount of

hardener. It took me a couple of shots to get a balance between time to work/time to cure.

Plasti-BONDED


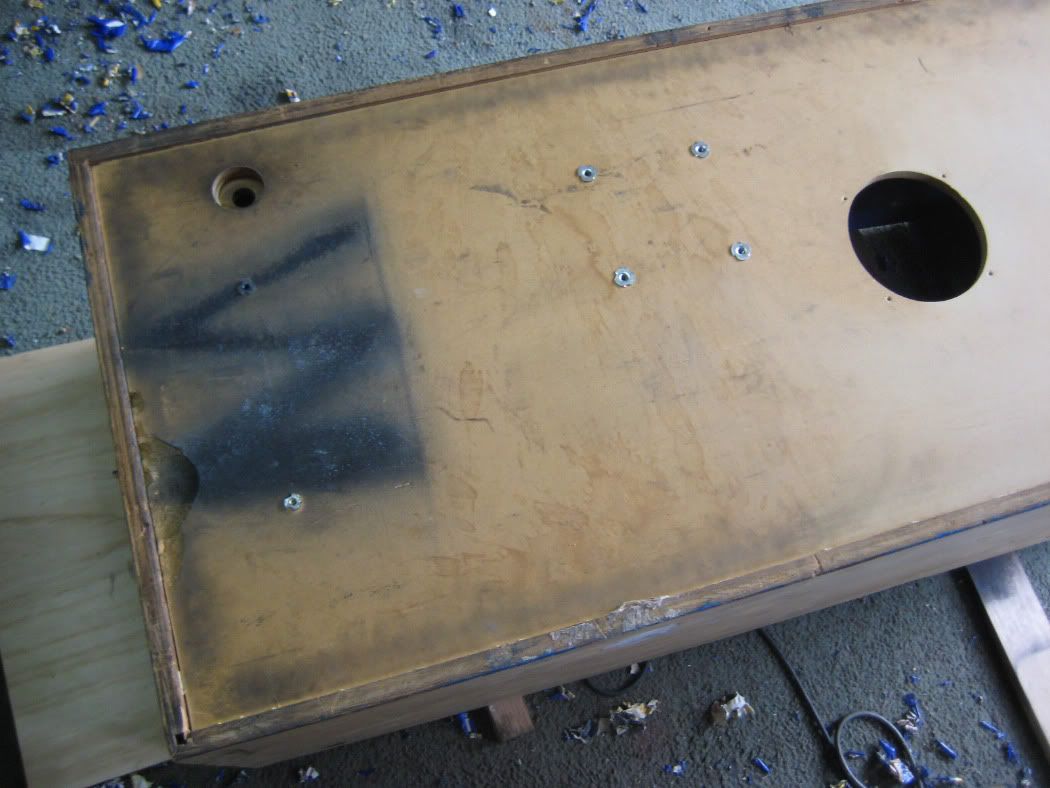
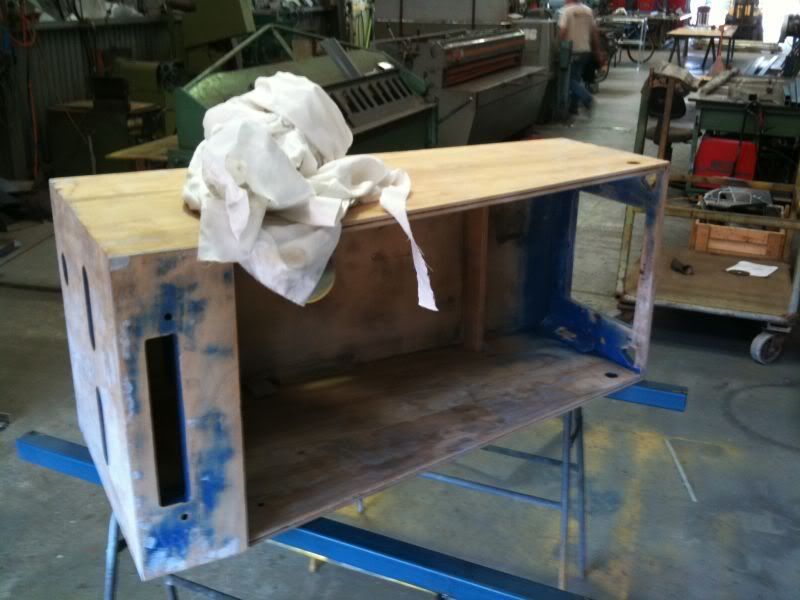
With the cabinet filled and sanded back - it was time to prime the cabinet for paint. I used a spray gun for all the paint work, which i was really happy with. It took a few light, even coats - but left me

with a really nice even finish. Although i sanded back the floor of the machine, i just couldnt get rid of all the imperfections; and the underside of the cabinet had been marked at some stage with a spray

can (which was absorbed deep into the timber).

The marked cabinet...


Cabinet ready for its first prime...
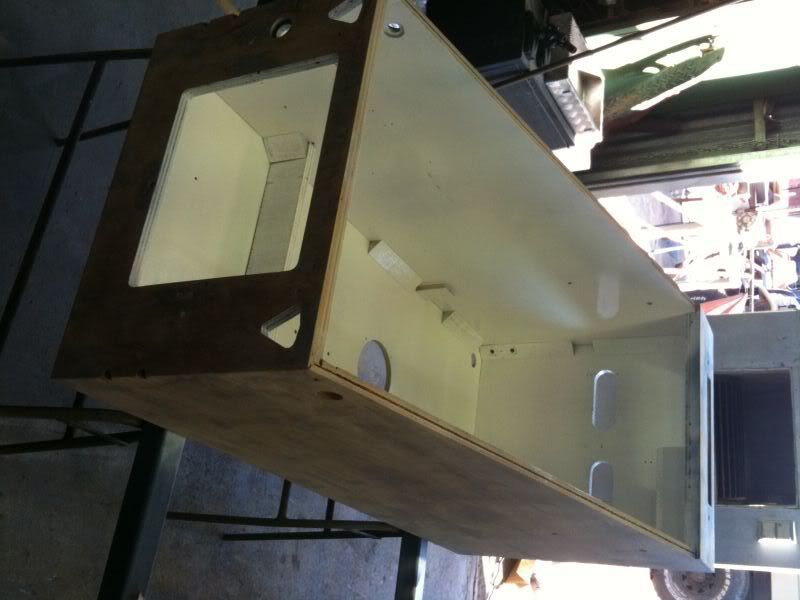

First coat...


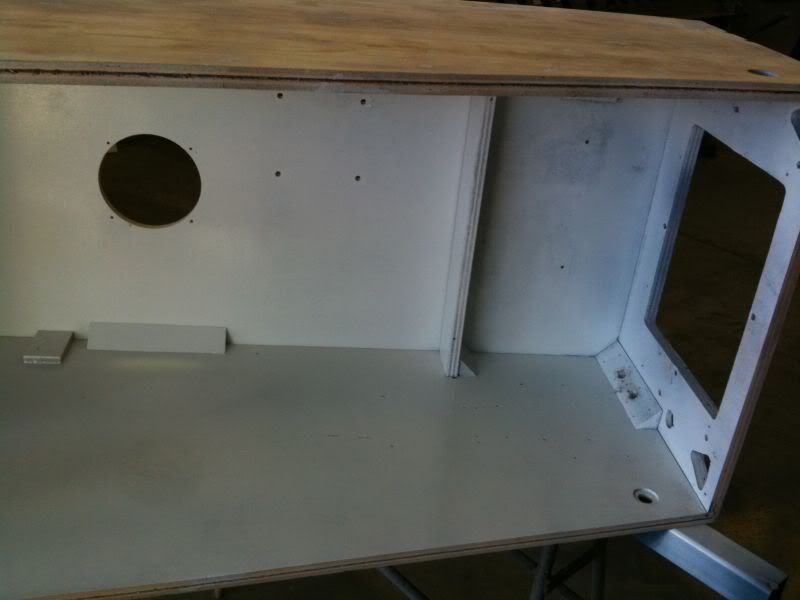
Second coat, i also did repeated this for the outside (no photos)


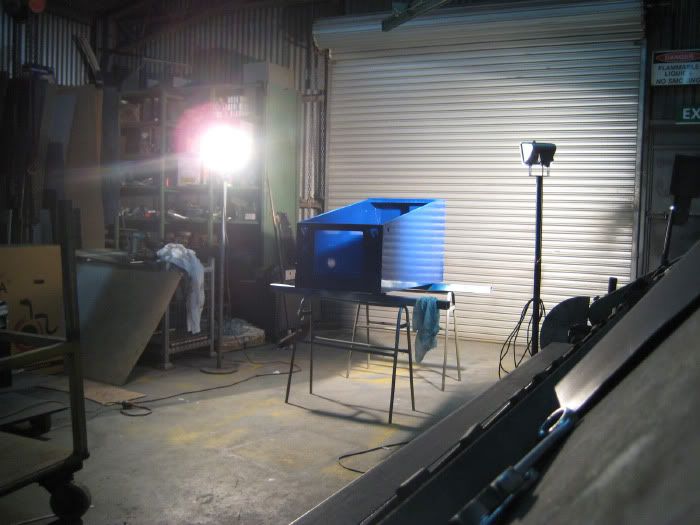
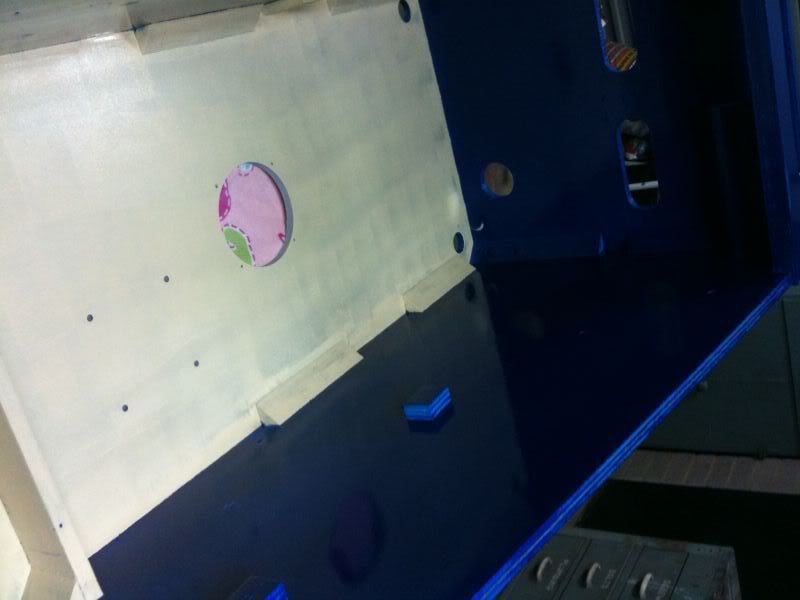
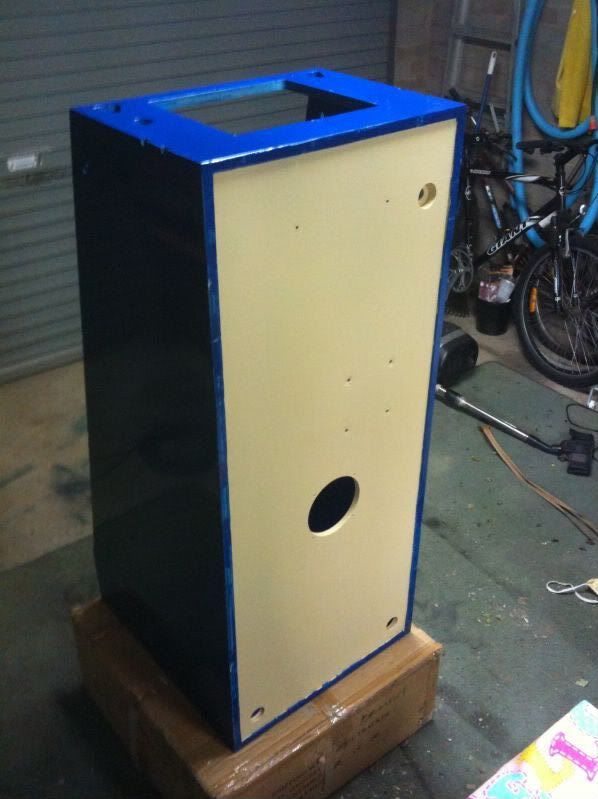
Cabinet getting some Funhouse blue treatment...


I used an acrylic paint with a similar colour tone to the timber, and painted the floor. I think this was one of the best things i did, as it really gave the blue paint a nice sharp edge to meet at the

floor.

First coat of acrylic...


Finished...


I did the bottom too...


On to the next post...

Offline el_timbo86

  • Trade Count: (+1)
  • *****
  • High Score Initials:
  • Forum Posts:
  • Geelong, Victoria
    • Hot Rodded Pins
el_timbo's Funhouse Restoration...
« Reply #1 on: February 19, 2010, 10:33:32 PM »
Next...

With the paint now on the cabinet, i left it to cure for a few days.

After the paint had cured, i installed new grounding braid.

Grounded AND cured...


Next up was the cabinet decals. The prep work in filling the grain, priming and paint really paid off, as i was left with a smooth surface for the new artwork. I used the dry method of application - and

dragged the artwork onto the cabinet.

DEstressing at this point!


With the artwork on, i went around and trimmed the overhang. This step really took the project the the next level, as i realised things were starting to come together. I had a new set of legs on hand, along

with protectors; but before installing them i decided to upgrade the cabinet leg brackets to the later Williams style. They have a much bigger 'face' which meant legs wouldnt eat away at the cabinet anymore.

After these were installed - on went the legs.

Seeing the cabinet up on its feet was a great feeling - I reflected on what i had started with, compared to what i was looking at now. Personally, i was really proud of my efforts so far.

Taking her first steps...


Standing tall...


The standard speakers were completely shot, and are produce pretty tinny sound at the best of times. I replaced the speakers with Jaycar Response speakers of the same ohmage. What an improvement! As i was

getting a heap of my own shop-out stickers printed, i thought i would replace the speaker rings with something a little more customised - Some funhouse speaker rings... I really didnt need to do it, but it

kinda adds to the whole restoration/refinishing thing.

I made up a mounting plate for the bigger speaker, and replaced the cabinet speaker grill with the same material, just bigger (matching the mount size).

 
Decal Installed and bolted down to the cabinet...


After this, i dismantled the lockdown bar, cleaned it up - and added my own shop-out decals. I used a product called 'Plasti-Dip to give the lever some grip. Funhouse also has a problem with a shorting fuse

when the lever touches another contact, so i dipped it a little further than normal. At this point, i also sent off a few parts to be re-chromed, and ordered a set of system 11 siderails from the

BestOfPinball team in Denmark - as turn around time for these kinda things is slowish...

My own shop-out decals...


Cleaned up the lockdown bar...


Plasti-DIPPED...


Reassembled and looking much cleaner...


I used the remainder of the week to clean up and reinstall the cabinet parts. It started looking like a pinball machine again.


After a week of procrastinating, i stripped down the backbox, photographing, bagging and labelling as i went. I used the same method as i did with the cabinet body - and again i was very pleased with the

results.

The backbox deals didnt respond that well to the heat, so i used up a couple of sanding disks...


On to the next post...

Offline el_timbo86

  • Trade Count: (+1)
  • *****
  • High Score Initials:
  • Forum Posts:
  • Geelong, Victoria
    • Hot Rodded Pins
el_timbo's Funhouse Restoration...
« Reply #2 on: February 19, 2010, 10:34:17 PM »
Next...

While watching Entourage one Sunday, i traced out and retyped the Williams Backbox warning text, and colour matched the Funhouse blue. I could've had this printed on transparent vinyl (basically laminate)

but decided that actually printing the blue would make the text look like it had been screened, and not overlayed. In order to achieve a flat surface, i spent a bit more time sanding and filling the back of

the backbox to get a seamless join around all panels.

Refinishing the backbox...


Fresh paint...


Sitting, Waiting, wishing...


Backbox decal ready to apply...


Grounding braid was stapled in, and i didnt really deviate from the factory layout - except square up the braid path. I cleaned all metal parts, and put her back together. After a few days, on went the

decals...

Grounding braid installed...


Side decals applied...


And the backbox decal - just need to trim the rear vents now...


After a short wait - my Chromed parts arrived - which also brings this thread up-to-date with the project.

Plunger faces rechromed and polished, MUCH much brighter this time! (Shooter Rod and spring just sitting there for looks at the moment)...


I'm having alot of fun, and i'm TRYING not to rush anything. I'm learning alot along the way, and i thank all the Aussie Arcade/Aussie Pinball guys for their super helpful posts, and their willingness to

help me with my pinball-noob questions. Also, a huge thanks to everyone here who posts their great restoration stories/tips etc. They are great to read, and infinetly helpful!

Thanks again guys, and ill keep this thread updated as i make more progress...

el_timbo

Offline Strangeways

  • Pinball Restoration is my passion
  • Administrator
  • Trade Count: (+9)
  • *****
  • High Score Initials:
  • Forum Posts:
  • Melbourne
  • ABN 68 283 634 461
    • Ride The Boney Beast
Re: el_timbo's Funhouse Restoration...
« Reply #3 on: February 19, 2010, 11:17:47 PM »

"Pinball noob"  %.%

You're kidding, right ? This is a professional effort if ever I've seen one. I expect this kind of work from someone who has done half a dozen restores !

Well done - I'm really pleased to see ANOTHER Funhouse restoration at this level. Your attention to detail is astounding.

PLEASE tell me you have leg protectors under those legs  #@#

Keep the updates coming  ^^^ ^^^
Aussie Pinball - Proud to be Australia's Premier Pinball Forum

http://www.australianpinballrestorations.com.au/

http://www.rtbb.com.au/catalog/

We carry the largest range of NEW Ramps in Australia

Offline Wotto

  • Trade Count: (+1)
  • ******
  • Forum Posts:
  • NSW Australia
Re: el_timbo's Funhouse Restoration...
« Reply #4 on: February 19, 2010, 11:24:49 PM »
Very good thread - love the photo's that match the happy/sad moments  #*#

"Taking her first steps" -  :lol :lol :lol LMAO
Great to see a pinball restore taking over the lounge room as well  *)*

Looks sensational so far.

PLEASE tell me more about that sub-speaker you have installed ( price too )
The sound is one area of my FH I would LOVE to get "clearer" as Rudy is known to mumble a bit - does it clean up the sound in any way OR just make the mumbles 'boomier'  !@#
DW Drums rule !

Offline el_timbo86

  • Trade Count: (+1)
  • *****
  • High Score Initials:
  • Forum Posts:
  • Geelong, Victoria
    • Hot Rodded Pins
Re: el_timbo's Funhouse Restoration...
« Reply #5 on: February 19, 2010, 11:25:00 PM »
Fear not Strangeways, YEP i did budget for a set of leg protectors and they were installed!!  %.%

To be honest, this is the first pinball machine i have ever purchased/worked on. It sat in my garage for two days so i could get it 'working' - before i started taking it apart. Seeing all these restorations is what got me motivated to give it a go myself -

Ill be sure to keep you guys updated, and thanks for the kind words. It means alot coming from guys who have done this kinda thing before...

el_timbo

Offline Strangeways

  • Pinball Restoration is my passion
  • Administrator
  • Trade Count: (+9)
  • *****
  • High Score Initials:
  • Forum Posts:
  • Melbourne
  • ABN 68 283 634 461
    • Ride The Boney Beast
Re: el_timbo's Funhouse Restoration...
« Reply #6 on: February 19, 2010, 11:29:14 PM »
Fear not Strangeways, YEP i did budget for a set of leg protectors and they were installed!!  %.%

To be honest, this is the first pinball machine i have ever purchased/worked on. It sat in my garage for two days so i could get it 'working' - before i started taking it apart. Seeing all these restorations is what got me motivated to give it a go myself -

Ill be sure to keep you guys updated, and thanks for the kind words. It means alot coming from guys who have done this kinda thing before...

el_timbo

Don't worry mate - I'm absolutely pumped that you have "taken the first step" - and what a "giant" step it is ! You will however, not stop at your first restore - once the bug bites and you see "first hand" that there is no greater satisfaction (you know hat I mean  #@#) - you will want to keep learning.

 *%*


Aussie Pinball - Proud to be Australia's Premier Pinball Forum

http://www.australianpinballrestorations.com.au/

http://www.rtbb.com.au/catalog/

We carry the largest range of NEW Ramps in Australia

Offline Wotto

  • Trade Count: (+1)
  • ******
  • Forum Posts:
  • NSW Australia
Re: el_timbo's Funhouse Restoration...
« Reply #7 on: February 19, 2010, 11:34:58 PM »
Aaaaah- and I thought my new FH ramps were gunna be impressive - this el_Timbo guy just upped the FH ante a bit boys  *)* :lol
DW Drums rule !

Offline el_timbo86

  • Trade Count: (+1)
  • *****
  • High Score Initials:
  • Forum Posts:
  • Geelong, Victoria
    • Hot Rodded Pins
Re: el_timbo's Funhouse Restoration...
« Reply #8 on: February 19, 2010, 11:39:18 PM »
Very good thread - love the photo's that match the happy/sad moments  #*#

"Taking her first steps" -  :lol :lol :lol LMAO
Great to see a pinball restore taking over the lounge room as well  *)*

Looks sensational so far.

PLEASE tell me more about that sub-speaker you have installed ( price too )
The sound is one area of my FH I would LOVE to get "clearer" as Rudy is known to mumble a bit - does it clean up the sound in any way OR just make the mumbles 'boomier'  !@#

To be honest Wotto, i dont know how much CLEARER the sound is, as i think the sound samples are the main setback when it comes to quality. The speaker that i had in there was just shot to pieces, in that it crackled and was the wrong ohmage for the machine (poor hack job). This site http://www.dziedzic.us/wpc_speaker_sound_info.html was a great resource, and i replaced the cabinet speaker with a 6" jaycar response speaker rated at 8 Ohms. To quote the site mentioned previously - "Unless otherwise directed, choose a replacement speaker that has the same impedance as the original. With a few exceptions, all of the speakers used in Bally / Williams WPC-era games are 4 ohms impedance; the exceptions are the early games (Funhouse, Gilligan's Island, Harley Davidson, Party Zone, and The Machine: Bride of Pinbot) that used 8 ohm speakers".

The sound still sounds like a low sample-rate sound should sound, but you can dial the speakers right up without any crackling/bottoming out. There is also a more noticable bass-line in the game music. The best part is that the speakers only cost me 20 dollars each (or there abouts). Definetely cheaper than some of the other options out there at the moment. I would be really interested to see how these went on a DCS game, as the sample rate of the sounds is much better...

Sorry i cant be of much help...

Offline Wotto

  • Trade Count: (+1)
  • ******
  • Forum Posts:
  • NSW Australia
Re: el_timbo's Funhouse Restoration...
« Reply #9 on: February 19, 2010, 11:41:30 PM »
No problems - you answered my question  - thankyou ^^^

But thats JUST subwoofer - correct  !@#
« Last Edit: February 19, 2010, 11:50:19 PM by Wotto »
DW Drums rule !

Offline el_timbo86

  • Trade Count: (+1)
  • *****
  • High Score Initials:
  • Forum Posts:
  • Geelong, Victoria
    • Hot Rodded Pins
Re: el_timbo's Funhouse Restoration...
« Reply #10 on: February 19, 2010, 11:54:49 PM »
No problems - you answered my question  - thankyou ^^^

But thats JUST subwoofer - correct  !@#

Its actually a mid-range speaker - i'm sure Jaycar stocks the same brand and size in Sub Woofers too. I would definetely recommend them primarily due to their   high quality:price    ratio.

el_timbo

Offline Caveoftreasures

  • Trade Count: (+16)
  • ******
  • Forum Posts:
Re: el_timbo's Funhouse Restoration...
« Reply #11 on: February 20, 2010, 01:22:21 AM »
FINALLY FINALLY FINALLY someone does a resto and treats the inside of the cabinet with the effort it deserves.

I am doing a NO FEAR and am going to have the inside exactly the same way.

HOW BLOODY PROFESSIONAL AND GREAT DOES THE INSIDE OF YOUR MACHINE LOOK. BEST I HAVE SEEN. FULL STOP !

I RECKON YOU HAVE DONE A FANTASTIC JOB.

Beautiful work. Bloody Excellent. Thought i would never see a cabinet done properly til now. CONGRATS ON A FINE LOOKING MACHINE I SAY.

 ^^^ ^^^ ^^^ ^^^ ^^^ ^^^ ^^^ ^^^ ^^^ ^^^ ^^^ ^^^ ^^^ ^^^ ^^^ ^^^ ^^^ ^^^ ^^^ ^^^ ^^^ ^^^ ^^^ ^^^ ^^^ ^^^
Behind every garage door could be a pinball collectors
"Cave of Treasures" 55 in my collection

Into  Stern -JJP - Cars , Road Bikes- Jet Skis - Star Trek n Sci-Fi & Electronics    
Beware of Stalkers & Walkers when playing The Walking Dead

My 7yr old son Hunter is my best mate in the world !

Offline johnwartjr

  • Trade Count: (0)
  • ******
  • Forum Posts:
  • Columbus, Indiana USA
  • It's ALIVEEEEEE!
    • My Home Gameroom . com
Re: el_timbo's Funhouse Restoration...
« Reply #12 on: February 20, 2010, 09:33:31 AM »
Looks great!

You should also consider adding some plasti dip to the prop rod. Games after Funhouse had the same coating used on the lockdown lever and the prop rod.

I've used Tony's guide for speaker replacement and it's nothing short of awesome. Even a $20 speaker will sound much better than the originals - since the originals were *cheap* and are already worn out.

Also, under the amp built into WPC-89 sound boards, all speakers share about 25 watts. Not like you're going to have enough horsepower to make inexpensive aftermarket speakers distort etc.


Offline MartyJ

  • Trade Count: (+4)
  • ******
  • High Score Initials:
  • Forum Posts:
  • Melbourne
Re: el_timbo's Funhouse Restoration...
« Reply #13 on: February 20, 2010, 11:44:58 AM »
Great work Tim.  Keep the updates coming...!  Very impressed.

Offline Pinprick

  • Trade Count: (0)
  • ******
  • Forum Posts:
  • Perth
Re: el_timbo's Funhouse Restoration...
« Reply #14 on: February 20, 2010, 03:13:11 PM »
Firstly, congrats on your meticulous restoration work - wonderful job.
Funhouse is such a fantastic game when it is fully functional - your efforts will be well rewarded.
Thanks heaps for posting the speaker info site . . . I've been planning to upgrade the bass speakers in all my collection at some stage, but felt a bit uncertain about the technical implications.
I did replace the bass speaker in my CFTBL with an 8 Ohm 8" Jaycar subwoofer some time ago. The original 6" speaker and grille had been stabbed several times from below. At the time no 6" 8 Ohm was available, but luckily I had the sense to match the impedance. The sound is much richer and "boomier" which I reckon is desirable on this game with so much music.
I guess you looked at those el neato speaker kits from the US but their prices plus freight are way too much.
Once again - well done! And great pics too ^^^

« Last Edit: February 22, 2010, 07:48:22 PM by Maxwiz »
"I don't operate on a level playing field"