Hey guys,
Well, the Embryon project has been completed and figured i best finish off the thread updates.
It has been a fantastic project, i am sure all of APR's customers will be very happy. The playfields presented a few solid challenges - some new, some encountered before. But here is a look into the process and the results as well.
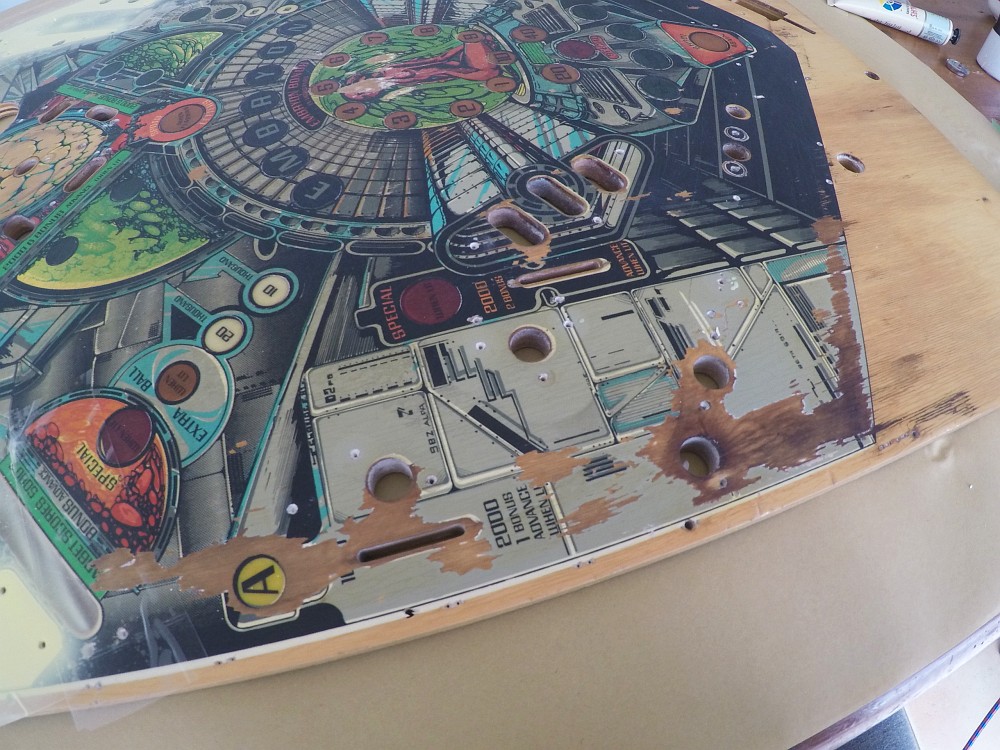
Working through the major damage on Nino's playfield here. You can see the extent of the damage here...
Refinishing the 'white' sections on Nino's example...
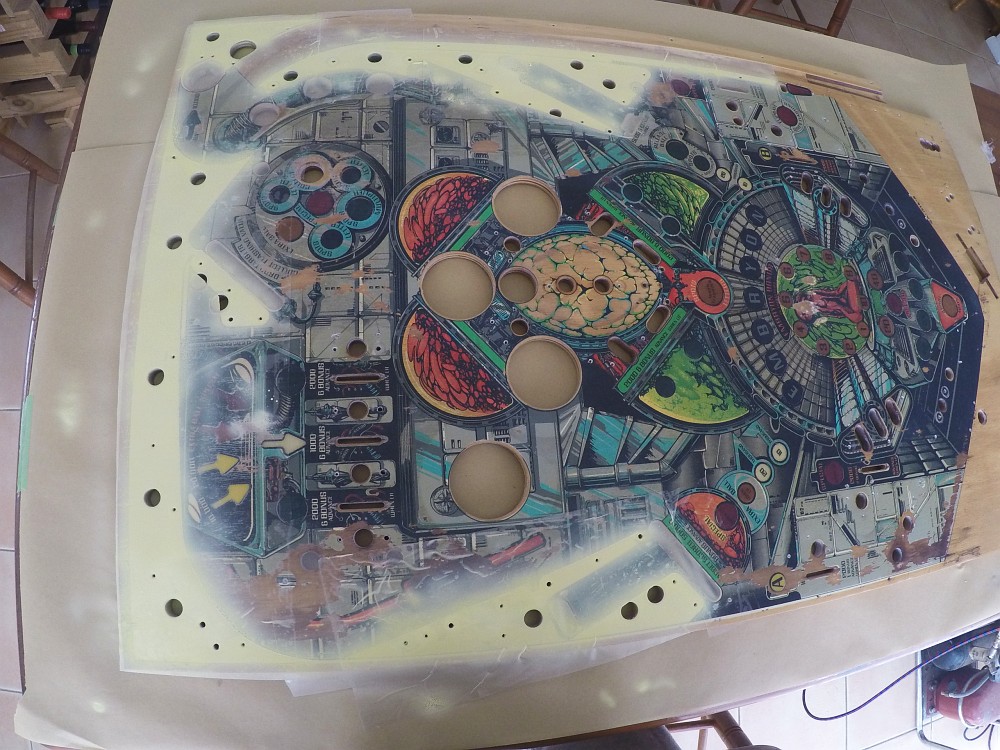
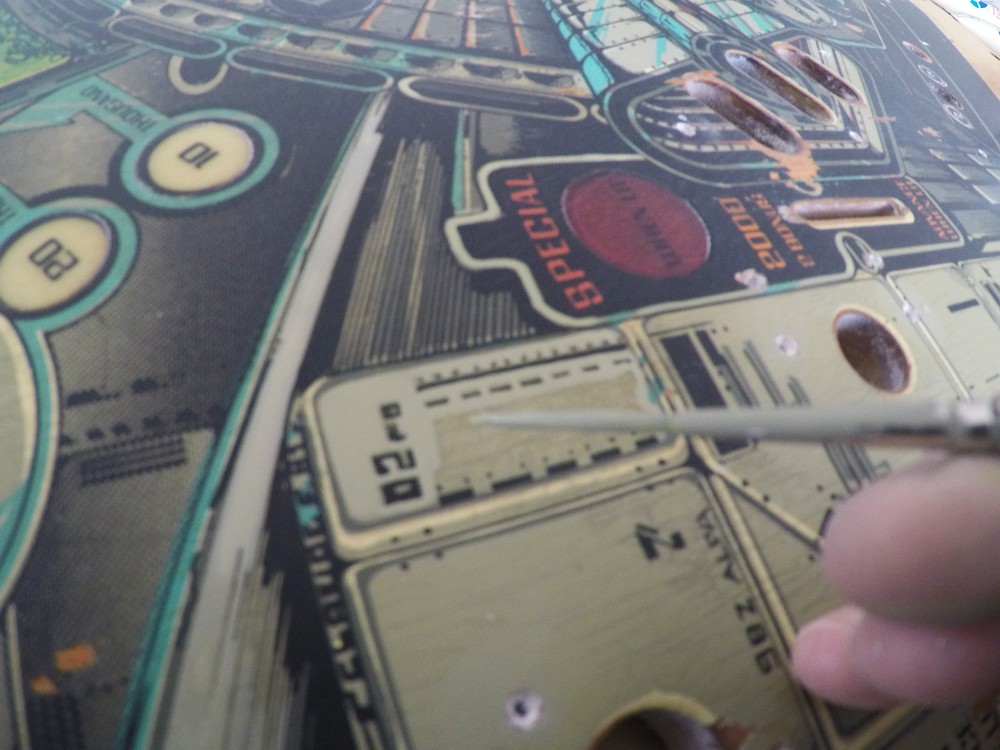
All of the grey sections are repainted, either through use of the airbrush or brush in fine detail areas.
Alot of Nino's playfield was carried out at home after hours due to the massive labour requirement...
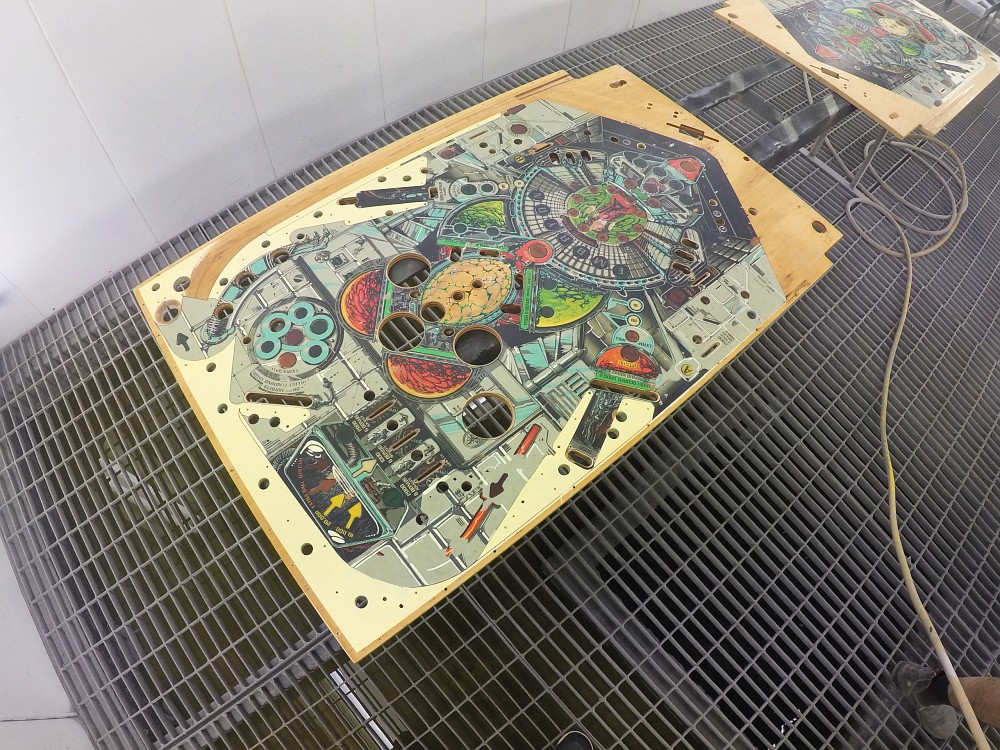
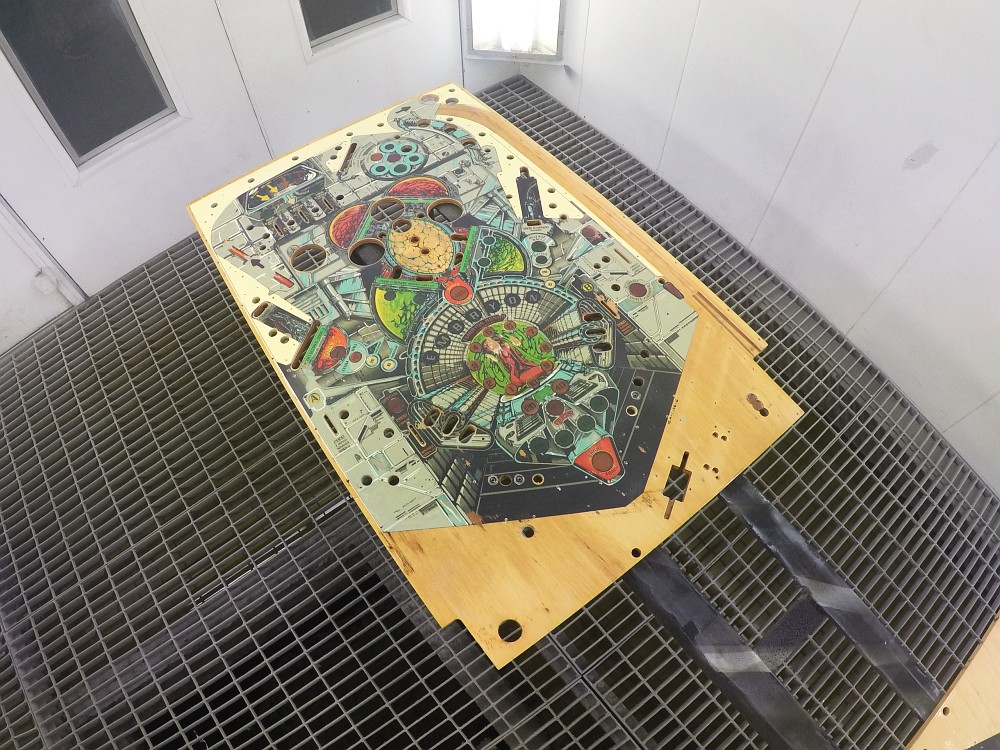
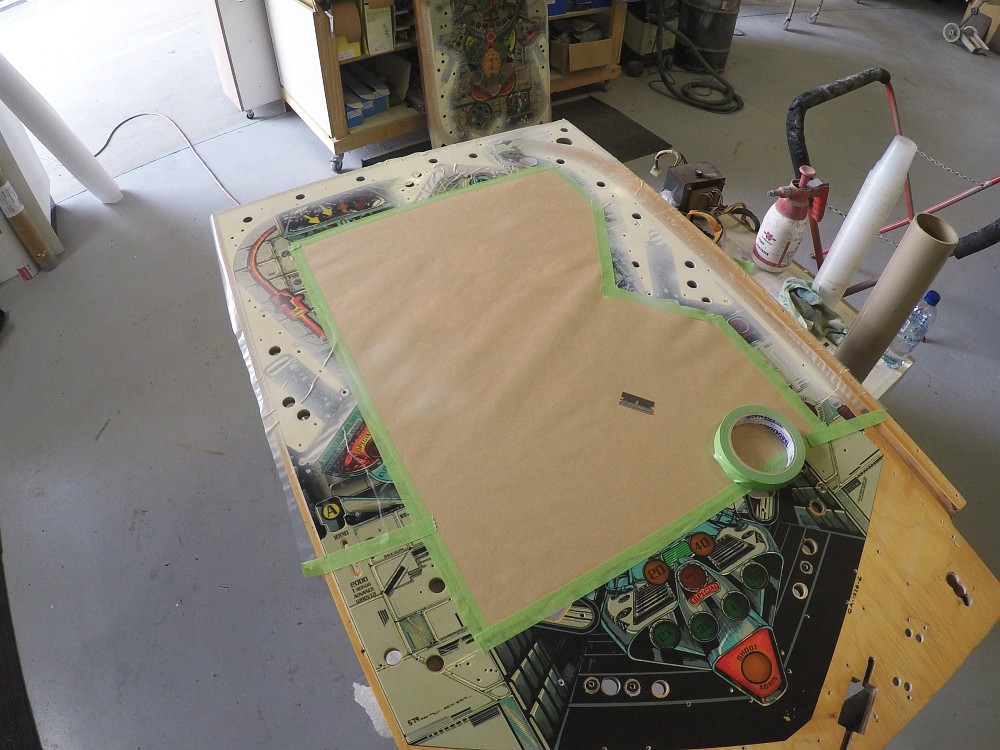
After all the major damage had been repaired, it was back into the booth to be cleared again. This locks in the repair work, and begins to level out the surface...
This is another playfield. This had an extra star rollover and a few other questionable repairs/additions...
You can see here the added rollover hole, and the amount of wear that was lurking under all the extra mylar and contact...
A plywood bung was made for this repair, and a fibre-mixed filler was used to help blend and bind the repair to the playfield...
Results...
Beginning similar repairs on this playfield now. Basically the same approach on each Embryon 4 times where required...
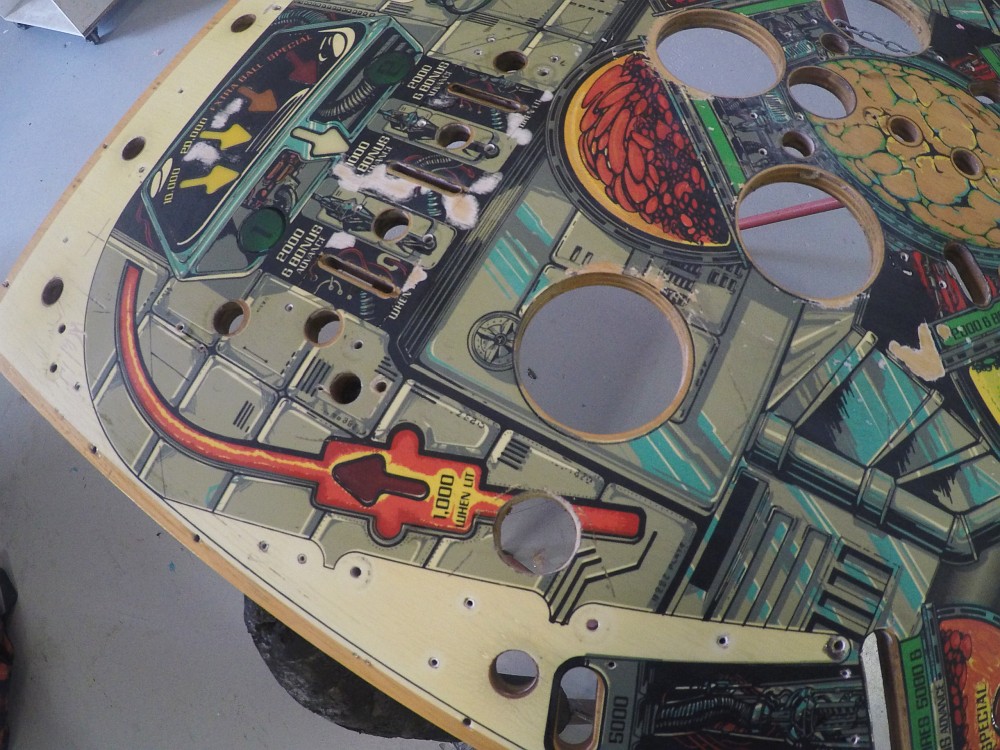
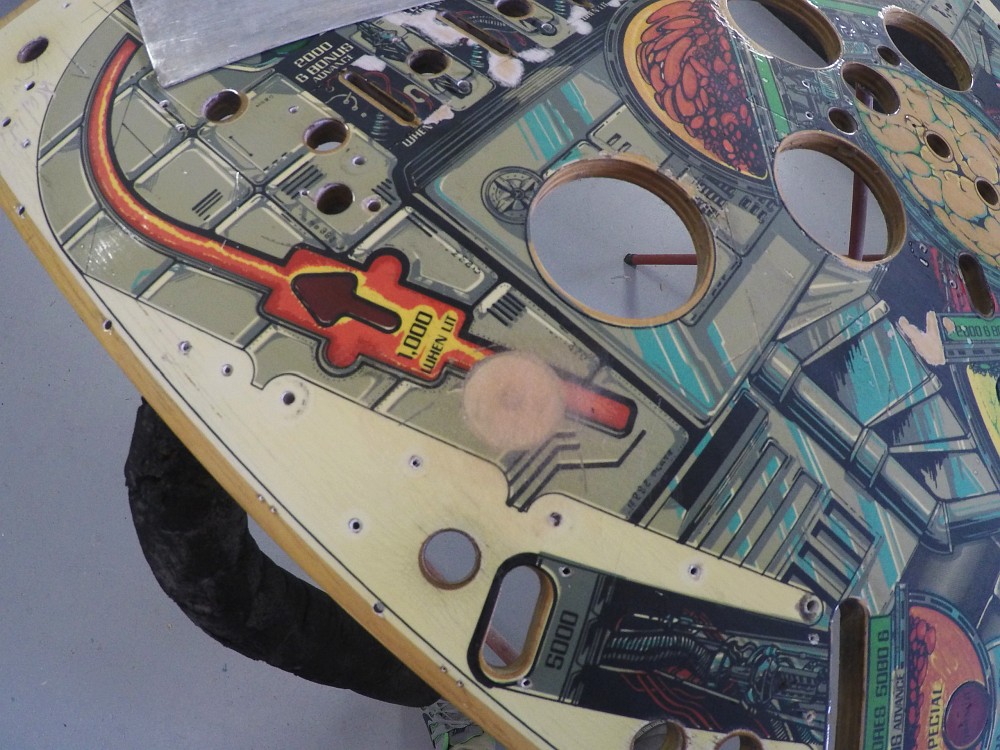
Whites lightly refreshed...
This was another Embryon, this had a couple of major repairs - but many minor ones. Grey and whites had already been corrected in this picture...
Whites on another Embryon...
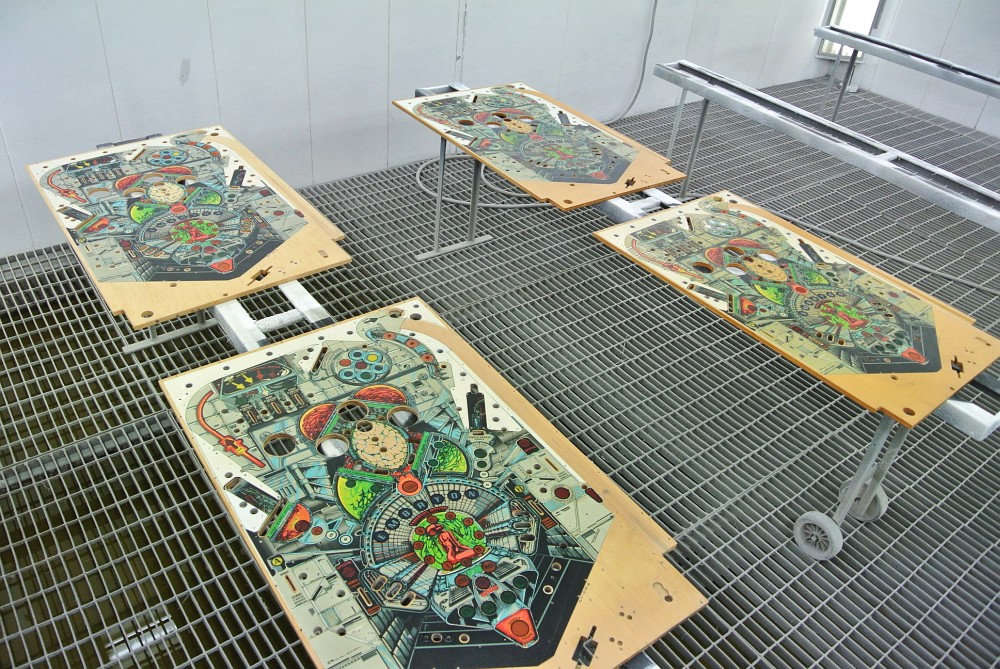
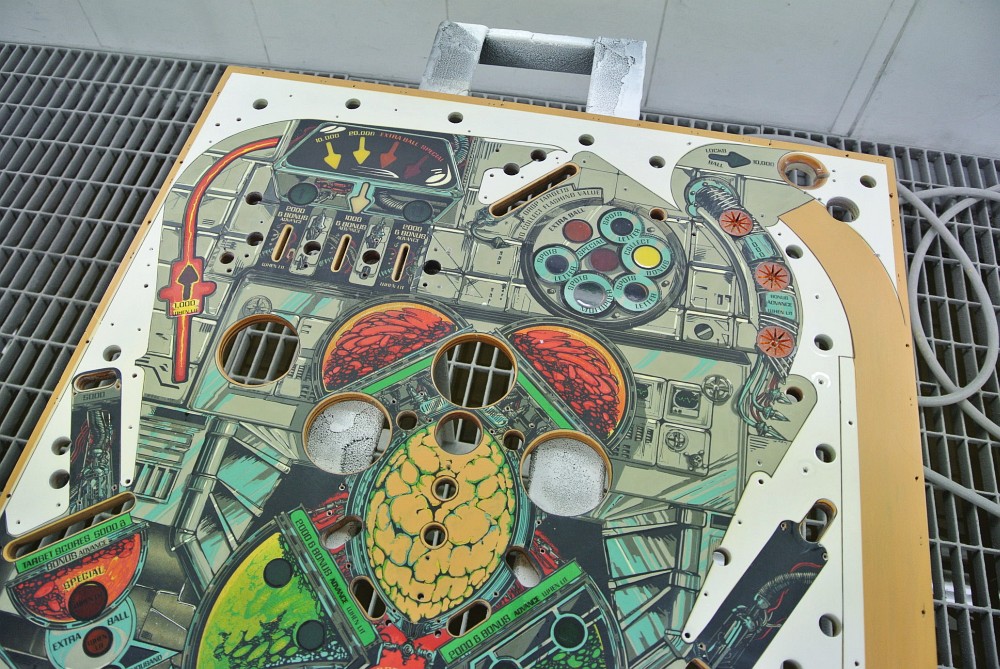
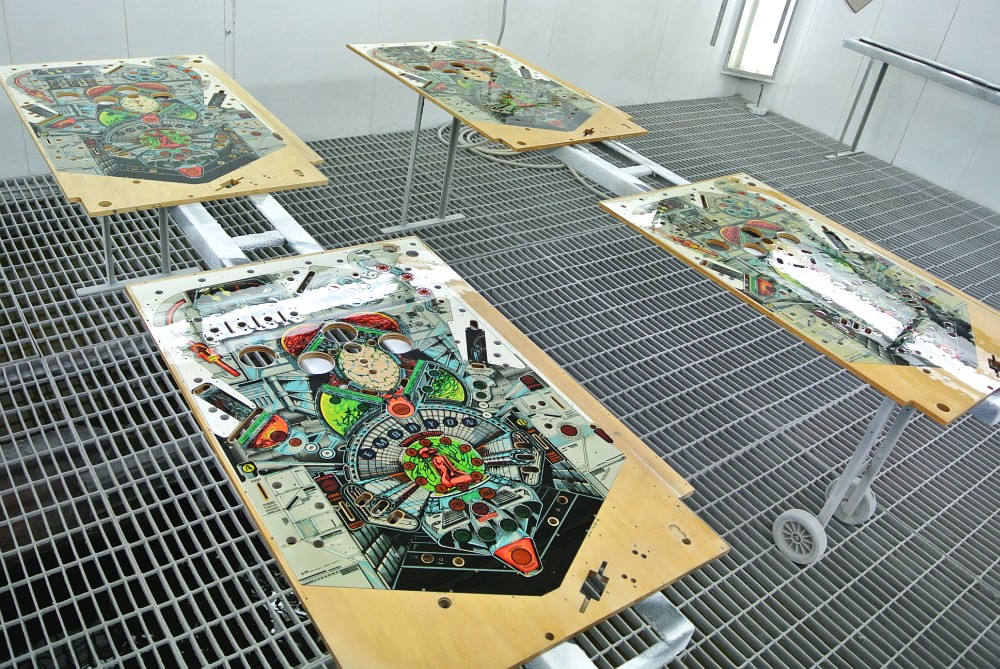
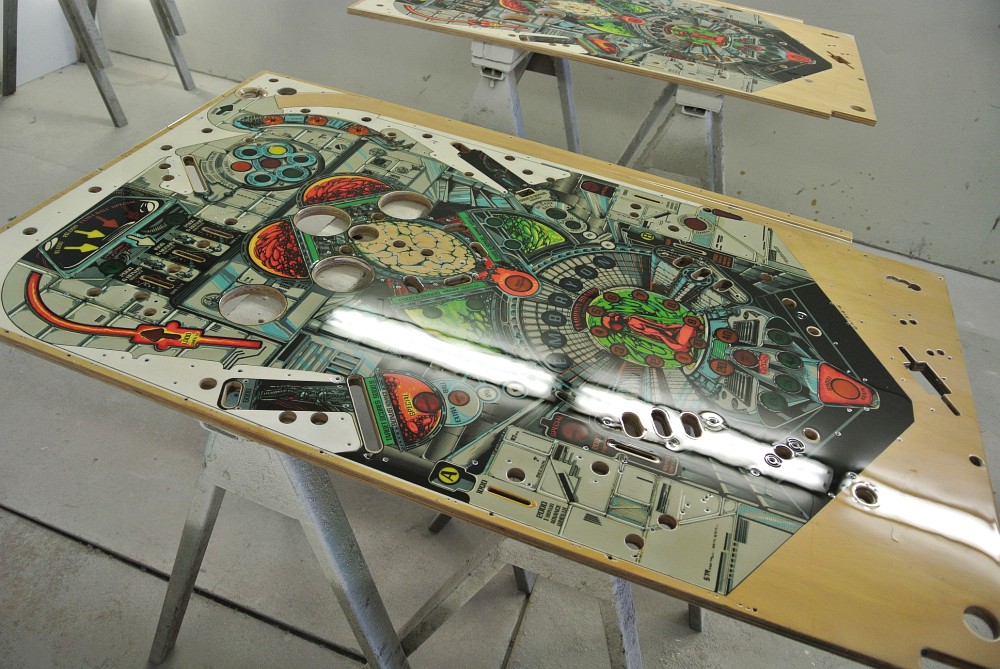
The above was carried out time and time again until all colours were sprayed. We finished the repairs with all the black keylines, hand painted and got the playfields ready to clear. Insert decals were created by us and used only where required. The following photos are of the four playfields in the booth prior to clearcoating...
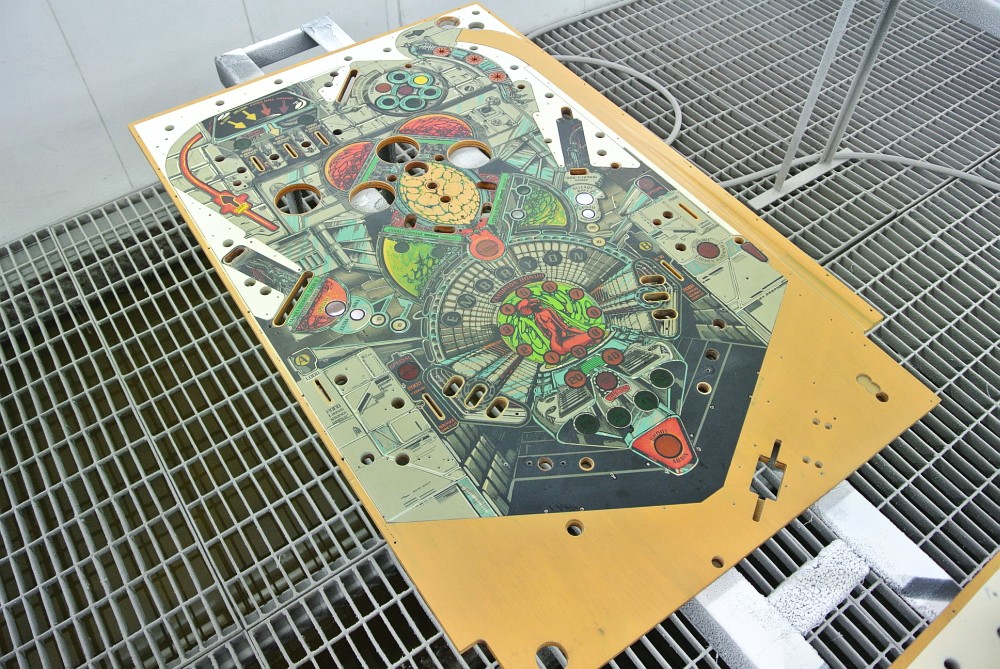

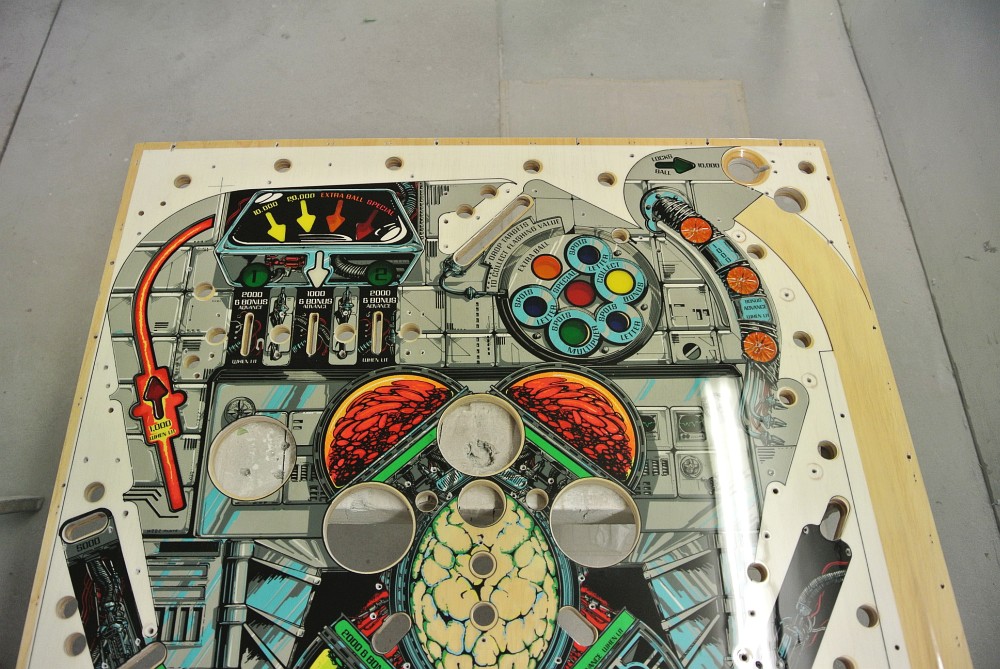
Upper section of Nino's playfield...
Mid of Nino's...
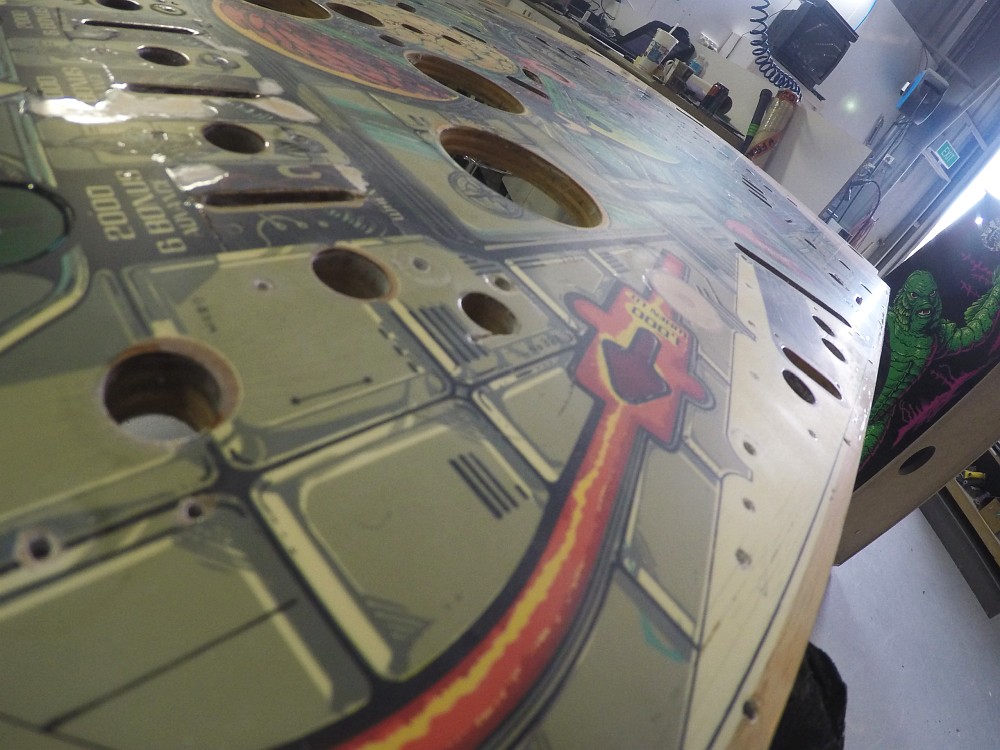
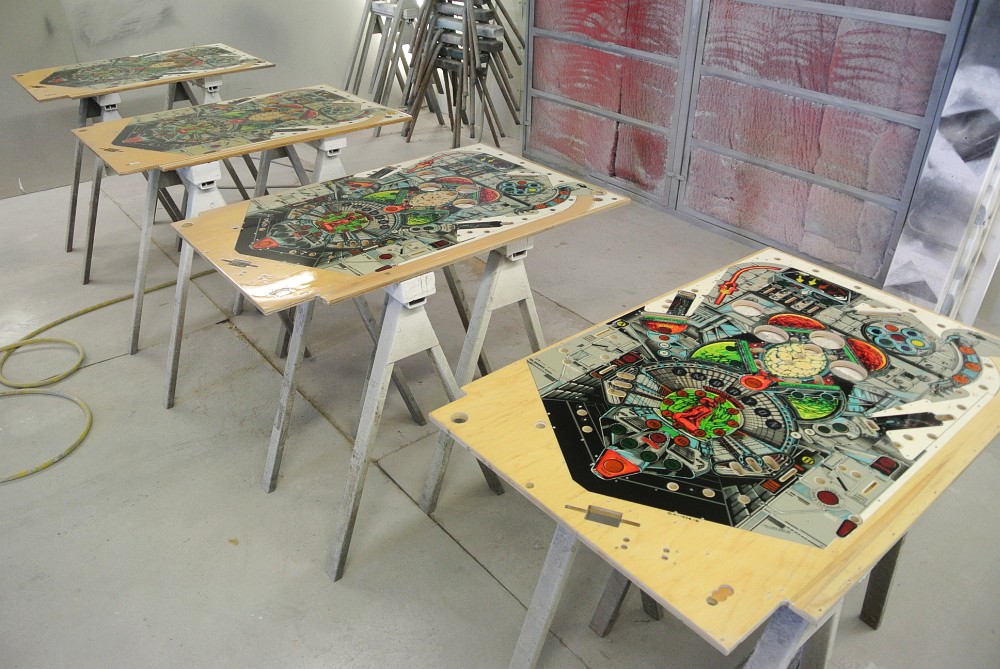
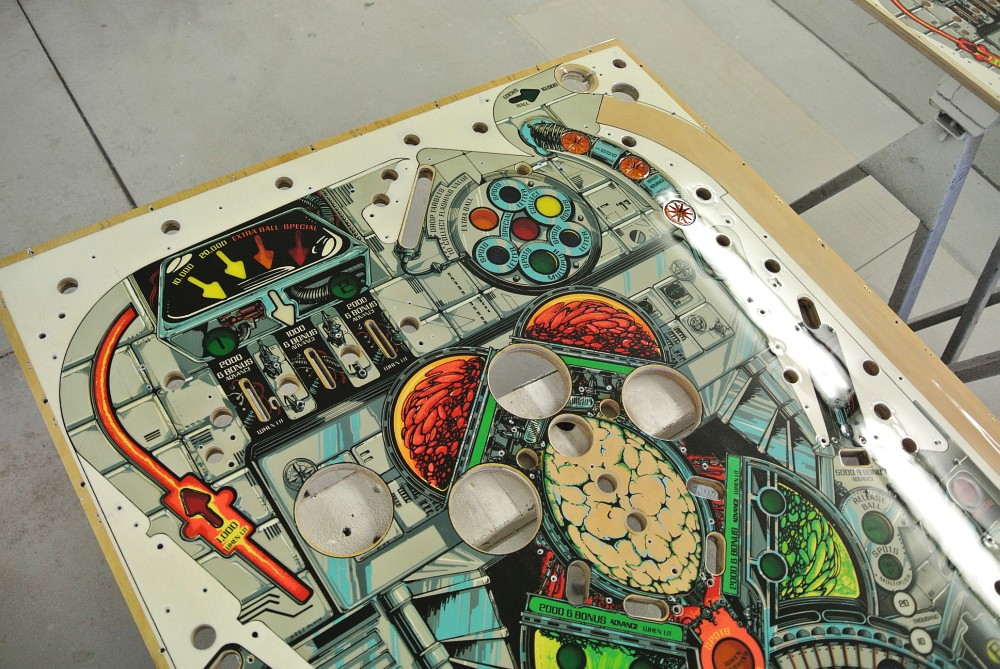
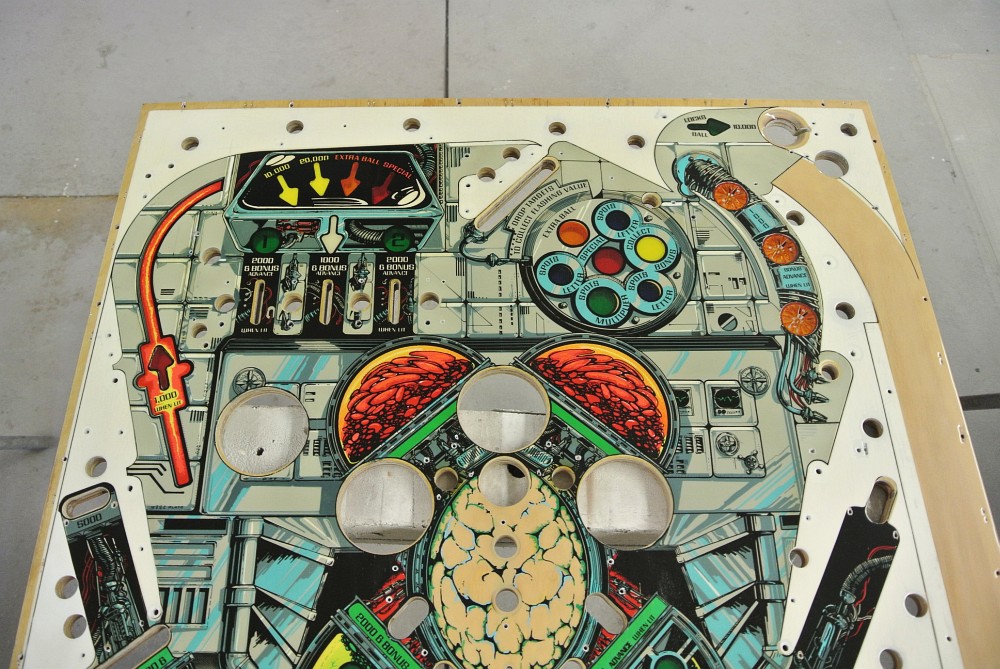
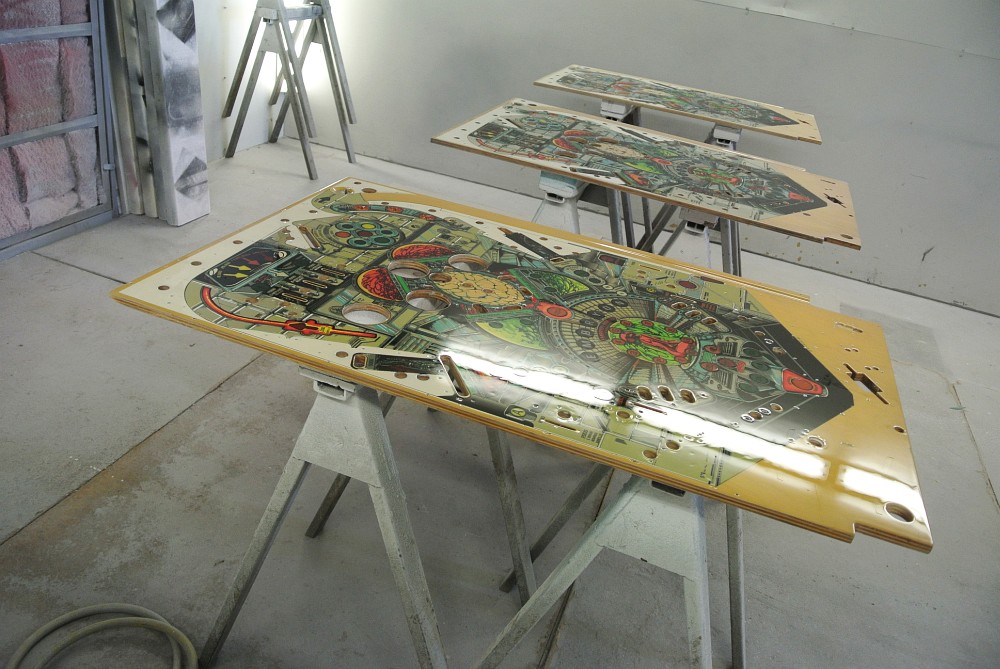
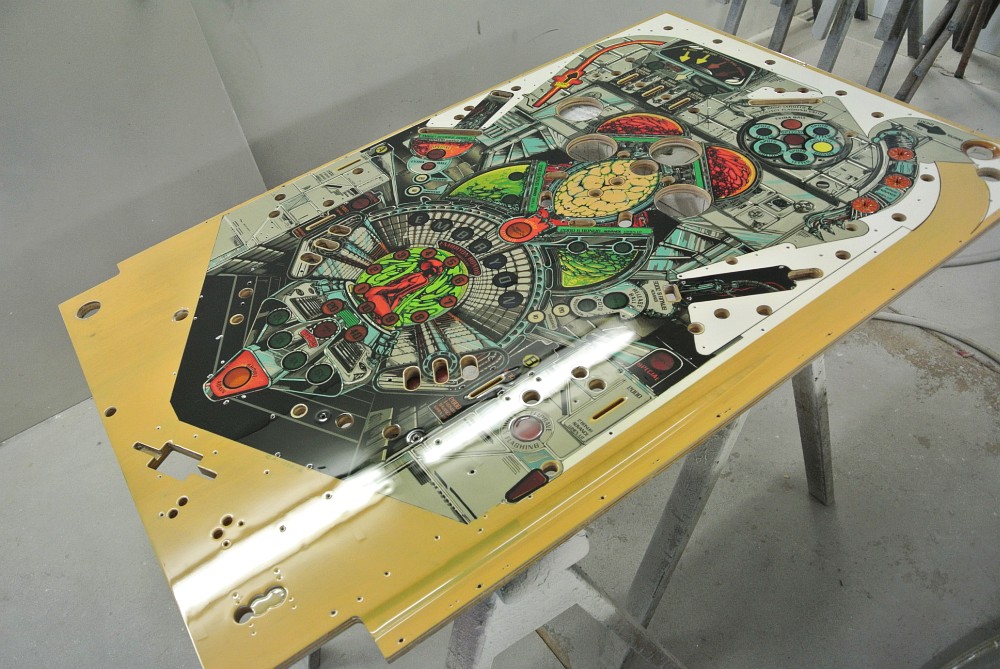
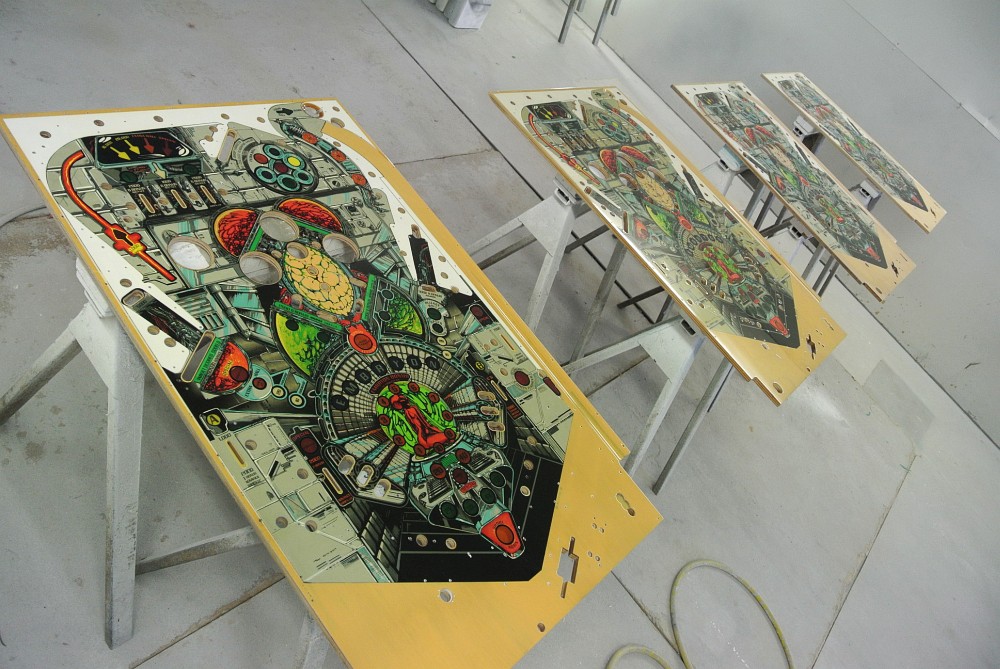
All cleared and ready to sand and polish in the next few days...
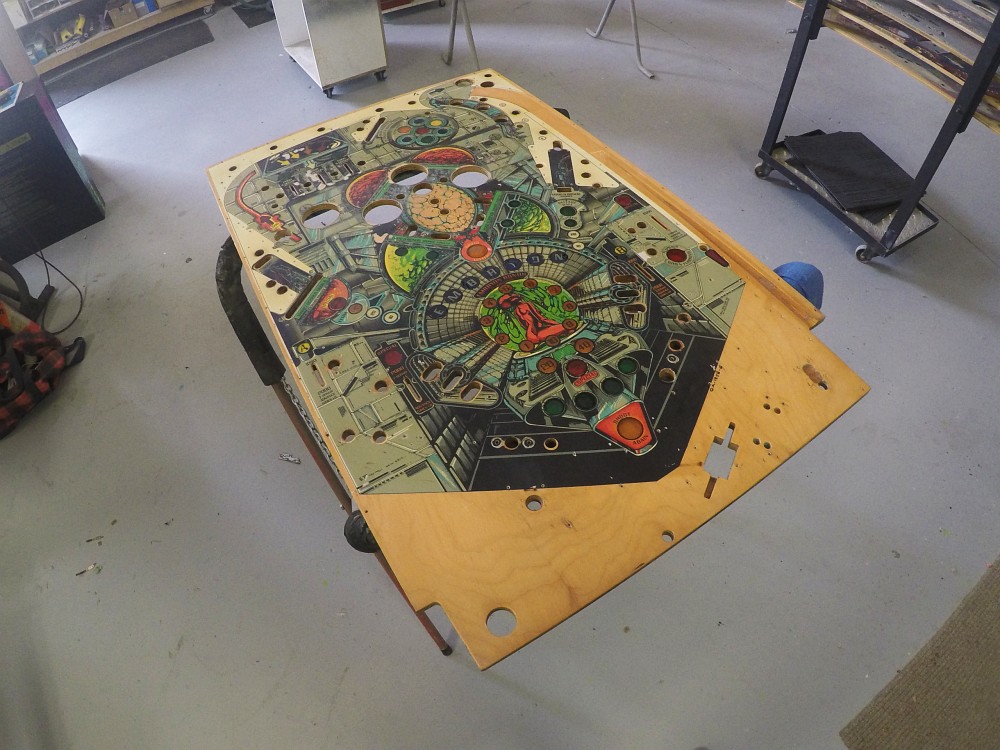
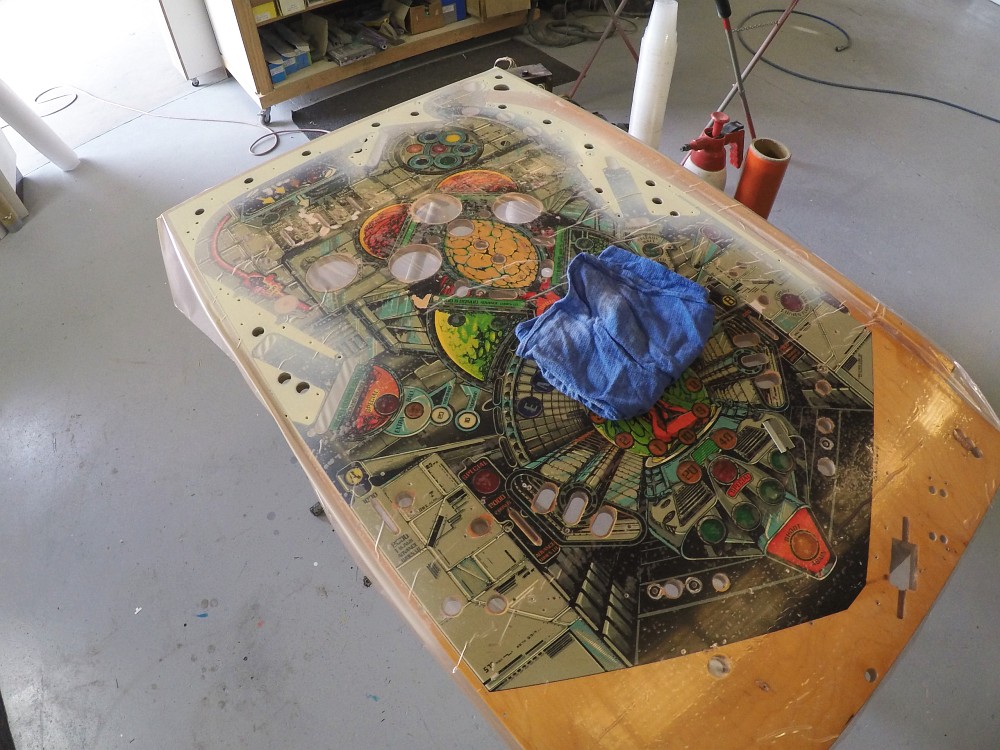
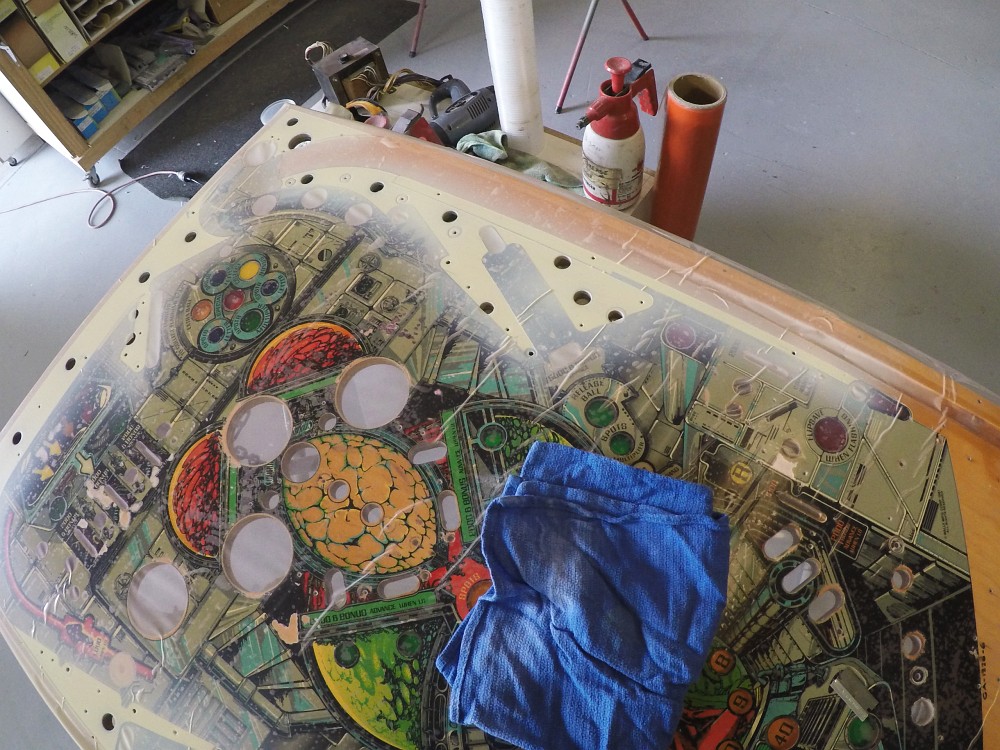
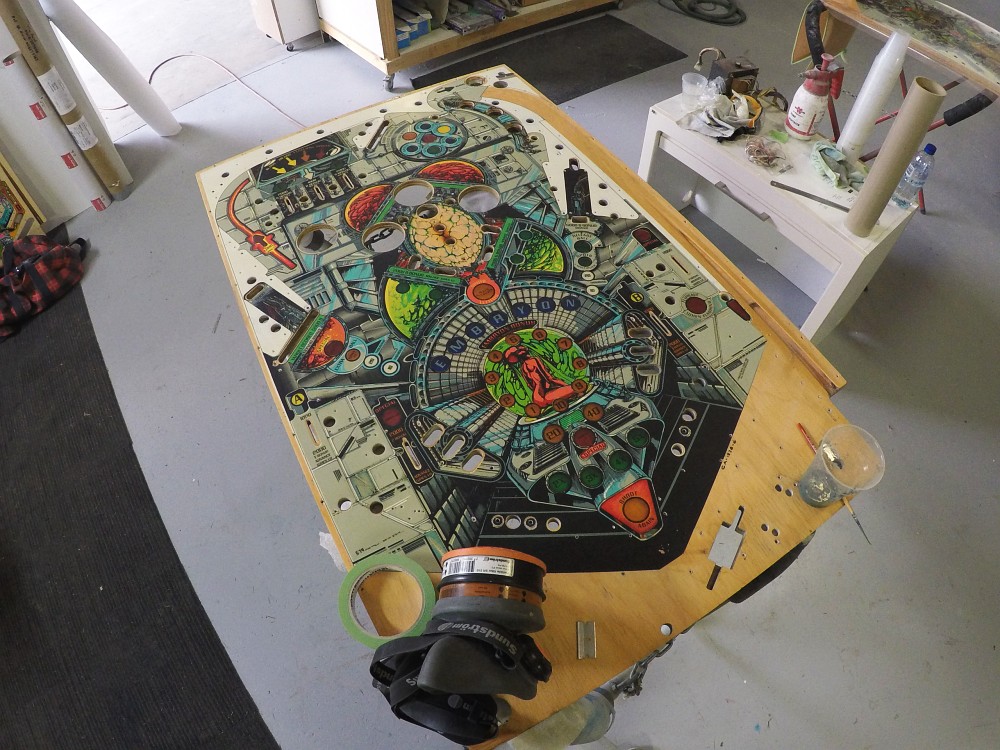
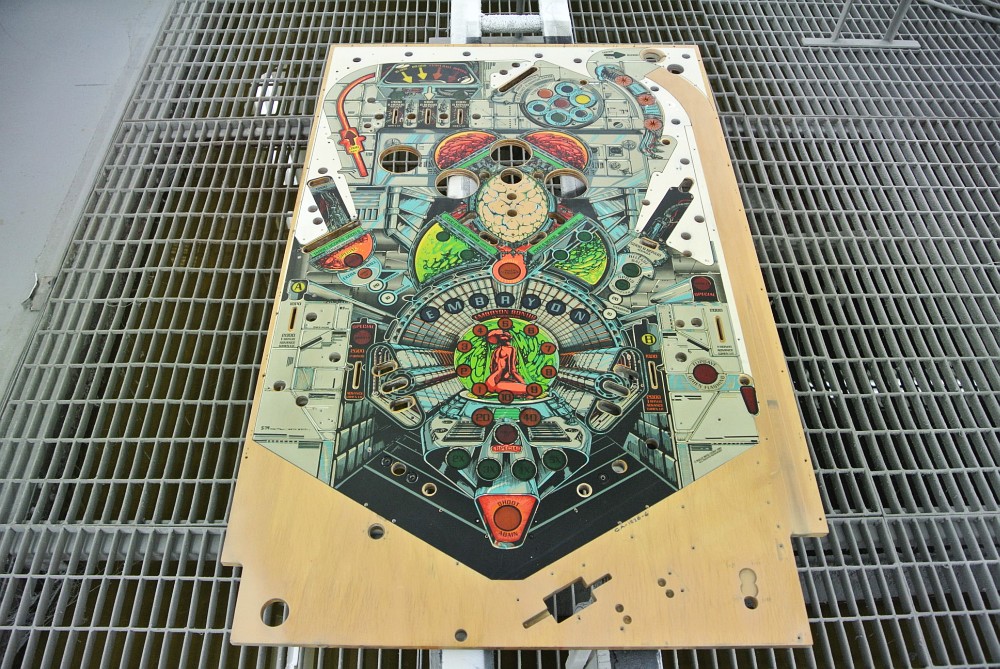
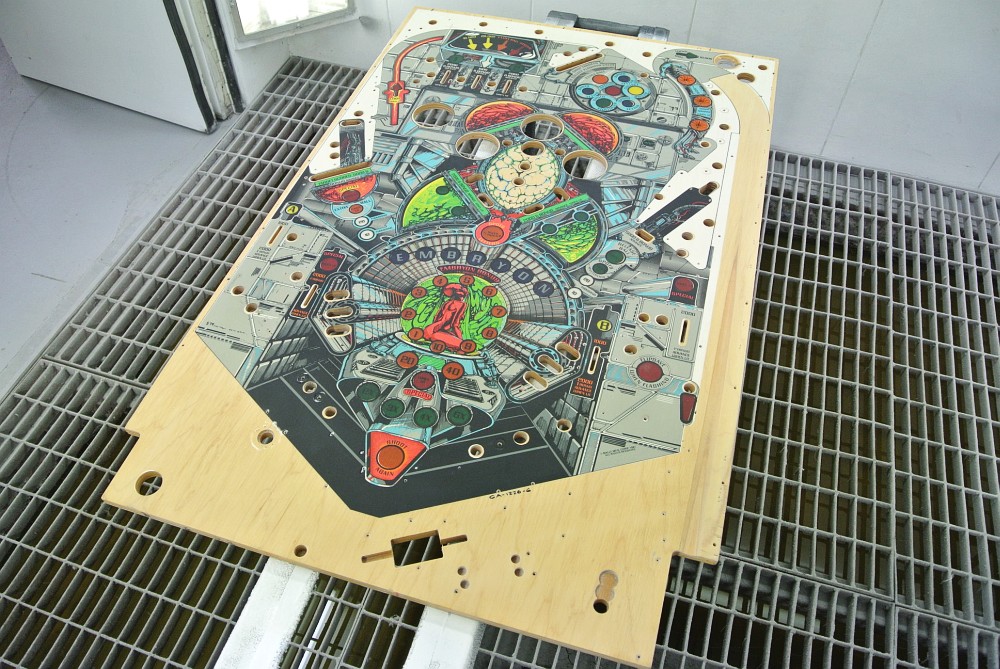
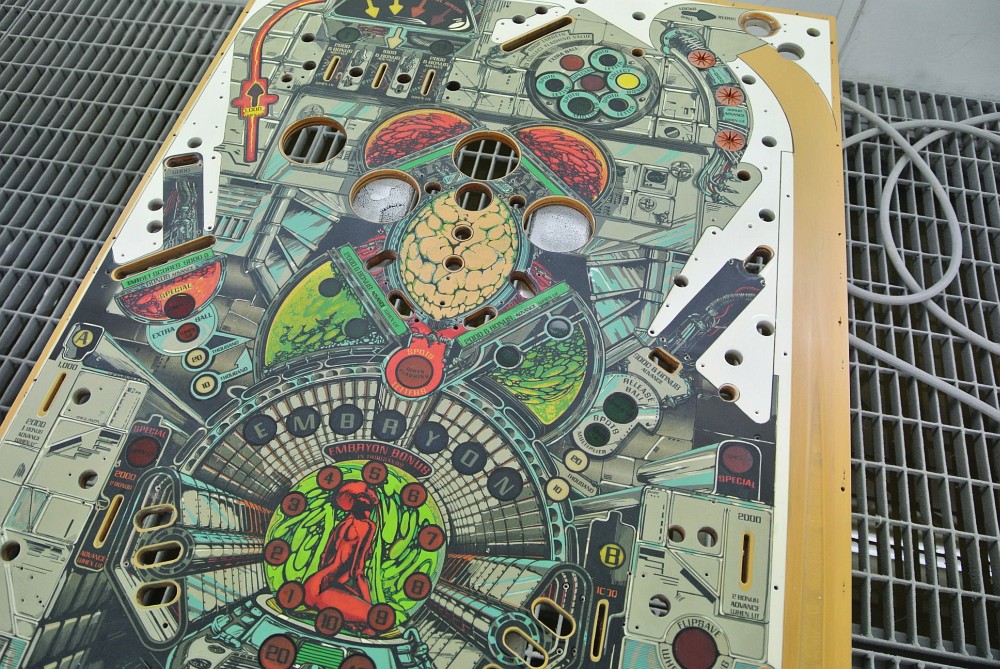
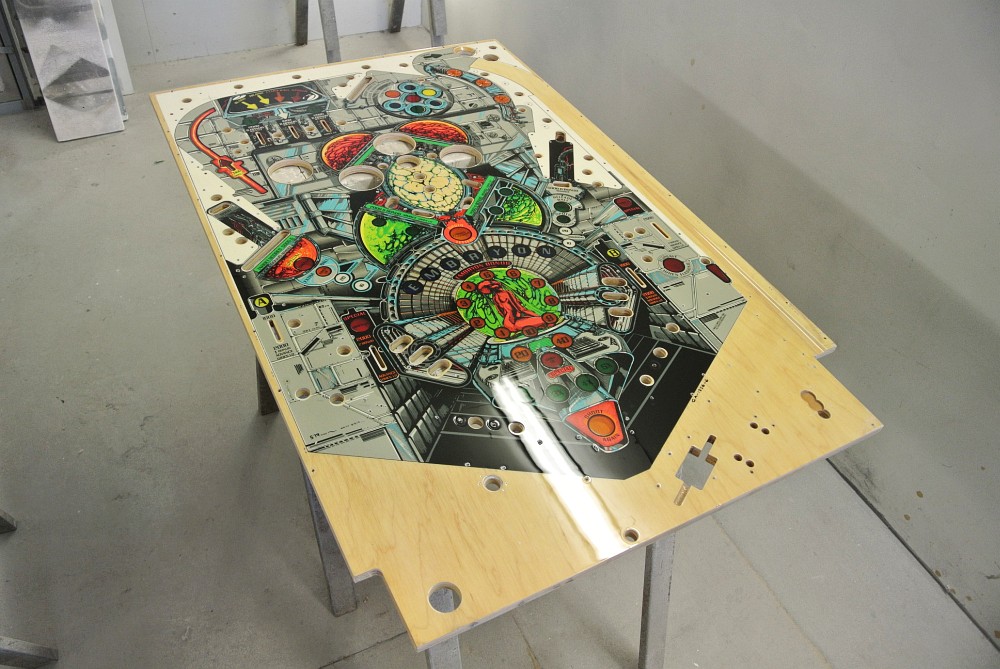
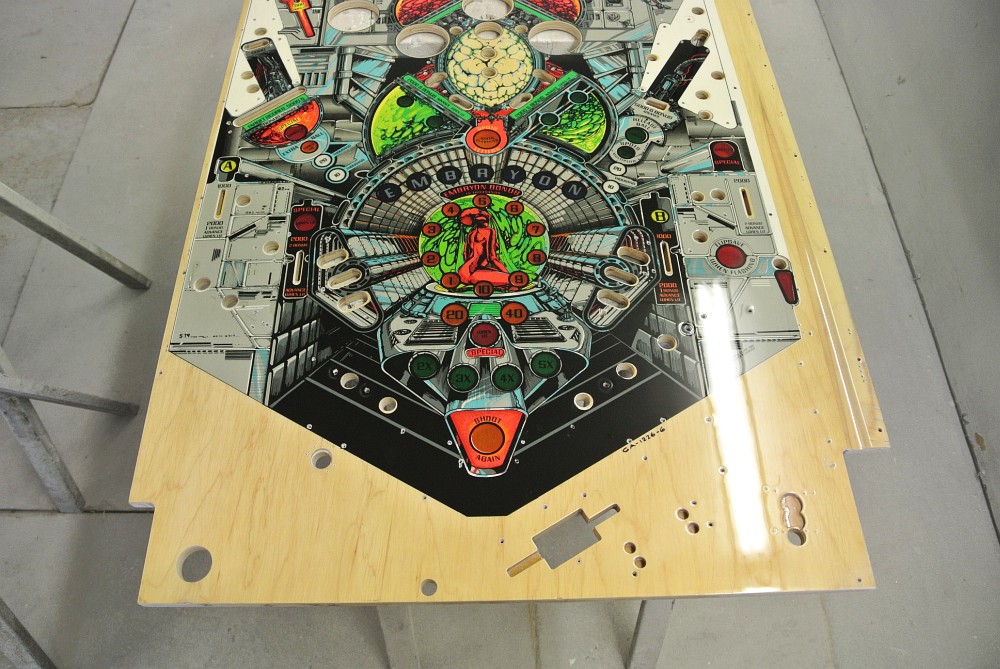
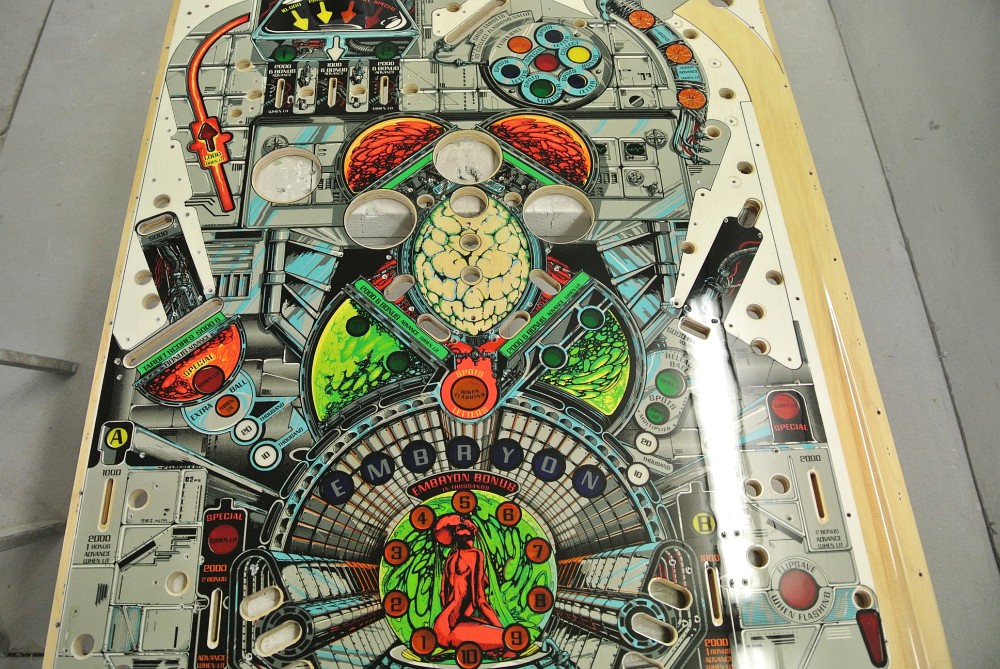
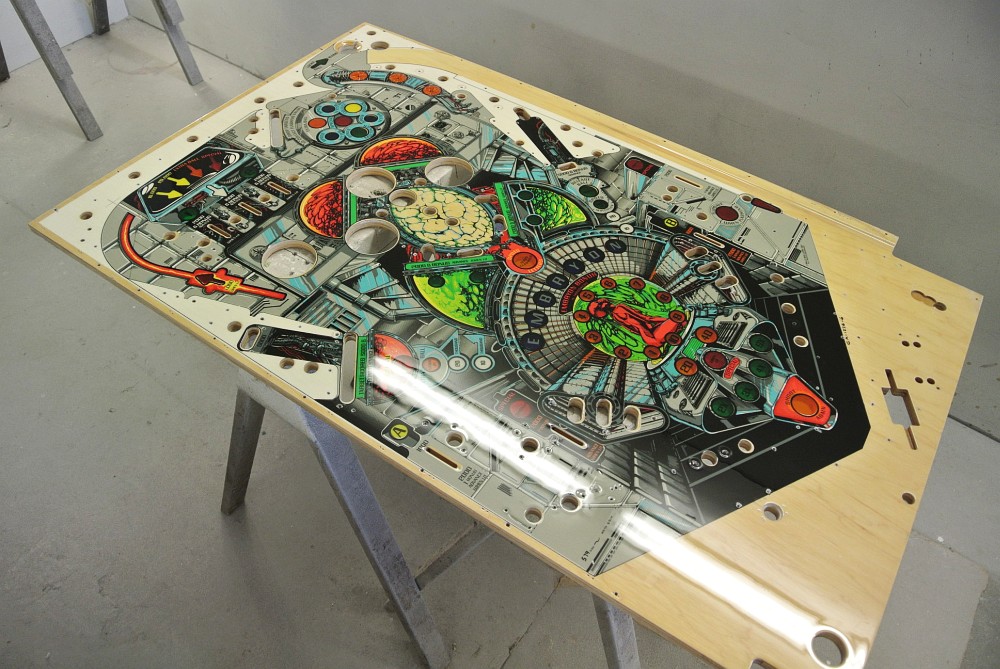
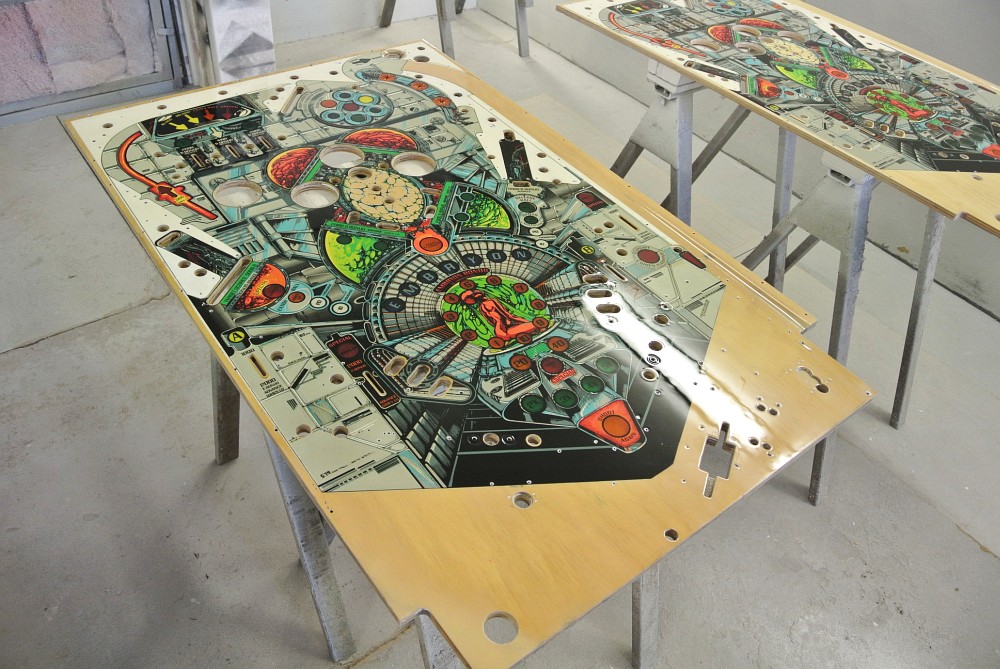
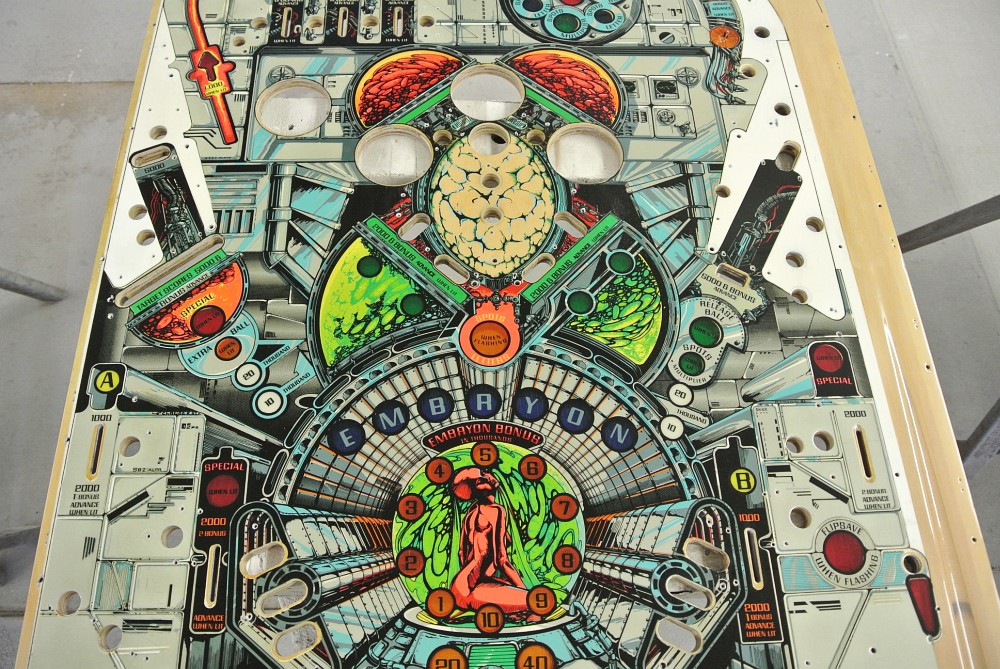
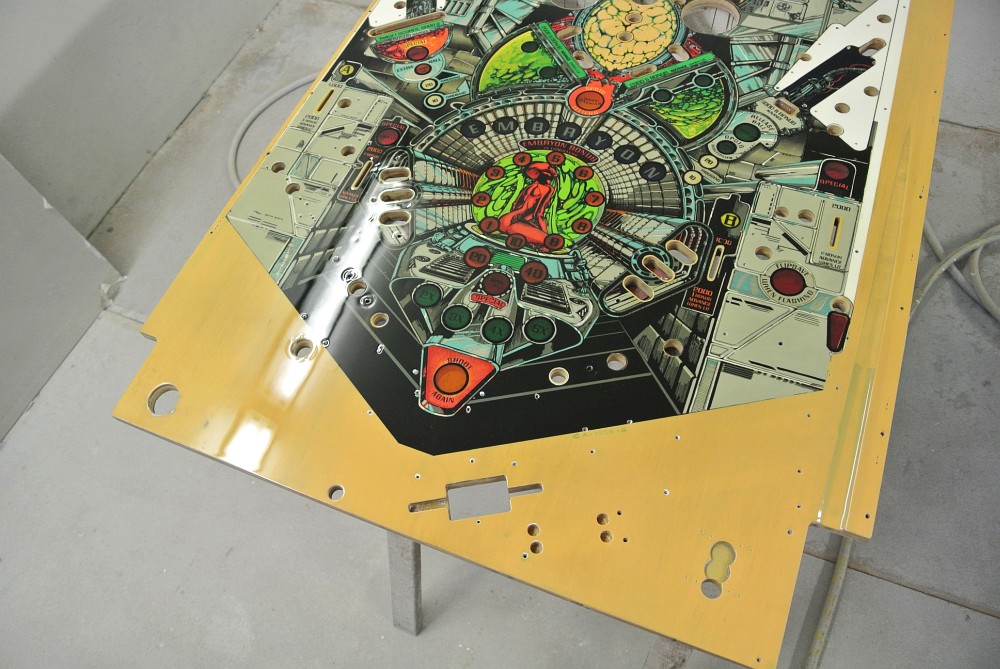
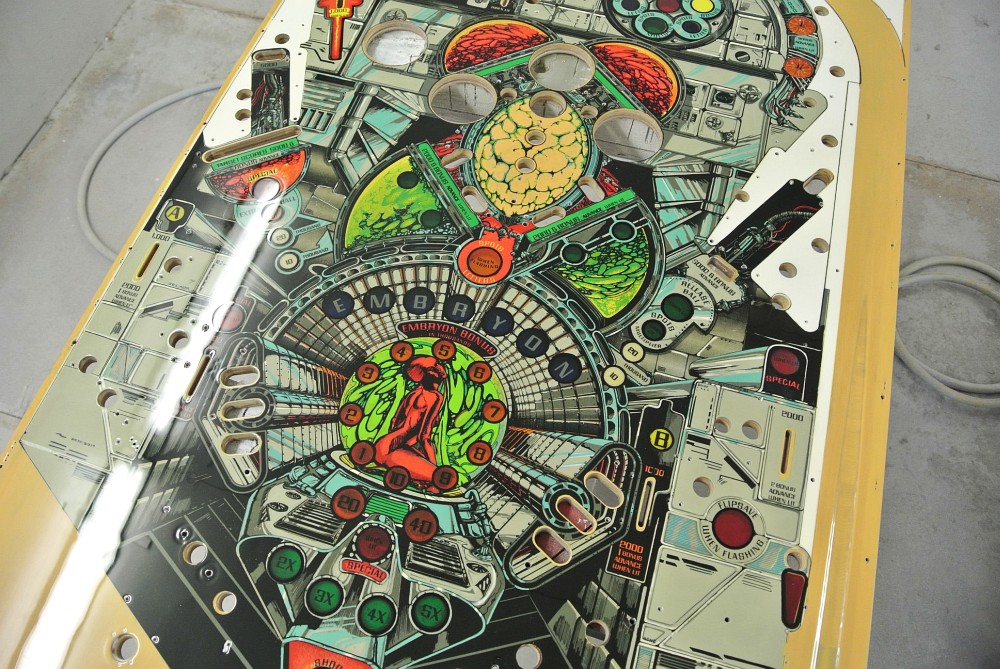
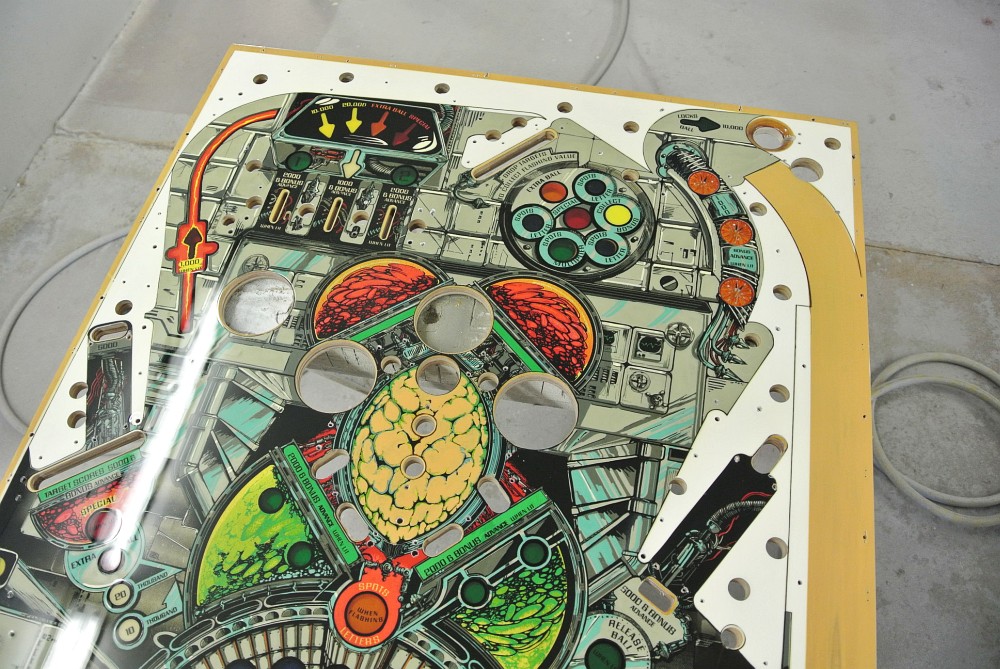
All the playfields were left to cure, they were then sanded and polished. Given it was a very bright day, playfields were photographed inside to capture the detail...
Embryon 1...
Embryon 2...
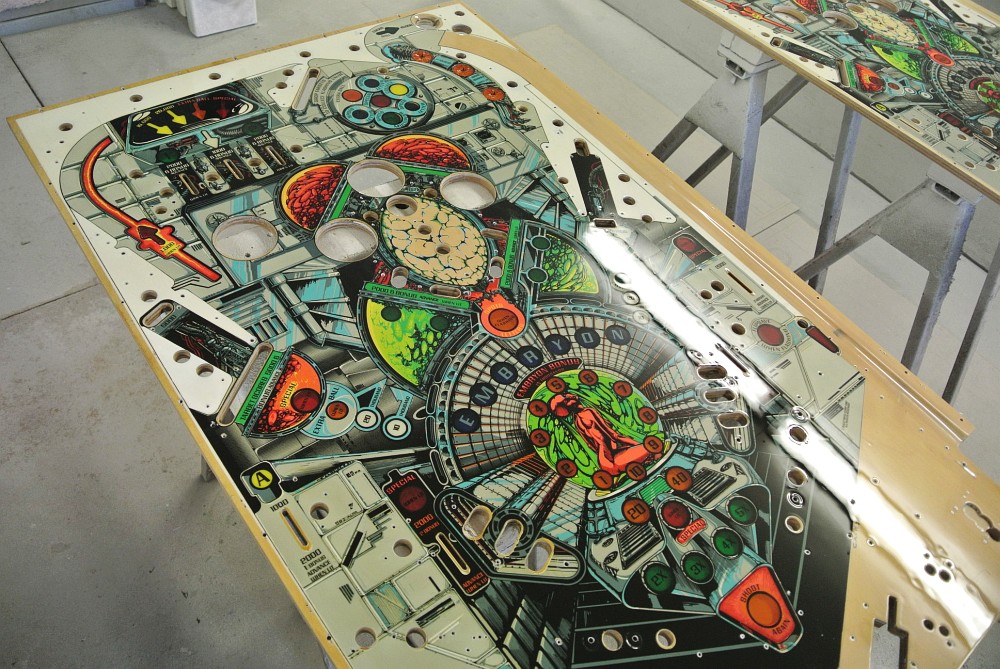
Embryon 3... (will add photos from other camera, battery died)
Embryon 4...
And that was that. The Embryon project complete. Just a big thanks to APR for organising this project. It has been a great opportunity for us down here. Also to Daniel (ddstoys) for helping with the replacement inserts and new star rollovers...
I hope everyone has enjoyed reading about this one, certainly one of the bigger projects we have taken on.
Looking forward to an even bigger 2016

Tim
HRP


