Author Topic: Star Trek: The Mirror Universe pinball  (Read 10885 times)

0 Members and 2 Guests are viewing this topic.

Offline zitt

  • Trade Count: (0)
  • ****
  • Forum Posts:
Re: Star Trek: The Mirror Universe pinball
« Reply #60 on: August 15, 2013, 03:35:14 PM »
After visiting with Modders-inc.com at Quakecon 2013; Lockman, MrRed, and I picked up a donor head from DonW in Garland. Don graciously donated this head to the Mirror Universe project. Very much appreciated these guys help in getting this head to Austin.

It started life as a Supersonic head... and was a rough from a paint flaking/ding perspective. All of this mattered nothing to me... as it was going to be dye/stained black just like the cabinet. Here are some before shots of the head:


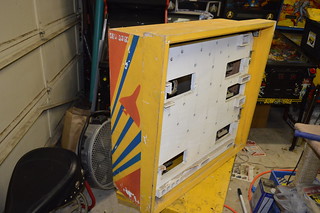
The back vent hole were coming apart; good because I wanted to improve the ventilation anyway...


I went about destructing the head... to create new vent holes. Since eventually I plan to put more than just the original boards in the head... I decided I wanted some active cooling (IE DC FANs)... What better way to integrate vents... but using something from the Enterprise.

Using the great work by colosseumbuilders.com, I recreated the Enterprise's impulse engines in CAD using the following as a guideline:

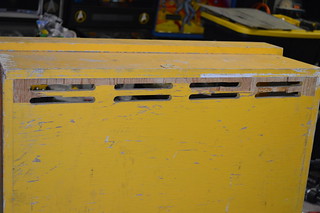
The resultant CAD file yielded the following rendering of the DXF file. In order to practice for the upcoming Playfeild CNC work; I wanted to practice with by CNCing out these vent holes in the Russian Plywood. Ken and I went to Techshop.ws this past Saturday and CNCed the back vents:


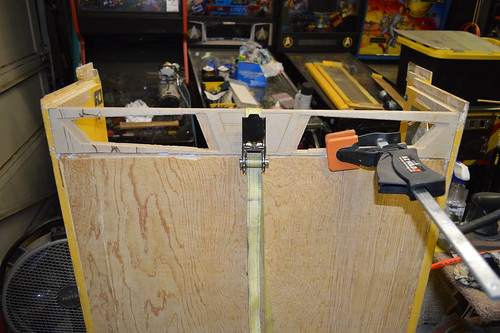
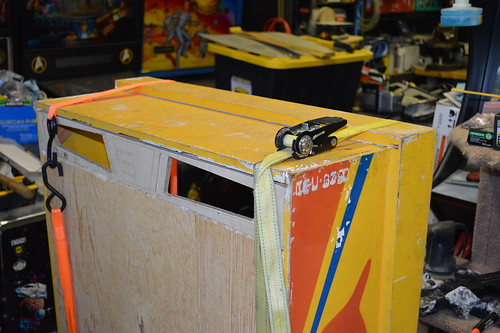
Once I got home; Saturday night I began re-assembling the head:


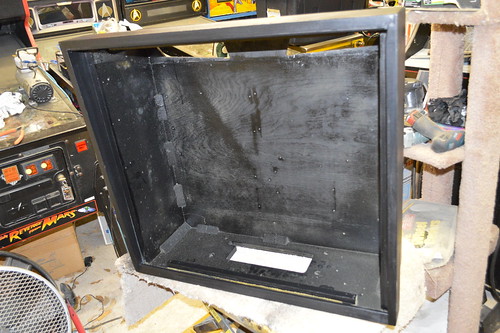
Then I lightly sanded and vacuumed the inside of the head to prep it for interior paint:


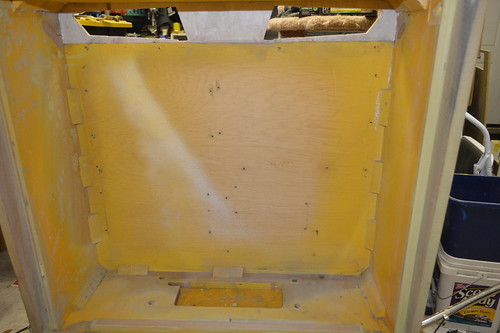
This time I decided to paint the inside prior to staining the outside; so:


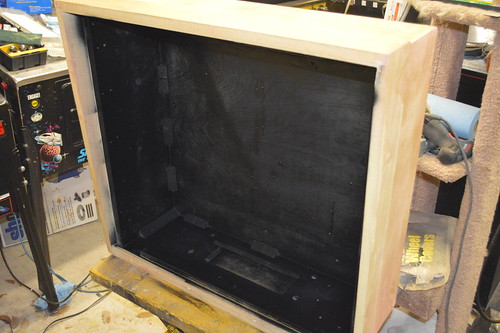
After the interior dried; I needed to replace the Veneer which I removed during the deconstruction phase.


I thought about going to woodcraft to get it; but really; I didn't want to drive 30minutes in traffic... so I opted to get the iron-on type from Lowes. It comes in a roll; and you melt the glue with an iron.


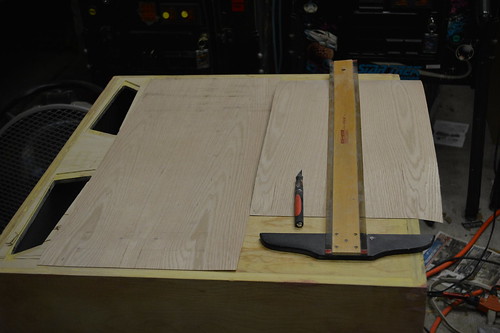
The smaller roll of veneer was on clearance; so I opted for it... but turned out to be a hair short. I filled the seams with Plastic Wood filler so the seams wouldn't be visible on the back without a close inspection.

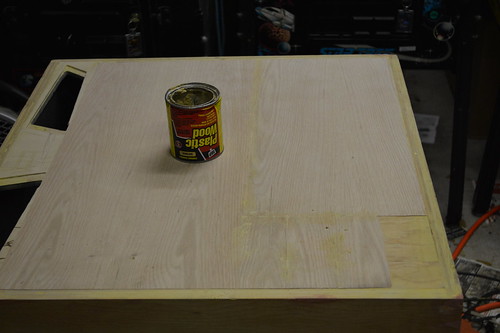
Not sure what I'm going to do about the small section... worst case I'll apply a patch after-the-fact.

After some lite sanding with the orbital sander the back and the head was ready for the Black Dye:


followed by the Black Stain:


Even the bottom didn't escape the black of space...


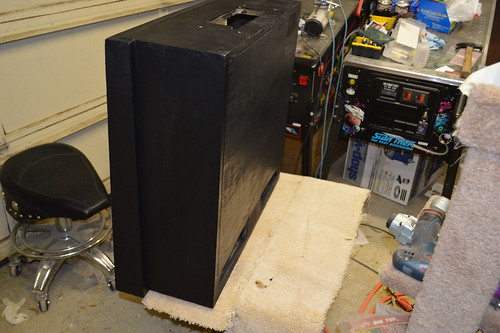
The plan is to let the Stain/Dye cure overnight. Then I'll begin to spray the Polycrlic Satin clear coat over the stain to seal the wood and prep is for future Stenciling.

My head did not come with any of the metal trays for the displays... if anyone is parting out a early 80s Bally Solid State machine... I'd very much appreciate the opportunity to obtain these trays for my Nixie tube displays. Please PM or email me. Thanks!

Offline zitt

  • Trade Count: (0)
  • ****
  • Forum Posts:
Re: Star Trek: The Mirror Universe pinball
« Reply #61 on: August 16, 2013, 02:43:47 PM »
While waiting on the Head to cure... I decided I wanted to do a little something extra for the background of the cabinet - approx where the Klingon ship would have been. I debated internally in my head of I wanted to go this far... in the end deciding "it's my machine; make it yours!".

I did some looking around on google images for Hubble space telescope pictures when I came across this picture of the M82 Galaxy:


Remember to Click the image to get higher rez shots you can zoom in on

Now that I had the picture... it was time to figure out how to get in on the cabinet. I had some White backed Water slide decal paper for my color laserjet; so I figured I'd give it a shot. Some water slide work... some Airbrush work... and we are left with two similar yet uniquely different renditions of the M82 galaxy on either side of the cabinet:


I coated the airbrush/decal work with some Matte clear spray paint while we waited on the head to cure.

I knew I wanted to do something different with the background black... that was adding holographic gold and silver flake to the topcoat before I stencil. So I did some google searching and ended up purchasing some gold and silver flake from PaintWithPearl.com. The idea was I wanted to have a star field over the black. Nothing really special about this webstore; other than they seem to be the most competitive w/ regards to color selection as well as price/ounce. 

I mixed about 1/8 a tsp of silver and 1/8 tsp of gold into the polyacrylic clearcoat I was going to spray over the black stain to seal it. With my Harbor Freight spray gun I sprayed the cabinet and head. 


In retrospect; the metal flake at 0.004 inch was just too small... looks more like star dust; not a starry night. Ideally; I'd have gotten several sizes and mixed them for a more random look. Here's a close up showing the gold/silver flakes:


Here's an attempt to capture the holographic nature of the flakes in the sunlight:


If I had it to do over... I'd proably have used less "dust"... and gotten some larger flakes to try and break up the eye candy... I may still try to apply some bigger flake; but honestly... I don't want to spend more time / money on the internet. Maybe I'll feel differently tomorrow.

In general; I'm pleased with the result... just need to put the finishing touches on the stencil designs so I can start that process.

Offline swinks

  • Trade Count: (+18)
  • ******
  • High Score Initials:
  • Forum Posts:
  • Lake Macquarie, NSW
Re: Star Trek: The Mirror Universe pinball
« Reply #62 on: August 16, 2013, 05:19:00 PM »
very cool and becoming a work of art
https://swinks.com.au

for pinball parts (reproduction & mods)
for pinball t-shirts

Offline Retropin

  • Trade Count: (+4)
  • ******
  • Forum Posts:
Re: Star Trek: The Mirror Universe pinball
« Reply #63 on: August 16, 2013, 06:19:35 PM »
I like the fleck a lot and will bear it in mind for future projects..

Offline ktm450

  • Trade Count: (+1)
  • ******
  • High Score Initials:
  • Forum Posts:
  • Geelong, Victoria
Re: Star Trek: The Mirror Universe pinball
« Reply #64 on: August 18, 2013, 01:40:27 PM »
Looks great  ^^^

Offline elkor-alish

  • Trade Count: (0)
  • ******
  • Forum Posts:
  • Perth
Re: Star Trek: The Mirror Universe pinball
« Reply #65 on: August 18, 2013, 05:56:08 PM »
I love the M82 Galaxy on the side!
Looks awesome.
I had no idea you were going to go into so much detail with this project when you started but I'm glad you are.
I can't wait to see your Nixie displays in action, actually I can't wait to see the whole finished product.
This is shaping up to be quite a spectacular project.
Pins: The Getaway, TotAN, WH2O, Pinball Magic, Banzai Run, Flintstones, Judge Dredd, Lord of the Rings LE, Metallica LE, Iron Man VE, The Walking Dead LE, Star Trek The Next Generation.

Offline zitt

  • Trade Count: (0)
  • ****
  • Forum Posts:
Re: Star Trek: The Mirror Universe pinball
« Reply #66 on: August 20, 2013, 04:11:00 PM »
Thanks for the kind words guys... appreciate it.

This past weekend; I intended to wrap up the Impulse Engine modification to the Mirror Universe pinball head. Unfortunatly it spilled over to Monday; mainly because I couldn't get my Laser cutter into a completely operational state. :(

Anywho; The intent was to make the vent holes to look like the Enterprise's Impulse Engine. To do this I created a stencil using the same scale and rendering as before. Since My laser cutter only has a 12x24 table; I had to only do 1/2 the stencil opting to flip it for the opposite side. Here's the stencil I created:


I laser cut this out of dry erase poster board and sprayed it lightly with some stencil spray adhesive. Here it is positioned for the left Impulse Engine vent:


Since I didn't have any grey spray paint on hand... and it was near or after midnight; I opted to spray with primer grey:


I then flipped the stencil (after the primer had dried for a couple of hours) and sprayed the other side with light stencil adhesive and then grey primer:


Now I needed to do some shading of the upper piece; So I used the drop pieces cut from the stencil as a stencil. Adhesive and some transparent black airbrush paint:


Next I needed to stencil the center panel lines. I had already laser etched the panel lines into the wood; but I decided attempting to hand paint the etch lines would be problematic. Cue Stencil number 2:


Adhesive, positioned:


Sprayed with Black Opaque Airbrush paint:


With the Stenciling complete; my attention returned to the Vents themselves. When I CNCed the wood; I also Laser cut a grill based upon the original render of the engines. The CorelDraw file looked like so:


As you can see; there are two grills (finger guards if you like) and two 60mm Fan brackets. The grills were a particular bitch to cut... The heat would cause the grills to warp. I went ahead and cut them; only to find that one of the long lines broke on one of the grills. The result of these grills it pictured here:


Upon reflection; I determined that the cause of the warpage was proably the amount of heat "transferred" during the long cut lines. The "spaces" between the grill lines were about 0.1"... while the solid part of the grill was ~0.8". This ratio was critical to the look I wanted (and to match reference photo). I also knew that the long runs were just too flimsy; so I had to modify the grill design to keep more "solid" acrylic in place. This would strengthen the grill and should help reduce the heat-induced warping.  Design Rev#3:

I also changed the order of cut on the file. I opted to do the periphery outline AFTER the center grill portions were cut. Again in an effort to minimize heat transfer and aid in preventing cutting mishaps if I had to restart the cut.

Here's the Laser At Techshop.ws cutting the Rev3 grills:


With the new grills complete; it's time to begin the assembly of the fan brackets:


Installed:


And the Test fit along with overall shot:


And a Closeup of the grills:


With that the back of the Star Trek: Mirror Universe head is complete. The grills were wrapped up and stored safely until the final stenciling is done on the sides and the whole piece is clear coated.

Offline ktm450

  • Trade Count: (+1)
  • ******
  • High Score Initials:
  • Forum Posts:
  • Geelong, Victoria
Re: Star Trek: The Mirror Universe pinball
« Reply #67 on: August 21, 2013, 10:04:24 AM »
If that is the detail for the back of the game, I look forward to seeing the rest of the pin, nice  *%*

Offline zitt

  • Trade Count: (0)
  • ****
  • Forum Posts:
Re: Star Trek: The Mirror Universe pinball
« Reply #68 on: September 11, 2013, 05:57:41 PM »
As mentioned here and here,
I've been working on a plan to add sound effects and background music to the project. To this end- I'm currently redesigning the AS-2815-3x/51 soundcard with modern components; specifically, I'm replacing the TTL PROM and 4bit counter which are both getting rare / expensive with a single MAX 3000 CPLD in 44pin PLCC. The CPLD cost 1.50 is single units... where the TTL PROM and 4bit counter are in the 5-6 range. The CPLD has just enough room to replace all the logic chips and house both sound PROMs for AS-2815-32 and AS-2815-51 designs. The -51 proms can be selected via a jumper wire. "In theory" it should work with any game listed with the AS-2518 boardset.

The sound effects tie into the existing switch matrix and run off of a raspberry pi.

The card should be a drop in replacement for existing card using mostly SMT components to keep PCB costs down.

IF anyone is interested; I posted my rev-99 schematics here:
http://pinball-mods.com/blogs/wp-content/uploads/2013/09/Pi_AS-2518-50_rev0_web.pdf
Still need to take free gates and tie them up so they don't float.

Also need to renumber components now that the layout is nearly complete. Then generate SilkScreen. I put a small prototyping area under the RazPi... just incase I need to do some rework.

Hope to have the design committed to OSHPark by the weekend.

Offline goodolddays

  • Trade Count: (0)
  • ******
  • Forum Posts:
  • Riverstone NSW
Re: Star Trek: The Mirror Universe pinball
« Reply #69 on: September 11, 2013, 06:51:12 PM »
Just caught up with this again . You are a man of many talents Zitt . Fantastic effort so far  and so much attention to detail ^^^
I need more room ! and more $$$

Offline zitt

  • Trade Count: (0)
  • ****
  • Forum Posts:
Re: Star Trek: The Mirror Universe pinball
« Reply #70 on: September 19, 2013, 12:02:37 PM »
Thanks for the kind comments.

A couple of days ago; my custom stencils came in from TwistedPins. I started with the head because it was still on the hydraulic table from the fan installation. I decided I wanted to use the same head stencils as the original bally; just change up the colors a bit.

I started by laying down the yellow stencil:


At this point; an improvement I'd suggest to these stencils is that for the first layer... the "red" covers should be removed. IE the planetoids shouldn't have any masks "inside" the oval shapes. That way you lay down a solid color and the second color (red) goes over the yellow so there are no registration offsets. This is what I did; I went ahead and removed all the squiggly shapes from the planetoids.

With the stencil ready; I taped off the surround areas with newspaper and put down some grey primer. This was done mainly to get the "grey" which I had chosen for the enterprise. Yellow generally goes over light grey than black so I sprayed everything.


I waited overnight for the grey primer to cure then masked off the enterprise grey and sprayed down some "Gold yellow" spray paint. I decided to use spray paint as it is easier to clean up than trying to spray the sign lettering enamel I used for the Bally Star Trek repair many years ago.


I let the yellow dry about an hour before carefully removing the masking. Here's how the first stencil turned out:


Another night time cure to let the paint harden before I put down the red-orange stencil. I decided I wanted the planetoid to be the same colors as original. The difference was in the Enterprise as you'll see in a moment. I sprayed the planets and then the Enterprise-shadows as "Driver blue".


I let the orange/blue combo cure in the TX sun for a few hours; then removed the masking. The Result:


There were some slight registration issues with the blue and grey; but really not that bad. Again; If it were me; I'd have created the stencils with the entire Enterprise in "yellow" and then have the "red" overlay cover the yellow to avoid the registration issues. I'm guessing TwistedPin did the stencils that way so someone could just do a single color... but really; the Red fades long before the yellow; so in my mind the yellow stencil should cover all the areas Red+yellow.

Anyway; I'm digging the custom Enterprise colors. Thoughts?

Offline zitt

  • Trade Count: (0)
  • ****
  • Forum Posts:
Re: Star Trek: The Mirror Universe pinball
« Reply #71 on: September 24, 2013, 03:08:36 PM »
I'm thinking about how to get stereo out into the world from the RazPi which would be mounted in the backbox on the Mirror Universe. Traditionally on later model pinball machines; they shrunk the vertical size of the backglass and put a speaker panel in it.
I don't want to do this because it would be non-traditional to the look of the machine.

As a result; I'm left with an issue which I could use the communities help with... Similar to what Jags did here:
http://pinside.com/pinball/forum/topic/custom-sounds/page/3#post-1121158

I'm looking at mounting some speakers to the backbox in some way. I'm looking for suggestions as to what might look "trek"-like. I came across these

but the price is kinda :EEK: and while high-tech looking; doesn't really scream TREK to me.

Anyone have some older speakers (cheap/gift) which might be mod-able to the a Trek theme? Any other suggestions on speakers? Anyone got some Logitech marketing contacts? ;D

Offline swinks

  • Trade Count: (+18)
  • ******
  • High Score Initials:
  • Forum Posts:
  • Lake Macquarie, NSW
Re: Star Trek: The Mirror Universe pinball
« Reply #72 on: September 24, 2013, 03:15:11 PM »
I think the location like jags would be good, not too obvious but effective.
https://swinks.com.au

for pinball parts (reproduction & mods)
for pinball t-shirts

Offline vinito

  • Trade Count: (0)
  • *****
  • Forum Posts:
  • Kansas City, KS USA
Re: Star Trek: The Mirror Universe pinball
« Reply #73 on: September 24, 2013, 03:58:08 PM »
how about a topper made with some of those outdoor rock-looking speakers and a borg cube subwoofer.
Yea I know - not too good. Just brainstorming here.
I feel more like I do now than I did when I first got here.

Offline zitt

  • Trade Count: (0)
  • ****
  • Forum Posts:
Re: Star Trek: The Mirror Universe pinball
« Reply #74 on: September 24, 2013, 05:03:24 PM »
you had me ... until; borg cube. Mirror Universe is too early for the Borg.