Author Topic: Stern Galaxy Restore  (Read 4839 times)

0 Members and 1 Guest are viewing this topic.

Offline Extra Ball

  • Read-Only
  • Trade Count: (0)
  • *
  • Forum Posts:
  • Newcastle
Re: Stern Galaxy Restore
« Reply #15 on: April 17, 2009, 05:15:50 PM »
Wouldnt work on Flash, it has so many multi-color areas.
 !@#

Offline Creech

  • Forum Founder
  • Trade Count: (0)
  • *****
  • Forum Posts:
  • Adelaide
Re: Stern Galaxy Restore
« Reply #16 on: April 17, 2009, 05:17:55 PM »
I just meant the black bits as it seems to stand out more on there.

Offline Extra Ball

  • Read-Only
  • Trade Count: (0)
  • *
  • Forum Posts:
  • Newcastle
Re: Stern Galaxy Restore
« Reply #17 on: April 17, 2009, 05:47:55 PM »
yep, Anyone tried heating the wax to get better penetration?

Offline MartyJ

  • Trade Count: (+4)
  • ******
  • High Score Initials:
  • Forum Posts:
  • Melbourne
Re: Stern Galaxy Restore
« Reply #18 on: April 17, 2009, 06:00:05 PM »
Nino,

You are welcome to borrow my T.C cleaning kit for a test if you want?  I've only tested it on diamond plate & mylar.

Just let me know.

Offline Strangeways

  • Pinball Restoration is my passion
  • Administrator
  • Trade Count: (+9)
  • *****
  • High Score Initials:
  • Forum Posts:
  • Melbourne
  • ABN 68 283 634 461
    • Ride The Boney Beast
Re: Stern Galaxy Restore
« Reply #19 on: April 19, 2009, 12:19:51 PM »

Thanks for the offer Marty, but I've done the best I think that can be done for that area - read below !

Previously, I removed just about everything from the bottom of the playfield. Now the corrosion was not bad, but there was the presence of the white powder deposited on all metal parts - so here's what I did for both sides of the playfield parts ;

Plastics - I used hot water and nifty. All the plastic parts (except the actual plastics set), were immersed in hot water and nifti and left overnight.

Plastics Set - Warm water and Nifti - Let them soak for a couple of minutes, wash and then rinse

All small metal parts - First immerse in boiling water and windex, soak overnight

The following day - wash all plastic parts, metal parts and small metal parts and then rinse and finally leave out in the sun to dry !

The screws etc still had some corrosion on them, so I let them soak in ranex for an hour. Then wash with windex. They had a dull look, but not a trace of corrosion. I then placed everything metal in the tumbler for 8 hours. Each individual screw (playfield parts side) was buffed.

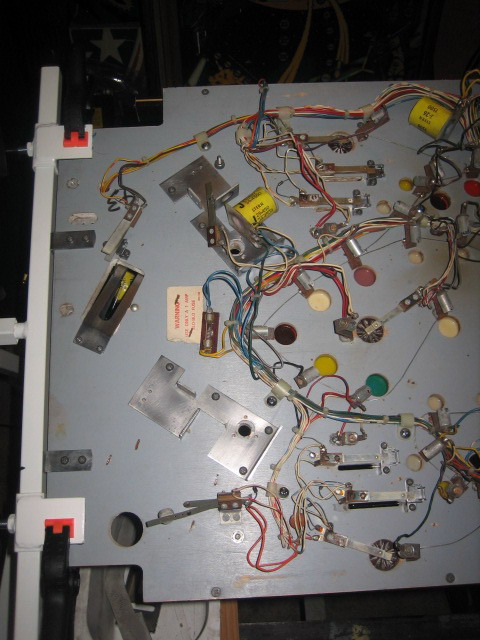
I used the wire wheel to clean the metal assemblies.

Finally - Time to reinstall everything ! The playfield switches were gently buffed and installed, as well as most other parts. I need to order some coil sleeves etc - they will be done later on.

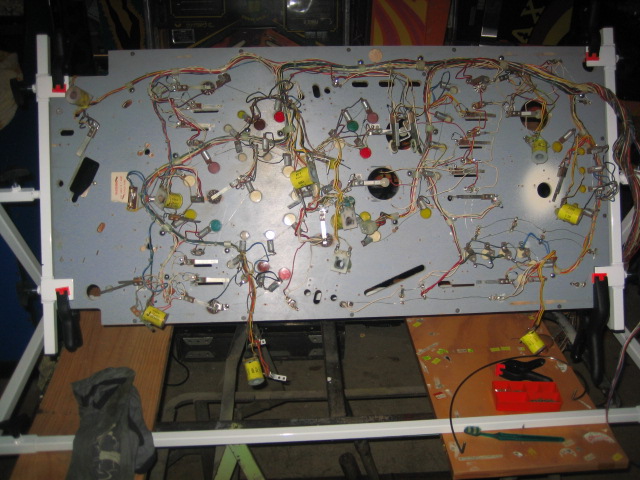
The underside was cleaned with Nifti and the wire loom as well. Looks like the light sockets may need replacement. Here's a picture of the underside as of last night ;


Slowly does it - but its coming along great.


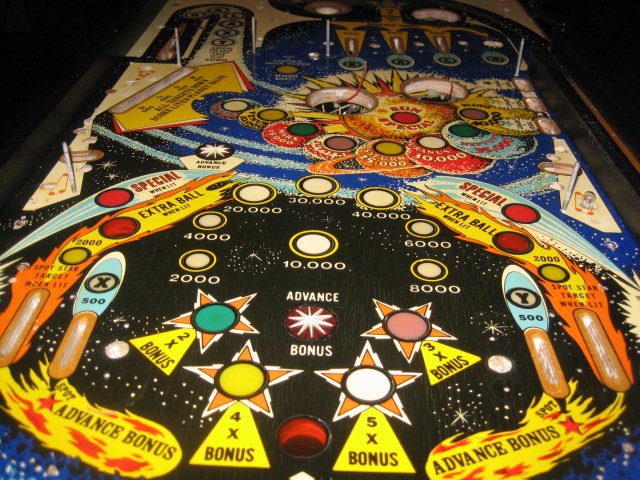
I spend a few more hours on the topside of the playfield. I tried to remove as much ball swirl as possible in the black areas, but I'm not going to do anymore work there as I may breach the original clearcoat. Once I was happy, I used Meguiars Paste wax and gave it 3 coats. It looks MUCH better in the flesh ! I will take the next set of picture during the day !


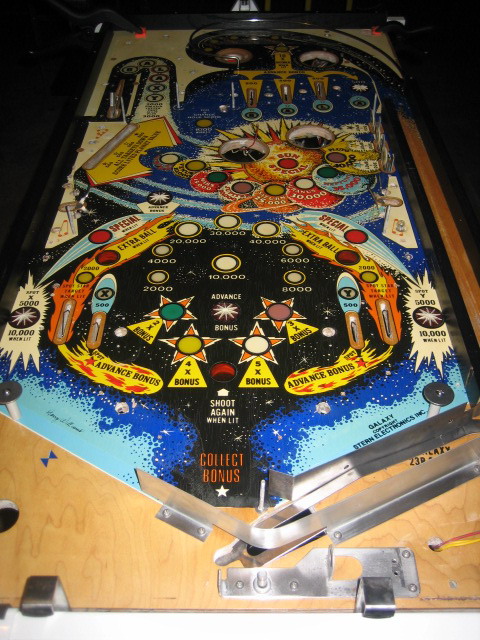
One of the metal guides on the ball trough had a broken tab, but luckily, I had a spare and I used that instead.

 &&


Aussie Pinball - Proud to be Australia's Premier Pinball Forum

http://www.australianpinballrestorations.com.au/

http://www.rtbb.com.au/catalog/

We carry the largest range of NEW Ramps in Australia

Offline ajlaird

  • Trade Count: (0)
  • ******
  • Forum Posts:
  • Greensborough, Melbourne
  • Go Ahead, Make My Day
Re: Stern Galaxy Restore
« Reply #20 on: April 19, 2009, 03:36:48 PM »
Looking great now, the work is paying off.

Offline MartyJ

  • Trade Count: (+4)
  • ******
  • High Score Initials:
  • Forum Posts:
  • Melbourne
Re: Stern Galaxy Restore
« Reply #21 on: April 19, 2009, 04:25:49 PM »
It is looking very nice Nino.  Very nice indeed.

The playfield rotissary looks very handy as well.

Offline beaky

  • Trade Count: (+7)
  • ******
  • Forum Posts:
  • Melbourne, Vic
Re: Stern Galaxy Restore
« Reply #22 on: April 19, 2009, 04:56:25 PM »
looks great
where do i get the magic eraser from?
On site pinball repairs in MELBOURNE NTH SUBURBS  : Circuit board repairs and refurbishing Australia wide (via Aust post)

Offline ajlaird

  • Trade Count: (0)
  • ******
  • Forum Posts:
  • Greensborough, Melbourne
  • Go Ahead, Make My Day
Re: Stern Galaxy Restore
« Reply #23 on: April 19, 2009, 06:21:20 PM »
Supermarket - it is a Chux product.

Offline beaky

  • Trade Count: (+7)
  • ******
  • Forum Posts:
  • Melbourne, Vic
Re: Stern Galaxy Restore
« Reply #24 on: April 19, 2009, 09:44:05 PM »
Supermarket - it is a Chux product.
thanks
On site pinball repairs in MELBOURNE NTH SUBURBS  : Circuit board repairs and refurbishing Australia wide (via Aust post)

Offline Strangeways

  • Pinball Restoration is my passion
  • Administrator
  • Trade Count: (+9)
  • *****
  • High Score Initials:
  • Forum Posts:
  • Melbourne
  • ABN 68 283 634 461
    • Ride The Boney Beast
Re: Stern Galaxy Restore
« Reply #25 on: April 23, 2009, 11:44:53 PM »

Lots going on with this restore - it is slow, but I ran out of Nifti  !@#

This is a mini update, but it is probably two nights worth of work. The tilt board and the lock down bar assembly were heavily affected by corrosion, and I thought I'd get this out of the way. The corrosion has turned into rust on the LDB assembly to the point where it is ingrained into the metal. I have two options - clean it as best I can, or paint it a silver color. After attacking it with the wire wheel, wire brush and Ranex, I thought I'd keep going with the first option.

Lock Down Bar BEFORE

One of the worst I've ever seen. BUT, the mechanism is not affected at all - It is easily moved


I basically stripped the handle and soaked it with boiling water and windex. Once it was clean, I used the wire wheel on my buffer and it started to look much better. Combined with the wire brush, and Ranex, it came up very nice. I'll show the top of the assembly once it is screwed back onto the cabinet.

AFTER


Tilt board BEFORE

Not really that bad..


I stripped, cleaned and polished the metal parts and resanded the wood. The wire loom was washed with nifti, rinsed and dried with compressed air.


AFTER


Looks MUCH Better !


I have not added the pictures of the cabinet before I started yet, as it is not finished. It will be covered later.


Aussie Pinball - Proud to be Australia's Premier Pinball Forum

http://www.australianpinballrestorations.com.au/

http://www.rtbb.com.au/catalog/

We carry the largest range of NEW Ramps in Australia

Offline Creech

  • Forum Founder
  • Trade Count: (0)
  • *****
  • Forum Posts:
  • Adelaide
Re: Stern Galaxy Restore
« Reply #26 on: April 24, 2009, 12:01:55 AM »
Awesome work mate. That Ranex is brilliant stuff.

Offline beaky

  • Trade Count: (+7)
  • ******
  • Forum Posts:
  • Melbourne, Vic
Re: Stern Galaxy Restore
« Reply #27 on: April 24, 2009, 03:49:10 AM »
looking good.
keep up the great work
On site pinball repairs in MELBOURNE NTH SUBURBS  : Circuit board repairs and refurbishing Australia wide (via Aust post)

Offline Astroboy

  • Trade Count: (0)
  • **
  • Forum Posts:
  • In the Shed
Re: Stern Galaxy Restore
« Reply #28 on: April 24, 2009, 12:05:25 PM »
Love your work. Very tidy.
I am searching for SPACE Themed Electro-Mechanicals.

Offline ddstoys

  • Trade Count: (+23)
  • ******
  • High Score Initials:
  • Forum Posts:
  • Geelong
Re: Stern Galaxy Restore
« Reply #29 on: April 25, 2009, 12:58:17 AM »
You Really are the restore king Nino that tilt panel looks fantastic