Author Topic: el_timbo's Funhouse Restoration...  (Read 4942 times)

0 Members and 1 Guest are viewing this topic.

Offline ktm450

  • Trade Count: (+1)
  • ******
  • High Score Initials:
  • Forum Posts:
  • Geelong, Victoria
Re: el_timbo's Funhouse Restoration...
« Reply #15 on: February 22, 2010, 12:31:32 PM »
Great work that cab looks fantastic  *%*

Offline el_timbo86

  • Trade Count: (+1)
  • *****
  • High Score Initials:
  • Forum Posts:
  • Geelong, Victoria
    • Hot Rodded Pins
Re: el_timbo's Funhouse Restoration...
« Reply #16 on: February 26, 2010, 05:16:43 PM »
Thanks for the encouraging words guys,

It really does help a 'first timer' keep his motivation levels up.

Well, i finally got around to tracing out the remaining decals required to finish the backbox.

Picked up the new decals-


Sliced them up-


And on they go...


While i was at it - i also made up some custom speaker decals for the speaker panel. The speakers i upgraded to are actually different sizes to the ones that came from the factory, so i set to work on a new speaker panel.

Looking at the old one, everything is bolted through and held in by t-nuts. I took some dimensions and milled up a new panel so i could start fresh.

Assessing what i've got...


Milling machines are your friend...


With the speaker holes cut for the new sizing, i used the old panel as a template (with the t-nuts still in) and dimpled the new panel with a tiny drill bit. This gave me a nice starting point for the spade bit, and i set out counter sinking the dimples to make way for the t-nuts. Once all holes were counter-sunk, i drilled out the diameter of the t-nut thread. This meant i still had plenty of bite from the nut-and this would still allow me to bolt parts back on easily.

Dimpling the new panel...


All holes counter sunk and ready for a test fit...


I removed all t-nuts from the old panel, straightened the teeth again with a pair of pliers - and went around re-installing them in my new panel.

Re-Installed...


I masked off the back of the panel before paint, as i didnt want any ugly overspray.

Masked...


After a couple of coats of spray, i removed the mask and my new panel was born.

After...


And the back...


The speakers are a nice fit, and i installed my speaker decals which just add a little life to the setup.


I still have to re-stencil the speaker grilles, and install the plastic surround, but thought i'd post an update.

Thanks for reading guys, hope your enjoying following my progress.  

el_timbo  $!&


« Last Edit: February 26, 2010, 05:19:40 PM by el_timbo86 »

Offline MartyJ

  • Trade Count: (+4)
  • ******
  • High Score Initials:
  • Forum Posts:
  • Melbourne
Re: el_timbo's Funhouse Restoration...
« Reply #17 on: February 26, 2010, 05:52:39 PM »
Looking good Tim.  Keep the updates coming!

Offline johnwartjr

  • Trade Count: (0)
  • ******
  • Forum Posts:
  • Columbus, Indiana USA
  • It's ALIVEEEEEE!
    • My Home Gameroom . com
Re: el_timbo's Funhouse Restoration...
« Reply #18 on: February 26, 2010, 06:11:10 PM »
You've got some mad skills man! What did you print the decals on? Specifically, what sort of printer and what media? I have no clue how to run a mill, but I have a friend who has done some work for me. Gives excellent results, and nice that you can run more parts if you need/want them!


Offline el_timbo86

  • Trade Count: (+1)
  • *****
  • High Score Initials:
  • Forum Posts:
  • Geelong, Victoria
    • Hot Rodded Pins
Re: el_timbo's Funhouse Restoration...
« Reply #19 on: February 26, 2010, 11:14:31 PM »
Thanks for the compliments guys. John - the decals for the speakers were printed on self adhesive vinyl, in what they call a 'lustre' finish type vinyl. It really looks nice once its installed, and feels quite durable too.

timbo

Offline johnwartjr

  • Trade Count: (0)
  • ******
  • Forum Posts:
  • Columbus, Indiana USA
  • It's ALIVEEEEEE!
    • My Home Gameroom . com
Re: el_timbo's Funhouse Restoration...
« Reply #20 on: March 04, 2010, 09:10:31 AM »
So do you print those with an inkjet printer? Laser printer?

Offline el_timbo86

  • Trade Count: (+1)
  • *****
  • High Score Initials:
  • Forum Posts:
  • Geelong, Victoria
    • Hot Rodded Pins
Re: el_timbo's Funhouse Restoration...
« Reply #21 on: March 04, 2010, 01:28:01 PM »
John,

They are printed on an offset printer using solvent inks. Sorry i cant tell you more about the process, but i dont know any more than that.

Timbo

Offline Wotto

  • Trade Count: (+1)
  • ******
  • Forum Posts:
  • NSW Australia
Re: el_timbo's Funhouse Restoration...
« Reply #22 on: March 04, 2010, 02:03:03 PM »
Great idea’s in this restore thread.

Is there ANY way you will be able to make a good quality audio recording of this game with all the new speakers when you are finished and upload the sound file to the net for us to hear it?
DW Drums rule !

Offline el_timbo86

  • Trade Count: (+1)
  • *****
  • High Score Initials:
  • Forum Posts:
  • Geelong, Victoria
    • Hot Rodded Pins
Re: el_timbo's Funhouse Restoration...
« Reply #23 on: March 04, 2010, 02:05:33 PM »
No worries Wotto,

Once its all finished i'll take some video, and see if i can borrow some nice audio recording gear from a friend.

Got the day off work today, so im finishing up the speaker panel at the moment...

Timbo


Offline ddstoys

  • Trade Count: (+23)
  • ******
  • High Score Initials:
  • Forum Posts:
  • Geelong
Re: el_timbo's Funhouse Restoration...
« Reply #24 on: March 04, 2010, 05:39:31 PM »
Wow only just spotted this thread and Damn im impressed.   Are you sure this is your first restore??????  Its really making all mine look like shit WELL DONE

Offline Strangeways

  • Pinball Restoration is my passion
  • Administrator
  • Trade Count: (+9)
  • *****
  • High Score Initials:
  • Forum Posts:
  • Melbourne
  • ABN 68 283 634 461
    • Ride The Boney Beast
Re: el_timbo's Funhouse Restoration...
« Reply #25 on: March 04, 2010, 07:03:25 PM »
Wow only just spotted this thread and Damn im impressed.   Are you sure this is your first restore??????  Its really making all mine look like shit WELL DONE

Its the best "Virgin" restore I've EVER seen  ^^^

I think we are all waiting for tonight's update  #@#
Aussie Pinball - Proud to be Australia's Premier Pinball Forum

http://www.australianpinballrestorations.com.au/

http://www.rtbb.com.au/catalog/

We carry the largest range of NEW Ramps in Australia

Offline el_timbo86

  • Trade Count: (+1)
  • *****
  • High Score Initials:
  • Forum Posts:
  • Geelong, Victoria
    • Hot Rodded Pins
Re: el_timbo's Funhouse Restoration...
« Reply #26 on: March 04, 2010, 11:39:44 PM »
Well, i had a day off work today so i got stuck into finishing off my speaker panel installing the system 11 siderails...

The siderails arrived safely on Wednesday (perfect timing) - and the same with my very small order of 8/32 screws from PSPA (Cheers Mark).

The big box o' fun...and the little one too...


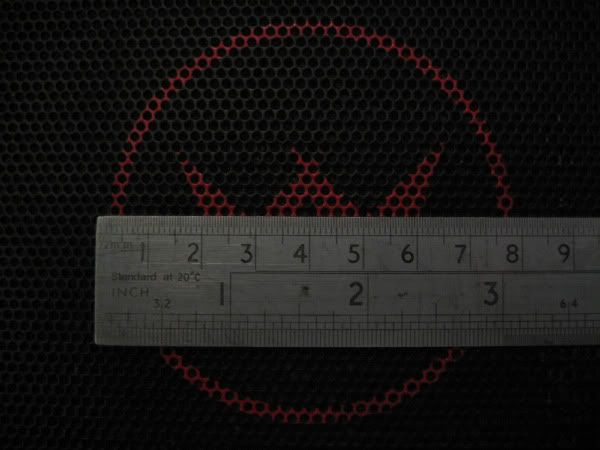
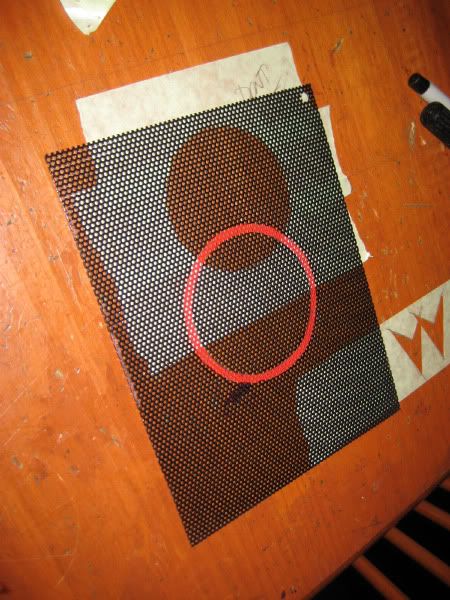
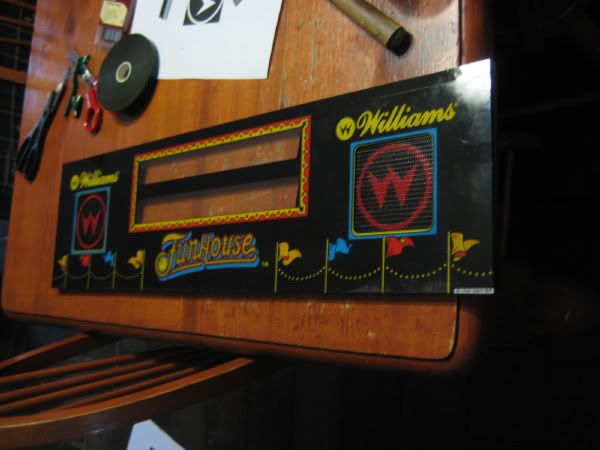
I figured that i should get the speaker panel finished first. The grilles had been screened with a red Williams logo that had been scratched off and faded over years of use, so i set out to re-stencil them.

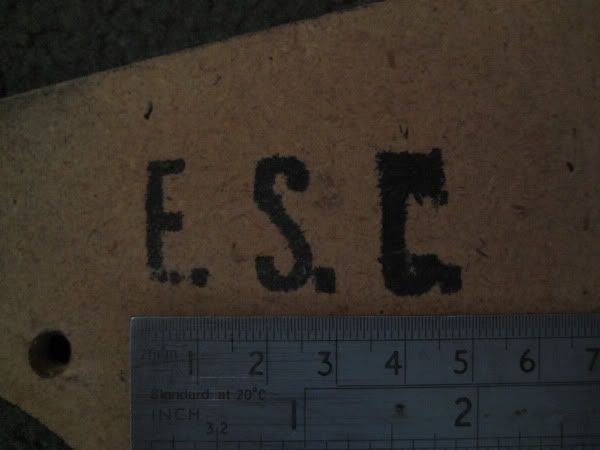
I photographed the logos with a ruler alongside so i could redraw them at the correct dimensions on my PC. While i was at it, i also took a measurement of the E.S.C stamp as i thought it was an important detail to include.

Williams sizing...


E.S.C. sizing...


With the redraws printed out, i set out cutting away the unwanted areas with the sharp blade. As the E.S.C logo was a bit smudged originally, i decided to do the same with my stencil.

Ready to go...


I lined up the stencil on my new panel, and compared it to the original.

Pretty close...


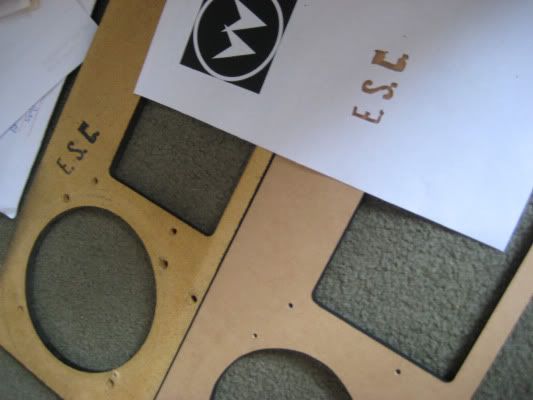
After a couple of quick shots with black, i lifted the 'C' side of the stencil and gave it another quick shot to get that 'inaccurate' look. I was happy with the results.

The deliberate messed up cabinet maker stamp...


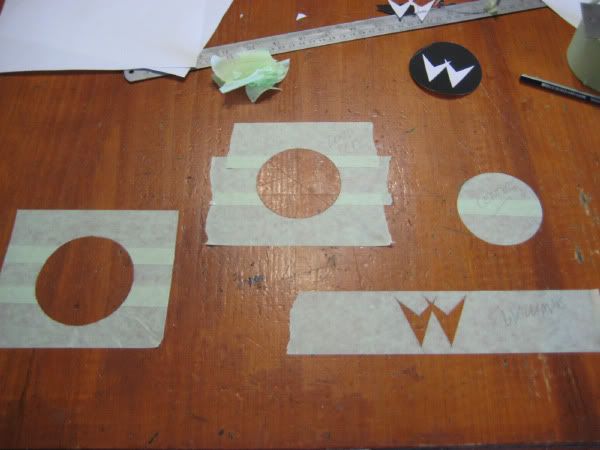
That was the easier stencil. I traced out the Williams logo onto some painters green tape, and cut all required parts separately.

All three parts...


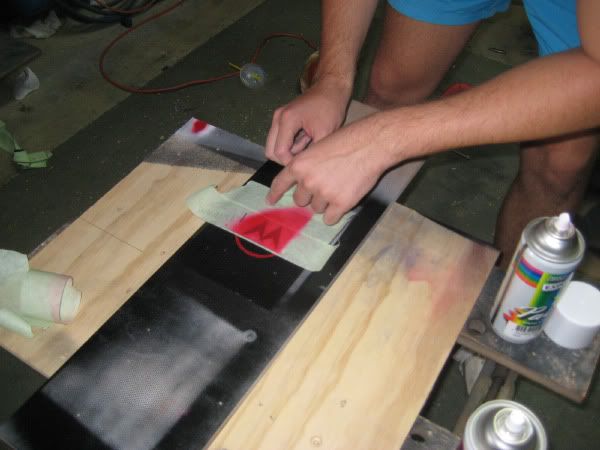
I tackled the circles first, so i lined these up and primed the circles with a white undercoat. Once dried i gave a couple of quick shots with the red, and the colour was really set off against the black.

Pretty sharp...


I left the cirlces for a few hours, then applied the same techniques to the 'W' part of the logo. To be honest, i suprised myself with how sharp they came out. I really was just experimenting today, but was happy enough with my initial results.

'W' area masked and waiting...


Surrounding area covered up...


Peeling back for the result...


Happy...


And a test fit...


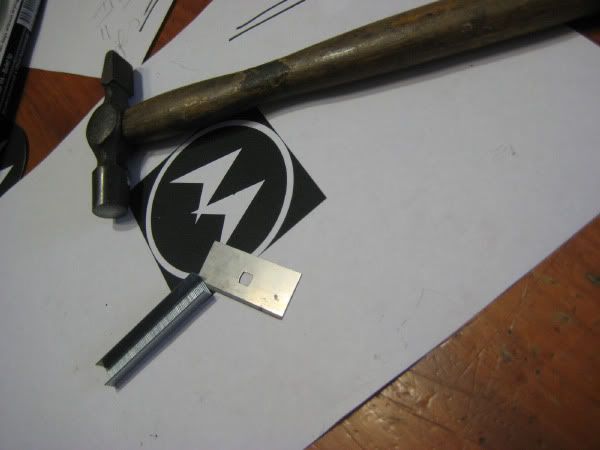
At the factory, these grilles were stapled in. I wanted to do the same, but i knew that it would be hard to line up the staple teeth with the grille holes...To combat this, i broke the individual staples off the group, and used a tack hammer to lightly tap them in. Worked just as well, and gave me the chance to line up the staples perfectly.

Tools required...


How they look close...


And far away...


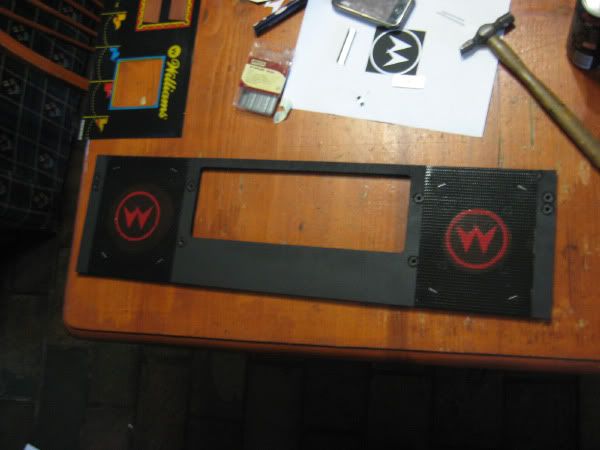
Then on went the screened speaker plastic...I bit of windex made this look new again...


The speaker panel is pretty straight forward to reassemble, so away i went.

Nearly ready...


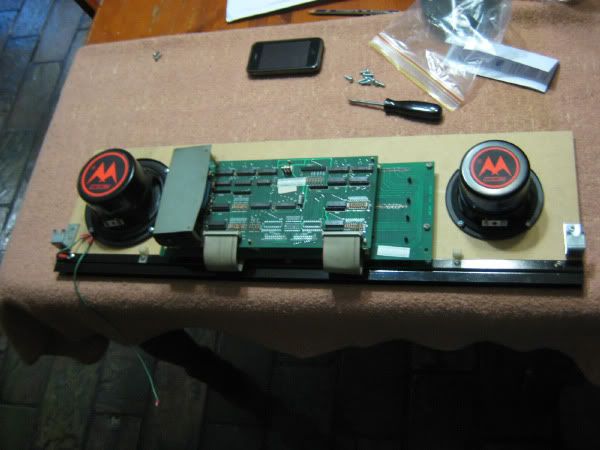
Rear of Speaker panel glamour shot...


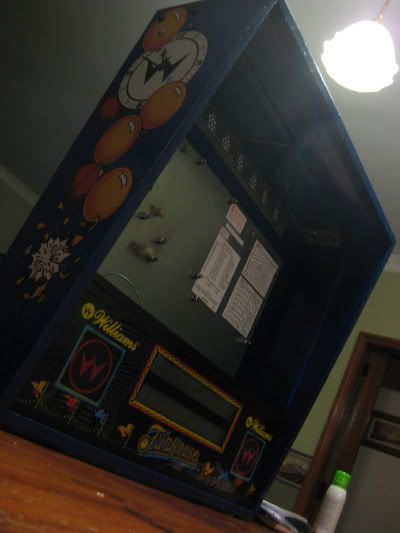
With everything secured, it was time to install it into the backbox to see how it turned out.

Sorry about the glamour shot angles, i got excited and just started snapping...


MORE...


By this stage, i was just HANGING to get the System 11 siderails on the cabinet. I had picked up some great double sided tape from an auto shop (thanks for the tip Marty) so i got this applied to the siderails first.

Just as a side note, I had seen the system 11 siderails on the Funhouse flyer, and then on a few HEP (Chris H) restorations. When i saw Martys Funhouse, i was completely sold. They looked great so i decided to revert to the flyer/proto look.

Line up twice, press firmly once is the only advise i can really give when installing siderails, as you dont want to be trying to pull the rails back off if you accidentally mis-align on your first attempt...

With the rails installed, it was time to pull back that protective white backing...

Before...


After...


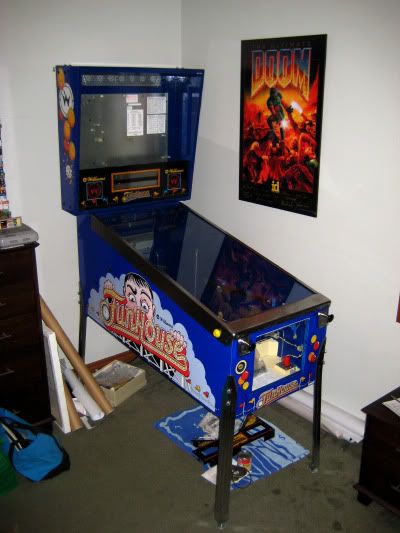
And this is how the cabinet looks as at 10:30 PM on the 4th of March...I still have a LOOOOOOOONG way to go, but im really having a good time along the way. I hope you guys are enjoying the thread, and i must say a big thank-you for all the positive feedback i've recieved. Definately helps with the motivation, and gives me the confidence to tackle another one...

Standing MUCH taller now...


Thanks for reading guys,

el_timbo

Offline MartyJ

  • Trade Count: (+4)
  • ******
  • High Score Initials:
  • Forum Posts:
  • Melbourne
Re: el_timbo's Funhouse Restoration...
« Reply #27 on: March 04, 2010, 11:45:29 PM »
Great work Tim.  Can't wait to see what you've done with the playfield!

It is looking exceptionally good all round.

Offline RaptorLawyer

  • Trade Count: (0)
  • ****
  • Forum Posts:
  • Melbourne
    • Sekured custom sneakers
Re: el_timbo's Funhouse Restoration...
« Reply #28 on: March 04, 2010, 11:49:04 PM »
Its been said many times before but awesome work Tim, its looking brand new!!

And as a side note that doom poster is freaking amazing, love it!
Kill each-other nicely please.

Offline ajlaird

  • Trade Count: (0)
  • ******
  • Forum Posts:
  • Greensborough, Melbourne
  • Go Ahead, Make My Day
Re: el_timbo's Funhouse Restoration...
« Reply #29 on: March 04, 2010, 11:50:44 PM »
Fantastic result there.

Yes, be proud!