Author Topic: Bally Star Trek  (Read 1169 times)

0 Members and 1 Guest are viewing this topic.

Offline Steve2010

  • Trade Count: (+11)
  • *****
  • Forum Posts:
  • Sydney
Bally Star Trek
« on: January 31, 2014, 01:00:44 AM »
Well, it’s been quite a long while since I posted my last (and first) full restoration, which was the Bally Delta Queen (http://aussiepinball.com/index.php?topic=7325.0) back in 2012.

Since that time, I have now fully restored a further four machines over the last 16 months or so, and it’s overdue to put some of this stuff on the forum.

My involvement with pinball has been an interesting journey so far.  “Re-introduced” to pins back in 2010 (since last playing them in my youth of the 70’s and 80’s), I was of course first consumed with really mostly playing them (and of course inevitably fixing them).  But the longer I looked at them, the lure of getting deeper into restorations was inviting.

With the Delta Queen, I initially had no intention of ever, ever doing a full restore, meaning to me including restoration of the cabinet artwork.  I said to myself, no way, respraying seems too much work.  But the longer I looked at the Delta Queen and the state of the cabinet, I inched closer to doing it.  And there’s been no looking back since the completion of that.

After the Delta Queen I next worked on a Six Million Dollar Man, which you may have seen recently posted for sale (and is now sold).  I was going to provide a full restoration thread on that machine, but have decided to give it a miss and jump to the next machine.  Before moving to that, I will say that the Six Million Dollar Man involved a full restencilling of the backbox with a touchup of the main cabinet.  But it was also the first time I tackled a playfield swap, which I really enjoyed.

OK, third machine up is this Bally Star Trek.

The cabinet was well and truly faded from the years, and you will see alot of Star Trek cabinets with fading.  Rarely do the original colours stand the test of time on this title.  The left side of the main cabinet was in very good condition for its age, but the front and right sides were woeful.  Significant difference in fade between left and right sides.

The backbox was really scuffed up, but the artwork not too bad.

The playfield was pretty good, it did have wear (mostly in the upper part of the playfield), but I was very fortunate to source a NOS one, so a playfield swap was on the cards.  Lastly, the backglass was superb, and I was really happy with this because this run of glass can typically have lifting of paint.  I would rate the BG on this one pretty much a 10/10.

Here are some initial images of the machine.  I had forgotten to capture some images of the whole machine prior to dismantling it, so these show the machine components just prior to commencement of restoration.


Offline Limorange

  • Trade Count: (0)
  • **
  • Forum Posts:
Re: Bally Star Trek
« Reply #1 on: January 31, 2014, 02:17:07 PM »
I love seeing these resto pics, keep us posted.

Offline DSB

  • Trade Count: (0)
  • ******
  • High Score Initials:
  • Forum Posts:
  • Gold Coast
    • OMNI Electrical & Data
Re: Bally Star Trek
« Reply #2 on: January 31, 2014, 06:07:55 PM »
Sounds like a good choice for a restoration. It will good to see how it turns out.

Offline Retropin

  • Trade Count: (+4)
  • ******
  • Forum Posts:
Re: Bally Star Trek
« Reply #3 on: January 31, 2014, 09:33:18 PM »
Is that the original PF?? if so.. for a Bally Star Trek this has MINIMAL wear... should see mine it has a large part of the Enterprise worn away like so many others.
Inserts straight up the middle tend to sink a bit and create a little step for the ball to rub on.. add  a few years and a lot of paint gets chipped away.
Nice machine and a very good starting point

Offline oldskool1969

  • Trade Count: (0)
  • ******
  • High Score Initials:
  • Forum Posts:
  • perth
Re: Bally Star Trek
« Reply #4 on: January 31, 2014, 10:41:35 PM »
I love it all these new jobs going at the moment. I haven't tackled one from this era yet! Projects are getting harder to source.
I need to learn more about cabinet paint and am looking forward to updates.  ^^^
If it isn't broke, it isn't pinball.

Offline Strangeways

  • Pinball Restoration is my passion
  • Administrator
  • Trade Count: (+9)
  • *****
  • High Score Initials:
  • Forum Posts:
  • Melbourne
  • ABN 68 283 634 461
    • Ride The Boney Beast
Re: Bally Star Trek
« Reply #5 on: February 01, 2014, 12:30:50 AM »
Great player and a fantastic base for a restoration !
Aussie Pinball - Proud to be Australia's Premier Pinball Forum

http://www.australianpinballrestorations.com.au/

http://www.rtbb.com.au/catalog/

We carry the largest range of NEW Ramps in Australia

Offline goodolddays

  • Trade Count: (0)
  • ******
  • Forum Posts:
  • Riverstone NSW
Re: Bally Star Trek
« Reply #6 on: February 01, 2014, 12:06:49 PM »
4 resto's in 16 months .. WOW ..
I did 4 over 2 years and then had to take an extended break from it , only recently started on another project .

If your 6MDM is anything to go by, your Star Trek is going to look great  ^^^
I need more room ! and more $$$

Offline Steve2010

  • Trade Count: (+11)
  • *****
  • Forum Posts:
  • Sydney
Re: Bally Star Trek
« Reply #7 on: February 01, 2014, 01:08:21 PM »
Is that the original PF?? if so.. for a Bally Star Trek this has MINIMAL wear... should see mine it has a large part of the Enterprise worn away like so many others.

Yes, that is the original PF.  But once you see the NOS one (which will appear in this thread), I guess I just wanted the PF to be the best along with the cabinet.


Now begins the fun of the cabinet restoration.  On one hand I really enjoy this, because I know the end result will be really good.  On the other hand, it is a long and very enduring time.  If you want to restore cabs (as in sand back and respray), then be prepared for alot of work!

After creating the previous Delta Queen stencils myself, I really at first did not want to create any more stencils if I didn’t need to.  So I began to look around on the net as to what was available.  I ended up purchasing 3 sets of stencils from Classic Arcades in the US – for Six Million Dollar Man, this Star Trek, and an upcoming Power Play.

To make a long story short, the stencils in my opinion were a waste of time.  Once they were delivered, I looked them over and found significant errors as compared to the original artwork.  In some examples, shapes were completely and utterly wrong.  I didn’t use them and I sent all of the stencils back to Jeff at Classic Arcades, but that took a few months to eventually get my refund.   I would caution anyone first if you are planning on using these stencils, and Jeff is pretty much at the bottom for any communication whatsoever.

So ……. it was back to creating the stencil set myself.  I do feel at the end of the day if you want it done right, then do it yourself if you are up to it.  I believe stencils should attempt to reproduce the original artwork with 100% aim of recreating original.  Creating stencils is a long, long process.  As I covered in the Delta Queen restoration, I used Reynolds freezer paper.  First is tracing all of the artwork on the paper.  This was very challenging for the backbox, because the yellow and orange perimeters did not contrast well (with the blue background) as seen through the paper when tracing.  It took more time than I had expected.  Tracing the orange on the main cabinet was slot easier (as it showed a better contrast against the yellow), and the blue was very easy.

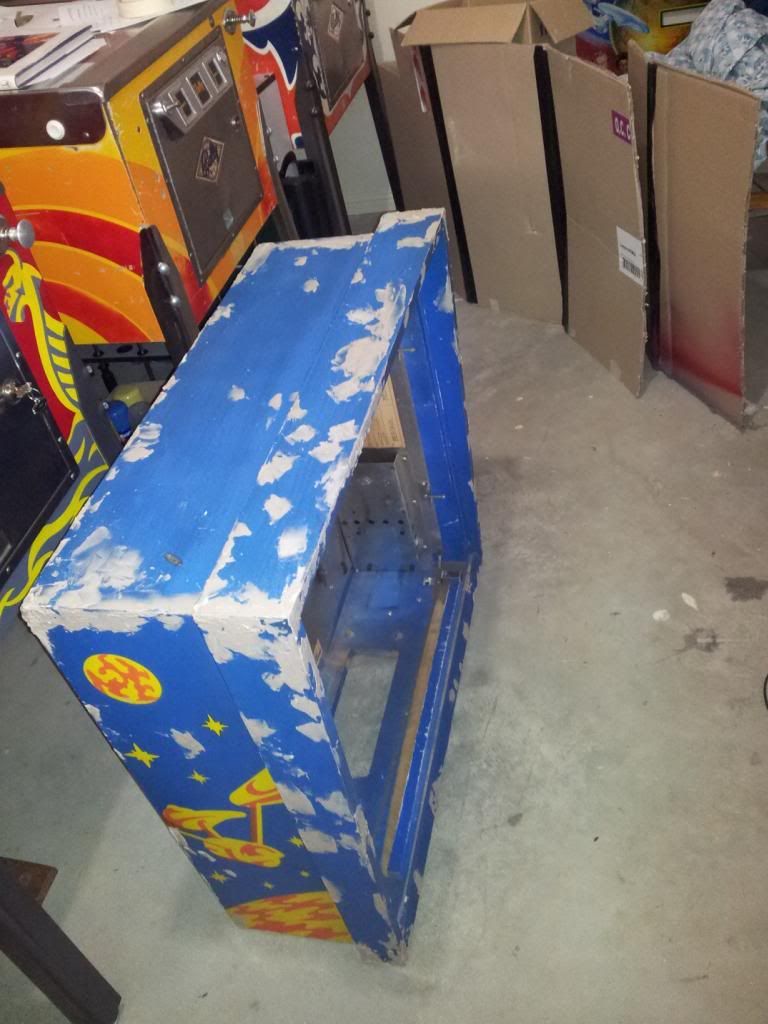
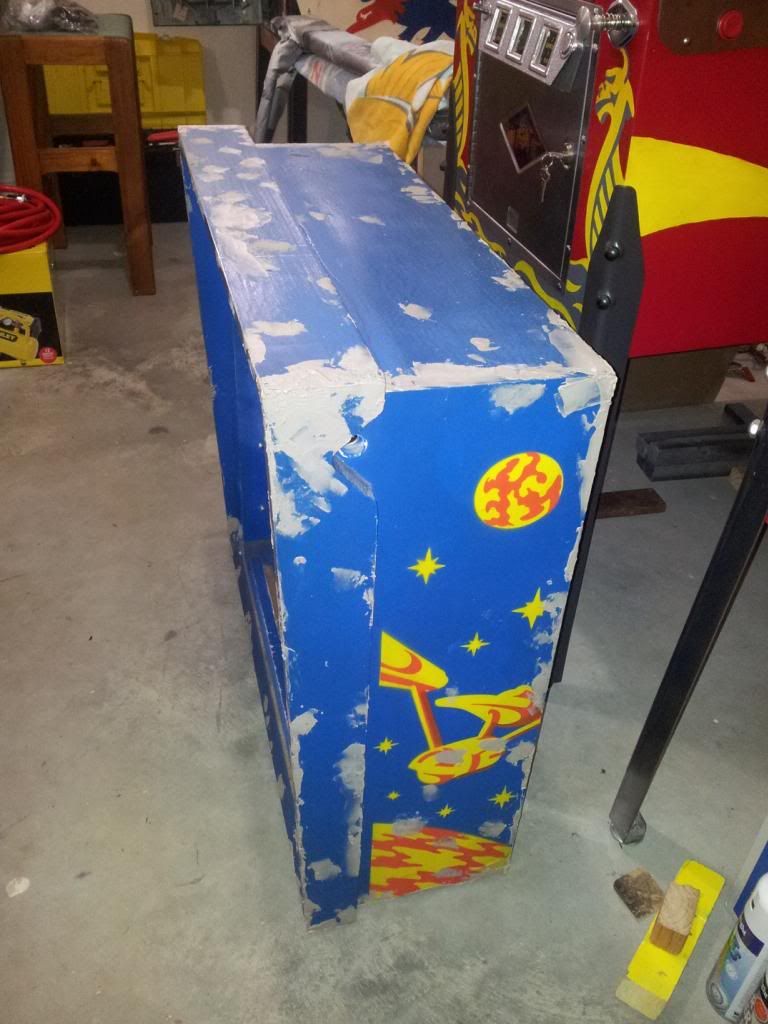
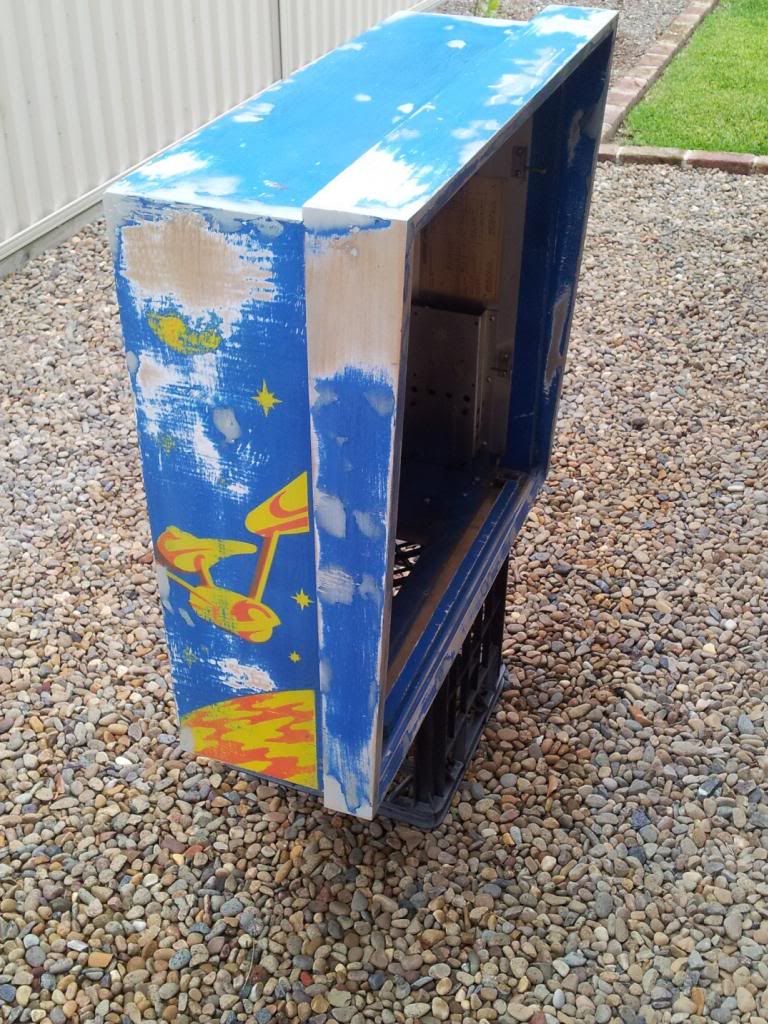
After completing the stencils, focus was then on the physical restoration of the cabinet.  First the backbox.

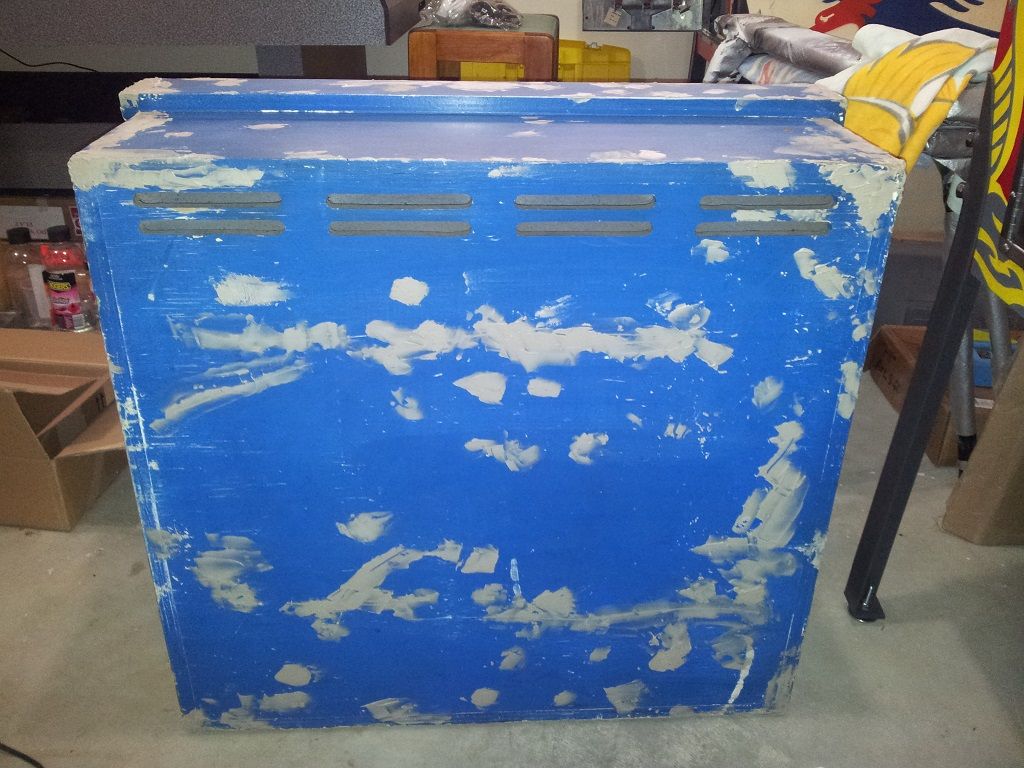
I use Minwax wood filler, and then sand back.  I have found in my experience that it is not really necessary to sand the paint back to bare timber.  Yes, probably would maximize a better “grip” for the primer coat that will go down, but just saying through my experience that sanding it back to what you see in the images below has worked for me.

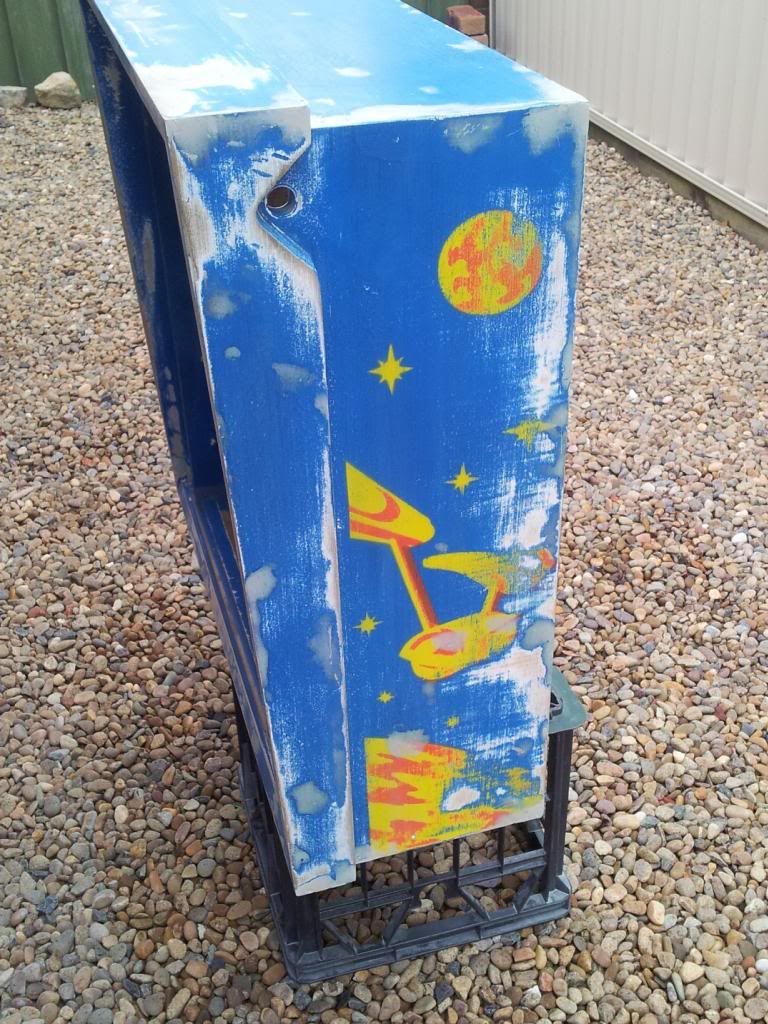
The images below show the backbox after applying the wood filler.


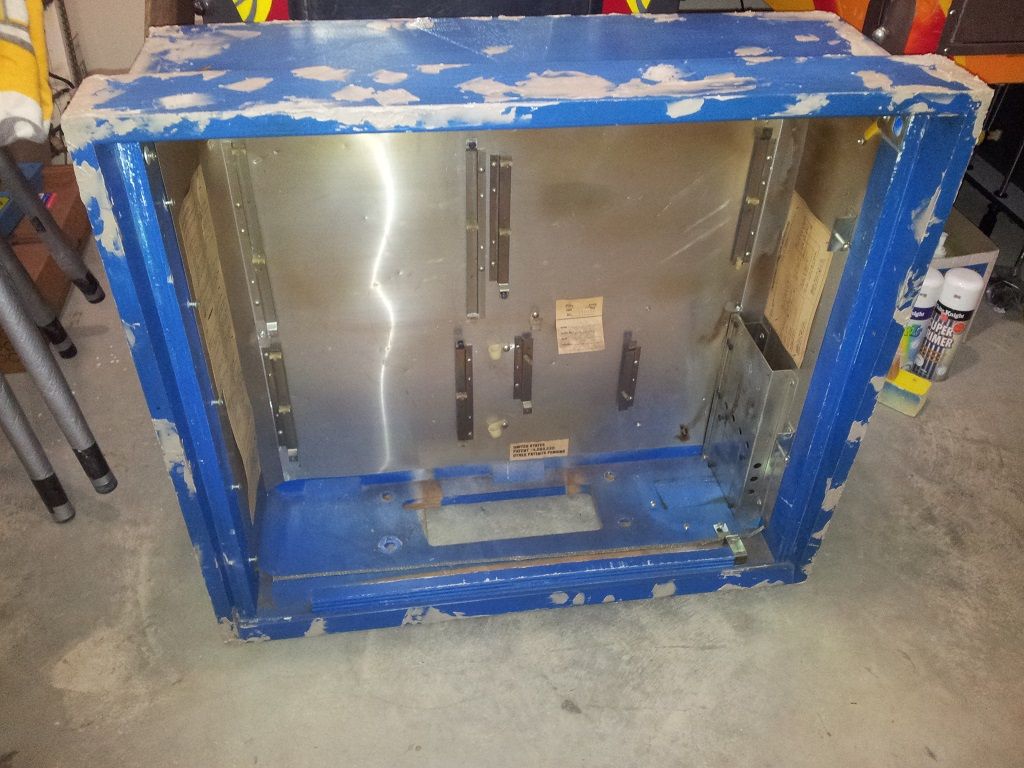
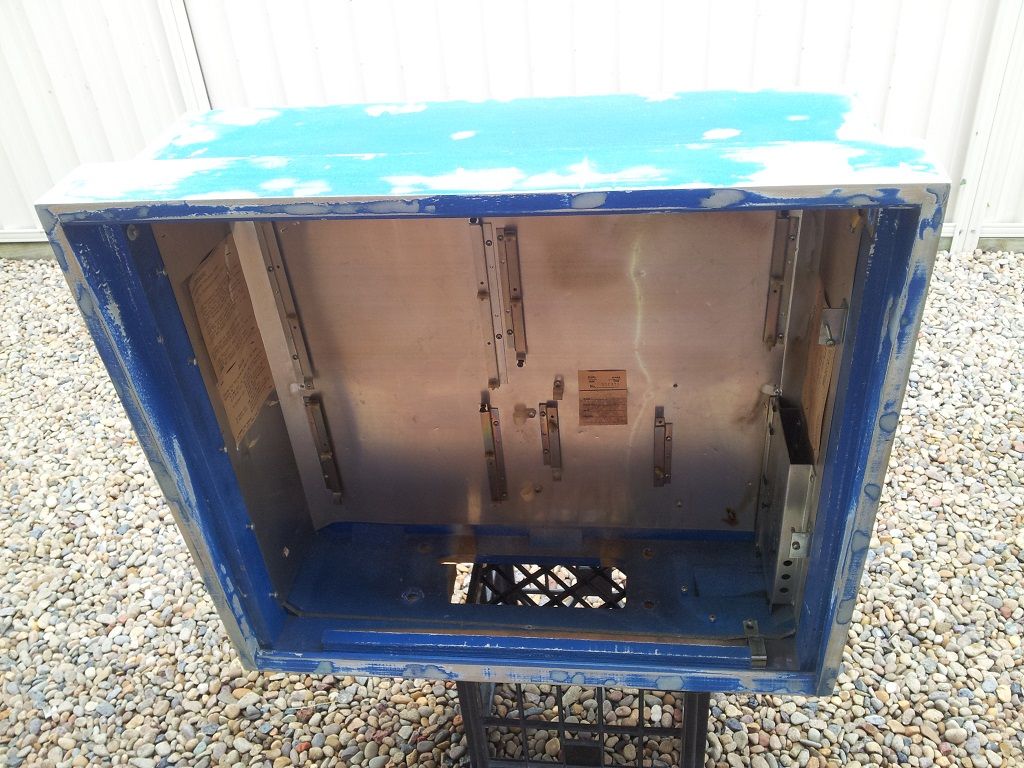
And these images show after sanding.


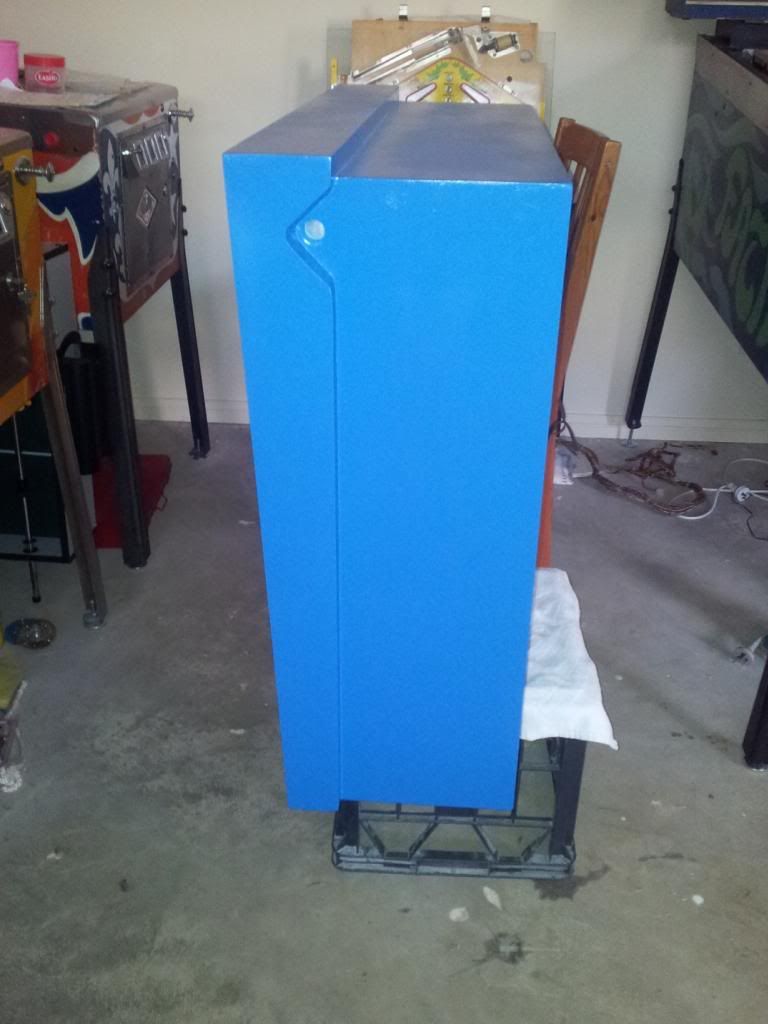
With the backbox now sanded smooth, I was ready to apply the primer followed by the base colour.  I use acrylic lacquers for paints (spray cans), and it is great as it goes on smooth and is touch dry within 10 minutes.

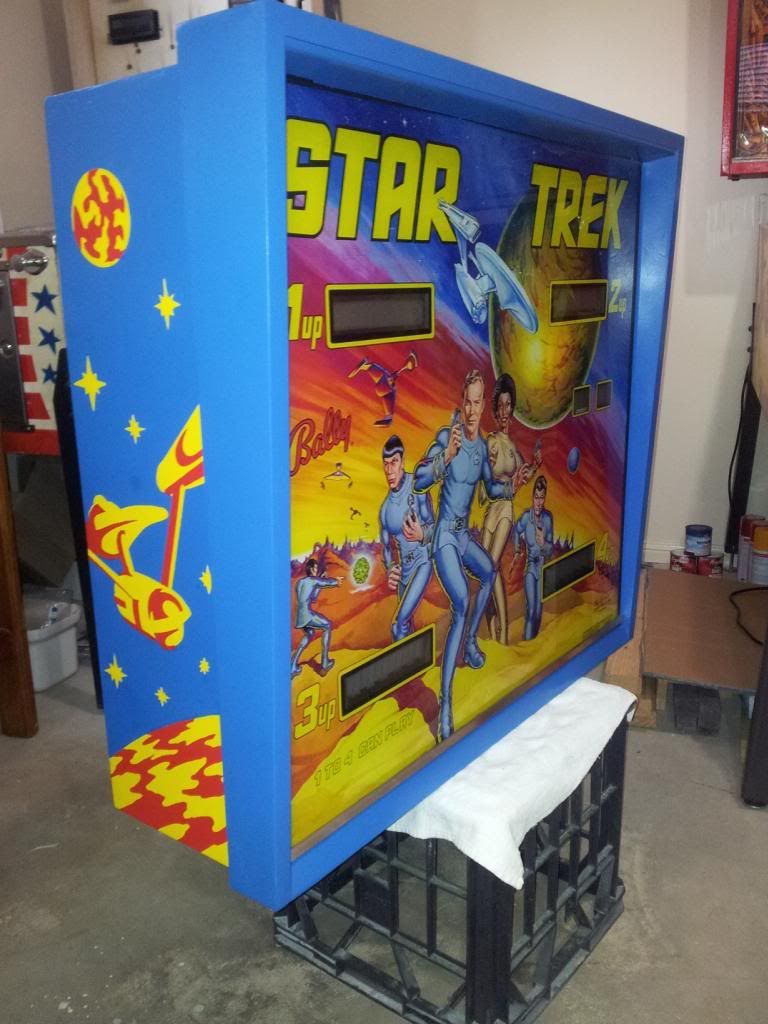
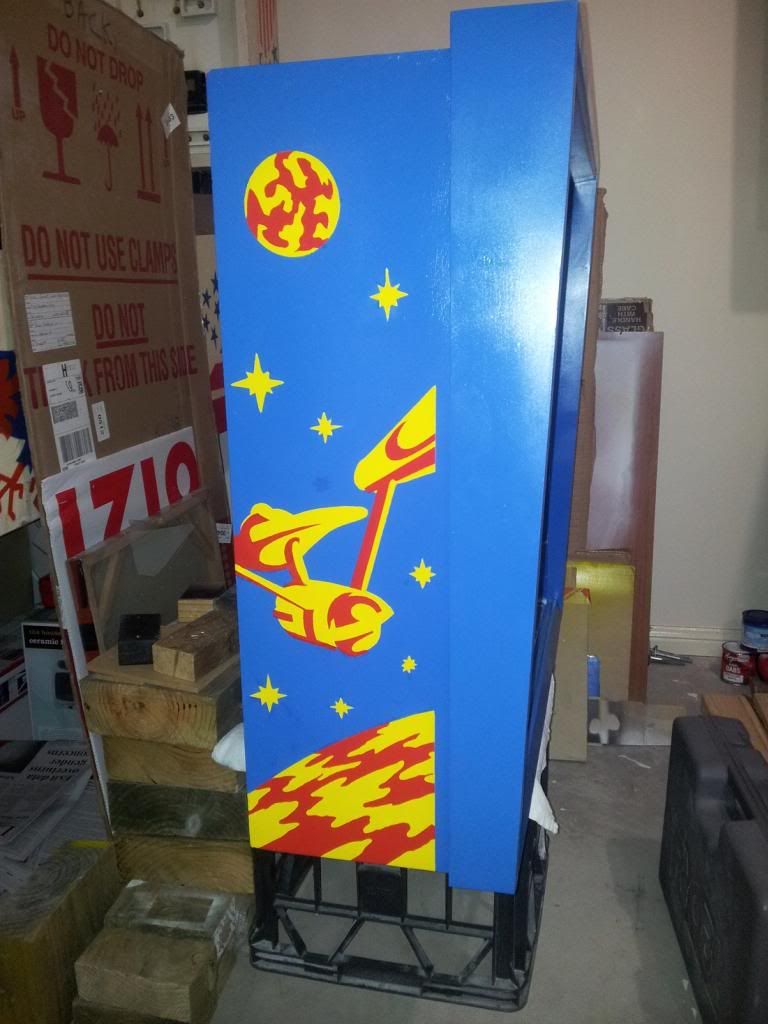
Here’s after the base colour was applied.  So nice and vibrant is the blue colour.


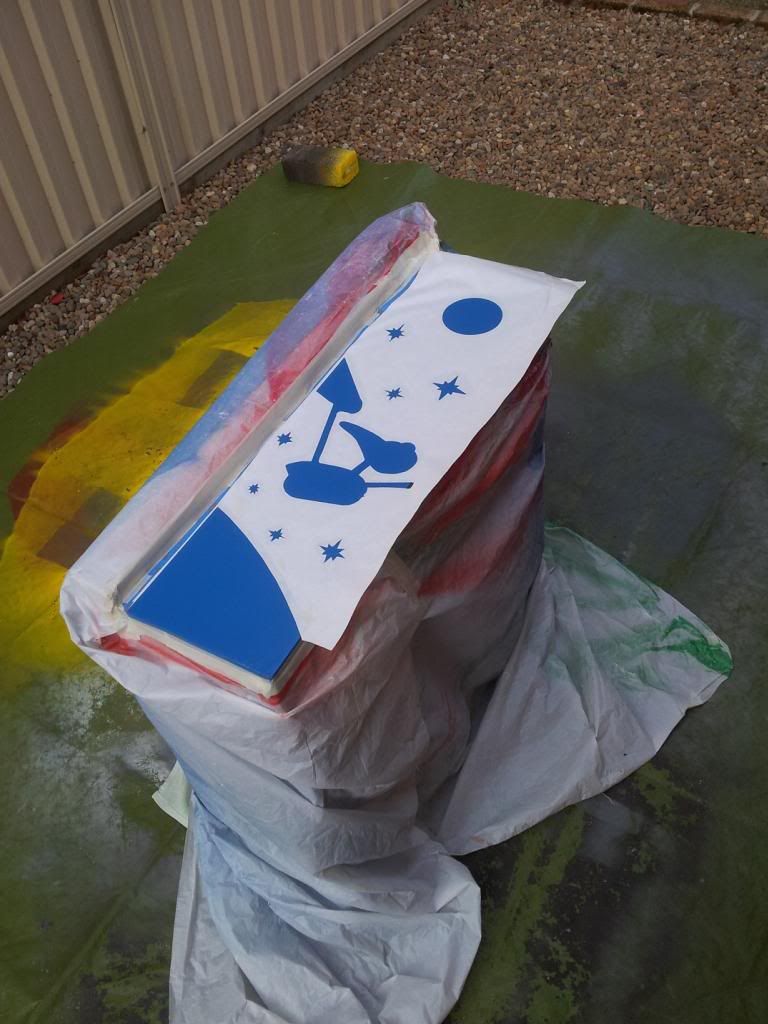
After applying paint (or primer), I usually leave it alone for at least 5-7 days to be on the safe side.  OK, next was applying the stencils for the next colour (yellow).  Here you see the stencil, which is adhered to the side with Krylon easy tack.

As I covered in the Delta Queen restoration, I found spraying the adhesive on the paper side of the freezer paper worked better (upon removal of the stencil) than spraying on the plastic side.  Much cleaner in the removal process.

Also, before I spray the paper side of the freezer paper, I first create effectively what I would call a spray mask and place this on top of the stencil before spraying.  I didn’t capture an image of this (which would have helped you to visualize what I mean), but it is many sheets of A4 paper taped together (side by side) big enough to cover the entire stencil.  And this paper is cutout (following the artwork perimeters) so that I end up spraying only the perimeter (about a 1cm width) of what needs to stick down to the cabinet.  Sorry if this doesn’t make sense, but in effect I am minimising of where the adhesive really needs to go, rather than blanketing the whole side of the stencil.

After spraying the stencil, I usually let it sit for about one hour before applying to the cabinet.  It says that the spray will be touch dry after 3 hours.

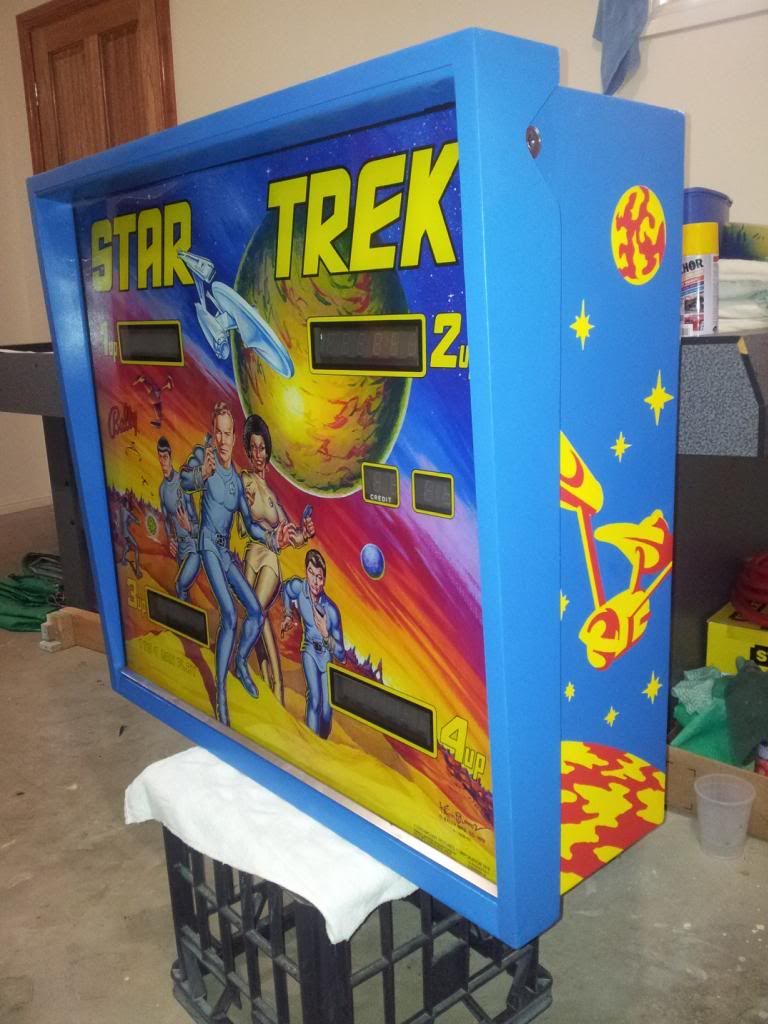
In the case of the images below, I actually ran out of yellow paint (I thought I would have enough, damn!) during the spraying.  I had to wait another 2 days until I got some more, and removing the stencil this time did take more effort.


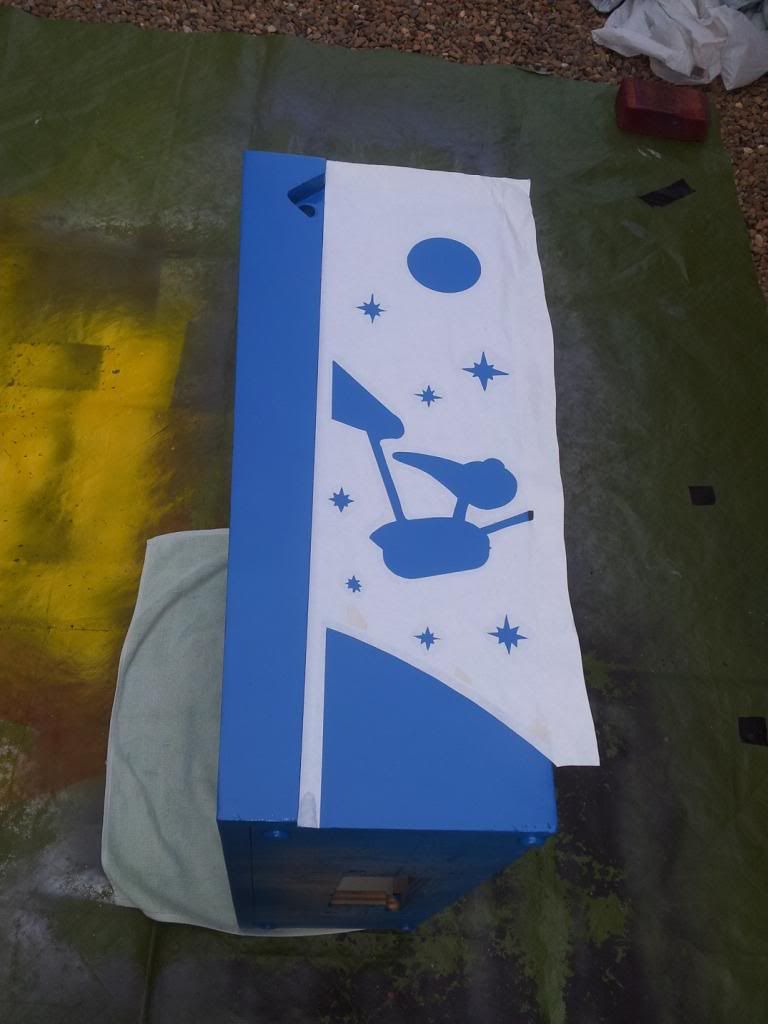
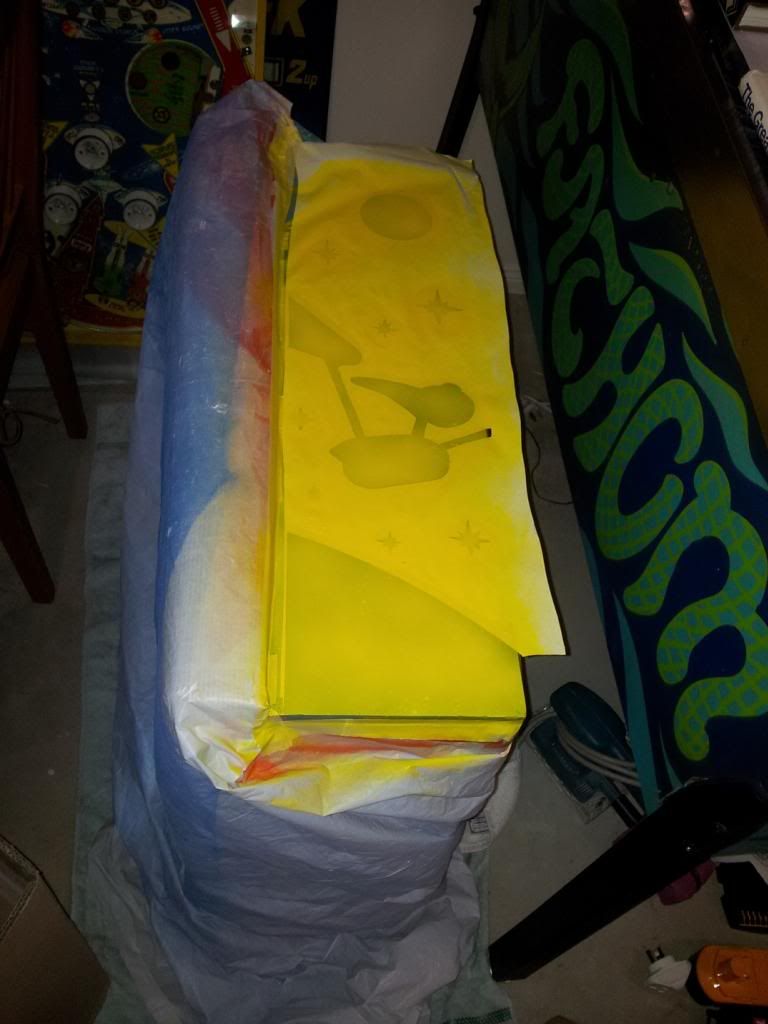
And here are the results.  I was really, really happy with the outcome.  And by the way, no, it does not come out this way after removing the stencils.  There is usually always some degree of paint bleed along the perimeter, so touchups are usually required after.  From a distance, you would not know they have been touched up.  But up really close you would see some of the effects of touchup.


Offline Freiherr

  • Trade Count: (+1)
  • ******
  • High Score Initials:
  • Forum Posts:
  • The Oaks, NSW
  • Amongst clouds
Re: Bally Star Trek
« Reply #8 on: February 01, 2014, 01:24:16 PM »
Wow, that backglass is super nice. Keep up the good work!
If you don't remember the 70s then you were on drugs.
If you remember playing pinball in the 70s you were having a good time.
If you don't remember anything,  then read about it here,

Offline goodolddays

  • Trade Count: (0)
  • ******
  • Forum Posts:
  • Riverstone NSW
Re: Bally Star Trek
« Reply #9 on: February 01, 2014, 03:56:19 PM »
That backglass is in great conditon Steve .  ^^^

Yes, a full cab repaint is a LOT of work but always worth the effort .

This thread has inspired me to do the hard yards and respray my Black Hole which really does need doing .

Think I will get it running 1st and play it for a while though  !@#.

On my other restores (which have all included cab repaints and full mechanical rebuild .. all were EM's), I have done all the work before playing even one ball ..  LOL
I need more room ! and more $$$

Offline Mr Pinbologist

  • Trade Count: (+5)
  • ******
  • High Score Initials:
  • Forum Posts:
  • Wauchope NSW
Re: Bally Star Trek
« Reply #10 on: February 01, 2014, 04:56:22 PM »
Nice job with the paint and stenciling Steve  ^^^ ^^^

After reading how you hold your stencils down with Krylon Easy-tack i think i'm gonna buy some a do a little experimenting myself with it  *%* *%*
Do you have any issues with it sticking to the paint and having to be removed after the stencil is taken off??

I also like your idea of the 'spray mask' for spraying the Easy-tack onto the stencils  ^^^

Offline Crashramp

  • Trade Count: (+3)
  • ******
  • High Score Initials:
  • Forum Posts:
  • Albury
Re: Bally Star Trek
« Reply #11 on: February 01, 2014, 08:09:39 PM »
Great work there, I'm looking forward to the next up date.  ^^^

Offline pinball god

  • Trade Count: (+1)
  • ******
  • High Score Initials:
  • Forum Posts:
  • Melbourne
  • Metallica is here to stay
Re: Bally Star Trek
« Reply #12 on: February 02, 2014, 10:22:16 PM »
Great job there mate
Still loving my Metallica Premium

Offline pinnies4me

  • Administrator
  • Trade Count: (+5)
  • *****
  • High Score Initials:
  • Forum Posts:
  • Victoria
Re: Bally Star Trek
« Reply #13 on: February 03, 2014, 03:46:27 PM »


Repaint looks great! I always have trouble getting started, but once I get going I really enjoy the process.
“If you wanna escape, go up to a pinball machine. There’s a magic button on the front that takes you to a world under the glass and makes the the rest of the universe disappear.”

Offline MartyJ

  • Trade Count: (+4)
  • ******
  • High Score Initials:
  • Forum Posts:
  • Melbourne
Re: Bally Star Trek
« Reply #14 on: February 03, 2014, 07:03:26 PM »
Great work.  Stencils are so unforgiving!