Thanks for the comments and kind words guys.
Do you have any issues with it sticking to the paint and having to be removed after the stencil is taken off??
Sometimes yes. I let the paint dry before I remove the stencil, and using the lacquers I can usually do this about 10-15 minutes after painting. Most of the times the stencil comes off nicely, but sometimes there can be some residue left. If that's the case, I let the paintwork really dry out for at least 3+ days (a week is even better), then use some of that citrus cleaner stuff (De-Solv-It) to remove the residue. A bit of work, but comes off very, very easily.
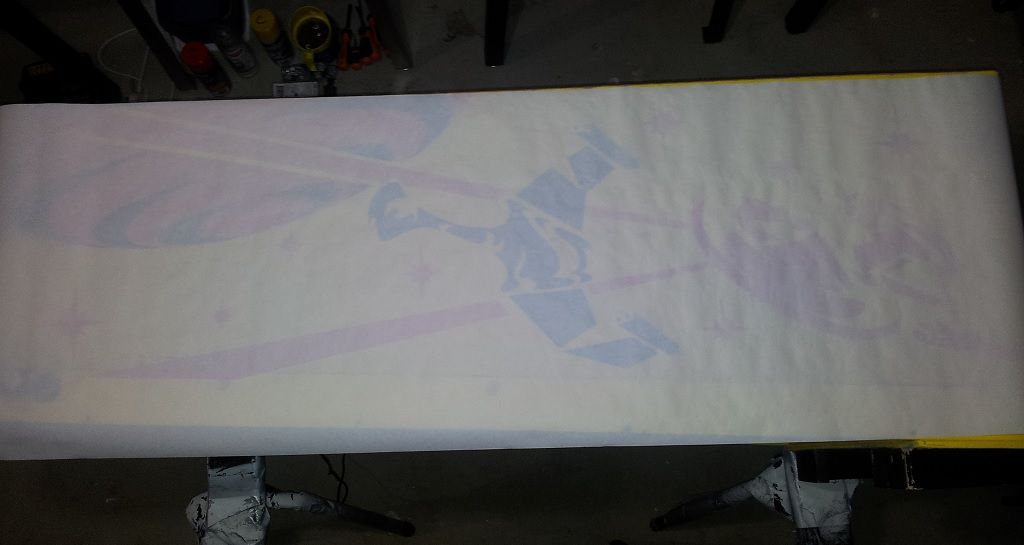
With the backbox complete, it was time to focus on the main cabinet. The image below shows the translucent nature of the freezer paper. Even as this image was taken from a distance and with ambient lighting, you can still easily see the original artwork through it for tracing purposes.
When I do trace, I usually use a bright incandescent lamp nearby to illuminate the area for ease of seeing the artwork below to maximise my ability to see it.
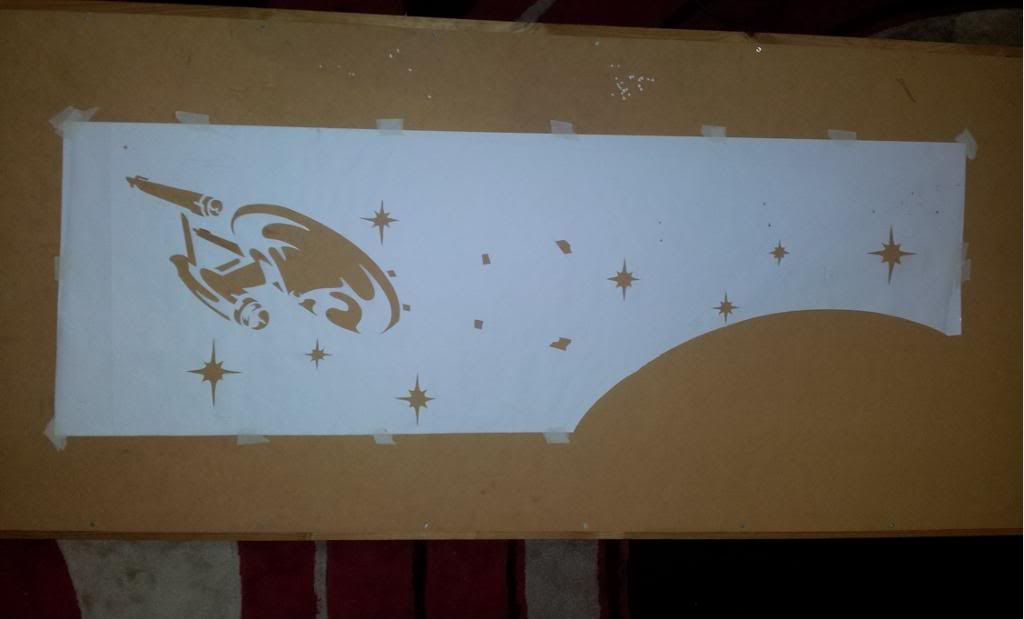
Below is the completion of the cut stencil. I trace artwork once on one piece paper. When that is finished, I place that paper together with another blank sheet of freezer paper back to back, and tape them against a large MDF board. I then use a sharp xacto knife to cut out the artwork. With one cut, both stencils are created for the left and right sides of the cabinet. The freezer paper is extremely easy to work with in terms of cutting it. The laborious part is the time put into the tracing and the cutting needed to complete the 10 stencils.
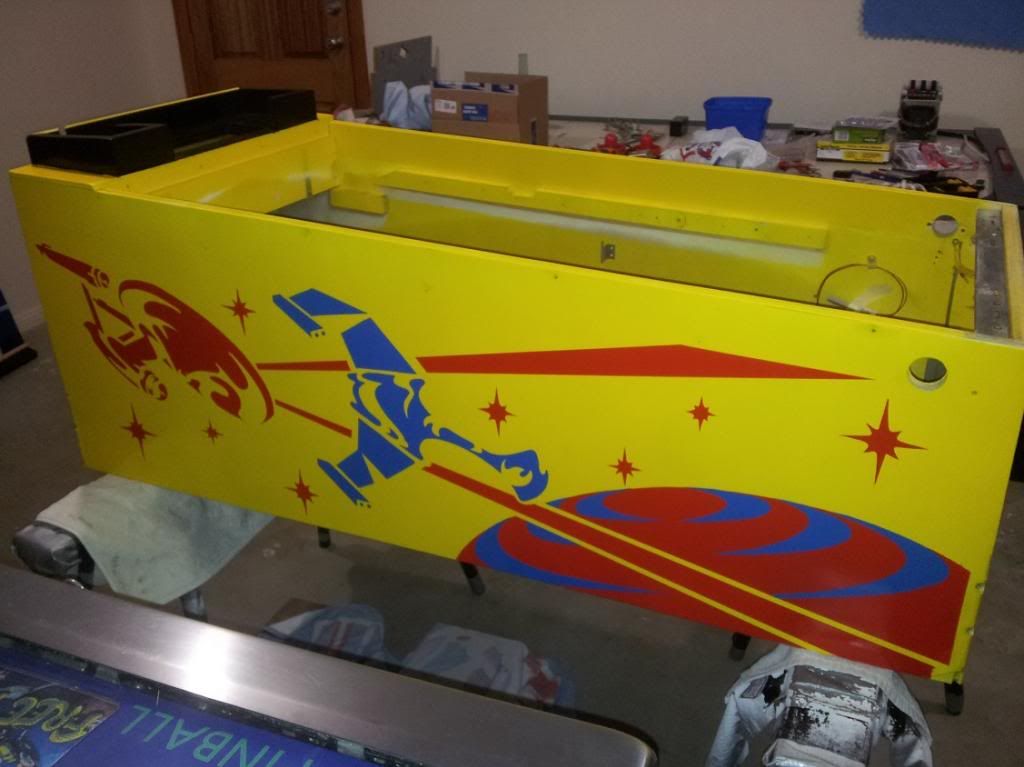
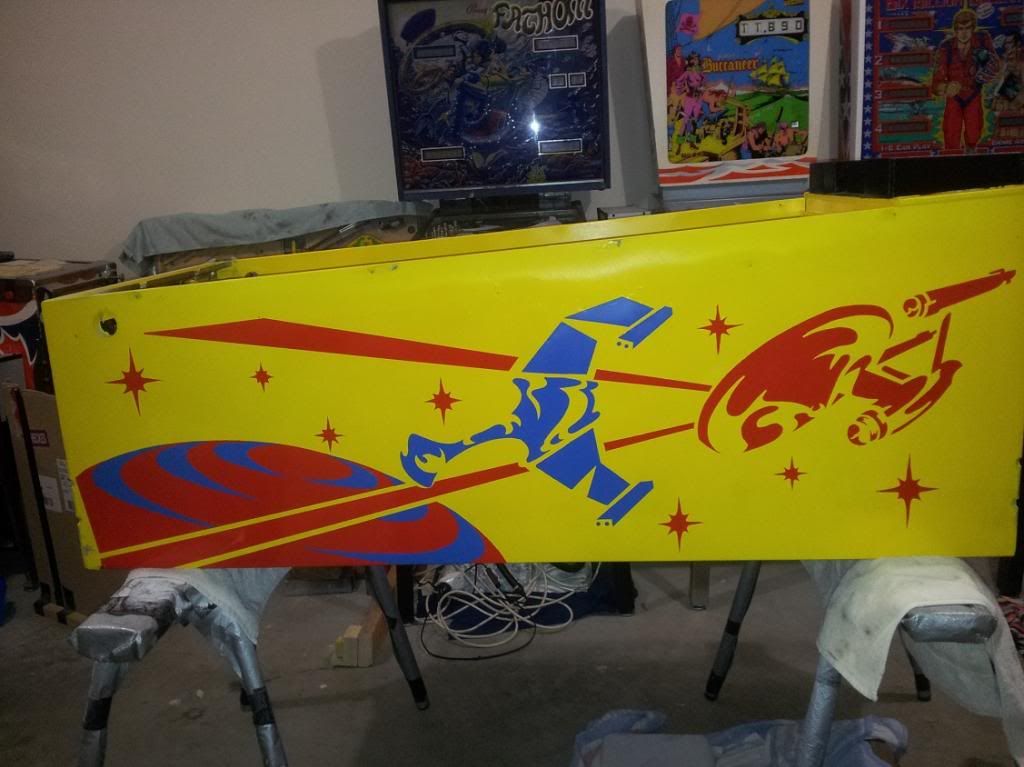
The cabinet complete. I also give the cabinet neck (I think that’s what it’s called) a fresh paint of satin black.