The Mirror project was put on hold for the last three weeks... First due to the SxSw Intel LANfest I was hosting... and then Texas Pinball Festival this past weekend. Now that I had the Pins back in the Garage'cade; I've refocused my effort on the Nixie Pinball Display.
I hand assembled the base and display boards and soldered them together.
I didn't want to commit the untested display to my Bally Star Trek... so I needed to figure out how to facilitate debug.
First problem was how to supply 190VDC to the HV section. Some googling found me some
555 timer circuits which would run off of a 9V.
Had most of the parts except a 250V 4.7uf cap and a pot. A trip to Frys solved that problem.
A bread board and an ATX power supply and I had a 190V psu. The ATX supply provides +5v to the display and +12V to the 190V psu's input.
Here’s a picture of the prototype 555 190V Nixie supply:
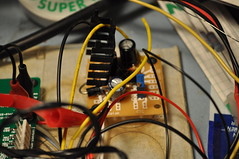
Initial debug turned up a dumb assembly mistake..– I swapped U1 & U2 despite the clear labels on the silkscreen.
I hardwired the display inputs to only lite digit 1 and display an 8 (1000b). 8 because it's the digit which uses the most current given the largest area. This will allow me to verify the anode current before committing to a final anode resistor. To "latch" the 8 digit; I used my RatShack Logic pulser to toggle the LE pin.
I was able to empirically calculate the Anode resistor using the built-in test point and pot. 21.4k... now I just need to find some 22k 603 resistors to make it work. 21.4k gives me 2.5mA of anode current which is typical for the NH-12A tubes I’m using.
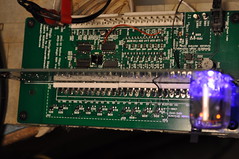
Here’s the top view of the display boards:
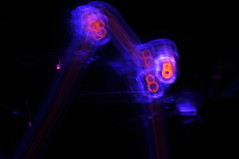
And the money shot for the backlite display:

I decided early on that I wanted the backlite to be purple rather than some other color because I thought it’d contrast nicely against the orange digits.
You can see the testpoint and Anode pot right below the Nixie tube. Obviously; these will be de-poped for “production” boards.
Here’s a picture I just thought was cool. A result of playing with camera shutter times:
With the resistor calculated; I need to focus on creating a Display tester so I can run the display thru all the digits and functions.


