Update -

The original cabinet has been stripped of all its parts - including the siderails and door. I kept three sections of wood
1 - behind the door plate as it has been covered since production and it will provide a good color match
2 - The rear section of the cabinet. It is better than the Far Out cabinet and will be reused
3 - The base
The rest of the Original Cabinet (Wood) was thrown out.
So I'm left with the Far Out cabinet.
Stripping the Far Out cabinetAfter removing all parts off the cabinet, I had to strip the paintwork. This is a lot easier to do than people think.. Here's a brief description;
Materials needed
- Citrus Strip - Available from Bunnings in a green can
- Two scrapers or metal spatulas
- Some rags
- old paintbrushes
- Two buckets of water
- Goggles for eye protection
- air mask
- Gloves
- A sunny Day !
Stripping a cabinet takes around half a day to do properly. Here's a condensed procedure;
Gloves, air mask and eye protection on..
Cabinet set up in a well ventilated area
Pour the Citrus Strip into a container and start smearing it on one side of the cabinet with a paint brush. Generously apply. The more stripper and time exposed to the paint, the easier it comes off.
Wait 30 minutes
Use a large scraper or spatula and test a section of the cabinet. If the paint does not move - wait longer.
Use the larger spatula to scrape the paint WITH THE GRAIN. ie. Fron the front to the back, or the back to the front.
As the paint scrapes off, flick it in the first bucket of water, and use the other scraper to remove the excess from the first scraper
Continue until done
Wipe the cabinet with a wet rag and rinse in the other "clean water" bucket...
Do this to all sides of the cabinet
Leave the cabinet in the sun to dry for a few hours
Then put the stripped cabinet away for a week before sanding
You can do sides of the head at the same time as the cabinet
Washup is EASY - Citrus Strip cleans up with water...
Just a note on Citrus Strip - It does not stink like normal paint strippers, and wearing a face mask is a bit "over the top", but I'm asthmatic, so I take all precautions.
It should look like this !

 Cabinet Repair
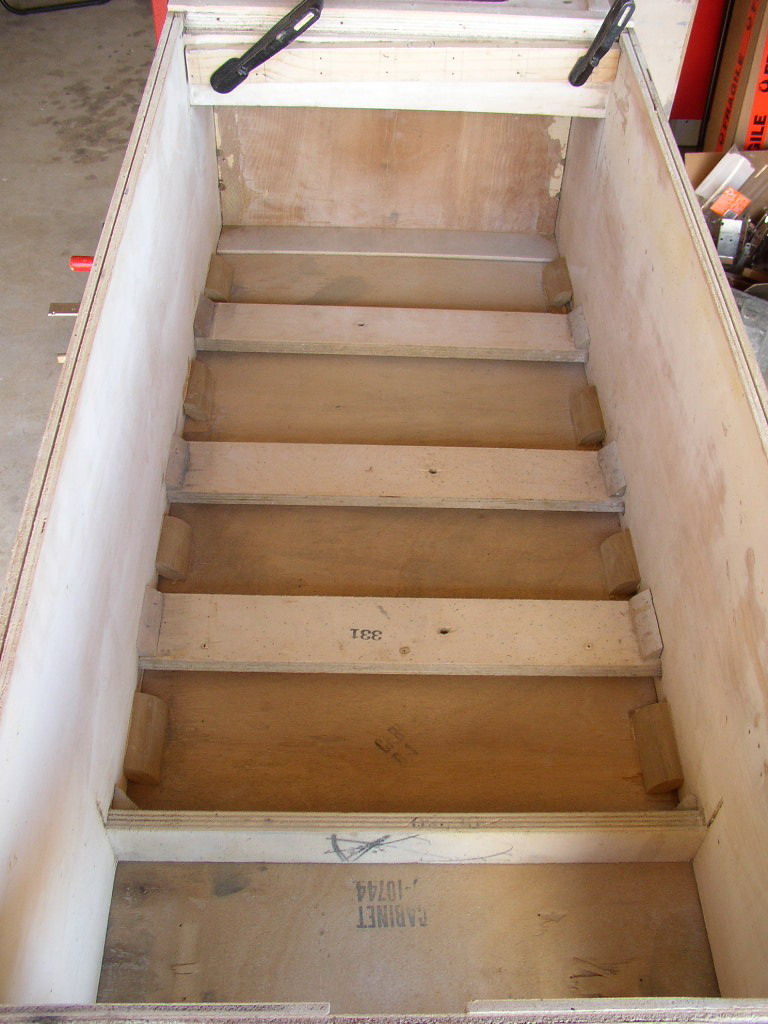
Notice the back of the cabinet has been removed. The base is also removed. I used the rear panel and the base from the Original Cabinet. This is a HUGE job, and a real pain to get right. The bottom panel was sanded clean and installed to ensure it fits. Easy..
Problem # 1 - The guides that hold the bottom base were completely broken and falling off. This is where I needed to be a little creative. This is hard to explain, but I installed the bottom base temporarily in position with the edges affected noted. I slipped tracing paper in between the bottom base and the very bottom "guide" of the cabinet that was missing. I clamped a "Straight edge" along the side of the cabinet. This would allow me to use Bondo to "fill" the areas missing wood. I did this for the side and the front. I let the Bondo dry and sanded back to at least get some coverage. When it dried, I simply slid the bottom base out and removed the tracing paper. A little more sanding and I was done !
Here a picture of the side that needed repairs prior to the procedure above...

Here's the exact procedure on the front of the cabinet - after the removal of the base and sanding ;


So now the base will slide into position. I will paint it a woodgrain color later...
Problem #2 - The Back Panel
Now that the base is in position, the back Panel has to be installed. I can't recall if I used wood glue or liquid nails here ! The cabinet HAS to be square when bracing the cabinet - and it is a job that should be done with a helper. Lots of clamps used here, but after a couple of hours, it was all done and square... A couple of nails here and there and it is done. I let it sit for two days before going on to the next step.

I bought some edging from bunnings and cut them into brackets..I added them to the sides to hold the baseboard in. I made two new corners at the rear where the leg mounts will be installed... But here is a picture of the finished cabinet.. More to come later - when I find them


