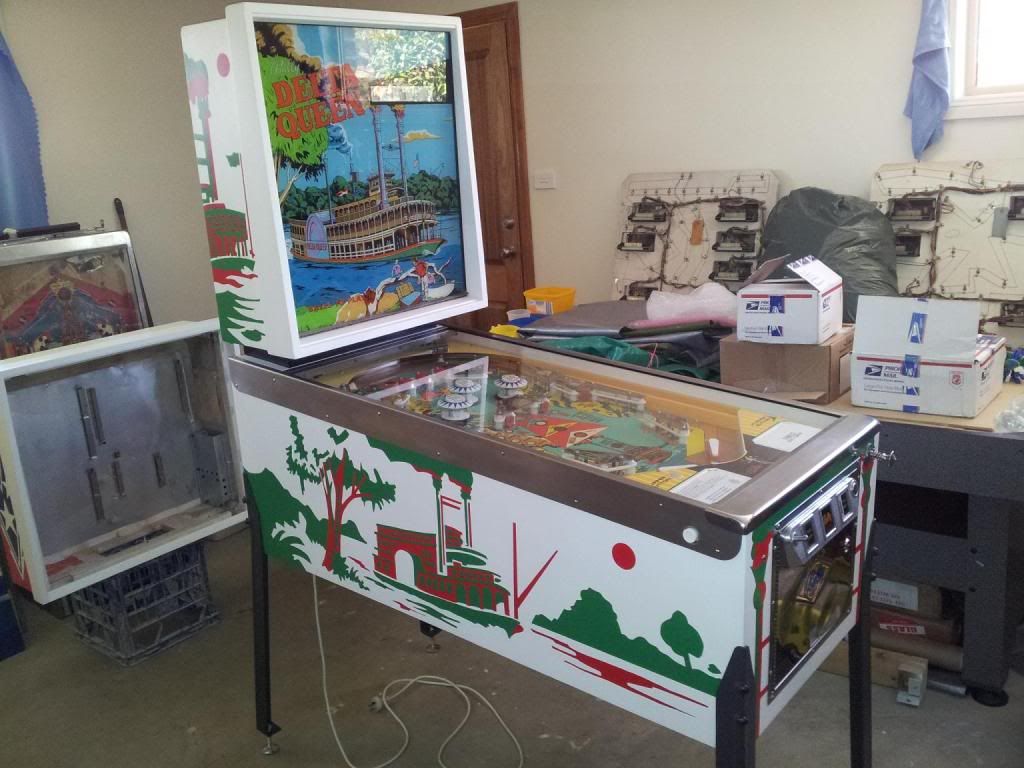
OK, so after a number of months since I thought I was "finished" with the Delta Queen, I decided to take the plunge and do a full cabinet restore. What a very long, but very rewarding road this has been, now that the results are finished.
I have never done a cab restore, and of course there was the daunting stencil creation and "how am I actually going to paint this beast" approach to think about.
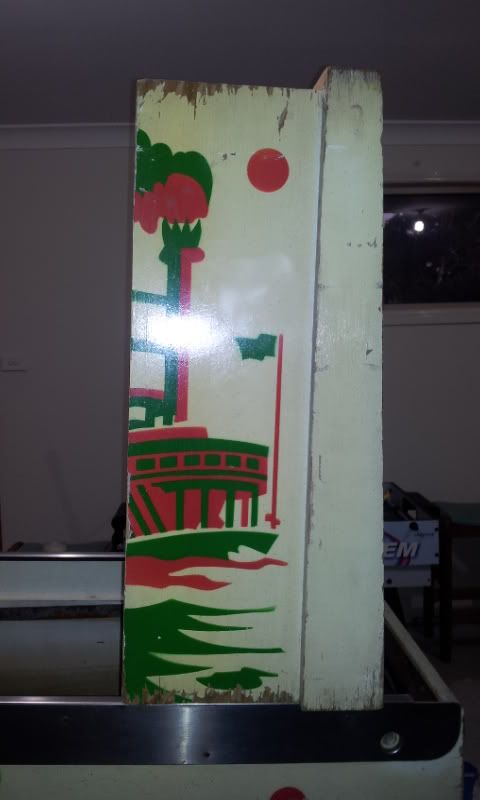
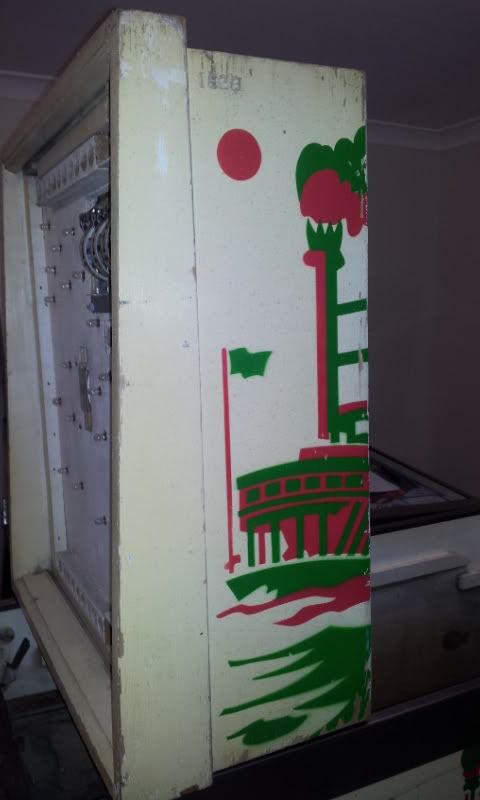
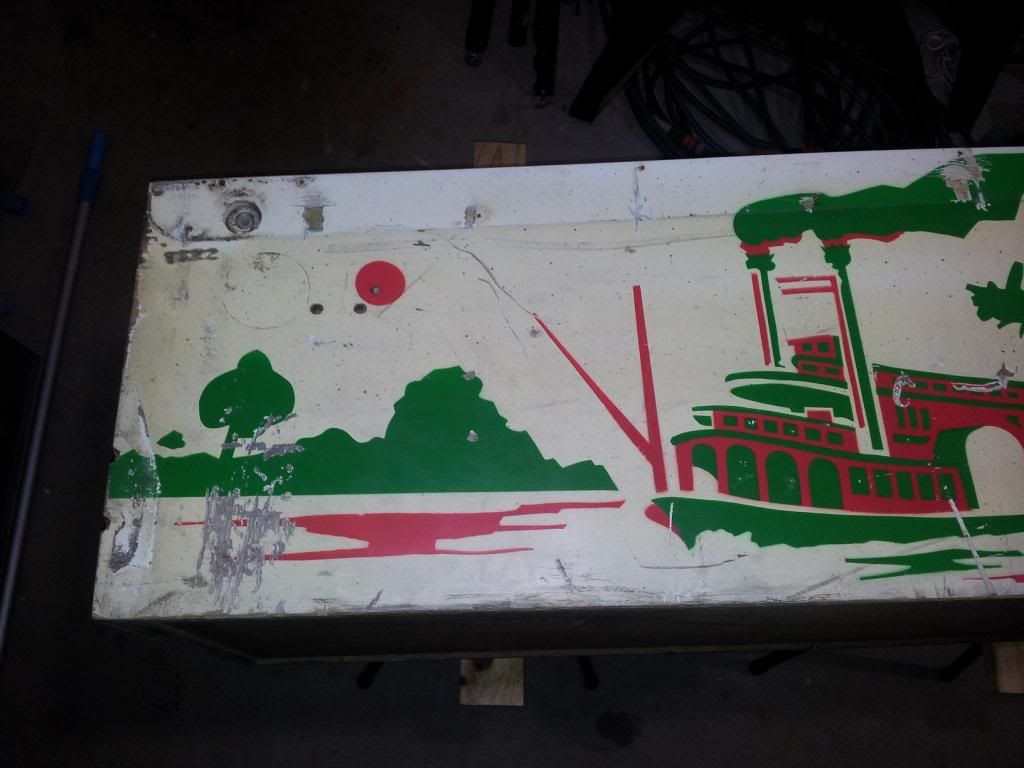
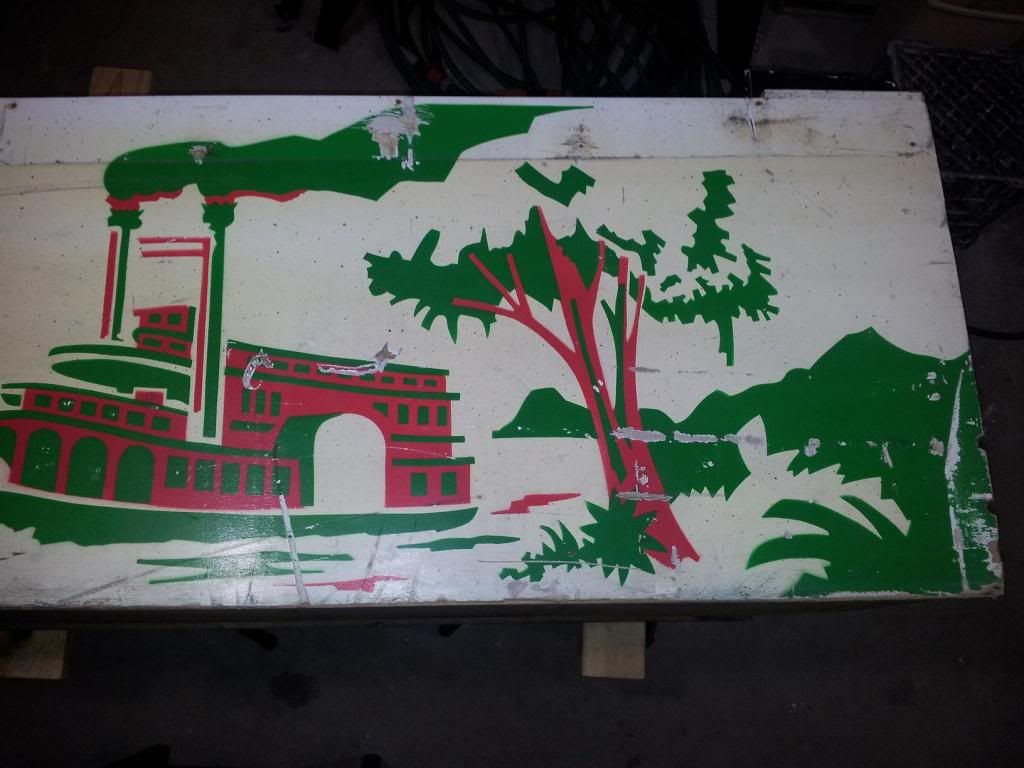
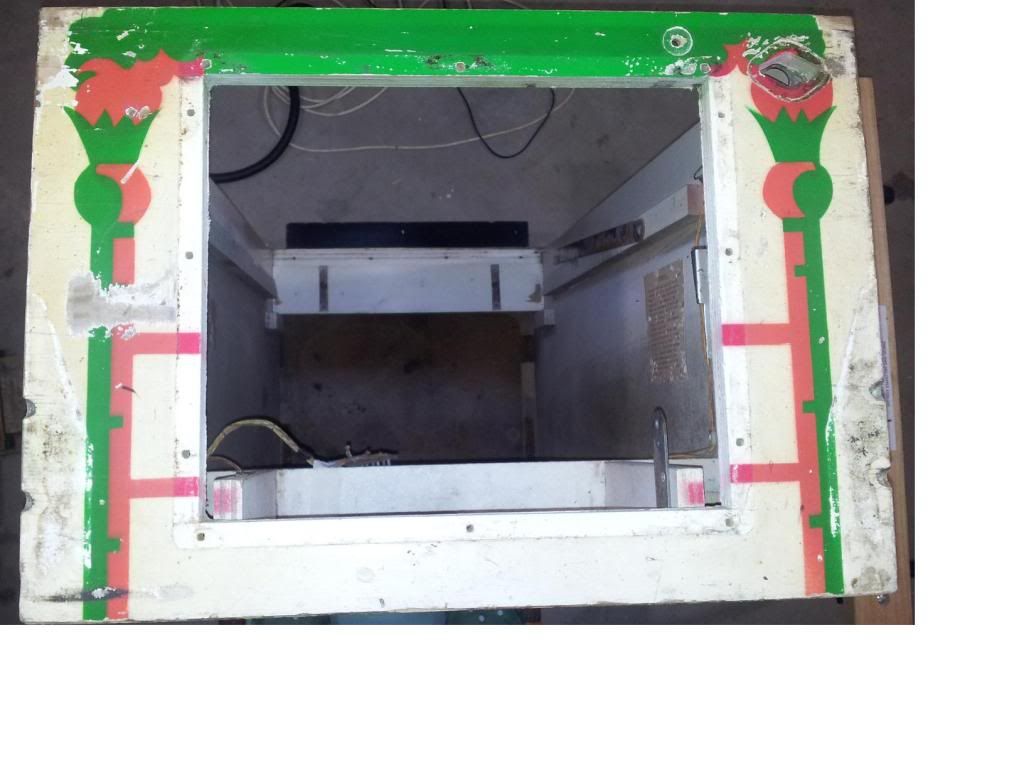
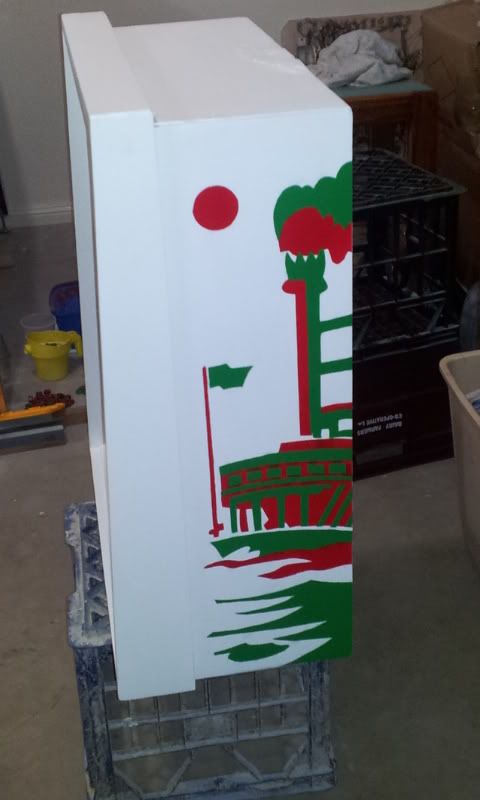
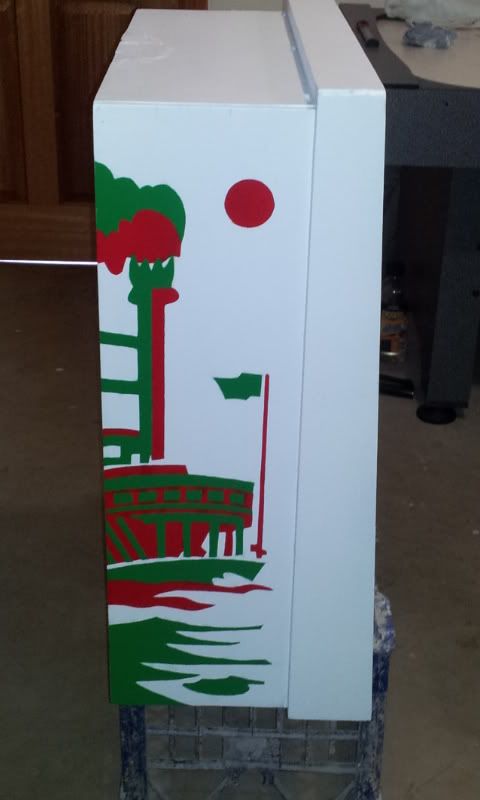
As you can see from the images below, the cab was in some rough shape, and the white background has long faded for a 1974 machine.

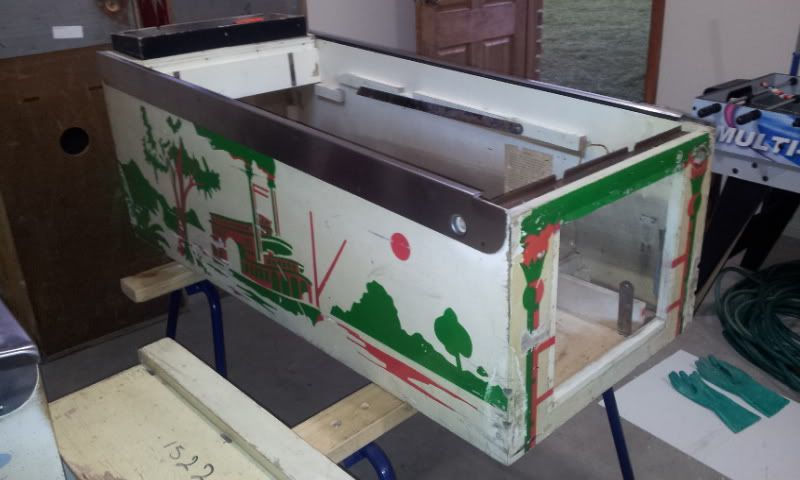
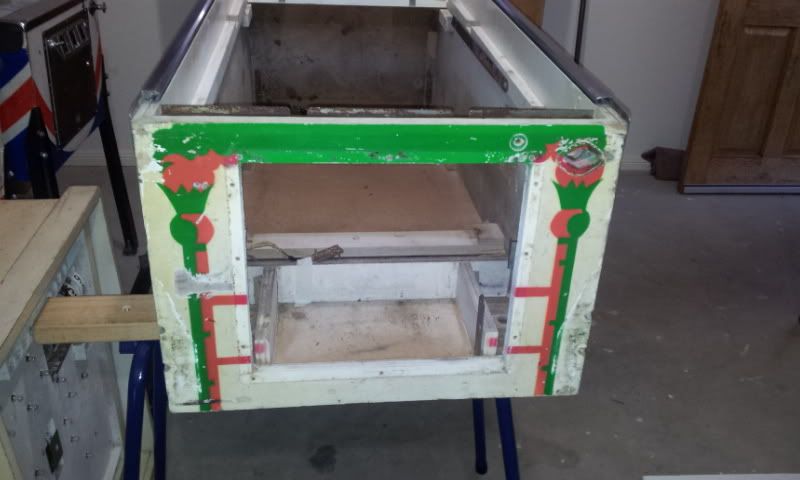
Here is some more detail in the images, and you can see just how rough it was ….. the beginnings!
The preparation began with the usual - sanding down, filling in the gaps, sanding some more, etc. I used acrylic lacquer spray paints, and started with a few coats of primer. I am using the range from Anchor, and although it probably isn’t an exact match, the range was sufficient to source a very good match (at least to my eyes).
One of the biggest pains in the arse was the creation of the stencils. I had read a bit on what to use for the stencil, and ended up using freezer paper. I have read about this on RGP (the thread I came across was
http://rgparchive.com/rgpforum/showthread.php?t=282364&highlight=freezer+paper&page=2), and gave it a go. This stuff has a shiny/plastic side, and a waxy finish on the other side. Placing it over the original artwork, it is translucent and has some level of transparency to it. Enough to trace the artwork directly onto the (wax) side of the paper with pencil. For the Delta Queen, this was not the simplest of patterns, and was very time consuming to create the whole set of stencils required.
After tracing, it was then using an xacto knife to cut out the patterns. The stencils were adhered to the cab using a Krylon low tack adhesive spray. I did get a bit of bleeding here and there of paint, but only minor touchups were needed.
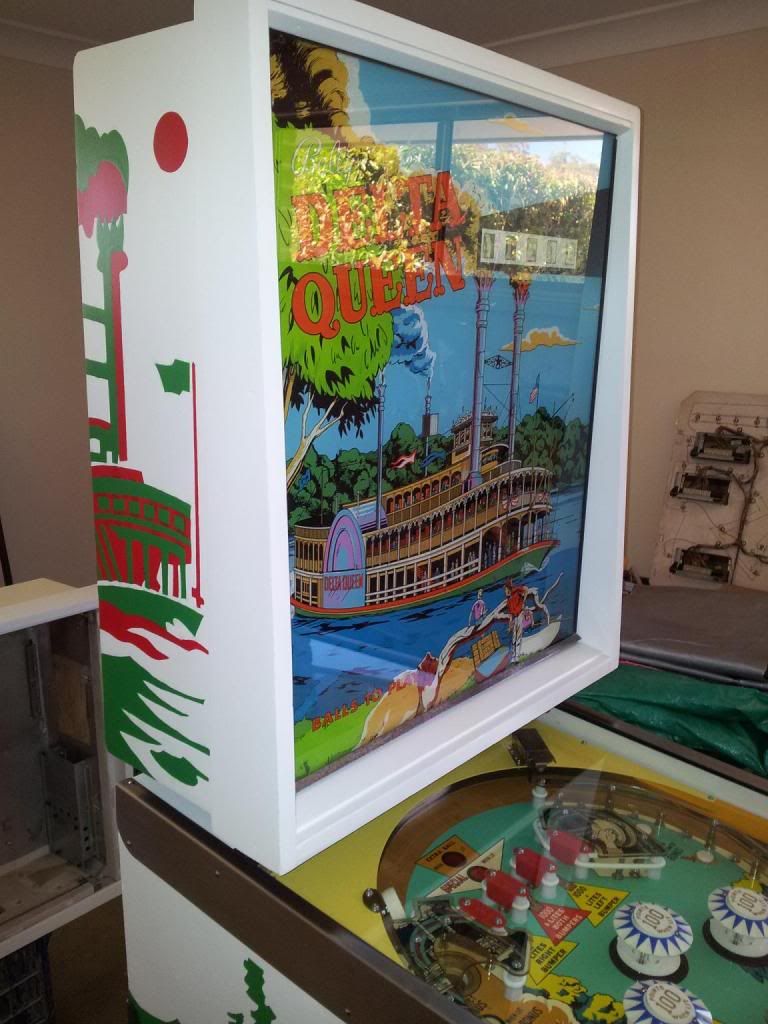
Alot of work for sure, but I was quite happy with the results.


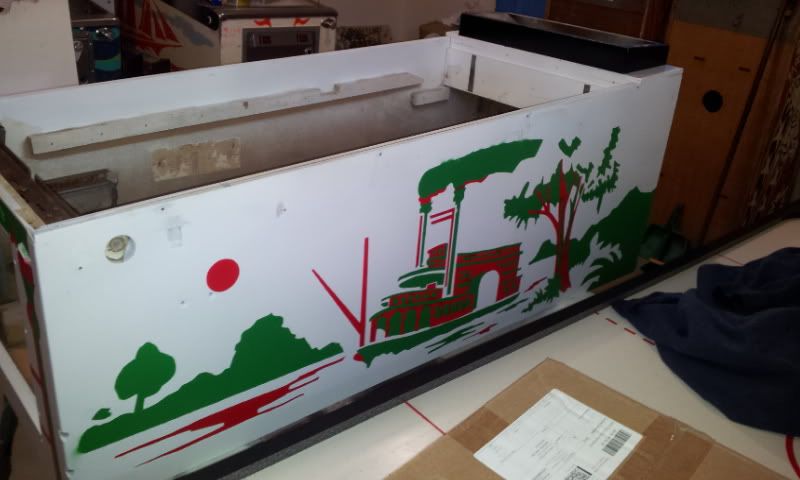

And here is the machine back together again.
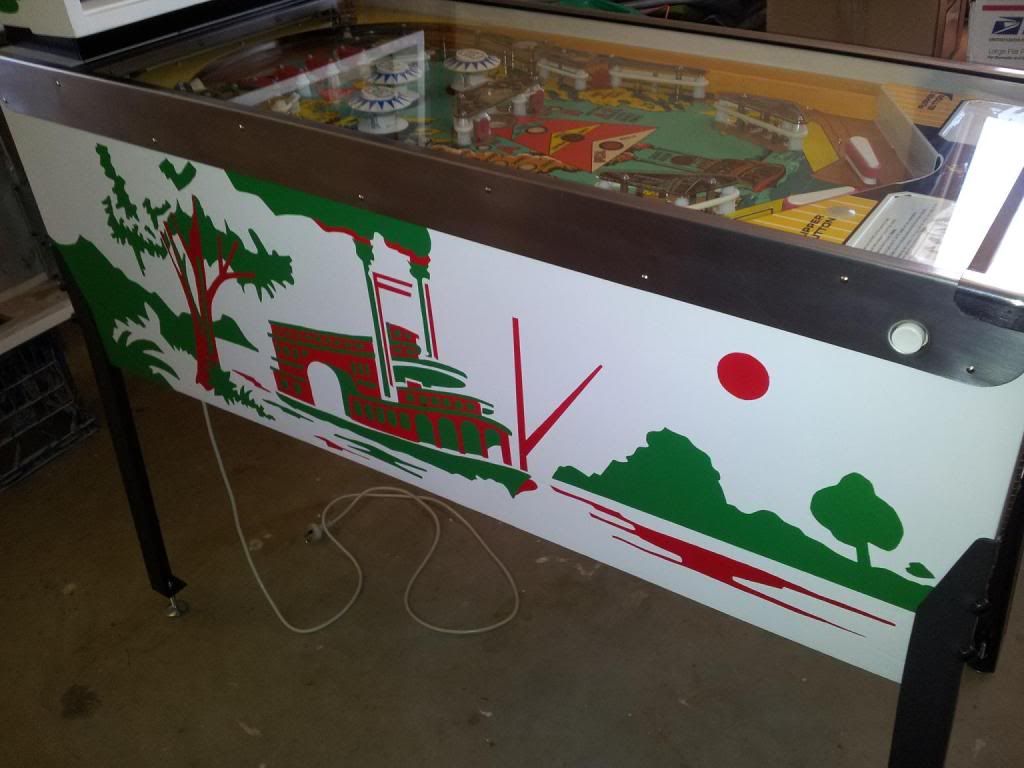
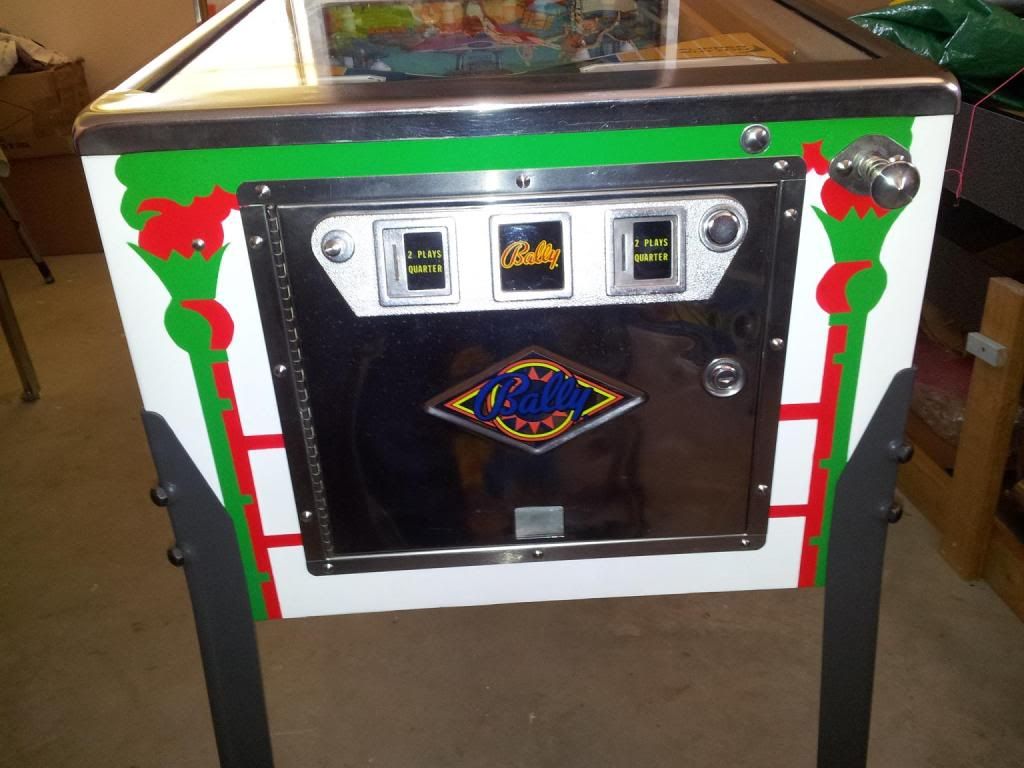
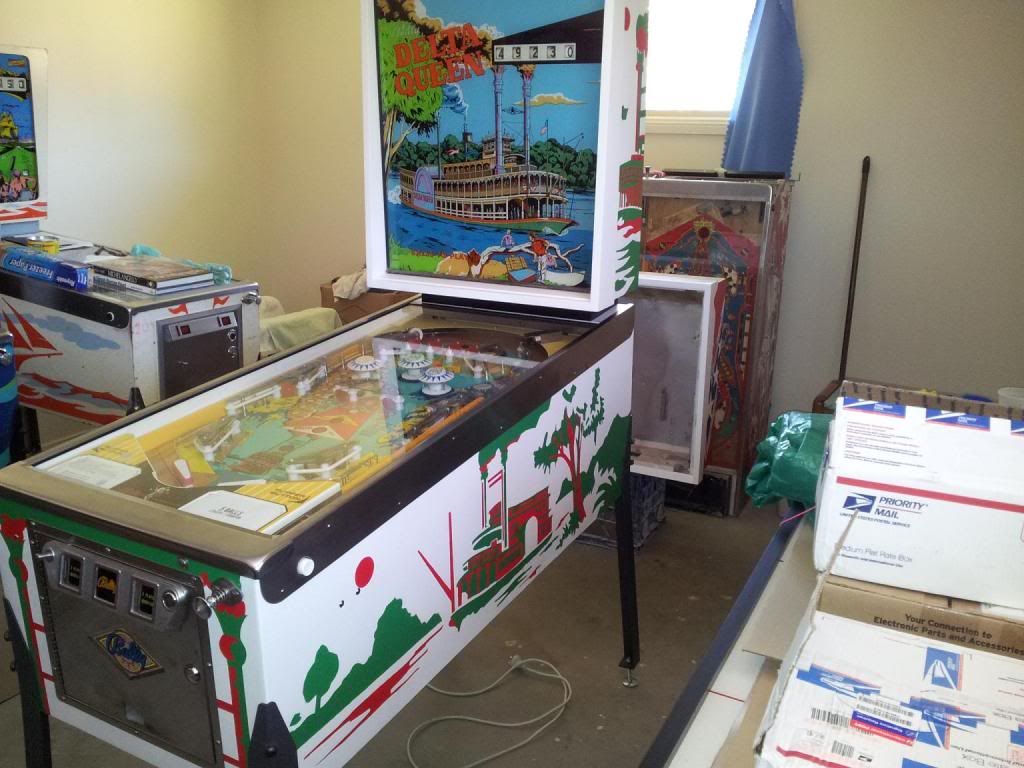
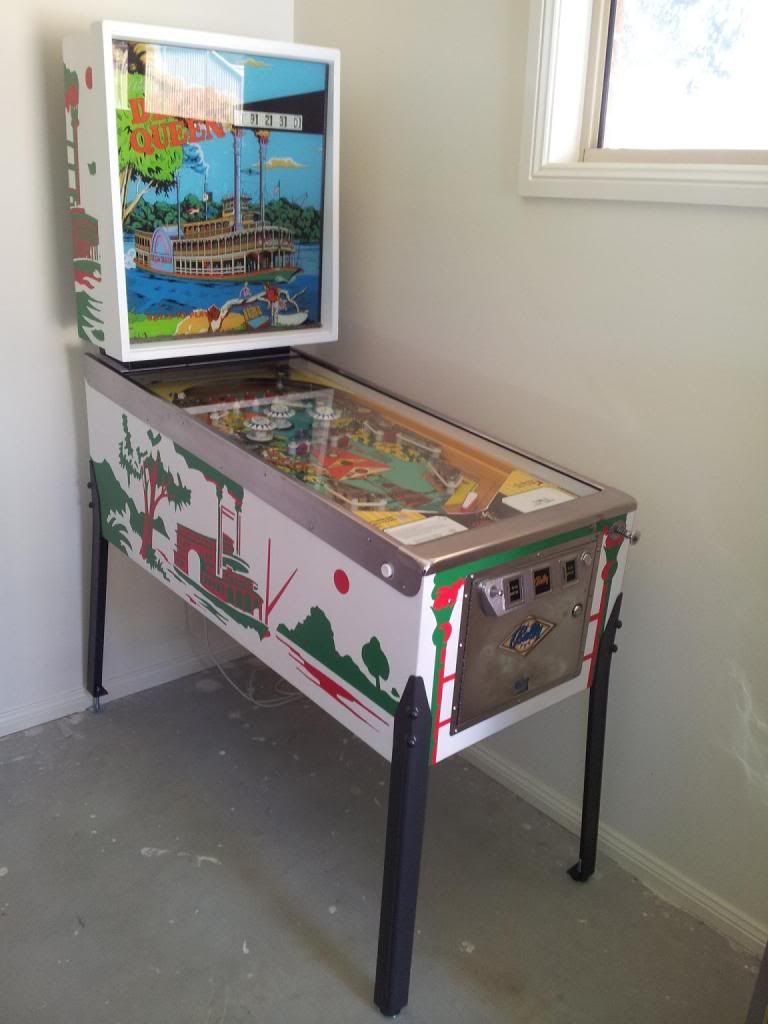
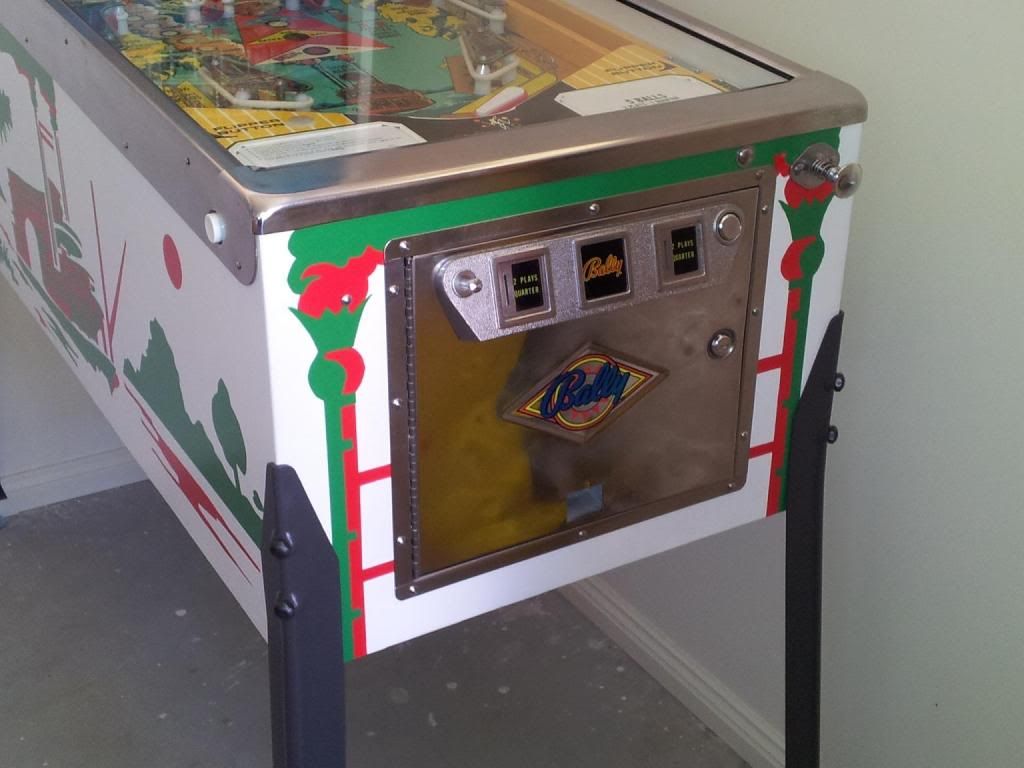
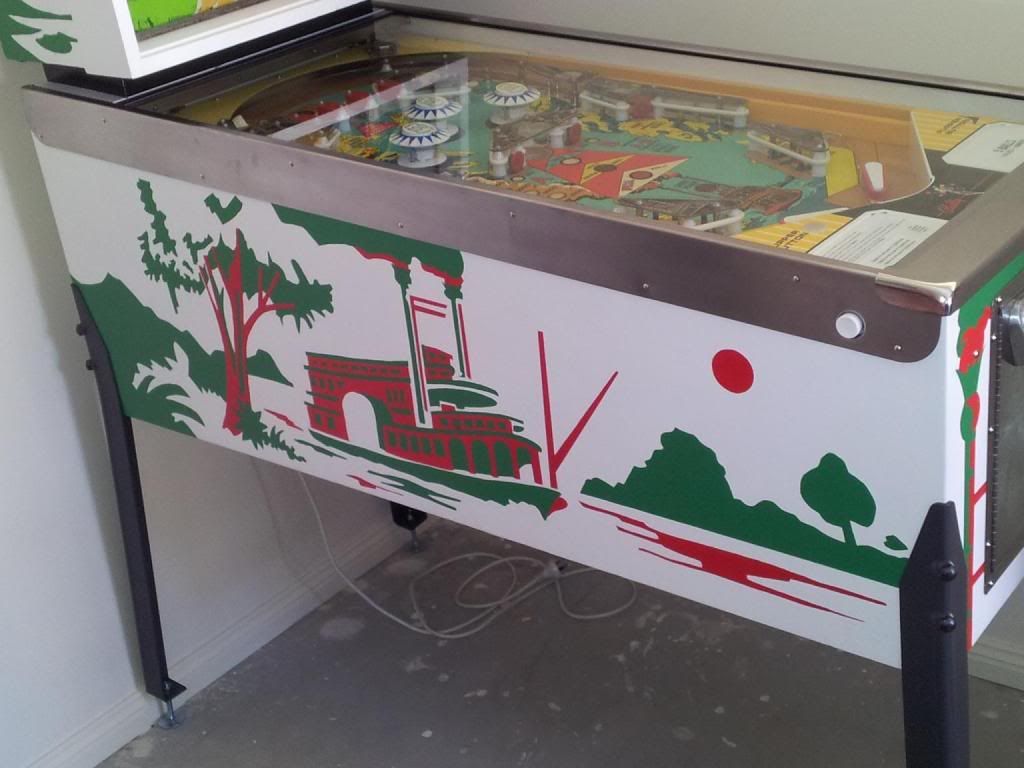
All in all, a huge effort to do this, and a learning curve for me. But, I must say I am quite pleased with the result.


