Lots of work behind the scenes getting the gross-level assembly started on the PF. Basically; I went thru and assembled all the Turbo bummers; kickout; switches such from the bottom side. No real pictures of this due to the tedious work involved. Once I had the big parts on the bottom of the playfield it was time to start installing some lighting. As I stated earlier in the thread; I created some custom LED boards to replace the underside switched Lamps.
An example of these switch lamps is as follow:
This being the center Xk's ... an butt load of lamp sockets which I hate tending to on my Bally Star Trek. To this end; I created custom LED boards which would bolt to the underside of the PF and give me the needed light. Given these are LEDs; they should last a lifetime under normal use.
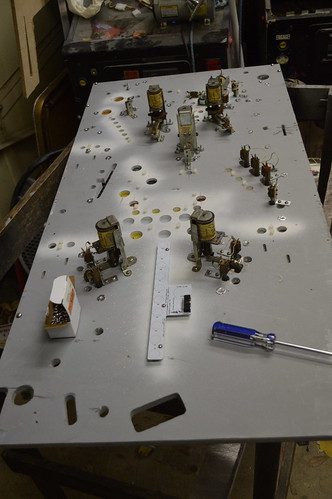
I started by carefully laying the Blank PCBs I designed out on the backside of the PF, drilling 0.24 of an inch into the wood, then Tapping said hole with a #6-32 tap. When the holes were tapped; I screwed in a 1/4" nylon standoff which the PCA (Printed Circuit Assembly) would mount to:
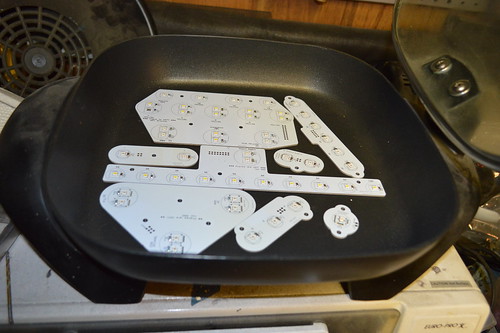
Once I had the standoffs in place; I went ahead and assembled the PCBs using the Skillet method and some soldering paste. Here's a majority of the pcbs in the skillet during reflow:
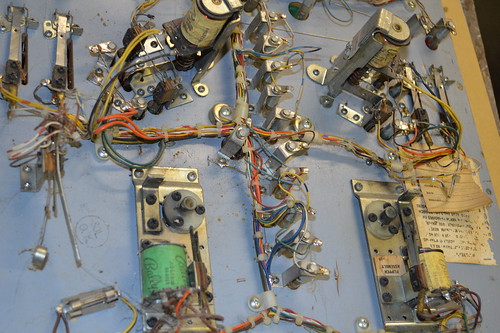
Once I had the SMT components done; I hand soldered the thru hole components. Which the PCBs assembled; the rest of the switch lamp matrix is assembled:

I ran out of 5 red LEDs and 5 white LEDs; so I need to order some more to complete the rollover switches and the lane indicators.
More coming; stay tuned.


