Author Topic: Bally Dr Who High End Restoration  (Read 21006 times)

0 Members and 1 Guest are viewing this topic.

Offline Strangeways

  • Pinball Restoration is my passion
  • Administrator
  • Trade Count: (+9)
  • *****
  • High Score Initials:
  • Forum Posts:
  • Melbourne
  • ABN 68 283 634 461
    • Ride The Boney Beast
Re: Bally Dr Who High End Restoration
« Reply #15 on: October 27, 2018, 10:26:25 PM »
Going back a few steps to the teardown stage just to show how filthy the subway ramp was. It was removed, stripped and placed in the Ultrasonic cleaner, but it was always going to be replaced.


Rusted panel will be removed and replated.


All the metal parts have been cleaned and replated. Ready for assembly on to the new subway Ramp.


Completed subway - a HUGE difference !


Of course - it is not seen, but that's not the point. Ignore the wiring - there's still some work to do once I have added more completed sections of the playfield.

Aussie Pinball - Proud to be Australia's Premier Pinball Forum

http://www.australianpinballrestorations.com.au/

http://www.rtbb.com.au/catalog/

We carry the largest range of NEW Ramps in Australia

Offline Strangeways

  • Pinball Restoration is my passion
  • Administrator
  • Trade Count: (+9)
  • *****
  • High Score Initials:
  • Forum Posts:
  • Melbourne
  • ABN 68 283 634 461
    • Ride The Boney Beast
Re: Bally Dr Who High End Restoration
« Reply #16 on: October 27, 2018, 10:36:27 PM »
Of course the topside of the playfield is coming along a bit slower, as I like to have the underside done perfectly so I can fit into the cabinet.


Tim did an amazing job with this playfield.  #*#

Even the switch brackets are replated. This DOES look like overkill, but the process of loading into the ultrasonic, with other parts, and then stripping the old plating, with other parts, and then just dropping them into the plating bath, with other parts - Not a big deal..


The coils are tested and coils outside their correct resistance are thrown in the bin. The good ones are cleaned. I do this by hand with Simple Green. Took 5 minutes with a toothbrush and sometimes a brass brush - big difference !


Other coils are cleaned using the same process. Flipper coils are discarded as I will be using new coils. These are the coils for a couple game - not just Dr Who..


Replated brackets and new parts. Moving parts are almost always new.


Installed into the game ;


Aussie Pinball - Proud to be Australia's Premier Pinball Forum

http://www.australianpinballrestorations.com.au/

http://www.rtbb.com.au/catalog/

We carry the largest range of NEW Ramps in Australia

Offline Strangeways

  • Pinball Restoration is my passion
  • Administrator
  • Trade Count: (+9)
  • *****
  • High Score Initials:
  • Forum Posts:
  • Melbourne
  • ABN 68 283 634 461
    • Ride The Boney Beast
Re: Bally Dr Who High End Restoration
« Reply #17 on: October 27, 2018, 10:46:20 PM »
Back to the VUK - which gets a POUNDING in this game. All orbit shots to the pop bumpers can either be deflected back into the main playfield, or predominantly drain into the VUK. All skillshots plunge into the VUK. All balls during multiball that hit Daleks drain into this VUK. So it has to be rebuilt and working perfectly. Here's what it looked like during teardown ;


It is a VERY well built SOLID mech. Thick gauge steel that will plate well !!


Here is the assembly rebuilt ;


.. and installed - Excuse the wiring - I have a few more components to add !


This game has the most intricate feature - the Time Expander - and therefore needs to be 100% restored to be running perfect. Dr Who is only second to ST TNG in terms of excellent engineering, and when this title is restored to this level, it is one VERY cool game to play !
Aussie Pinball - Proud to be Australia's Premier Pinball Forum

http://www.australianpinballrestorations.com.au/

http://www.rtbb.com.au/catalog/

We carry the largest range of NEW Ramps in Australia

Offline DSB

  • Trade Count: (0)
  • ******
  • High Score Initials:
  • Forum Posts:
  • Gold Coast
    • OMNI Electrical & Data
Re: Bally Dr Who High End Restoration
« Reply #18 on: October 30, 2018, 09:38:12 PM »
Very impressive work!  ^^^

Offline Strangeways

  • Pinball Restoration is my passion
  • Administrator
  • Trade Count: (+9)
  • *****
  • High Score Initials:
  • Forum Posts:
  • Melbourne
  • ABN 68 283 634 461
    • Ride The Boney Beast
Re: Bally Dr Who High End Restoration
« Reply #19 on: January 09, 2019, 10:06:15 PM »
A lot of progress has been made, but updates need to be done quicker I think !

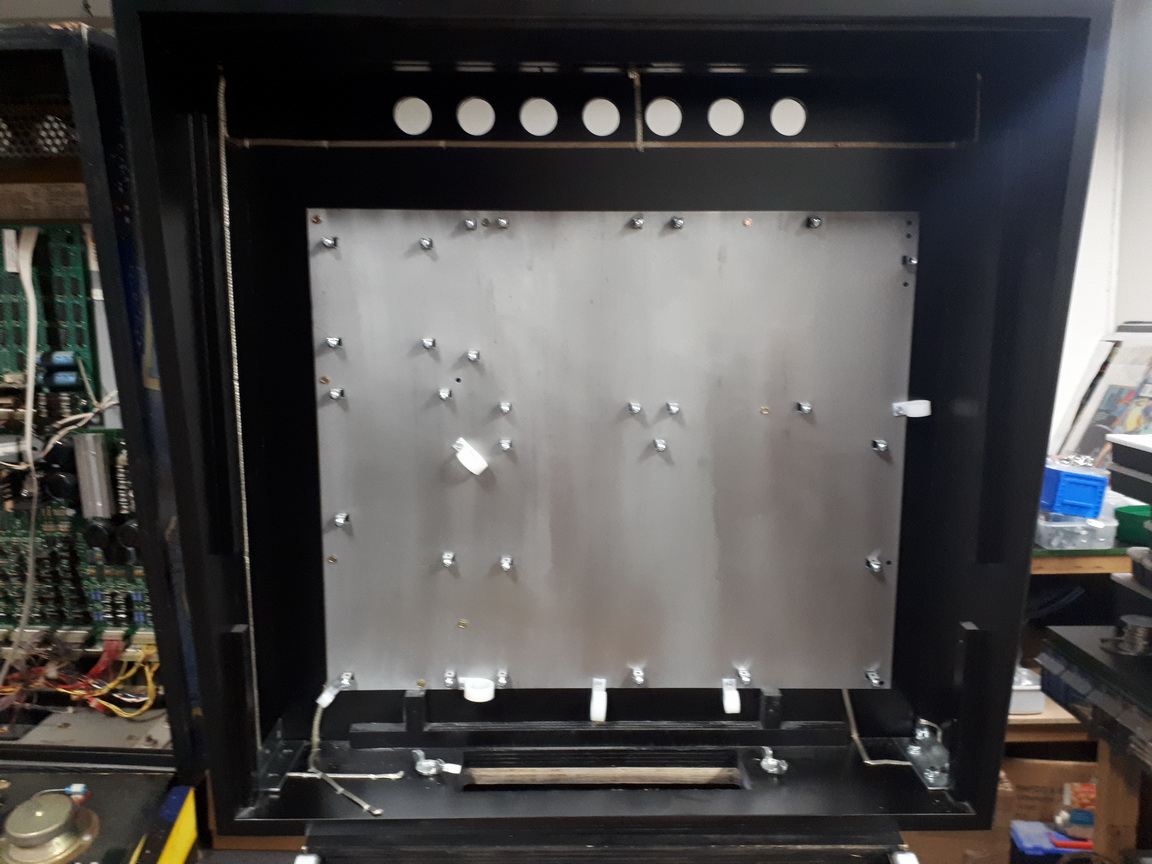
The backbox plate is cleaned and polished. All the nuts are removed so that the polishing is easier. I just use Autosol and buff with a rag.


The boards are cleaned and placed into position so I can setup the cabling correctly. The loom was cleaned in the Ultrasonic cleaner previously and looks brand new. I use new cable clamps as it is quicker and cheaper than cleaning the old clamps. I re use the old clamps (once cleaned) in reconditioning jobs.


The lamp sockets are replaced throughout the game as well as the sockets mounted on plastics.


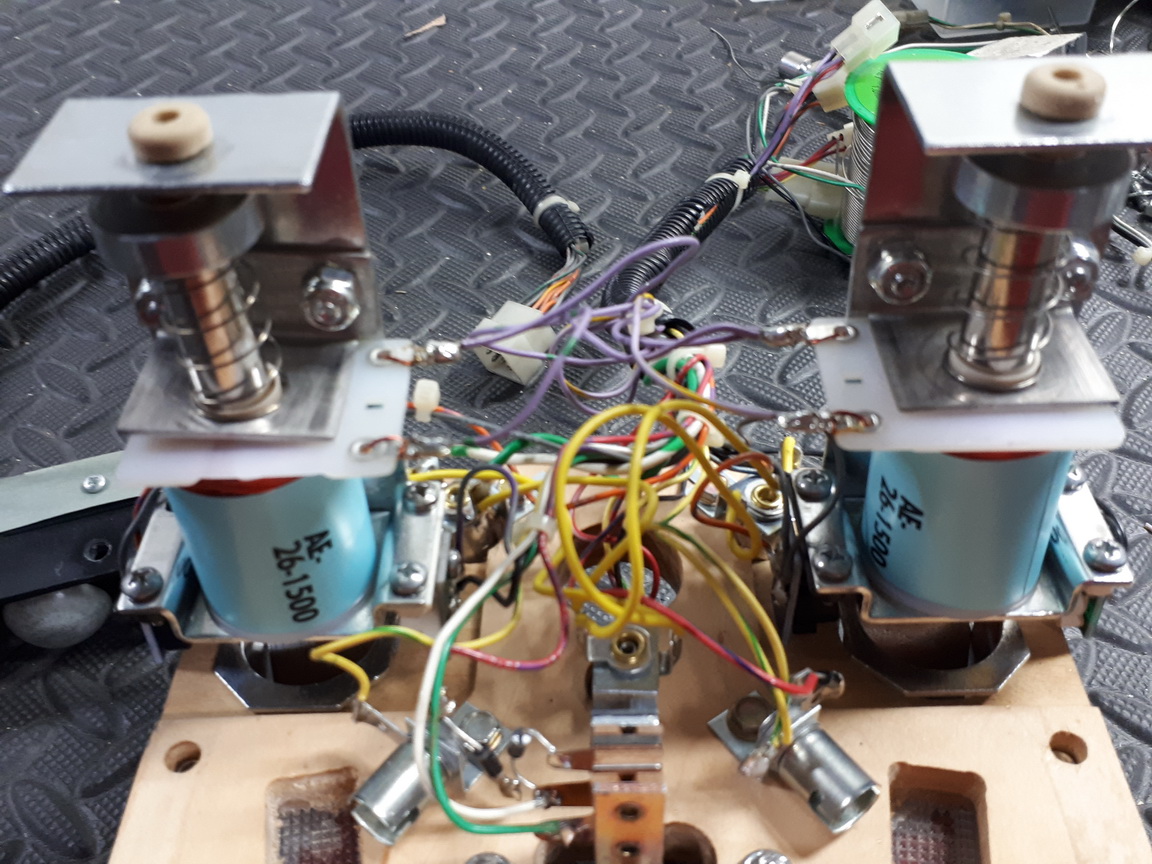
Some serious time is devoted to the Time Expander assembly. Given this assembly is difficult to remove and service, I replace almost everything - optos, coils and lamp sockets.


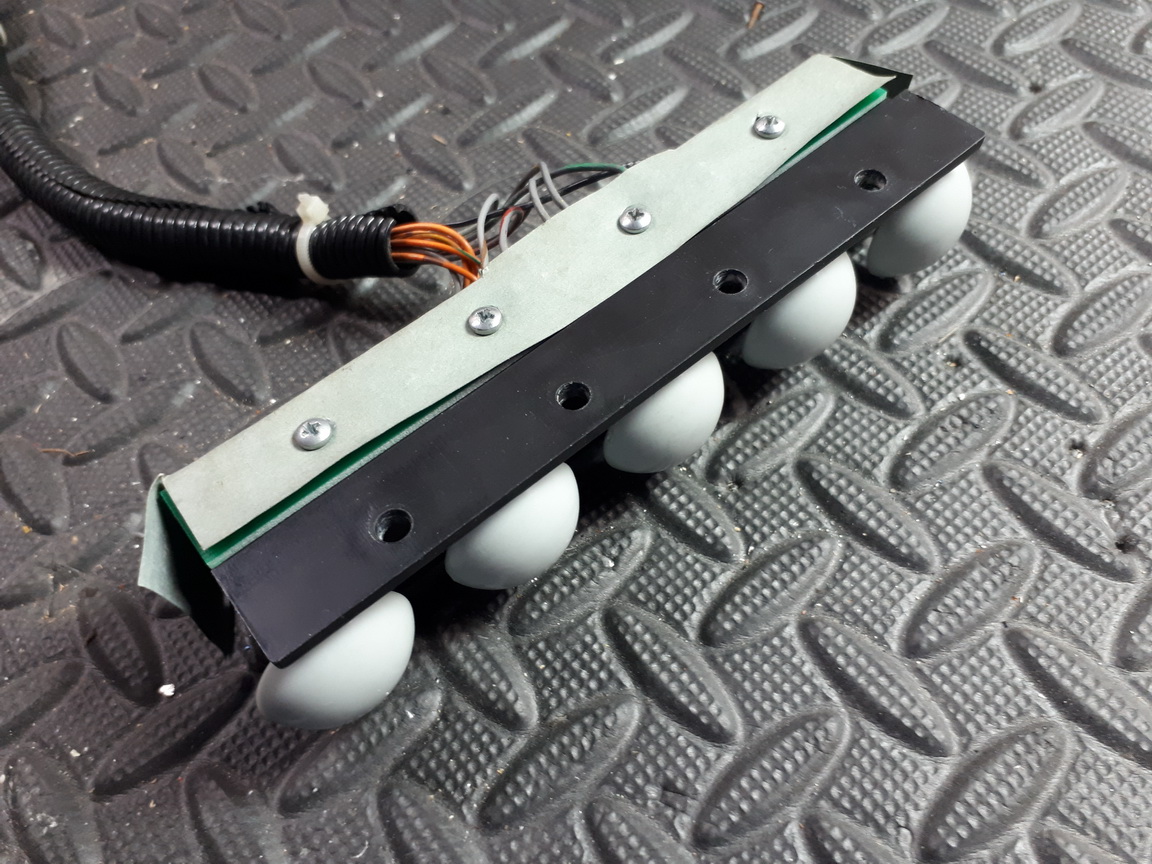
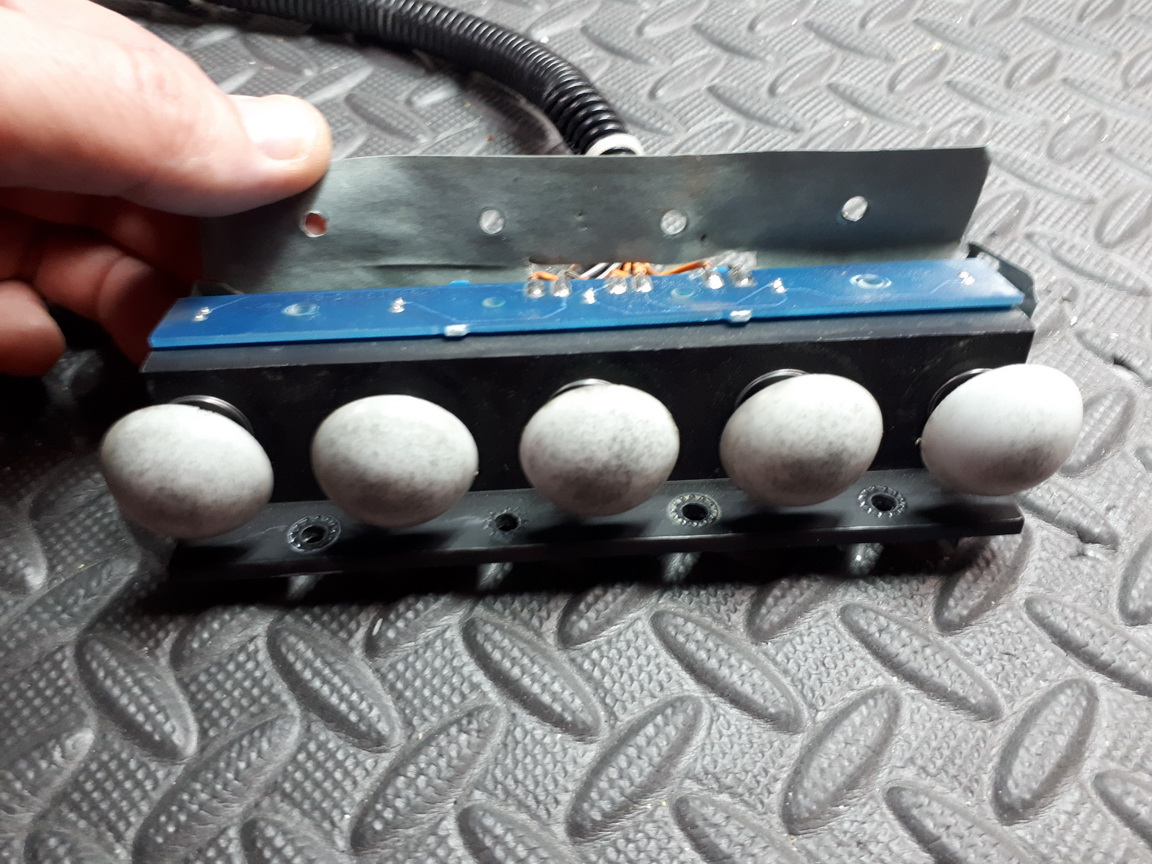
Particular attention is devoted to the opto bank assembly. Often SMASHED out of shape, with LEDs hanging on by a thread.. I had to wait until the opto board set was re-run as I don't want to pull apart this assembly just for a faulty opto ! Just replace the board. At this level of resto, it is better to replace than repair.


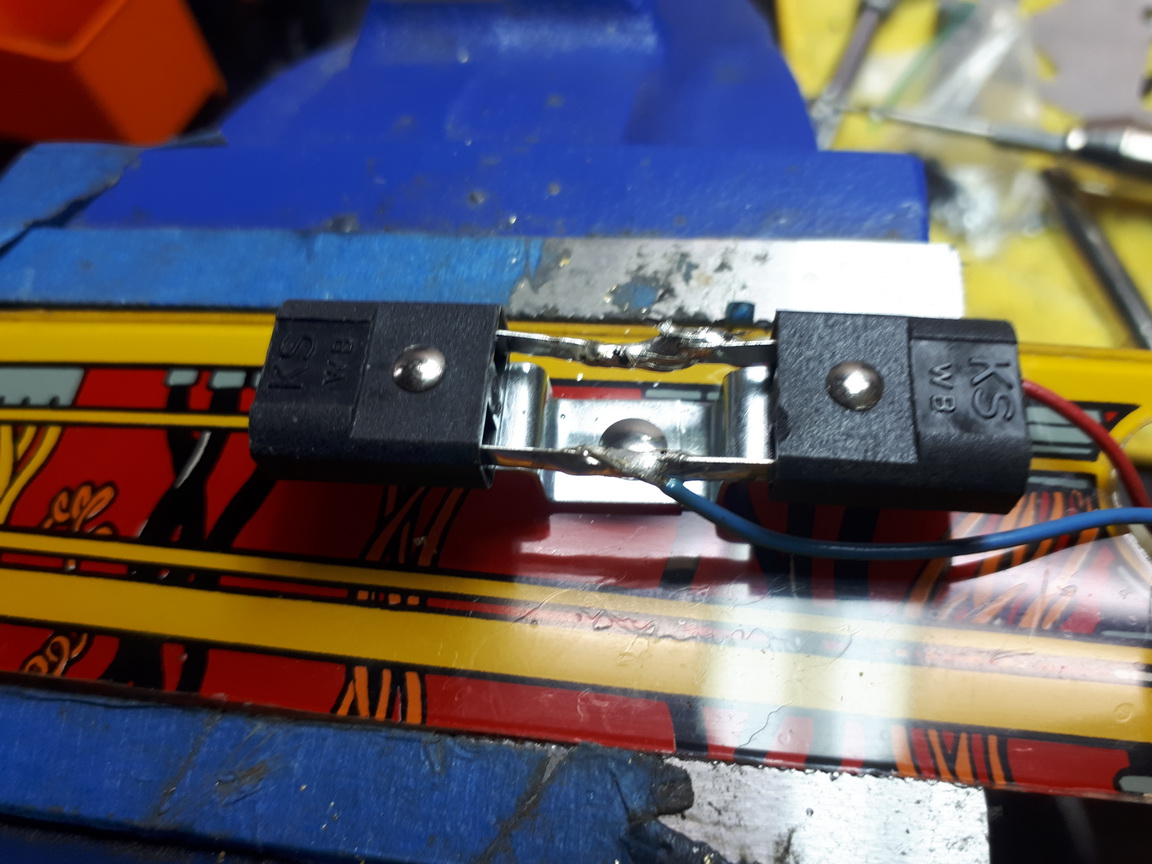
Cleaning the individual switches - These are not available at this time, so the best way of cleaning is to mount them in a drill, and use Novus 3, followed by Novus 2 - on a slow setting. Sometimes, a quick spin with Red Scotchbrite will even out the scratches and stubborn dirt.


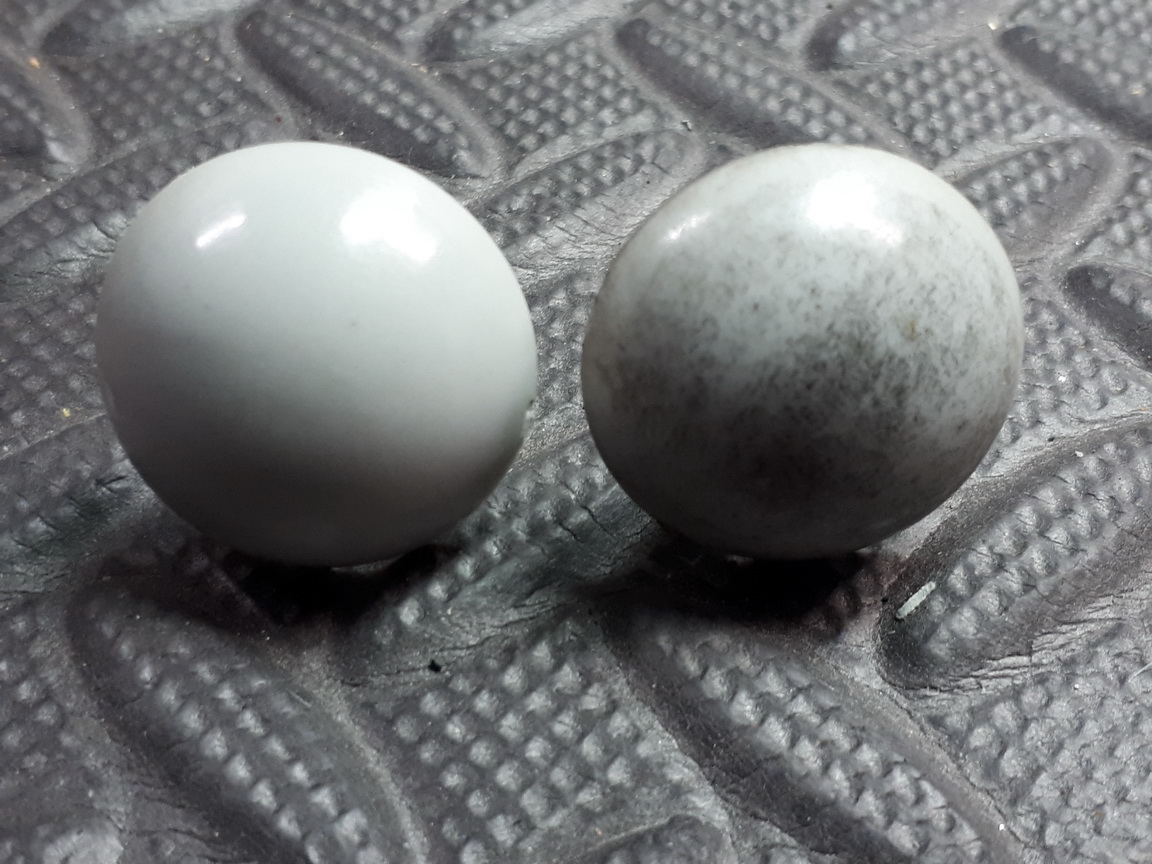
They probably look better than new !


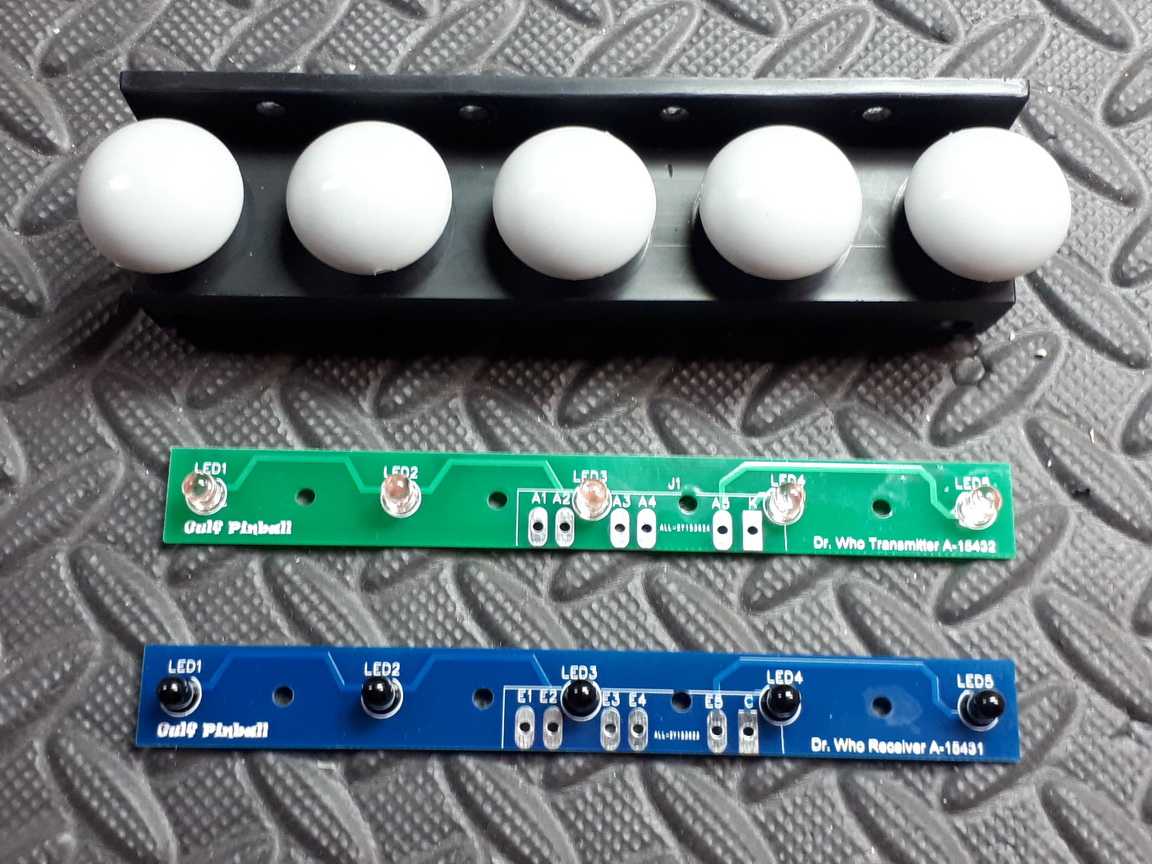
New Opto boards installed, and assembly re-assembled. I did have to straighten up the black plastic as it had copped a pounding and was causing issues. The springs were replaced.


Aussie Pinball - Proud to be Australia's Premier Pinball Forum

http://www.australianpinballrestorations.com.au/

http://www.rtbb.com.au/catalog/

We carry the largest range of NEW Ramps in Australia

Offline Strangeways

  • Pinball Restoration is my passion
  • Administrator
  • Trade Count: (+9)
  • *****
  • High Score Initials:
  • Forum Posts:
  • Melbourne
  • ABN 68 283 634 461
    • Ride The Boney Beast
Re: Bally Dr Who High End Restoration
« Reply #20 on: January 09, 2019, 10:23:41 PM »
Re-assembly of the Dalek switches / metal scoop is also time consuming - cleaning re graining etc. I use Hex head machine screws rather than phillips head to mount the mini post panel. The reason for this is that this panel with the mini posts cops a beating, and EVERY Dr Who I've seen has this panel loosened over time. To re tighten, you need to remove the outermost mini posts. If you use 1/4" hex heads, all you need is a 1/4" spanner - no need to remove anything.


Time Expander entrance Cliffy protector is mandatory.


Moving on to the main assembly - re-plated and polished. New bracket screws installed.


This assembly requires new bushings. They are expensive, but they make a huge difference. The Time Expander Assembly is the ONLY assembly I recommend any lubricant on metal to metal parts. I use Castrol Boat Grease. It is VERY good for this application, and previous Dr Who restorations I've used this grease on are still working 100%.


Don't go nuts - This is all that is needed ;


Next Step is to degrease and polish the cam. The mounting bracket is plated and the motor is a new motor.


Next Update shorty !

Aussie Pinball - Proud to be Australia's Premier Pinball Forum

http://www.australianpinballrestorations.com.au/

http://www.rtbb.com.au/catalog/

We carry the largest range of NEW Ramps in Australia

Offline Crashramp

  • Trade Count: (+3)
  • ******
  • High Score Initials:
  • Forum Posts:
  • Albury
Re: Bally Dr Who High End Restoration
« Reply #21 on: January 09, 2019, 11:15:42 PM »
It’s coming along very nicely Nino. Everything looks like new.

Offline DSB

  • Trade Count: (0)
  • ******
  • High Score Initials:
  • Forum Posts:
  • Gold Coast
    • OMNI Electrical & Data
Re: Bally Dr Who High End Restoration
« Reply #22 on: January 11, 2019, 09:07:42 PM »
Very nice. This is going to come out looking awesome

Offline Maycle

  • Trade Count: (0)
  • *
  • Forum Posts:
  • Burkina Faso
Bally Dr Who High End Restoration
« Reply #23 on: February 05, 2019, 03:18:34 AM »
Looks great Our Falcon is undergoing the same restoration process; will post pics soon.
John

Offline Strangeways

  • Pinball Restoration is my passion
  • Administrator
  • Trade Count: (+9)
  • *****
  • High Score Initials:
  • Forum Posts:
  • Melbourne
  • ABN 68 283 634 461
    • Ride The Boney Beast
Re: Bally Dr Who High End Restoration
« Reply #24 on: February 22, 2019, 10:51:14 PM »
New Cabinet switches are installed ;


New sockets for the Dalek Topper. The LED flasher was changed as it didn't provide the effect I was looking for.


Time Expander is completed. I LOVE the red mini superbands. This assembly is by far, the most difficult feature of any game to have working 100%. For now, it looks great !


Replacing ALL the switches is imperative on all my High End Restorations, but if there is ONE switch that has to be replaced in any game - it is THIS switch - The playfield glass switch mounted on the inside of the cabinet. This switch prevents the Time Expander assembly from moving up and down while the playfield glass is out.


Even the Tilt mechanism is plated and rebuilt !


Here's an issue I came across with the Time Expander Assembly. The NEW reproduction cam has a BIG problem (one on the left). Let's see if anyone picks it up..  #@# #@#


The game has Starship-Fantasy Ramps installed, but the ramp entrance plastics are not part of the set. In fact, they are not reproduced at all. So I made my own.


.. and I think they look great installed !


Almost there !

Aussie Pinball - Proud to be Australia's Premier Pinball Forum

http://www.australianpinballrestorations.com.au/

http://www.rtbb.com.au/catalog/

We carry the largest range of NEW Ramps in Australia

Offline Crashramp

  • Trade Count: (+3)
  • ******
  • High Score Initials:
  • Forum Posts:
  • Albury
Re: Bally Dr Who High End Restoration
« Reply #25 on: February 23, 2019, 05:17:27 PM »
Very nice Nino and even more rewarding when you make some of the unobtainable parts yourself.

Offline Strangeways

  • Pinball Restoration is my passion
  • Administrator
  • Trade Count: (+9)
  • *****
  • High Score Initials:
  • Forum Posts:
  • Melbourne
  • ABN 68 283 634 461
    • Ride The Boney Beast
Re: Bally Dr Who High End Restoration
« Reply #26 on: February 27, 2019, 10:04:55 PM »
The new cabinet didn't have the holes drilled for the headbox bracket, so I had to use simply geometry and mathematics to line up the holes perfectly.


Once I was sure that each side was even, I drilled a pilot hole and used a woodscrew to test clearances.


Once it is adjusted perfectly, I drill and bolt on the first bolt.


Other side ;


Done !


This is a new cabinet, but I didn't mind doing the extra work as these holes etc might be different from machine to machine. Working off ONE example may not be 100%. Because this is a high end resto, I wanted it to be mm perfect. Equal distances on both sides. The brackets will never scratch the side rails !


Moving on to an anomaly I've NEVER seen on a WPC machine. As I was teting the game, the transformer was hot - too hot to leave your hand on it. This could have been attributed to anything, but I thought I'd use a simple process of elimination to work out if the problem was the primary or secondary of the transformer. Unplug the secondary plaugs and leave the machine on for 4 hours - and it was still getting hot. So it must be the primary (mains). I checked the connector jumpers and they were fine, but from experience, I looked at the input connector and the connector was mis-wired from factory ! The Orange and the white / Orange returns are meant to be in the same row - but they were not !


This would have caused the overheating. But checking the circuit diagram, no damage other than heat would have been experienced. So I re pinned the connector ;


Tested the machine for 8 hours continuous and it was warm to touch. Very happy !


This COULD have been a LONG session of trouble shooting, but thankfully - it was solved quickly. One of several bizarre issues with the game and NEW replacement parts. No one has worked out the issue with the cam on the previous update  !@#

Aussie Pinball - Proud to be Australia's Premier Pinball Forum

http://www.australianpinballrestorations.com.au/

http://www.rtbb.com.au/catalog/

We carry the largest range of NEW Ramps in Australia

Offline Strangeways

  • Pinball Restoration is my passion
  • Administrator
  • Trade Count: (+9)
  • *****
  • High Score Initials:
  • Forum Posts:
  • Melbourne
  • ABN 68 283 634 461
    • Ride The Boney Beast
Re: Bally Dr Who High End Restoration
« Reply #27 on: February 27, 2019, 11:02:02 PM »
Now that the Power issues are solved, it is time to test the game.


The playfield is simply incredible. Tim did a great job. NEW ramps really helped give the game that finishing touch !


The ramp covers I made myself - Very pleased with them !


Time Expander in the "home" position. Genuine Cliffy protectors !


Upper playfield


Messing around with Ablaze Super Brights - and I think it looks EXCELLENT !


Almost done !
Aussie Pinball - Proud to be Australia's Premier Pinball Forum

http://www.australianpinballrestorations.com.au/

http://www.rtbb.com.au/catalog/

We carry the largest range of NEW Ramps in Australia

Offline ddstoys

  • Trade Count: (+23)
  • ******
  • High Score Initials:
  • Forum Posts:
  • Geelong
Re: Bally Dr Who High End Restoration
« Reply #28 on: February 28, 2019, 08:30:41 AM »
Oh wow there’s pop bumper up the top right corner.   Those crystal clear ramps make a difference


Sent from my iPhone using Tapatalk

Offline pinballheaven

  • Trade Count: (+3)
  • *****
  • Forum Posts:
  • Melbourne
Re: Bally Dr Who High End Restoration
« Reply #29 on: February 28, 2019, 01:59:11 PM »
Great work and great game ^^^