Author Topic: Atari Superman restore  (Read 5822 times)

0 Members and 1 Guest are viewing this topic.

Offline Mr Pinbologist

  • Trade Count: (+5)
  • ******
  • High Score Initials:
  • Forum Posts:
  • Wauchope NSW
Atari Superman restore
« on: March 19, 2019, 11:02:50 PM »
Hi guys, been a while since i've posted any restore threads so i thought i'd share some of the progress pics from one of several games i've been working on for the last six months..


This Atari Superman was dropped off to me in July last year.. completely out of the blue, didn't even know i was getting it!! I was already working on a Wms Little Chief for the owner at the time, and i thought he was calling in one Sunday to check on its progress! Then he informed me he had bought another pin and want me to take a look at it.. next thing i knew we were unloading this Superman out of his vehicle.


Having had no previous experience with Atari pins, I had a couple of months earlier advised him against buying anything Atari if it didn't work, he assured me this one DID play.. just had no sound, so we set it up and confirmed that it did indeed play.


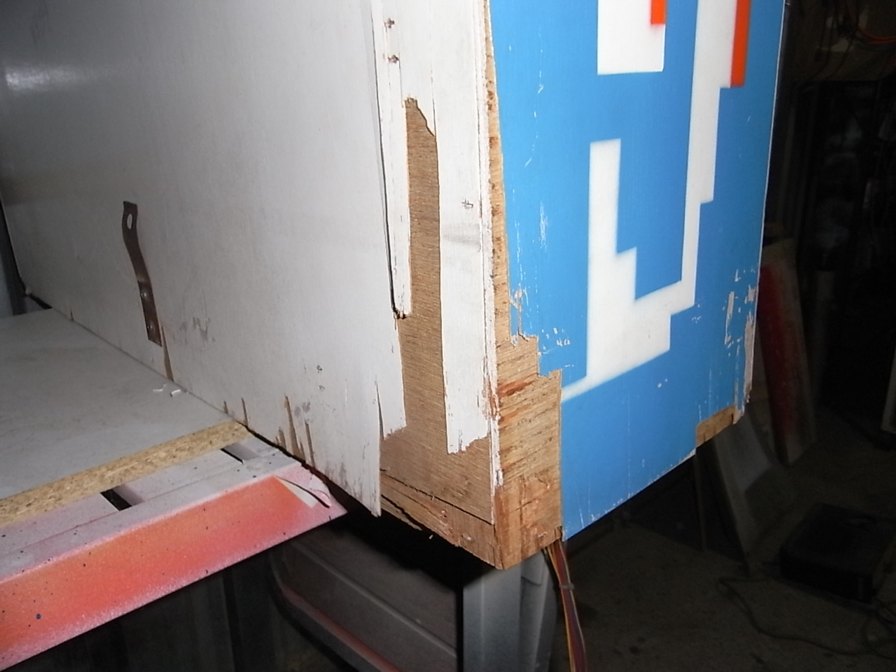
As can be seen in the pics it was in ROUGH shape!! lots of badly delaminated ply on the cabinet and backbox, and the playfield had some wear and every insert was loose.. so to cut a long story short.. this 'quick fix' turned into a full restoration!


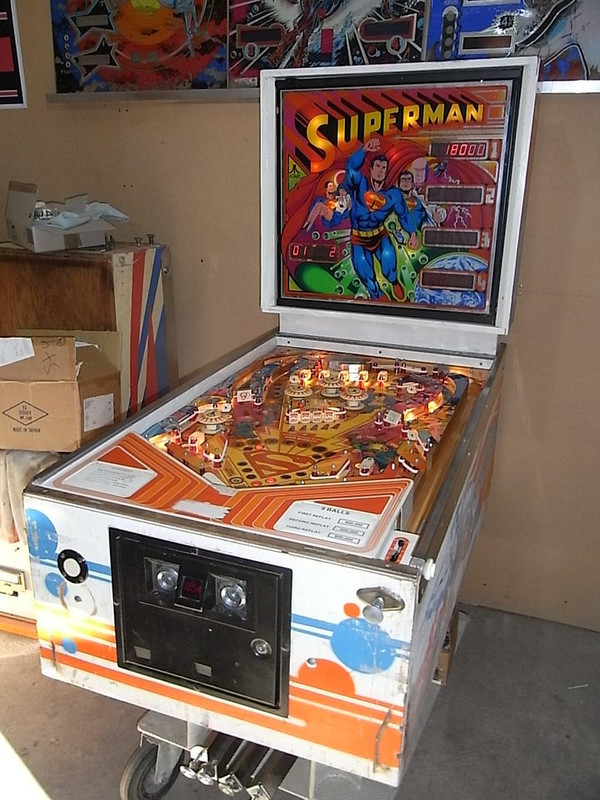
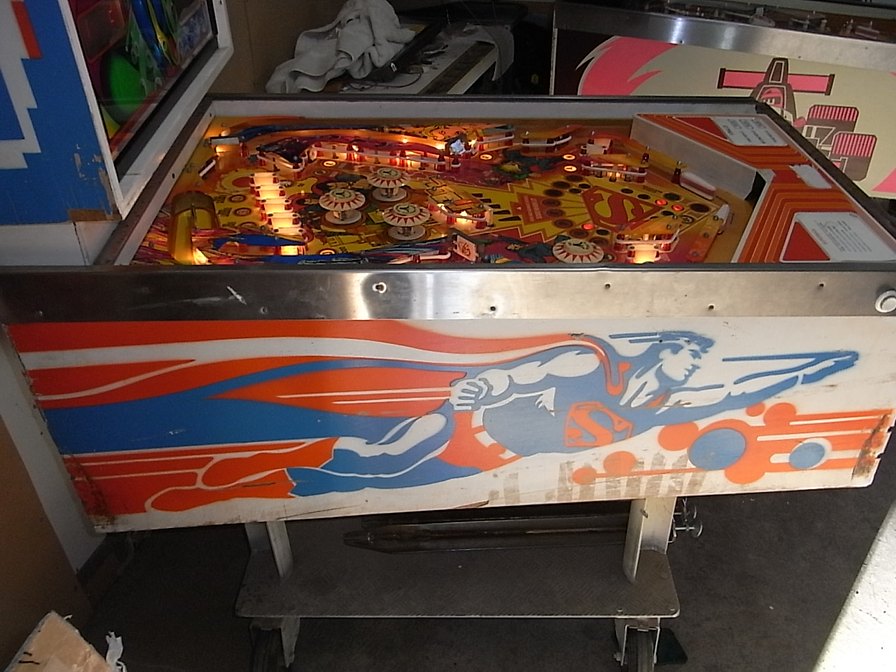
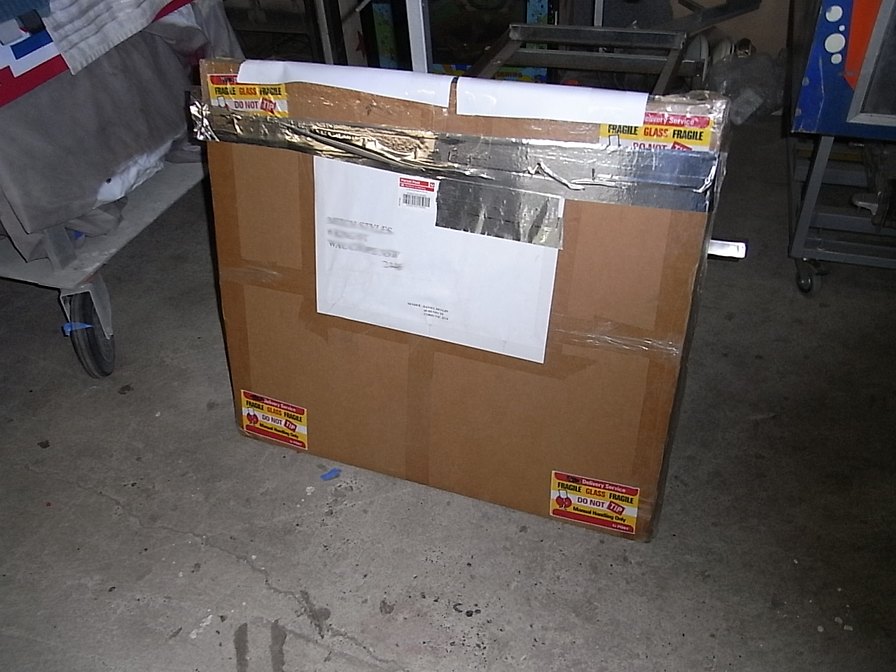
Some pics of the game as received;


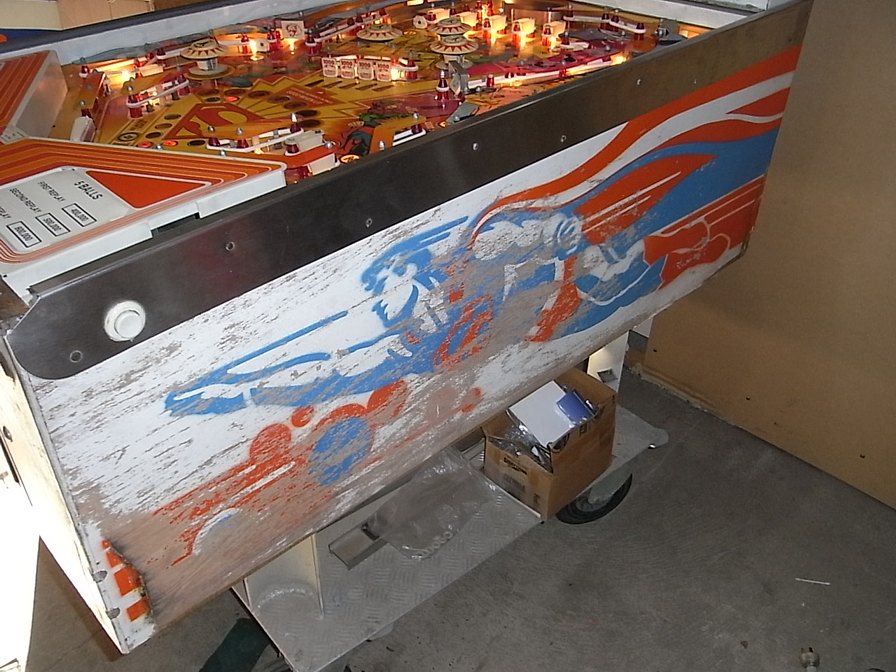
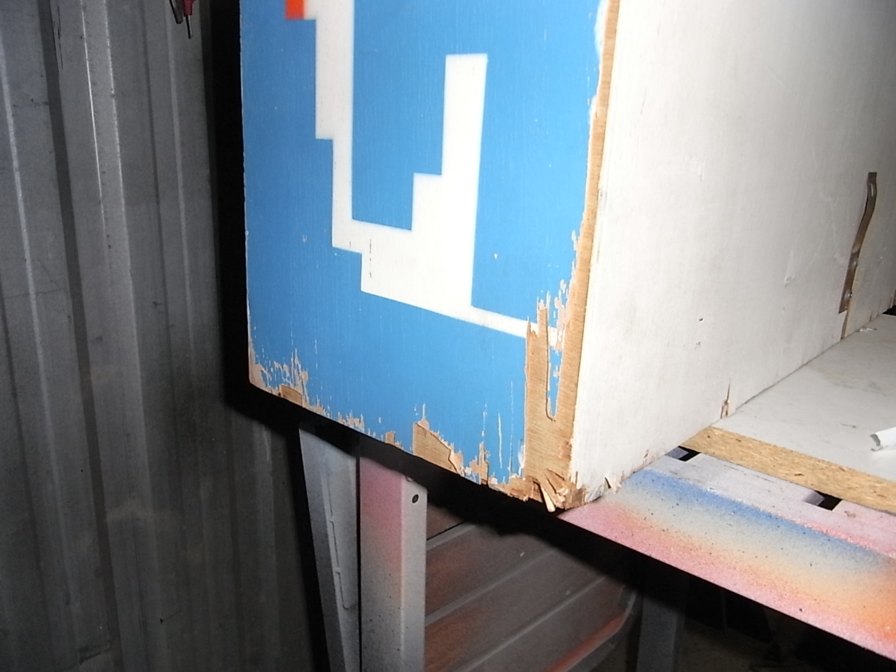
Some of the delaminated ply.. in places it was literally falling apart!!


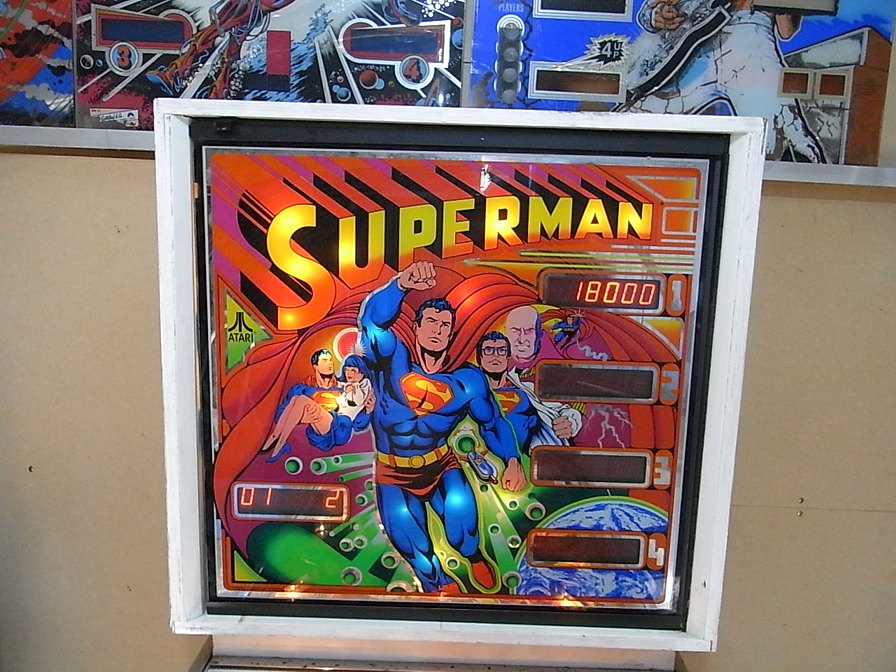
Backglass is in nice shape!!


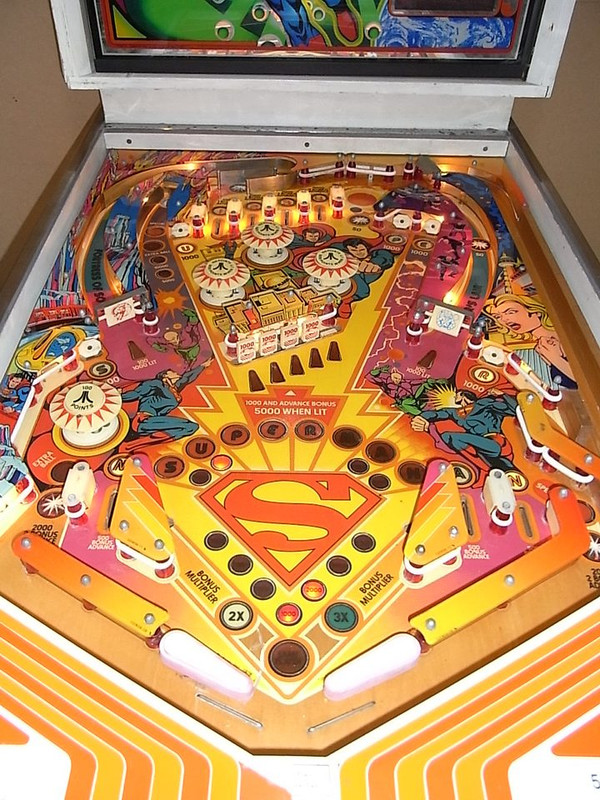
Playfield; Overall not too bad, a couple of small wear spots, ALL of the inserts were loose and it had a full mylar over the whole playfield.. which had worn through around a lot of the inserts.


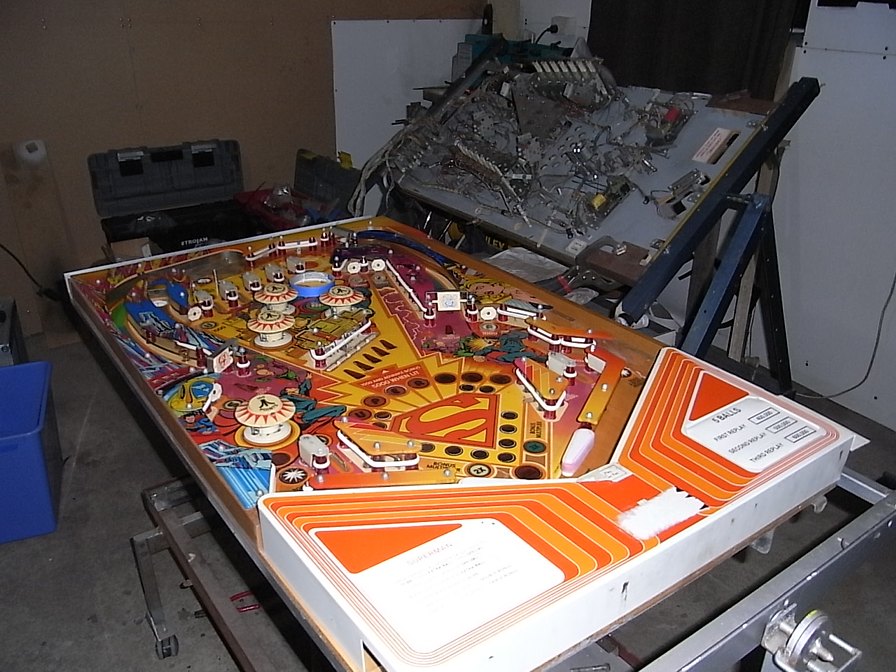
Fast forward a couple of months, the work started; the teardown begins  :D
Playfield out and mounted into a rotisserie


Backglass removed and put aside wrapped in cardboard for safe keeping


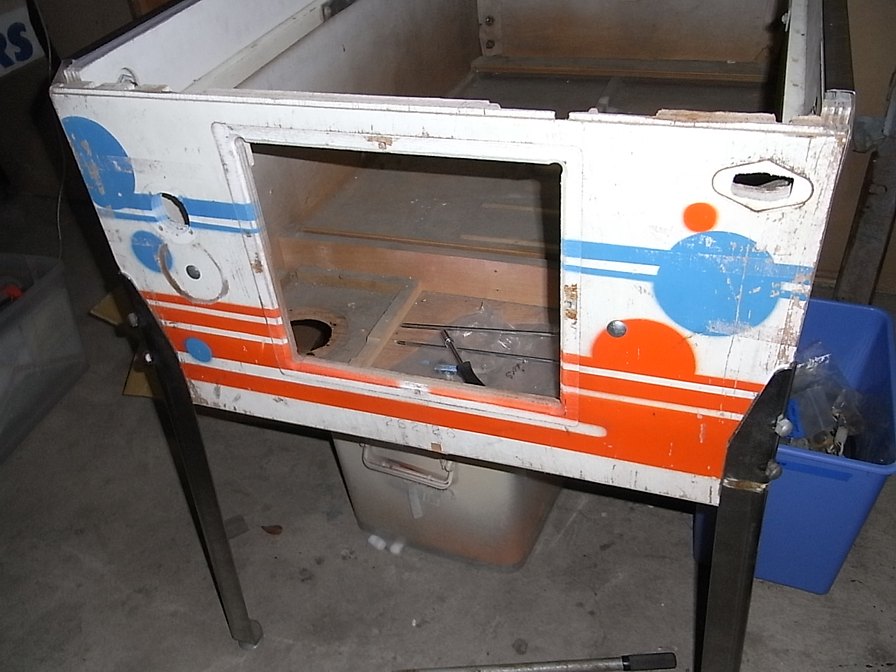
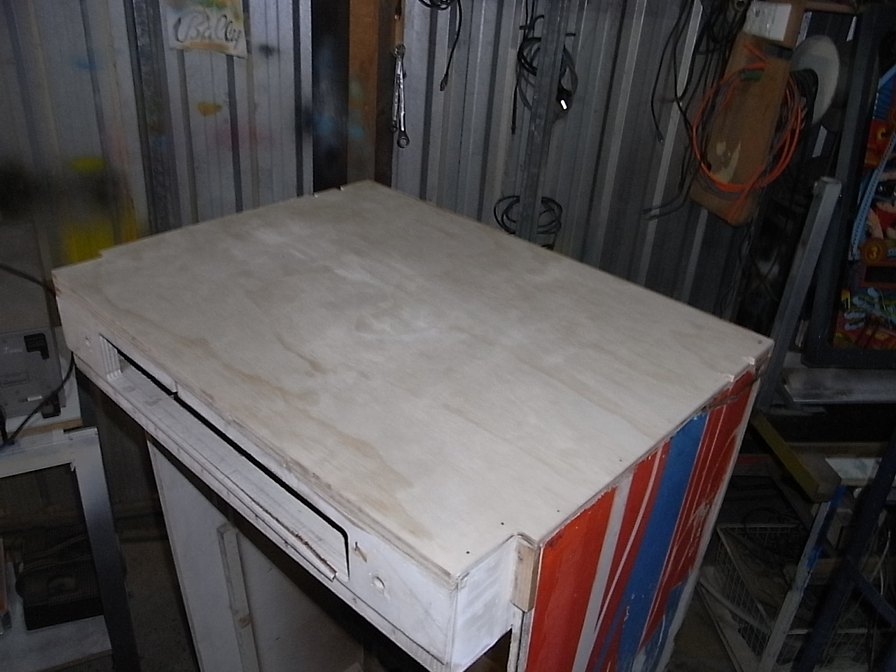
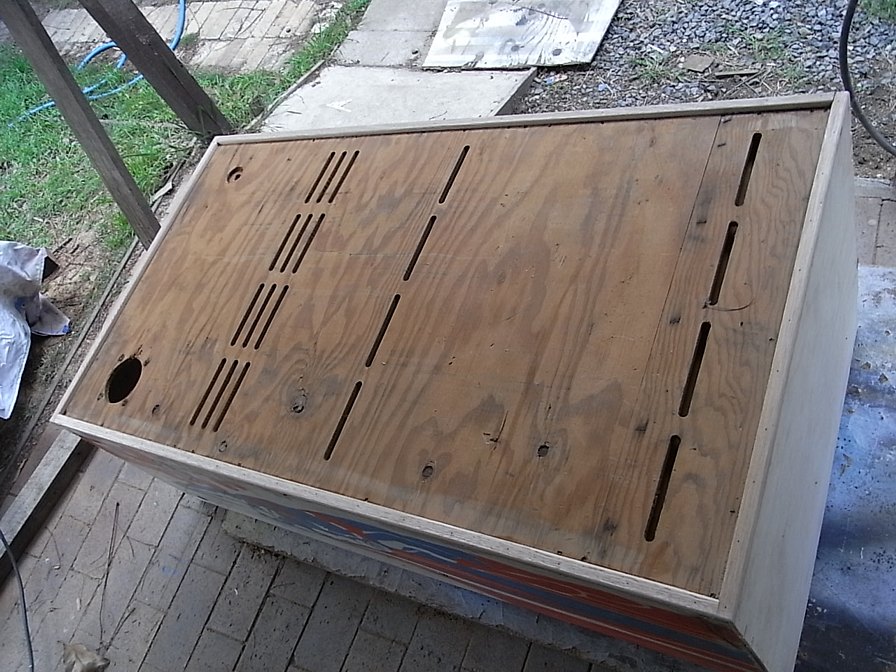
I started with the cabinet repairs, the back panel was falling apart so it was replaced with new plywood.
First though i glued and clamped the lifting ply on the sides


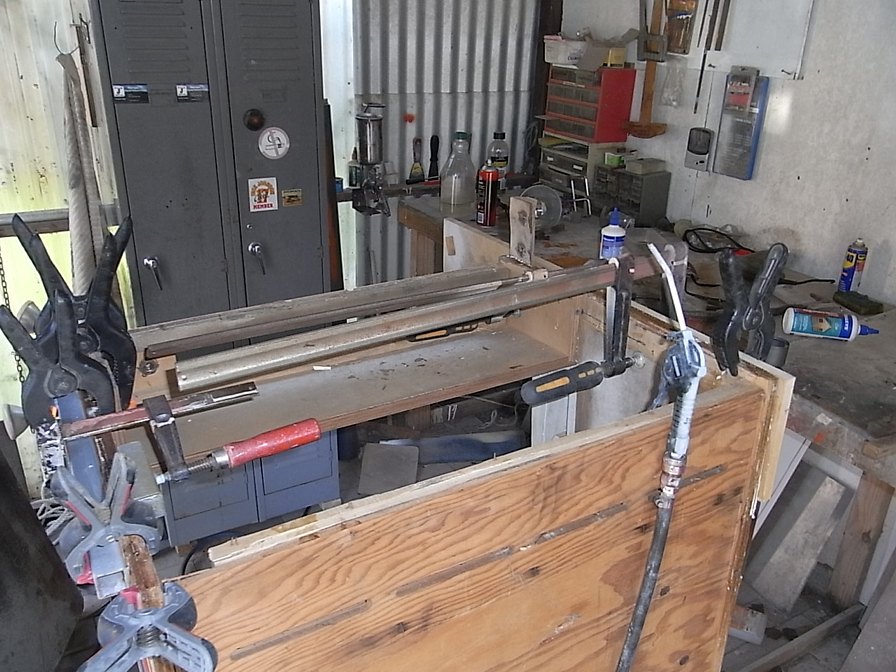
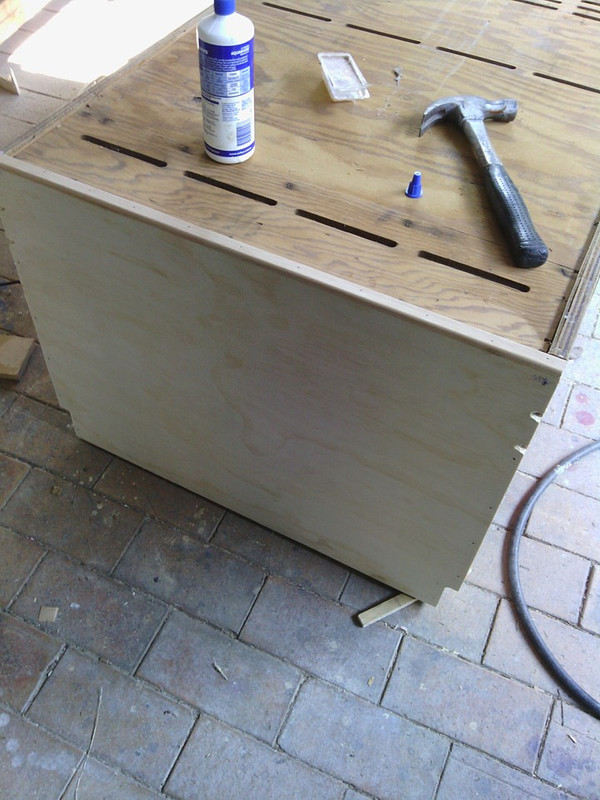
I added Tassie Oak strips on all bottom edges to repair the torn up edges of the cab sides and front and back.


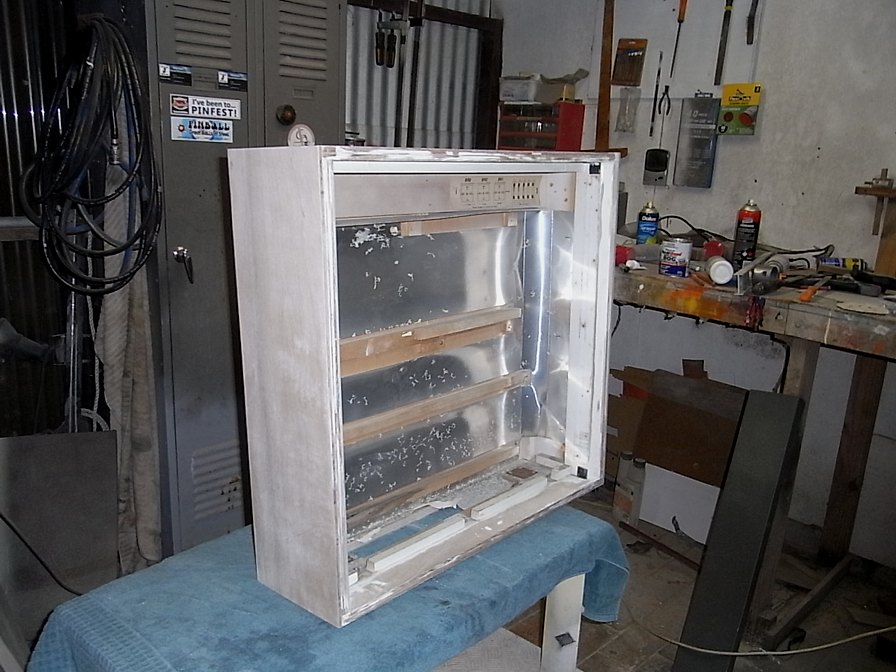
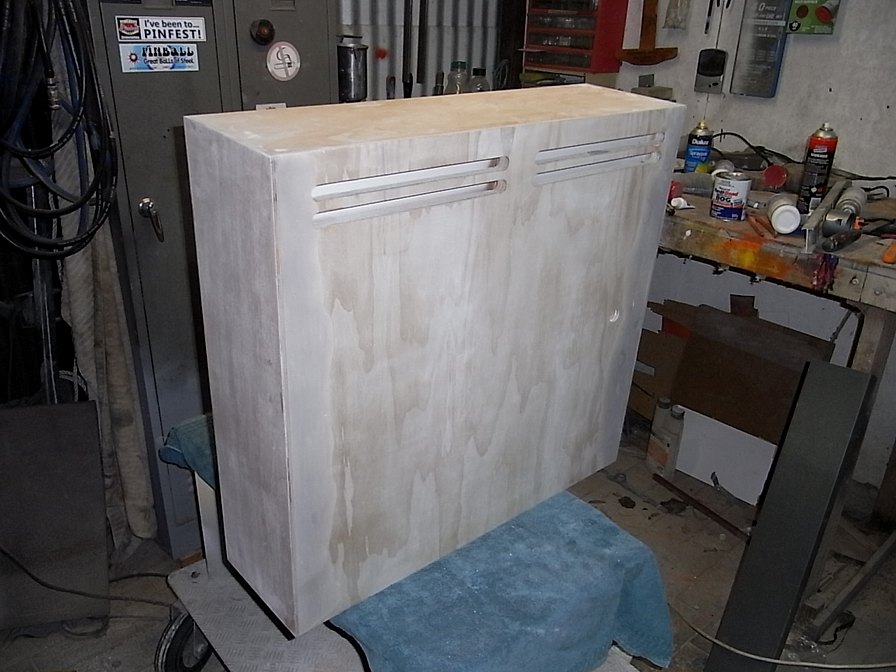
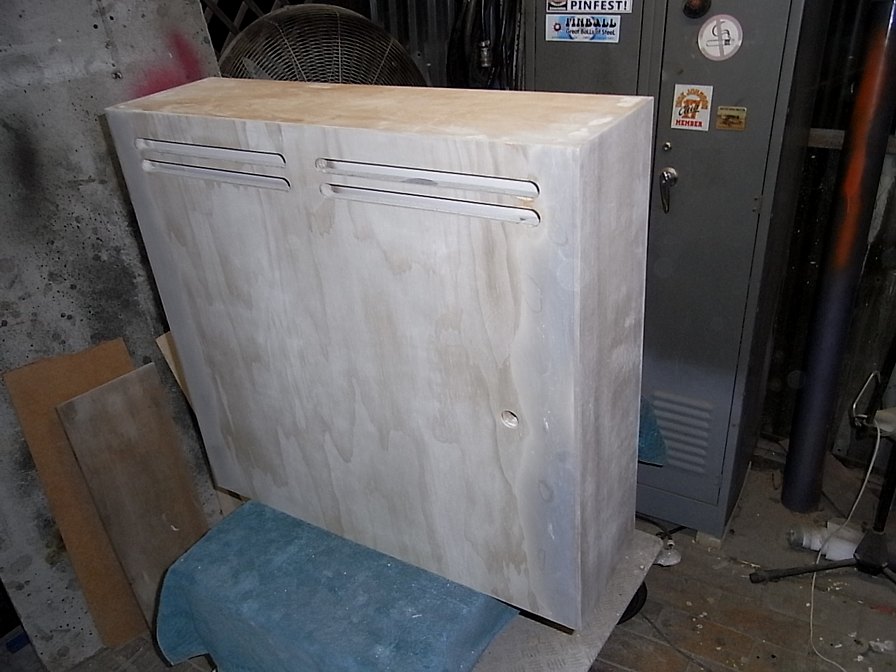
Backbox repairs; lots of gluing of lifting ply  ^&^


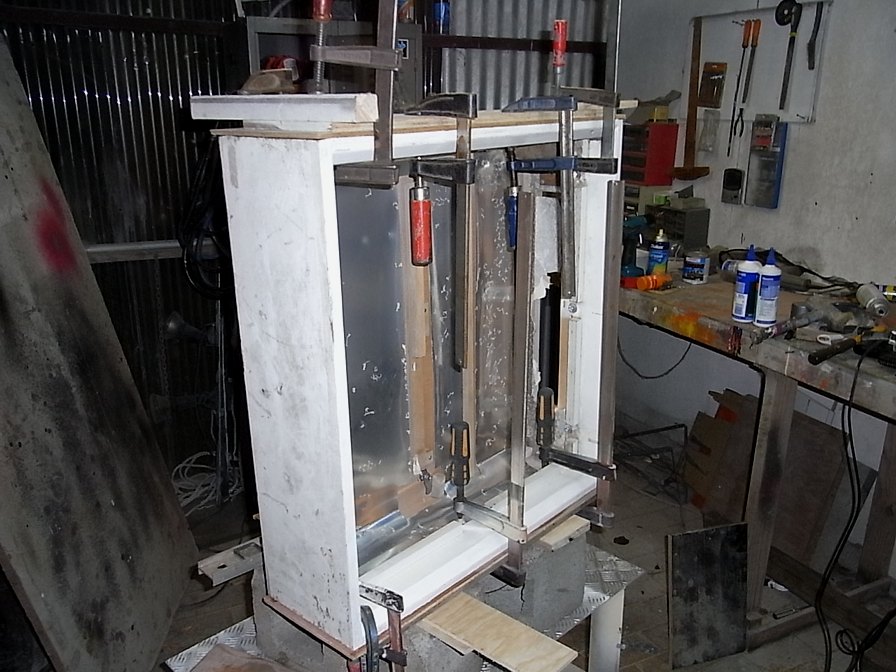
For the sides, i ended up removing the top layers of ply (6mm) and cutting and gluing 6mm marine ply to repair the sides.. same was done to the back panel as well!


Offline Mr Pinbologist

  • Trade Count: (+5)
  • ******
  • High Score Initials:
  • Forum Posts:
  • Wauchope NSW
Re: Atari Superman restore
« Reply #1 on: March 19, 2019, 11:20:47 PM »
First primer coats after all repairs had been done!


Fast forward a couple of weeks, final primer coats after all minor flaws were done .. and there were HEAPS of problems to deal with to get it to this stage  ^&^


White base coat applied!


Stenciling progress.. same process as used for just about every cab i've ever done, stencils made from tracings of the cab/backbox


Final results...


Offline Mr Pinbologist

  • Trade Count: (+5)
  • ******
  • High Score Initials:
  • Forum Posts:
  • Wauchope NSW
Re: Atari Superman restore
« Reply #2 on: March 19, 2019, 11:56:48 PM »
Playfield; mylar removed.. this part always worries me! A little bit of paint lift to deal with.. not too bad luckily.


Damaged areas filled where needed before touchups.. my apologies for the lack of detailed pics  @.@


White areas under the plastics redone


Nearly done... starting to look good again!!


Mylar applied


Offline Mr Pinbologist

  • Trade Count: (+5)
  • ******
  • High Score Initials:
  • Forum Posts:
  • Wauchope NSW
Re: Atari Superman restore
« Reply #3 on: March 20, 2019, 12:10:08 AM »
Reassembly.. the FUN part  :D


Mechanical assemblies all fully rebuilt of course! Some of them required fairly extensive repairs.. in the form of welding!
One of the slingshot brackets had a spot weld let go so it needed to be welded solid again


Offline ddstoys

  • Trade Count: (+23)
  • ******
  • High Score Initials:
  • Forum Posts:
  • Geelong
Re: Atari Superman restore
« Reply #4 on: March 20, 2019, 02:16:10 AM »
Stunning mate I love your work


Sent from my iPhone using Tapatalk

Offline Crashramp

  • Trade Count: (+3)
  • ******
  • High Score Initials:
  • Forum Posts:
  • Albury
Re: Atari Superman restore
« Reply #5 on: March 20, 2019, 07:27:11 AM »
Great work, you’ve really given it a new life.

Offline Mr Pinbologist

  • Trade Count: (+5)
  • ******
  • High Score Initials:
  • Forum Posts:
  • Wauchope NSW
Re: Atari Superman restore
« Reply #6 on: March 20, 2019, 09:27:59 AM »
More pics; Drop target refurbishing;


The targets were not resetting properly due to a badly worn hinge pivot hole


The worn out hole was welded over and recut to repair.


Targets were cleaned up, worn art touched up by hand and mylared to prevent future wear.


Coin door was stripped and repainted in as close to the original finish as possible


The fuse panel from inside the cabinet was in horrible shape and i couldn't bring myself to refit it in that shape! So it was stripped, de-rusted and painted and the text re-added using waterslide decals created from scans of the original text, then clearcoated... looks much better me thinks!


Before


After


Brand new side rails added as the originals were scratched and dented and looked like shit


Boards back in and fired up for the first time in six months. This is where i'm currently up to with the project. Only issue so far is about about half a dozen lamps either are out or stuck on, and they start working normally after the game has been on for about ten minutes or so.


Looking at the manual, all of the affected lamps are driven by the same 4099 8 bit latch IC so i'll have a look at replacing that IC. I ordered the ICs which arrived yesterday, so hopefully i'll have it running normally by the end of the day


Offline ktm450

  • Trade Count: (+1)
  • ******
  • High Score Initials:
  • Forum Posts:
  • Geelong, Victoria
Re: Atari Superman restore
« Reply #7 on: March 20, 2019, 12:11:00 PM »
Very nice work mate, looks awesome  ^^^

Offline pinnies4me

  • Administrator
  • Trade Count: (+5)
  • *****
  • High Score Initials:
  • Forum Posts:
  • Victoria
Re: Atari Superman restore
« Reply #8 on: March 20, 2019, 01:41:02 PM »
Absolutely stunning!! Love the power supply cleanup!
“If you wanna escape, go up to a pinball machine. There’s a magic button on the front that takes you to a world under the glass and makes the the rest of the universe disappear.”

Offline Strangeways

  • Pinball Restoration is my passion
  • Administrator
  • Trade Count: (+9)
  • *****
  • High Score Initials:
  • Forum Posts:
  • Melbourne
  • ABN 68 283 634 461
    • Ride The Boney Beast
Re: Atari Superman restore
« Reply #9 on: March 20, 2019, 09:49:45 PM »
Beautiful machine and an awesome resto so far mate. Lucky the cabinet is in such great shape. The resto I've been working on was a complete and utter disaster. I had to replace the entire side, so I'm glad you only had to deal with the back panel. Backglass is perfect - playfield is VERY nice. This will be an awesome resto when done. I can't remember a nice superman, but I like it so much I bought my own - more as a reference for the one I'm restoring. I am a bit concerned that the CPU board might give me headaches - happy yours is working ok.
Aussie Pinball - Proud to be Australia's Premier Pinball Forum

http://www.australianpinballrestorations.com.au/

http://www.rtbb.com.au/catalog/

We carry the largest range of NEW Ramps in Australia

Offline Mr Pinbologist

  • Trade Count: (+5)
  • ******
  • High Score Initials:
  • Forum Posts:
  • Wauchope NSW
Re: Atari Superman restore
« Reply #10 on: March 20, 2019, 10:12:01 PM »
Beautiful machine and an awesome resto so far mate. Lucky the cabinet is in such great shape. The resto I've been working on was a complete and utter disaster. I had to replace the entire side, so I'm glad you only had to deal with the back panel. Backglass is perfect - playfield is VERY nice. This will be an awesome resto when done. I can't remember a nice superman, but I like it so much I bought my own - more as a reference for the one I'm restoring. I am a bit concerned that the CPU board might give me headaches - happy yours is working ok.

Thanks Nino.. Damage was way worse than what i pictured in the thread, didn't get as many pictures as i should have  @.@
The pictures really didn't tell the whole story with this game (not enough pics), one side of the cabinet had about a quarter of the top layer of ply lifting and gluing wasn't possible, at one point i was going to look for some wood veneer to replace the whole top layer, in the end i cut out the bad sections and filled them. And that side was the one with the least visible damage.. the side with the artwork all but gone was actually the best and needed the least amount of work!!


As i mentioned, with the backbox i removed and replaced the top 6mm of the sides, and 3mm of the outer layers of the back panel, glued, then cut out the lock holes and ventilation slots with a router. This was EASILY the WORST cabinet i've ever had to restore.. the ply Atari used really was CRAP and i'd be a happy camper if i never had to restore another Atari cab  ^&^


And yes i was lucky with the boards with this game and really dodged a bullet with the MPU.. The ONLY reason i took this game on was because it actually worked! though i did have to do some work on the driver board to resolve an issue where about eight lamps were not working (one of the 4099 latch ICs was bad.. sorted that out today).


Only other issue is a bad display with some segments missing.. not much i can do about that as its in the LEDs themselves and not the board. Customer is going to have to try to find a spare display (don't much like his chances unless someone reading this has one)
« Last Edit: March 20, 2019, 10:22:41 PM by Mr Pinbologist »

Offline Mr Pinbologist

  • Trade Count: (+5)
  • ******
  • High Score Initials:
  • Forum Posts:
  • Wauchope NSW
Re: Atari Superman restore
« Reply #11 on: May 22, 2019, 09:54:00 PM »
Final Update; The game is now complete having had all of the remaining work done and final testing and fine tuning done  $#$


As mentioned previously i had several lamps out on the playfield, all controlled by one IC (4099 latch IC), replacing that one IC got all of the affected lamps working correctly.


While the board was out i decided to replace all of the headers on the driver board AND the MPU, as they were horrible looking and brittle (one actually broke while straightening it)! MPU board got most of the electrolytic capacitors replaced, The main supply cap in particular (the large one on the left) was bad causing flickering displays and measured high resistance on my ESR meter.


ALL of the G.I lamps were replaced with LEDs, as requested by the customer... good call as the game looks awesome with them... backglass really POPS now!! I chose to use warm white LEDs, and added some blinker LEDs behind the name on the backglass.


The customer is absolutely stoked with the final result, he's been and seen/played the game and LOVES it! Now he just needs to pick it up!!


Offline ddstoys

  • Trade Count: (+23)
  • ******
  • High Score Initials:
  • Forum Posts:
  • Geelong
Re: Atari Superman restore
« Reply #12 on: May 23, 2019, 12:56:03 AM »
Beautiful as always mitch


Sent from my iPhone using Tapatalk

Offline pinnies4me

  • Administrator
  • Trade Count: (+5)
  • *****
  • High Score Initials:
  • Forum Posts:
  • Victoria
Re: Atari Superman restore
« Reply #13 on: May 23, 2019, 07:39:03 AM »
That is awesome, absolutely beautiful.
“If you wanna escape, go up to a pinball machine. There’s a magic button on the front that takes you to a world under the glass and makes the the rest of the universe disappear.”