Author Topic: Stern Quicksilver High End Restoration  (Read 9062 times)

0 Members and 1 Guest are viewing this topic.

Offline Strangeways

  • Pinball Restoration is my passion
  • Administrator
  • Trade Count: (+9)
  • *****
  • High Score Initials:
  • Forum Posts:
  • Melbourne
  • ABN 68 283 634 461
    • Ride The Boney Beast
Stern Quicksilver High End Restoration
« on: April 13, 2020, 03:57:38 PM »
This is another restoration started a while ago, but not documented. Now that I have time up my sleeve, there will be a lot of restos posted. It will be a LONG and detailed thread.

Objective

To restore the game as a NIB (Nearly In Box) machine. A High End Restoration that would involve all aspects - playfield, cabinet etc.
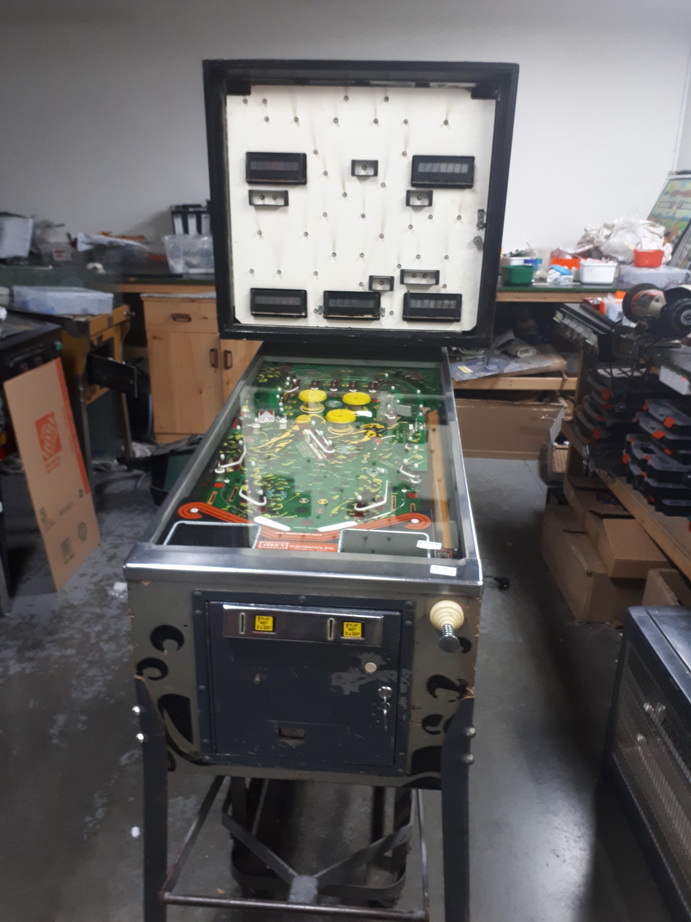
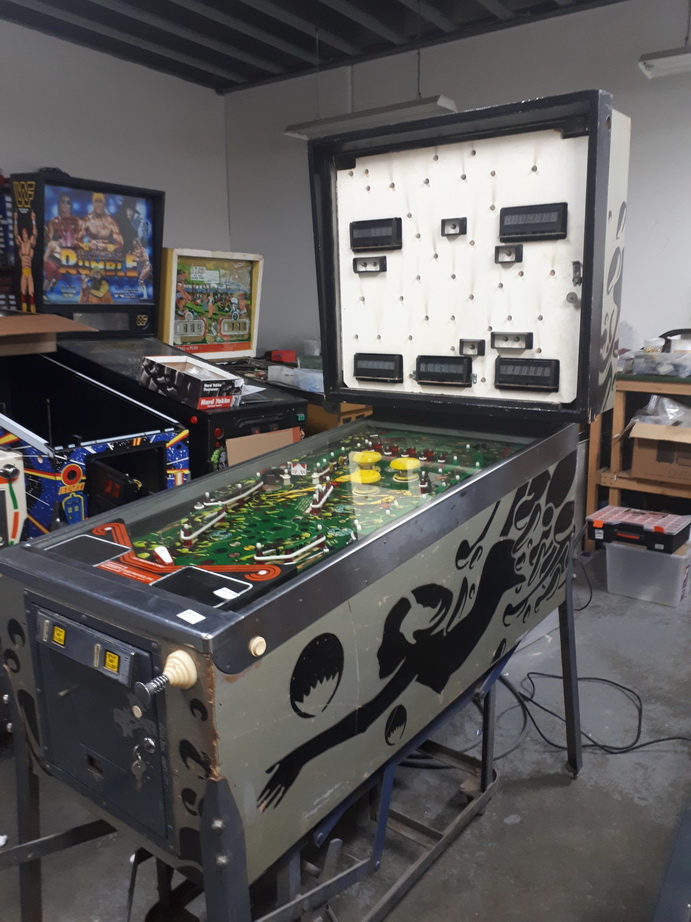
Condition Report

Starting base was reasonable for a game that was WELL played.

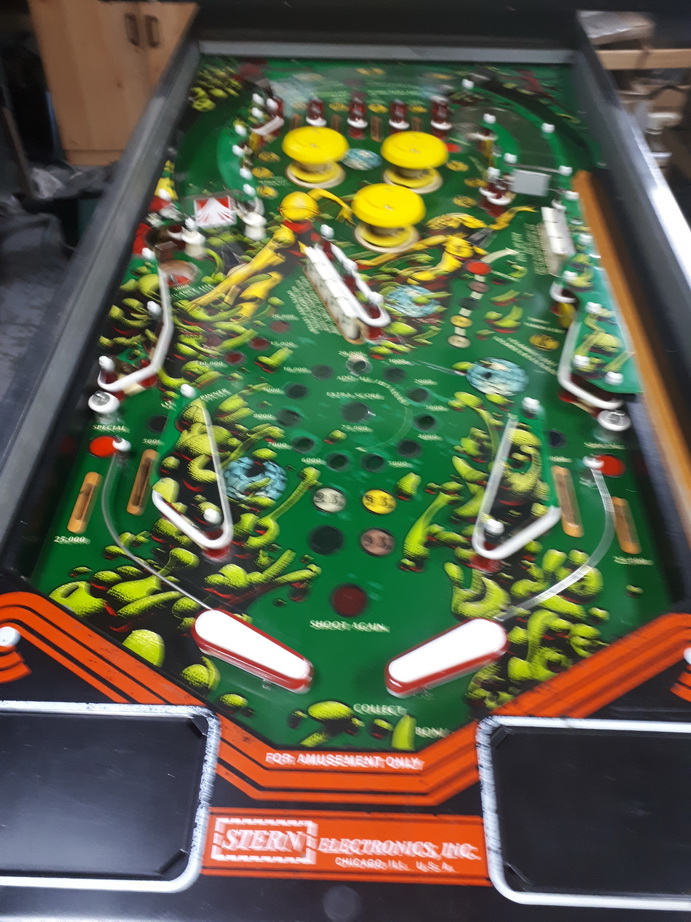
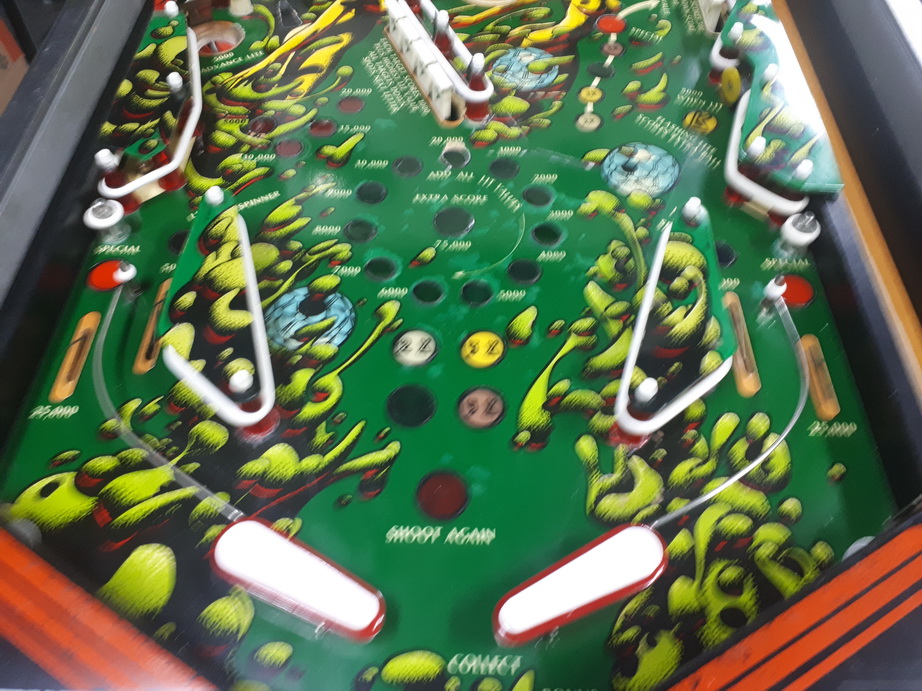
Cabinet - 5/10 - Paint was faded, minimal damage but missing the original wood "pedestal" between the head and cabinet. Timber was VERY dry and weathered.Playfield - 4/10 - Worn with a patchwork quilt of mylar and some touch ups. Ir is going to @el_timbo86 for a full treatment
Backglass - 6/10 - Presented well from the front, but it has touch ups on the rear. Hopefully CPE make a repro !
Electronics - 8/10 - Altek boards throughout. Just needs some playfield re wiring etc..

Before Photos

In the workshop, prior to commencing. The game played ok, with some faults.


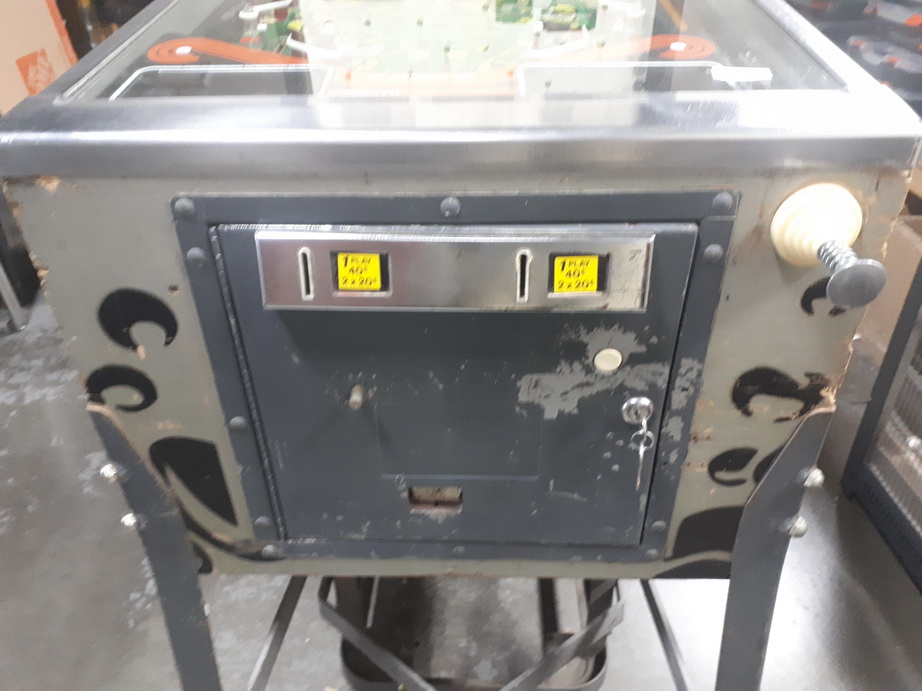
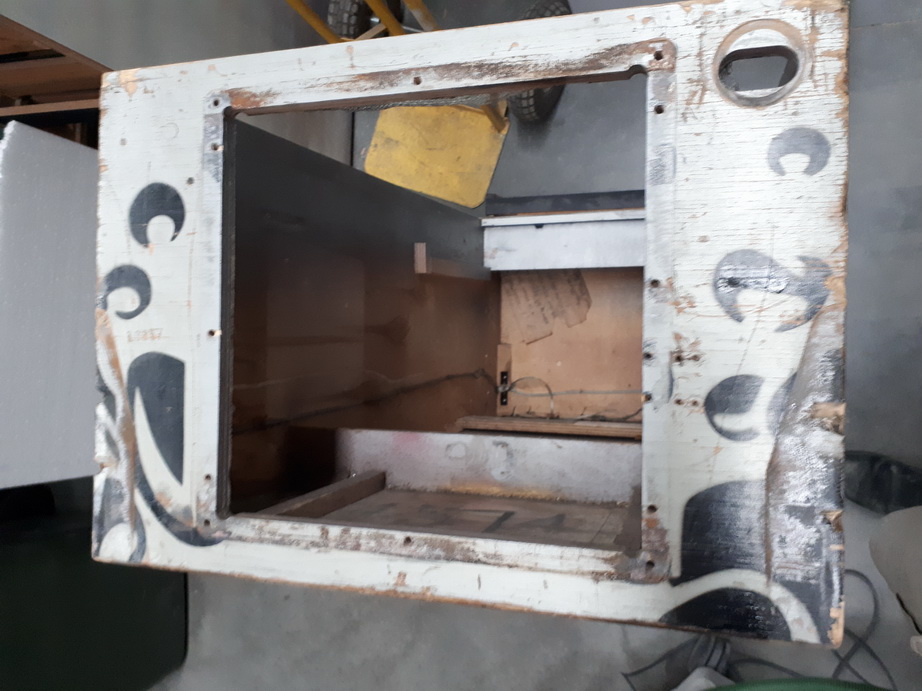
Nice security system on the door !


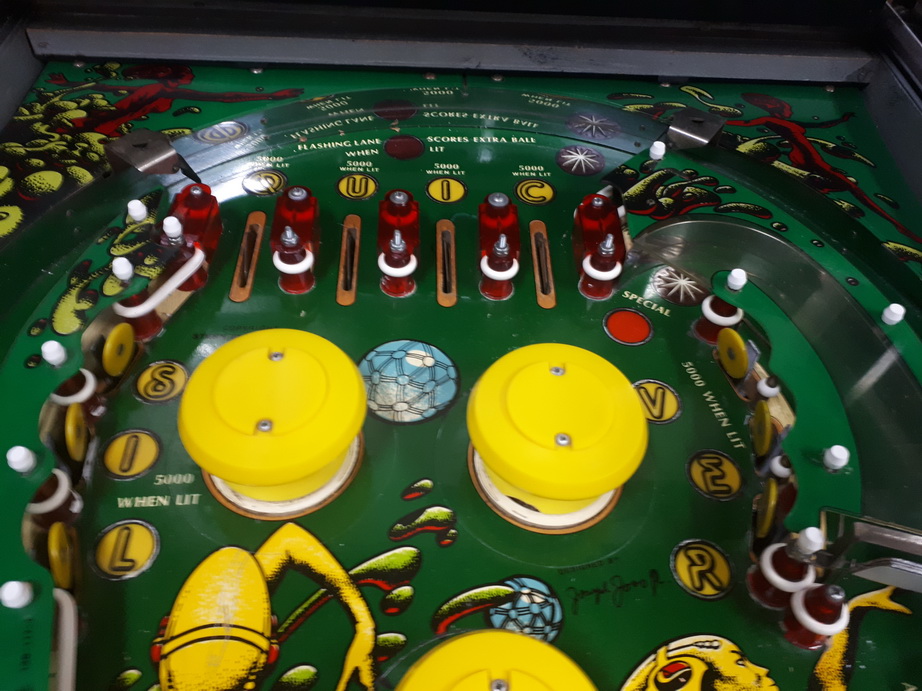
Playfield has various issues, but will be restored to "better than original" by Tim.


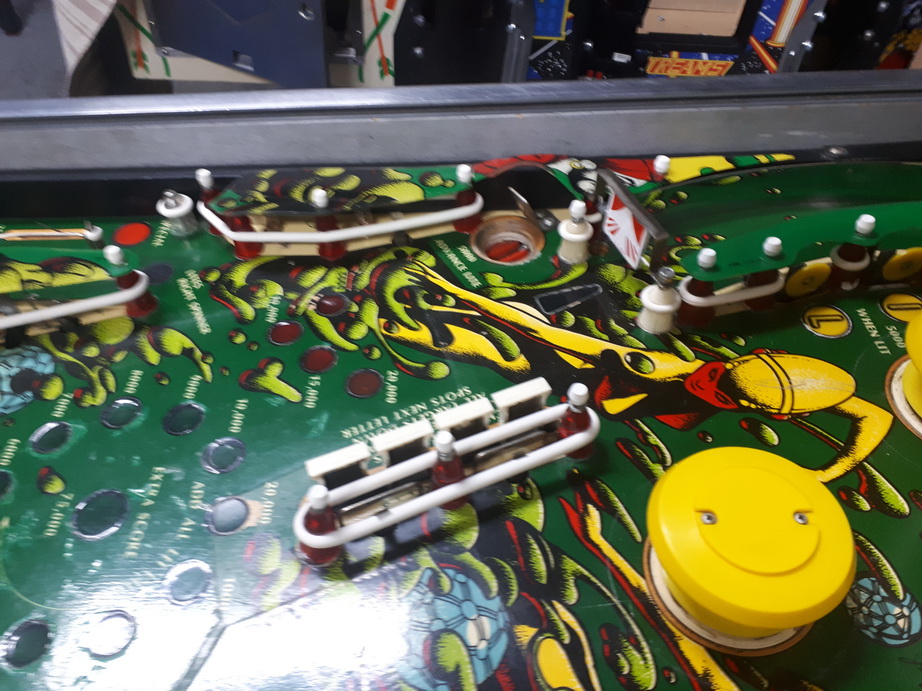
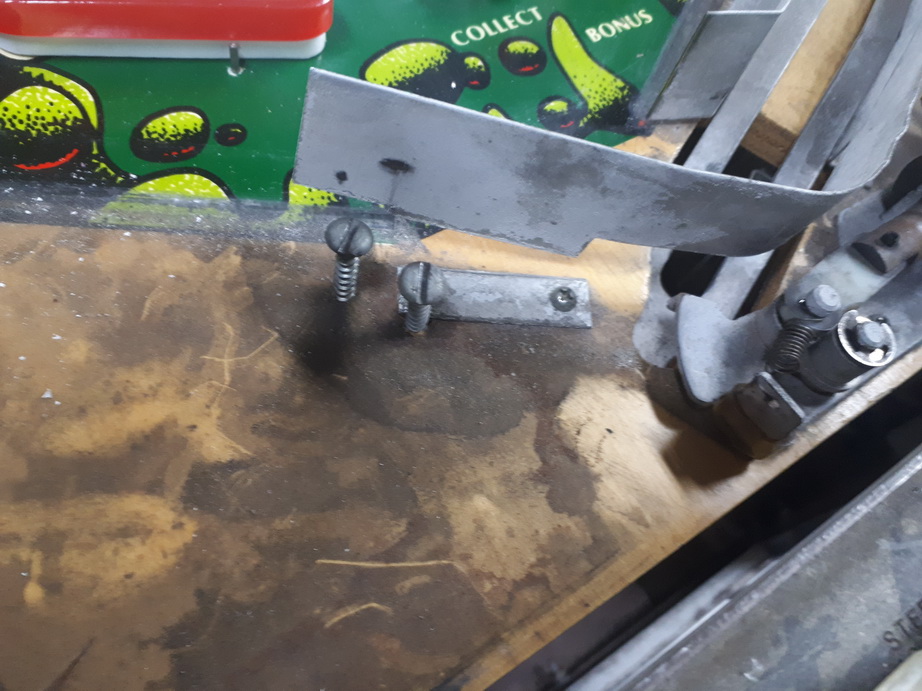
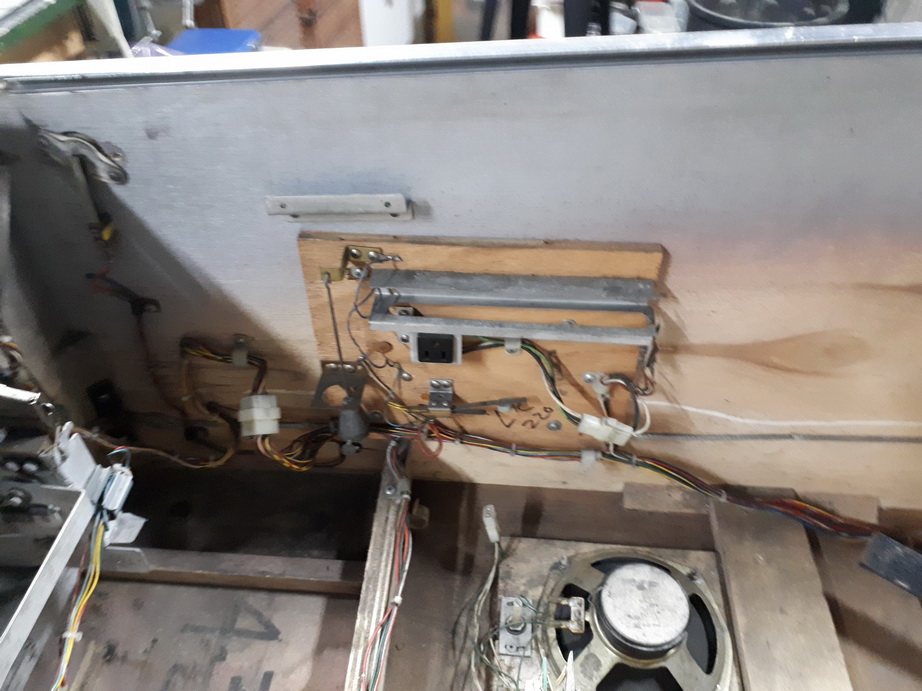
Interesting "mod" under the apron !


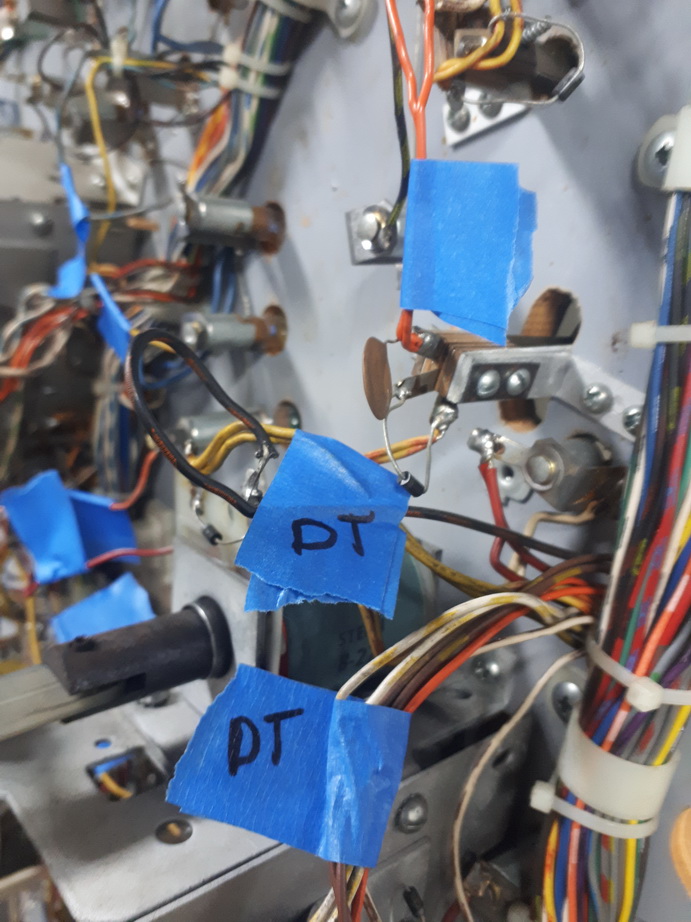
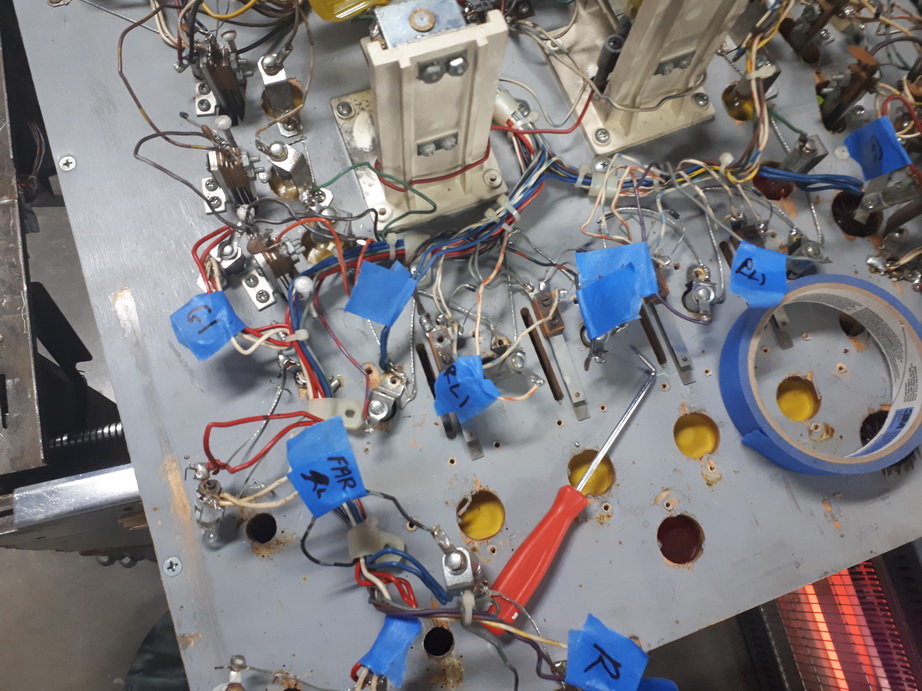
Time to label all the wiring prior to stripping the playfield.


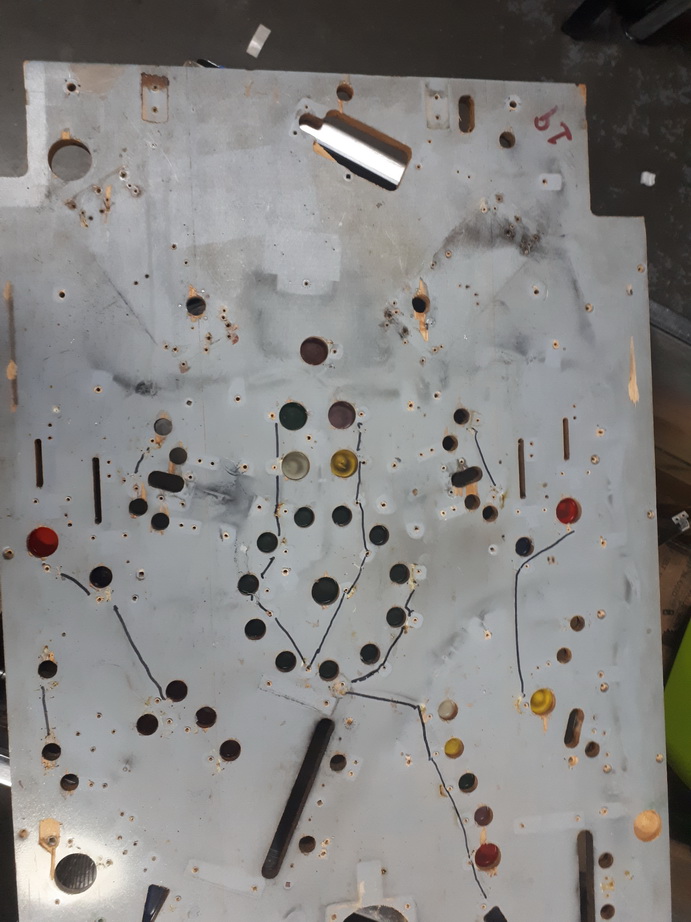
Playfield stripped and documented ;


Moving on to the cabinet. Under the legs is a sample of the correct color for the base. I take the lower cabinet to my paint guy so he can match the color AND finish. This paint is clearly a gray color, BUT, it has purple "flecks" in it that I never noticed. You can see the purple (VERY faintly) in this photo. I could have left it gray only, but adding the purple made a difference when the two colors were next to each other, and it mage the match perfect.


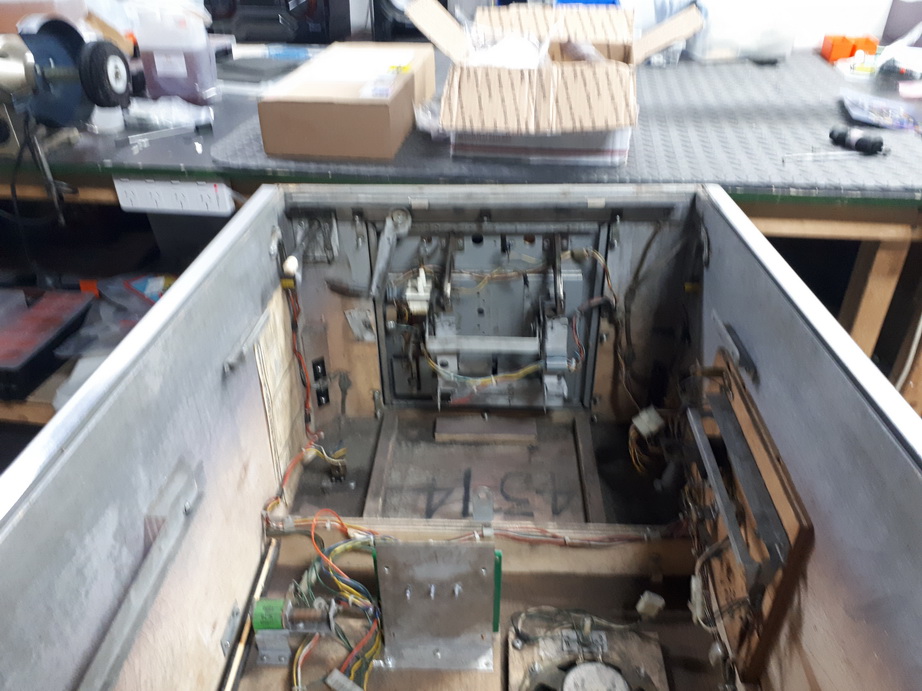
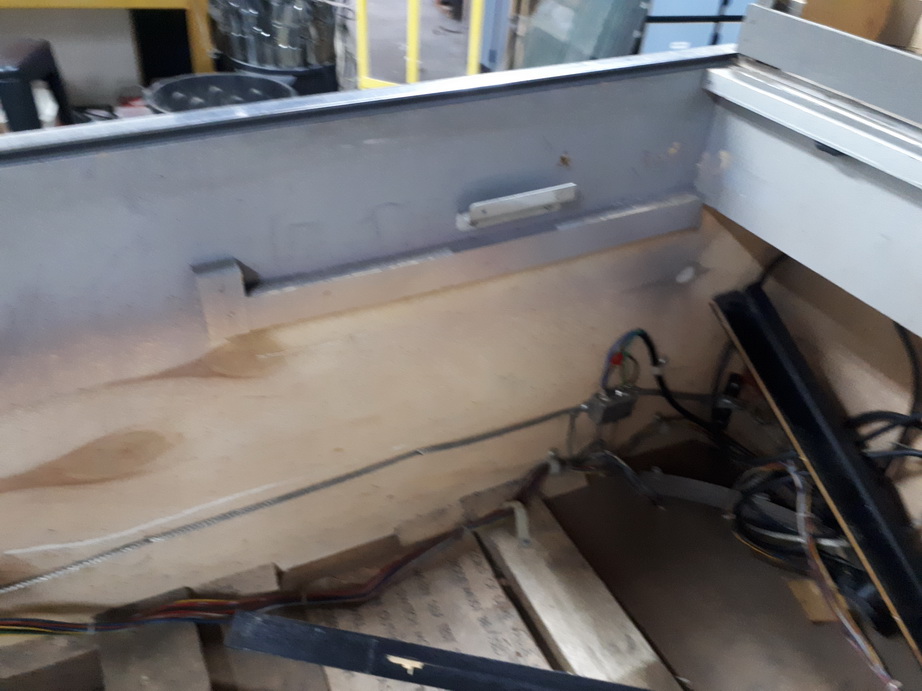
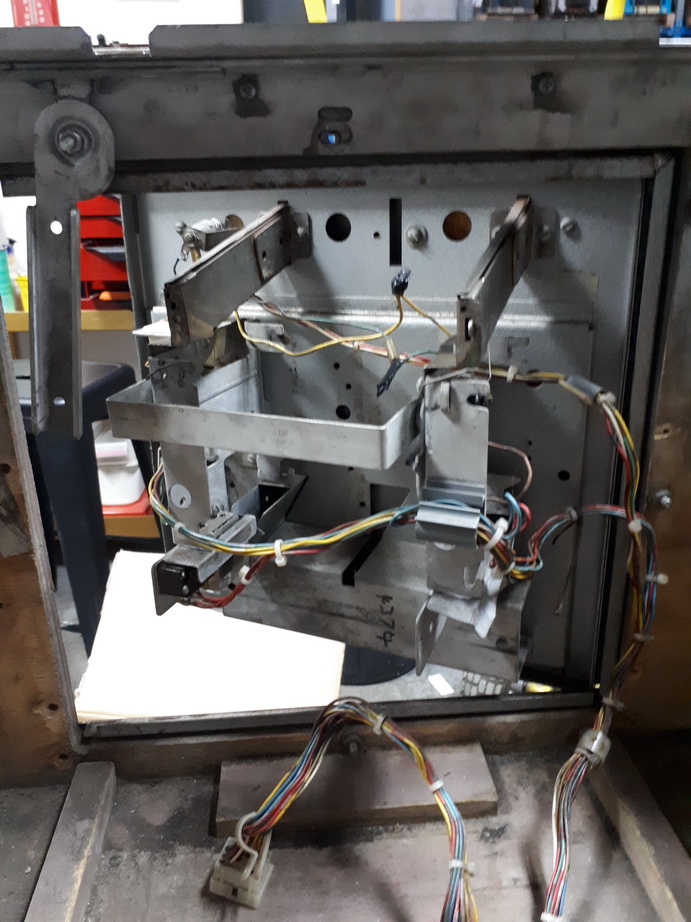
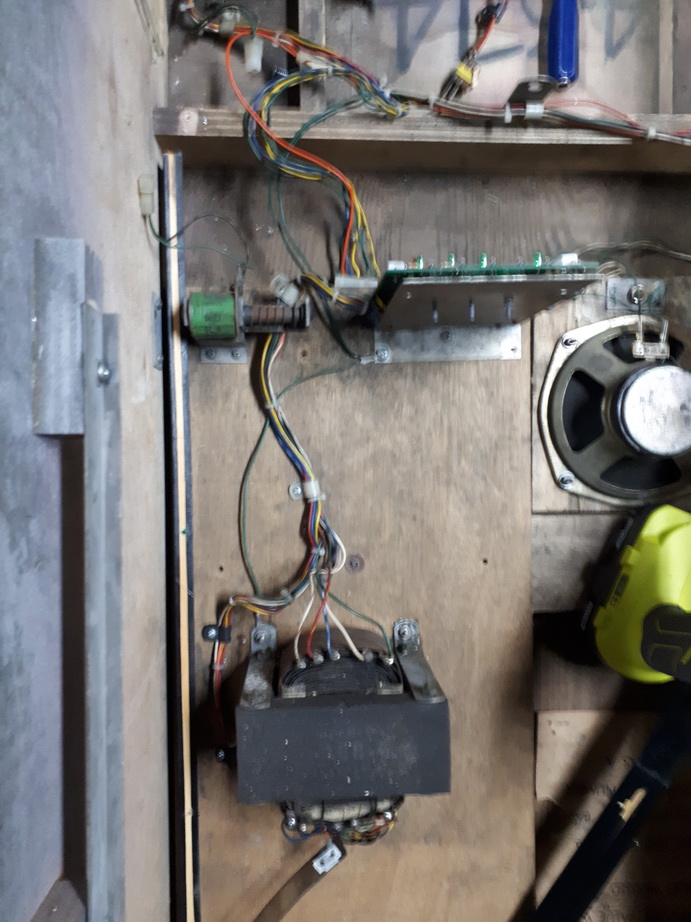
Reference photos of inside the cabinet.


Below is a photo which demonstrates the weathered or "dry" condition of the cabinet. There are parallel lines across the front which are signs of either lower grade timber or the machine was stored on a warmer climate or conditions. There's not much you can do when presented with this type of cabinet, especially when the entire cabinet is the same throughout. A replacement cabinet would be the best and more expensive option, but no one produces Stern cabinets. Another option is to have it sprayed in two pack or use heavy "highfill" enamels - which I'm not tooled up to do, nor do I have the knowledge. I dislike cabinets done with heavy highfill or two pack as they are not original in my view, but perfectly acceptable if it is for your machine. I just won't do it.

So the question would be - "Why not just fill the cabinet with filler" ? Not a good idea, in fact, this would be the worst option. This timer is still "breathing". what that means is that in different seasons and climatic conditions, the timber will still expand and contract. I could use filler and make the cabinet appear like a sheet of painted glass, but in 5 years time, the weather and conditions would see chunks of filler and paint flake off. This is a case where I employ the same methods as any cabinet, and the cabinet will appear "weathered" even after painting. It is the only option for an original restoration.


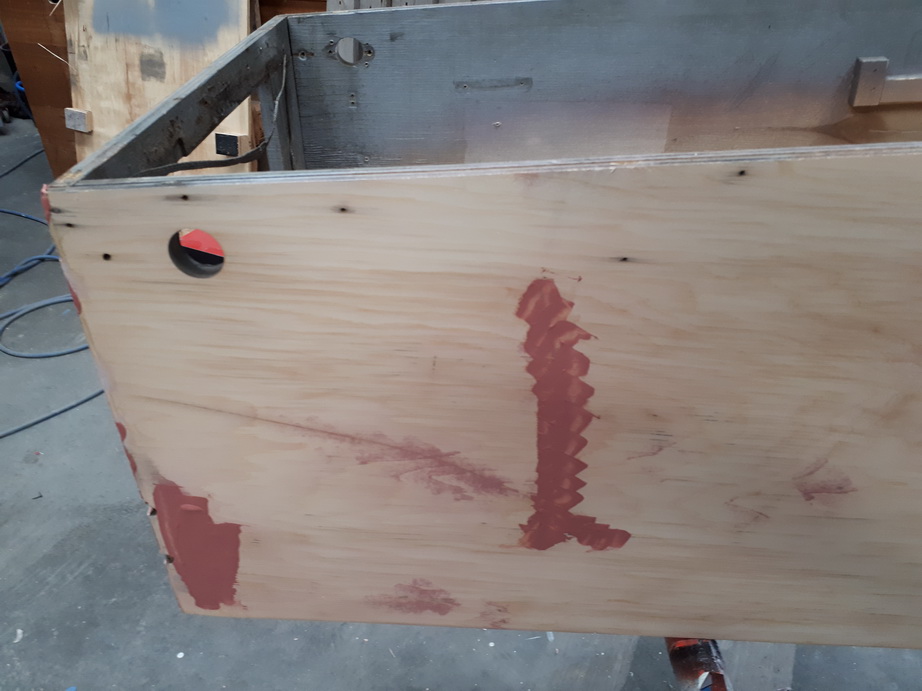
However, scratches and dints are attended to ;


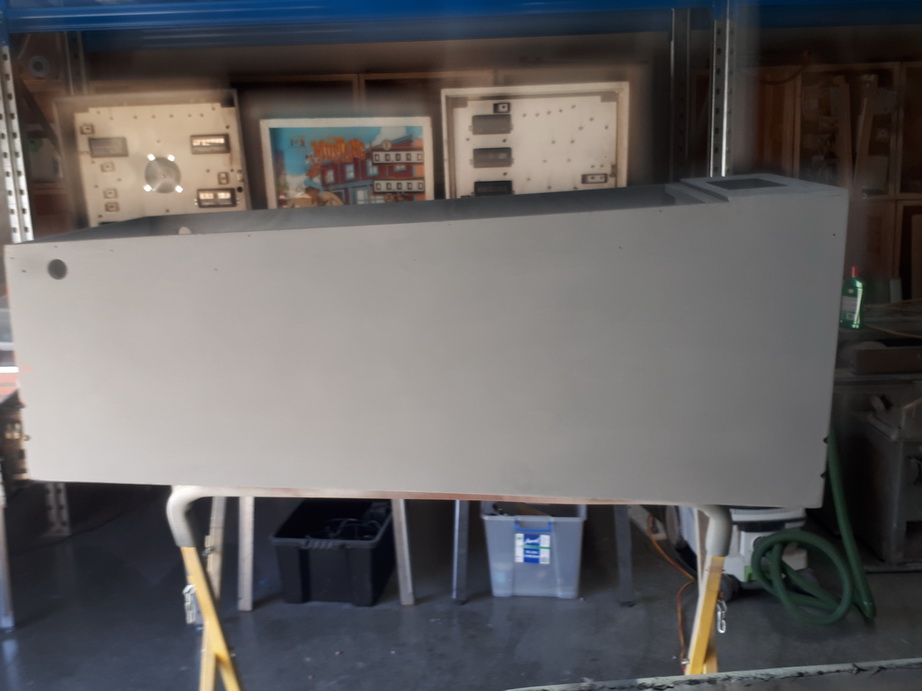
Prepping and undercoating the cabinet ;


End of part 1 !
Aussie Pinball - Proud to be Australia's Premier Pinball Forum

http://www.australianpinballrestorations.com.au/

http://www.rtbb.com.au/catalog/

We carry the largest range of NEW Ramps in Australia

Offline Ballywannabe

  • Trade Count: (0)
  • *****
  • Forum Posts:
  • Perth
Re: Stern Quicksilver High End Restoration
« Reply #1 on: April 13, 2020, 04:14:12 PM »
Will be following with interest.  One of my favourite classic Sterns - super quick and great sounds.
Don't forget Pinball Rescue has plastics for this one.
I remember the cab being almost silver back in the day.

Offline Strangeways

  • Pinball Restoration is my passion
  • Administrator
  • Trade Count: (+9)
  • *****
  • High Score Initials:
  • Forum Posts:
  • Melbourne
  • ABN 68 283 634 461
    • Ride The Boney Beast
Re: Stern Quicksilver High End Restoration
« Reply #2 on: April 13, 2020, 04:42:54 PM »
Will be following with interest.  One of my favourite classic Sterns - super quick and great sounds.
Don't forget Pinball Rescue has plastics for this one.
I remember the cab being almost silver back in the day.


I installed the Pinball Rescue Plastic set - it was of very high standard and a good color match. This machine is the fastest machine I've ever played - the the point I warned that it might need playfield plastic protectors. Hence the name "Quicksilver". It is just insane.
Aussie Pinball - Proud to be Australia's Premier Pinball Forum

http://www.australianpinballrestorations.com.au/

http://www.rtbb.com.au/catalog/

We carry the largest range of NEW Ramps in Australia

Offline Strangeways

  • Pinball Restoration is my passion
  • Administrator
  • Trade Count: (+9)
  • *****
  • High Score Initials:
  • Forum Posts:
  • Melbourne
  • ABN 68 283 634 461
    • Ride The Boney Beast
Re: Stern Quicksilver High End Restoration
« Reply #3 on: April 15, 2020, 08:16:24 PM »
This is a really easy cabinet to paint as there is only one color, so not registration issues to deal with. As mentioned in the first installment, the base coat was modified with the purple fleck, and it was much closer to the original color and finish. The black is just the one stencil. I wait 2 days for the base to cure, and no more than that - even though it is dry (touch dry in 10 minutes), I like to ensure the stencil colors bind before fully cured.


I use @Pinball Pimp Stencils, which are tricky with acrylics, but I've worked out a really good system with exceptional results. First I like to trim the stencils and play around with the alignment. I use the blue tape once I'm happy with the alignment.


Once aligned, I can start to peel back the stencil. I take my time here, making sure there are no bubbles etc - really easy if you are patient.


Don't worry about the unpeeled section rolling up a little. It has been aligned so it will be exactly straight.

Cabinet side is done and ready for the transfer removal.


The headbox is prepped and ready to go at the same time. I like to do the color at the same time as sometimes the finish can be slightly different in different conditions. Black can be hard to control if you paint in separate sessions. It is hard to "build up" a dark color.


Peel off the stencil, and here is the lower cabinet !


Headbox masked off and ready ;


The photo below came out well. You can see how light the coat of paint is. This is the first coat after the mist coat. No need to go nuts and this is the secret to using acrylics with these stencils. You can EASILY see the stencil. The thickness of the paint is thinner than the stencil. This stops any edge forming on the stencil that will cause issues when peeling the stencil. This is where you need patience and work with the paint and stencil to make it work.


"Less is More" - This is the finish a Stern cabinet should have.


Lower Cabinet ;


Very pleased with the final result. Around 10 minutes after painting, I use a soft rag to remove any edges. Cabinet is now put aside.


Aussie Pinball - Proud to be Australia's Premier Pinball Forum

http://www.australianpinballrestorations.com.au/

http://www.rtbb.com.au/catalog/

We carry the largest range of NEW Ramps in Australia

Offline ddstoys

  • Trade Count: (+23)
  • ******
  • High Score Initials:
  • Forum Posts:
  • Geelong
Re: Stern Quicksilver High End Restoration
« Reply #4 on: April 16, 2020, 05:45:41 AM »
Nice work as always


Sent from my iPhone using Tapatalk

Offline oldskool1969

  • Trade Count: (0)
  • ******
  • High Score Initials:
  • Forum Posts:
  • perth
Re: Stern Quicksilver High End Restoration
« Reply #5 on: April 16, 2020, 10:31:14 AM »
needed a bit more Zipple for the Nipple , ha ha
If it isn't broke, it isn't pinball.

Offline Strangeways

  • Pinball Restoration is my passion
  • Administrator
  • Trade Count: (+9)
  • *****
  • High Score Initials:
  • Forum Posts:
  • Melbourne
  • ABN 68 283 634 461
    • Ride The Boney Beast
Re: Stern Quicksilver High End Restoration
« Reply #6 on: April 25, 2020, 08:00:34 PM »
More cabinet progress. The door was painted, bent and had holes were there must have been a clasp with a lock. Some holes were riveted. The idea is to straighten it out, strip, repair and then paint. I decided I was going to plate the internals, as I've never plated the inside door of a Stern.


Strip the paint, remove the rivets and prep to fill those holes.


Time to straighten up the door with some clamps and timber ;


I used a metal putty that was easy to apply and file. I had to do it twice.


Prime the inside ;


First coat of Hammered finish. Much better but still needs work ;


Aussie Pinball - Proud to be Australia's Premier Pinball Forum

http://www.australianpinballrestorations.com.au/

http://www.rtbb.com.au/catalog/

We carry the largest range of NEW Ramps in Australia

Offline Strangeways

  • Pinball Restoration is my passion
  • Administrator
  • Trade Count: (+9)
  • *****
  • High Score Initials:
  • Forum Posts:
  • Melbourne
  • ABN 68 283 634 461
    • Ride The Boney Beast
Re: Stern Quicksilver High End Restoration
« Reply #7 on: April 25, 2020, 08:17:28 PM »
Time to collate all the parts that I intend on plating. These are stripped, cleaned in the ultrasonic and put aside while I prep the zinc plating bath. I had to replace the old plating bath contents as it was becoming inconsistent.


Those Flipper bases are filthy !


Various parts that need repair


I learnt a lesson with plating Stern parts - They are very lightly plated from factory, and the metal is poor quality. It is a softer metal, and the thinner the piece, the poorer the outcome. Thick pieces plated better. I most likely will not plate Stern door parts again as several parts had to be replated several times, and to strip the fresh plating was a nightmare. Thicker parts turned out as expected.
Here are some parts in the pickle (Hydrochloric Acid and water mix). This strips the old plating. Usually, a part will take 15-20 minutes to strip. Stern parts are so lightly plated, it took less than a minute.


Here is an example of thicker parts - The flipper bases turned out well. Here is a comparison ;


Slightly thinner pop bumper brackets - Not as good, but better than it was ;


Coin door microswitch plate - Turned out really good and was clearly a different metal - that's why it was a good result.


Coin door bracket - not too bad. Still not as good as a Bally or Gottlieb equivalent, which I've plated several times ;


Aussie Pinball - Proud to be Australia's Premier Pinball Forum

http://www.australianpinballrestorations.com.au/

http://www.rtbb.com.au/catalog/

We carry the largest range of NEW Ramps in Australia

Offline Ballywannabe

  • Trade Count: (0)
  • *****
  • Forum Posts:
  • Perth
Re: Stern Quicksilver High End Restoration
« Reply #8 on: April 25, 2020, 11:09:38 PM »
Hi Nino
nice work as usual.  You are right about Stern using crappy quality metal.  Target banks in particular have severe wear when there is metal to metal contact.

They are not your usual Stern flipper base plates - they look like a cross between the 1st generation and the 2nd generation (which they should be).  The gen 2 normally sit off the playfield, and the flipper stroke is limited by a separate bracket rather than the end bent up like the one you have (see https://www.pinballlife.com/classic-stern-flipper-base-sub-assembly-left-or-right-staked.html) .  Wonder if it is factory?
cheersIan

Offline Strangeways

  • Pinball Restoration is my passion
  • Administrator
  • Trade Count: (+9)
  • *****
  • High Score Initials:
  • Forum Posts:
  • Melbourne
  • ABN 68 283 634 461
    • Ride The Boney Beast
Re: Stern Quicksilver High End Restoration
« Reply #9 on: April 27, 2020, 04:05:54 PM »
Hi Nino
nice work as usual.  You are right about Stern using crappy quality metal.  Target banks in particular have severe wear when there is metal to metal contact.

They are not your usual Stern flipper base plates - they look like a cross between the 1st generation and the 2nd generation (which they should be).  The gen 2 normally sit off the playfield, and the flipper stroke is limited by a separate bracket rather than the end bent up like the one you have (see https://www.pinballlife.com/classic-stern-flipper-base-sub-assembly-left-or-right-staked.html) .  Wonder if it is factory?
cheersIan


I think it might have been factory, and W1 Bushing used. The owner ordered the W2 (Gen 2) plates and we had the bushings, so it was returned to the factory configuration for the machine. A lot of these parts for Sterns are now available from PBL. I remember making my own kits from various suppliers 10 years ago.
Aussie Pinball - Proud to be Australia's Premier Pinball Forum

http://www.australianpinballrestorations.com.au/

http://www.rtbb.com.au/catalog/

We carry the largest range of NEW Ramps in Australia

Offline Ballywannabe

  • Trade Count: (0)
  • *****
  • Forum Posts:
  • Perth
Re: Stern Quicksilver High End Restoration
« Reply #10 on: April 27, 2020, 04:47:37 PM »
Yes, I remember all sorts of bodge jobs #@# We really are spoiled now!

Offline Strangeways

  • Pinball Restoration is my passion
  • Administrator
  • Trade Count: (+9)
  • *****
  • High Score Initials:
  • Forum Posts:
  • Melbourne
  • ABN 68 283 634 461
    • Ride The Boney Beast
Re: Stern Quicksilver High End Restoration
« Reply #11 on: May 02, 2020, 04:54:53 PM »
Now that the door is done, I painted the legs, with the same Hammered Finish paint I used on the door. These legs were straight and in good condition to start with, so they came out very nice.


The original Pedestal, or the cabinet head mounting assembly, was completely broken, so I made a new one and painted it.


I secure it permanently by driving 4 screws into the cabinet.


The aluminum backing was polished and came up great. More plated parts installed in the headbox and the boards mounted.


Rewire the headbox lamp panel.


Rectifier PCB mounting plate is plated and new standoffs installed. Repro Fuse card laminated and glued on to the panel.


Rectifier PCB installed ;


Moving on to the playfield underside. Different screws all over the place !


Incredible soldering skills !


Time to rebuild the mechanisms. Neglected for so many years !


Aussie Pinball - Proud to be Australia's Premier Pinball Forum

http://www.australianpinballrestorations.com.au/

http://www.rtbb.com.au/catalog/

We carry the largest range of NEW Ramps in Australia

Offline ddstoys

  • Trade Count: (+23)
  • ******
  • High Score Initials:
  • Forum Posts:
  • Geelong
Re: Stern Quicksilver High End Restoration
« Reply #12 on: May 02, 2020, 08:38:37 PM »
Wow these had a fuse card hahaha all the sterns I’ve worked on I’ve never seen one


Sent from my iPhone using Tapatalk

Offline Strangeways

  • Pinball Restoration is my passion
  • Administrator
  • Trade Count: (+9)
  • *****
  • High Score Initials:
  • Forum Posts:
  • Melbourne
  • ABN 68 283 634 461
    • Ride The Boney Beast
Re: Stern Quicksilver High End Restoration
« Reply #13 on: May 06, 2020, 05:48:56 PM »
The owner commissioned @el_timbo86 to restore the playfield, and as per usual, the finished playfield restoration is incredible. Remember, this was a well worn original playfield, and the completed playfield looks better than new. Before someone asks -"Why didn't you just use a Mirco ?" - Check the photos.. and I've heard too many horror stories..

All spots / marks / streaks etc are from the overhead fluros.


Stunning result. Will look great when installed !


The Loom is washed in the Ultrasonic, so that's why it looks new. Some of the Lamps sockets will fail as part of this process, and some will improve with the surface rust and corrosion removed. Time to map out the GI. The #1363 lamps sockets were all replaced in the end.


Playfield components such as switches and targets are aligned and positioned. The blue painter's tape with sharpie marks are left untouched by the ultrasonic. Normal tape sometimes does not survive.


Plated and rebuilt parts are put into position. The flipper bases are not the correct ones, but they are put there for now.


Aussie Pinball - Proud to be Australia's Premier Pinball Forum

http://www.australianpinballrestorations.com.au/

http://www.rtbb.com.au/catalog/

We carry the largest range of NEW Ramps in Australia

Offline Strangeways

  • Pinball Restoration is my passion
  • Administrator
  • Trade Count: (+9)
  • *****
  • High Score Initials:
  • Forum Posts:
  • Melbourne
  • ABN 68 283 634 461
    • Ride The Boney Beast
Re: Stern Quicksilver High End Restoration
« Reply #14 on: May 06, 2020, 06:03:26 PM »
This generation of Sterns used plastic Pop Bumper assemblies. Don't be fooled, these  surprised me with their action - much better than metal - well in this machine anyway ! The base on one of the white original bases is broken in two spots ;


On the left, is a used Data East. On the right is a later DE / Capcom version. Only one difference. The original Stern has timber / plastic switch mounting screws, whereas the DE / Sega uses a machine screw arrangement. The originals are no longer available, so to match the playfield, I went with black.


I MUCH prefer the original switches. They are slightly different from Bally and Williams and appear to be similar to Gottlieb "high current" switches. I clean these up and replace the switch matrix capacitor. Small detail, but makes a HUGE difference in playability.


Drop Target before replating ;


Test run of plated drop target with the wrong Drop targets (color) - but it came out really good !


Time to replace the black vinyl strips on the ball guides ;


Remove the old and sand the wood rail ;


Note I have an old playfield glass as a cutting board.


Flatten out the edges and bubbles and it is ready to install !

Aussie Pinball - Proud to be Australia's Premier Pinball Forum

http://www.australianpinballrestorations.com.au/

http://www.rtbb.com.au/catalog/

We carry the largest range of NEW Ramps in Australia