Author Topic: Another Addams rebuild by Finny (Warning; Large photos)  (Read 550 times)

0 Members and 1 Guest are viewing this topic.

Offline Finny

  • Trade Count: (0)
  • **
  • Forum Posts:
  • Melbourne Australia
  • Finnys Pinnys
Another Addams rebuild by Finny (Warning; Large photos)
« on: January 30, 2010, 02:57:16 AM »
The following is a start to end rebuild of an Addams family which took a few months to complete. I think it was well worth the effort as the finished machine plays fast and looks sharp.

The photos speak for themselves but I have made some comments under each photo to help explain what was done. Please Enjoy!


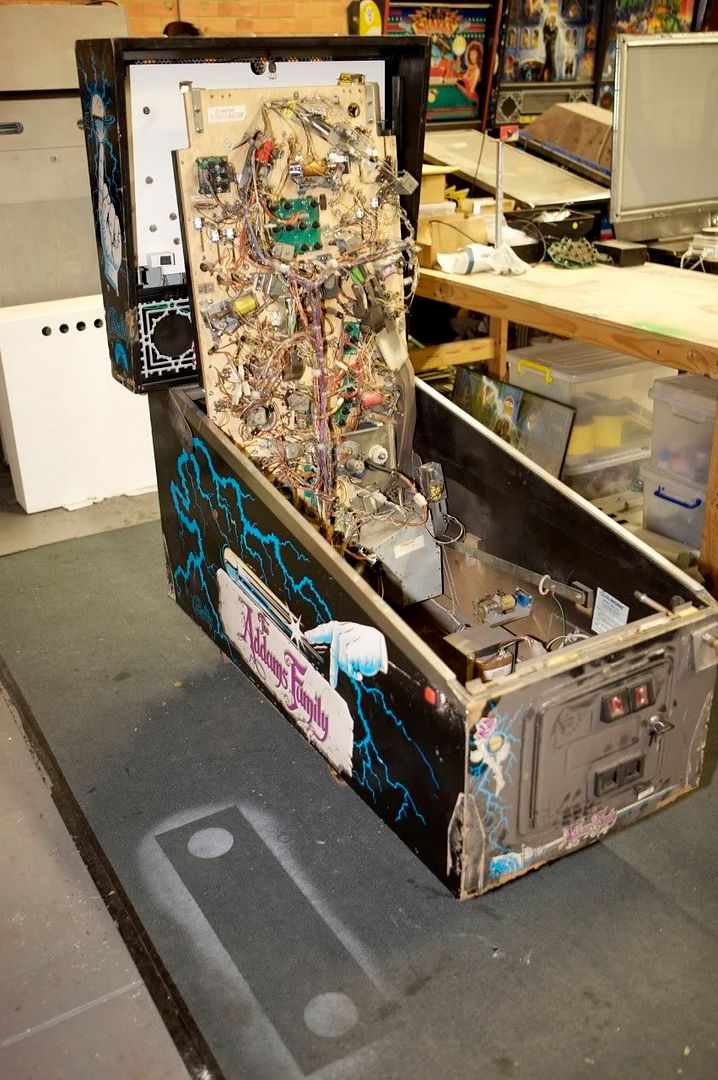
The victim... this machine has seen better days and is a good candidate for a complete rebuild. It was sourced from Markc a few years ago and I believe it was a European export. The cabinet was in real bad condition, although it could be fixed, I felt it wasn't acceptable and discarded it. A late model dona Dracula was used instead. When I source another cabinet latter the Drac will be resurrected again, he never dies... Ha Ha...


Mounted up on the playfield rotisserie for deconstruction.


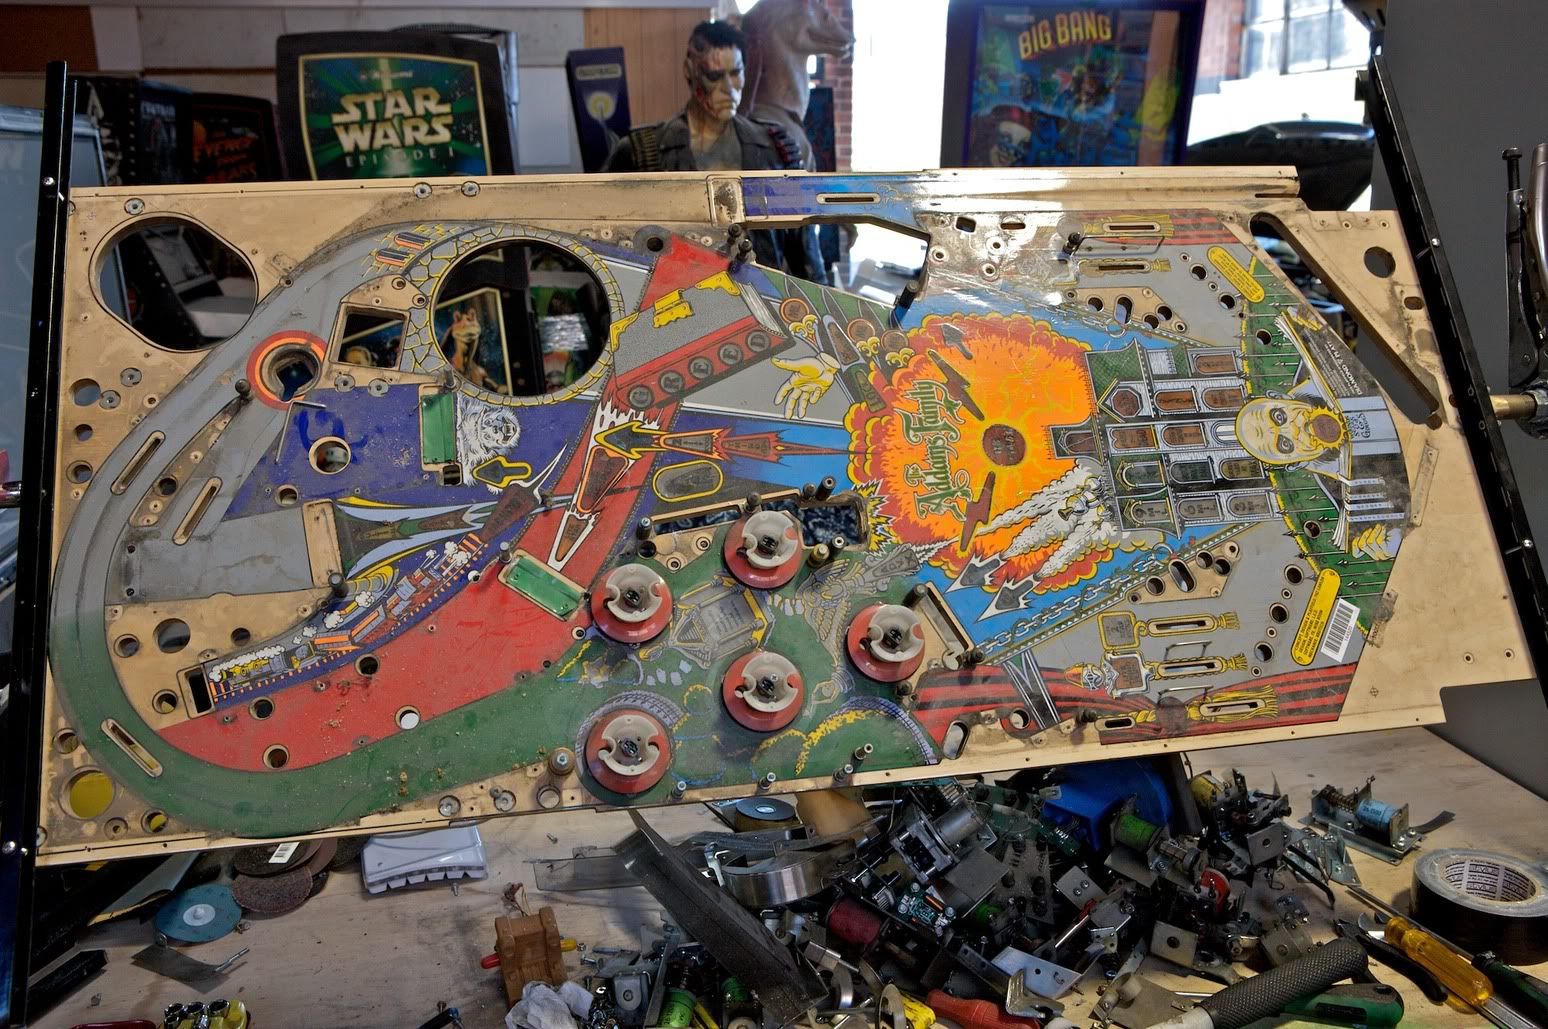
Playfield not worth saving due to butchers attempting repairs and age.


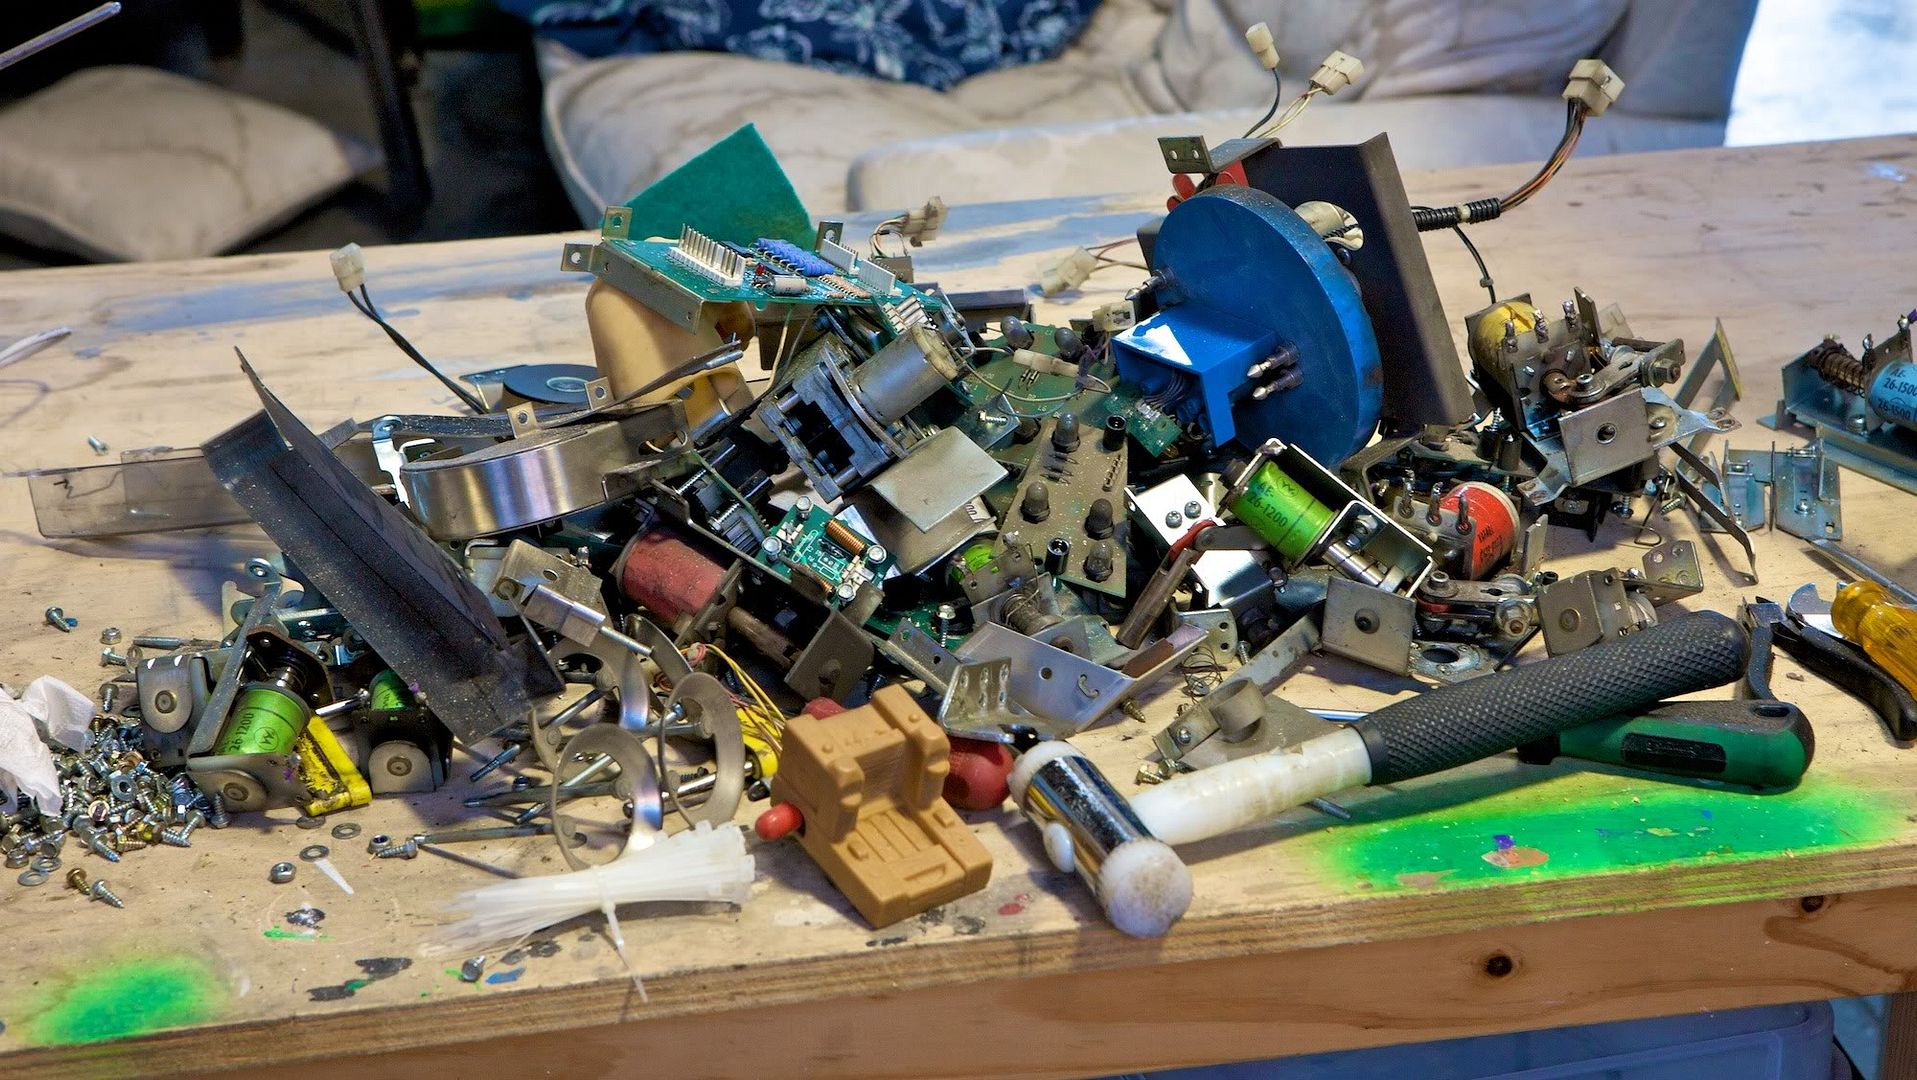
Leftovers for rejuvenation...


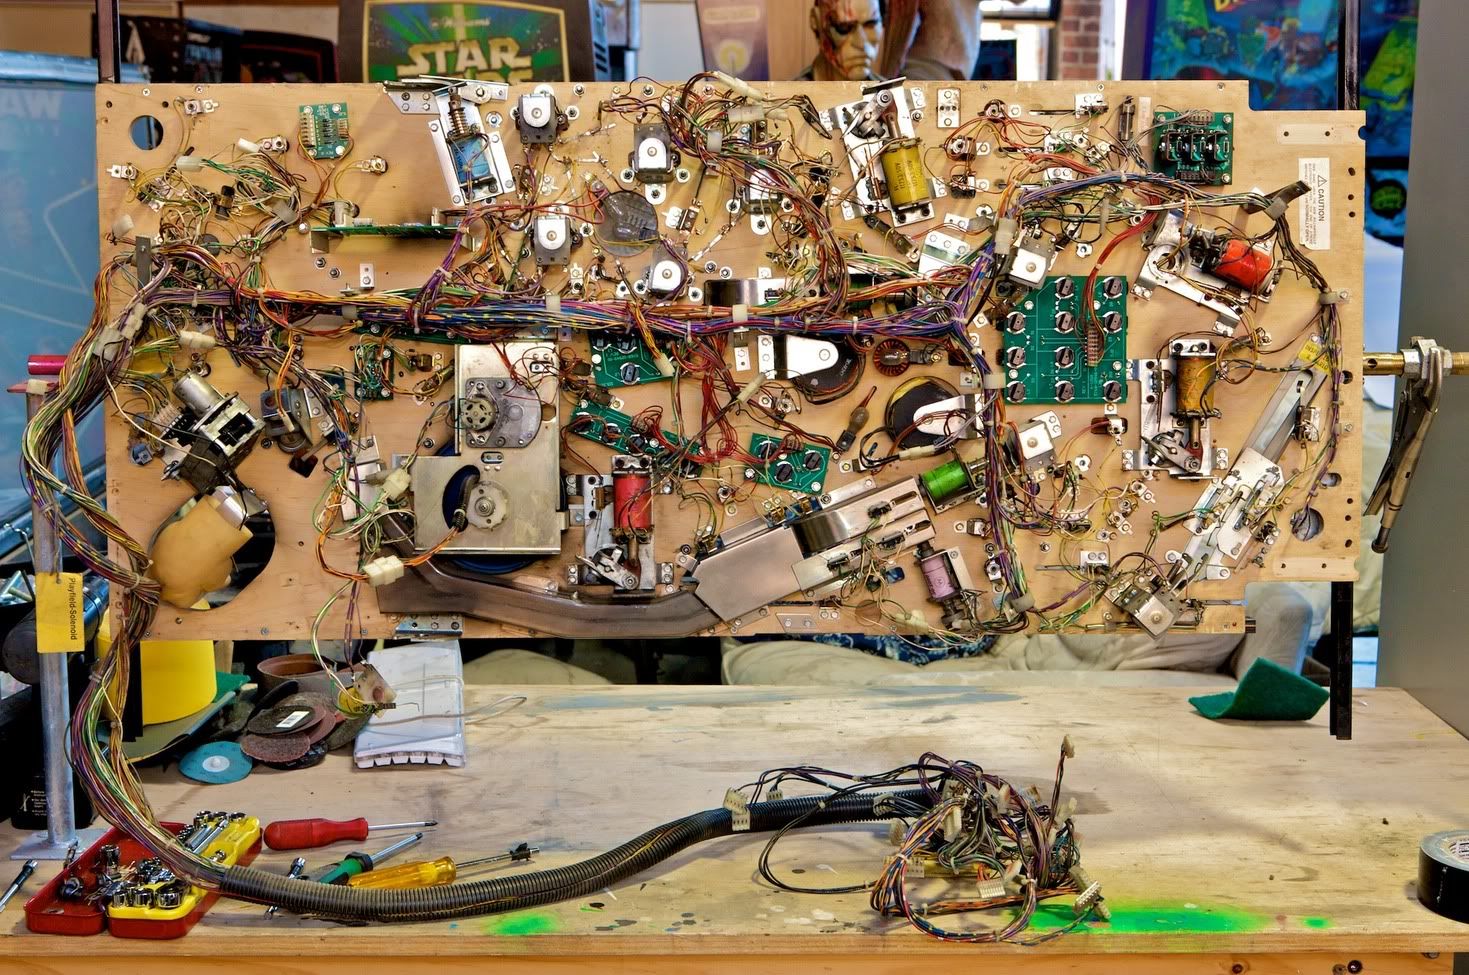
Playfield rats nest. This will be pulled apart, cleaned, retied and any shit connectors replaced.


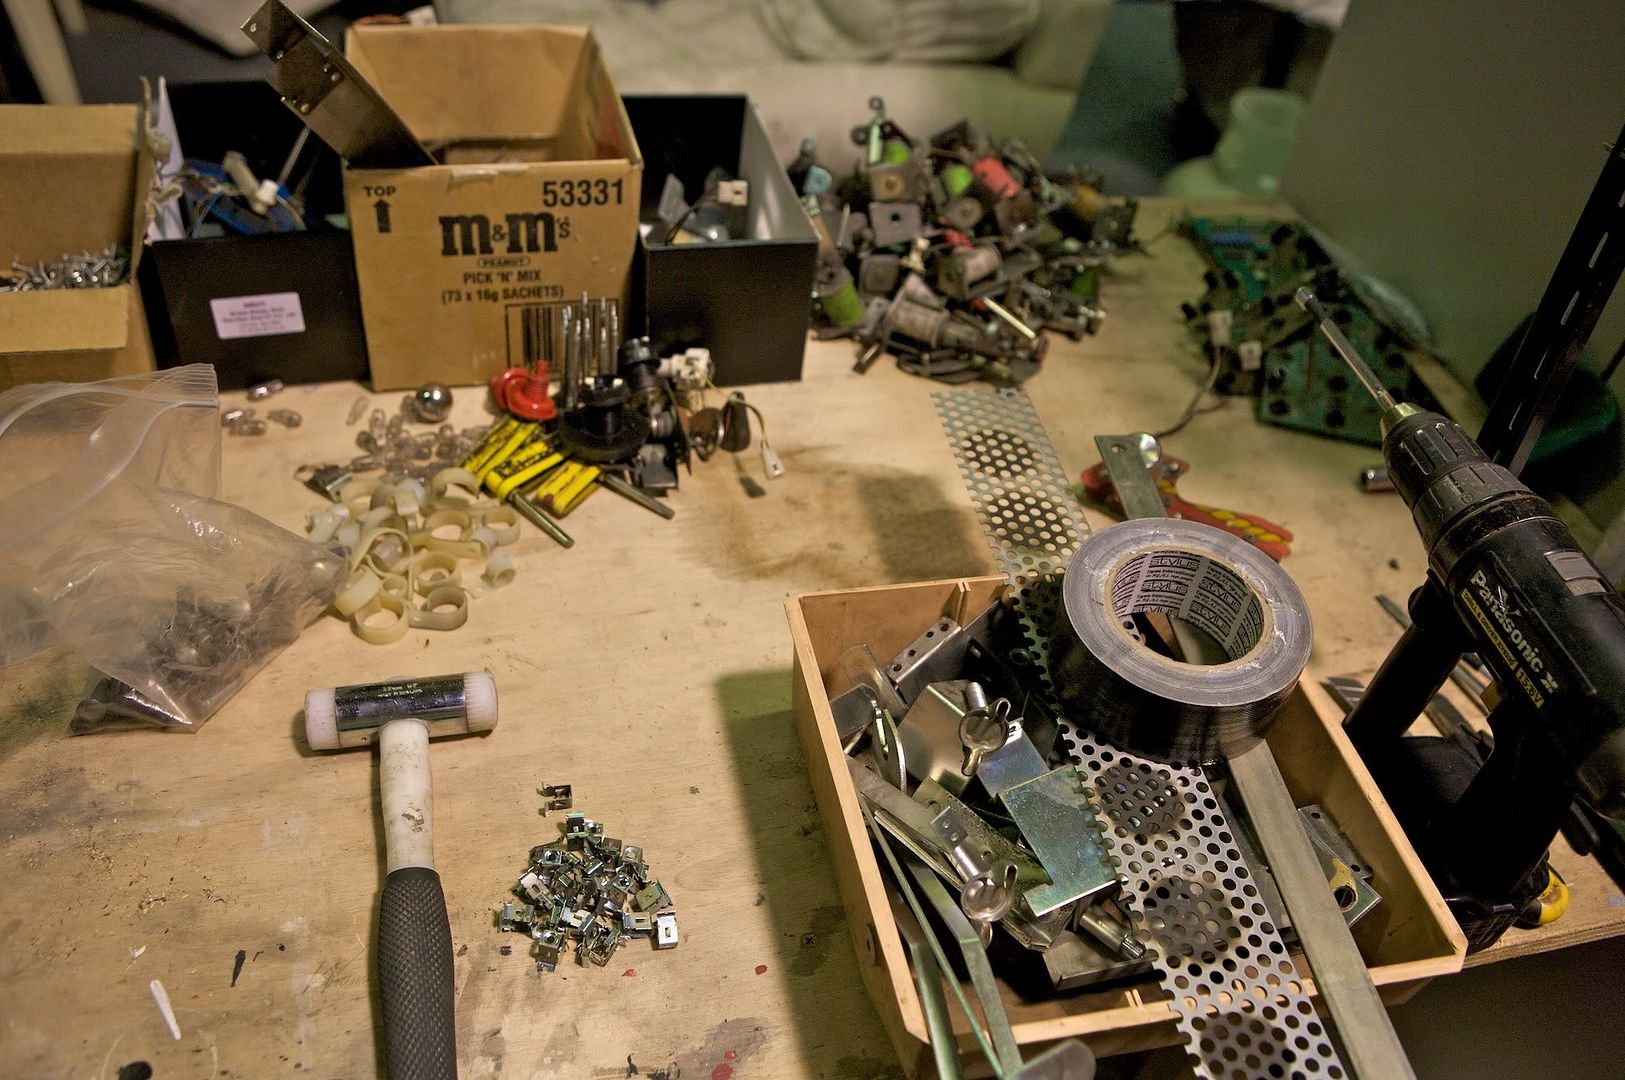
Sorting out all the bits for plating and cleaning.


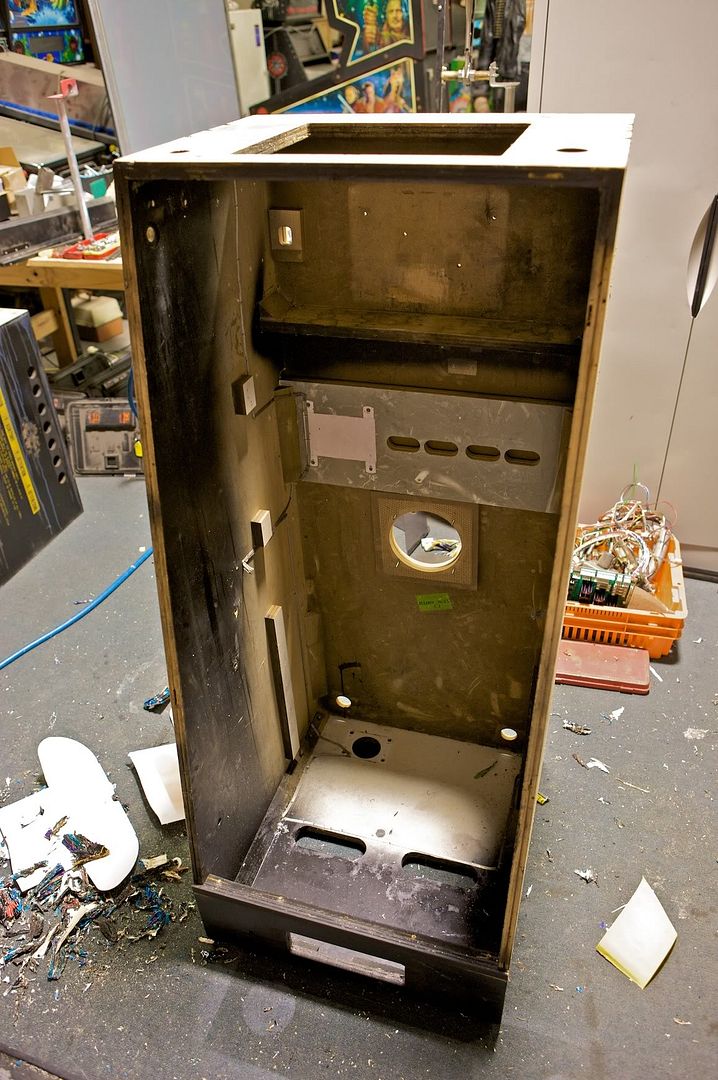
Drac ready for striping.


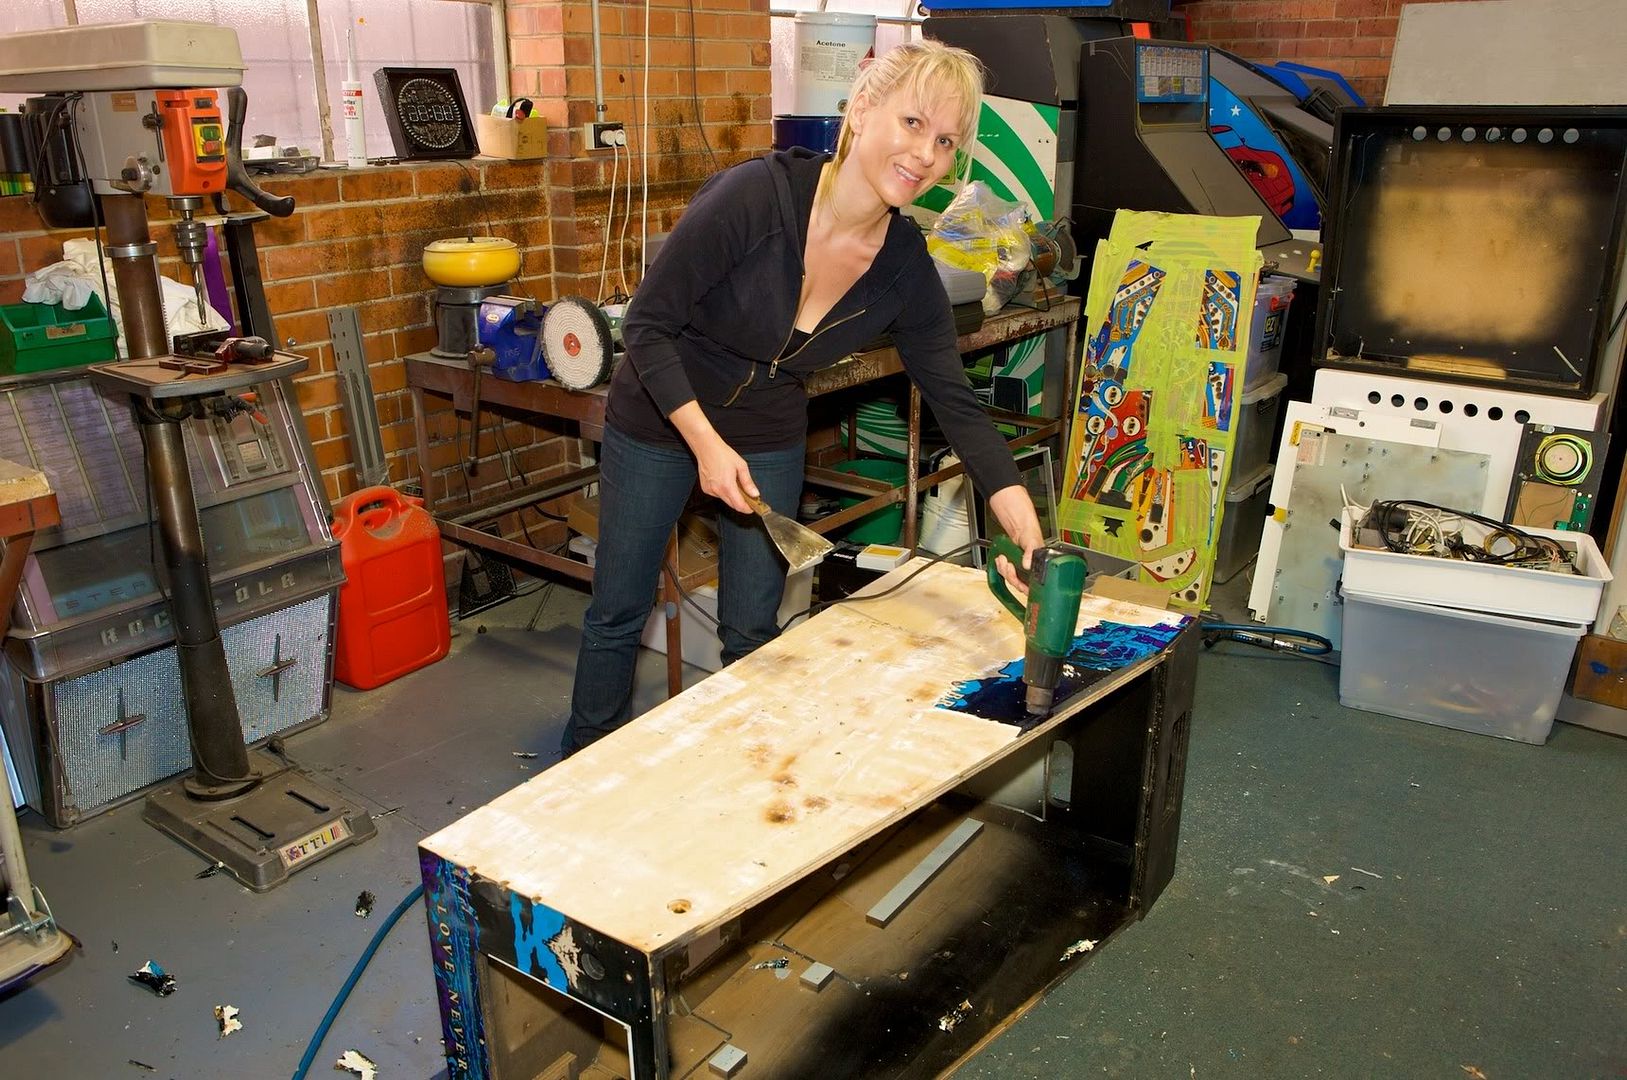
My helper (Wife) with the heat gun. After the decals came off, Acetone was used to remove the excess glue with a scrapper.


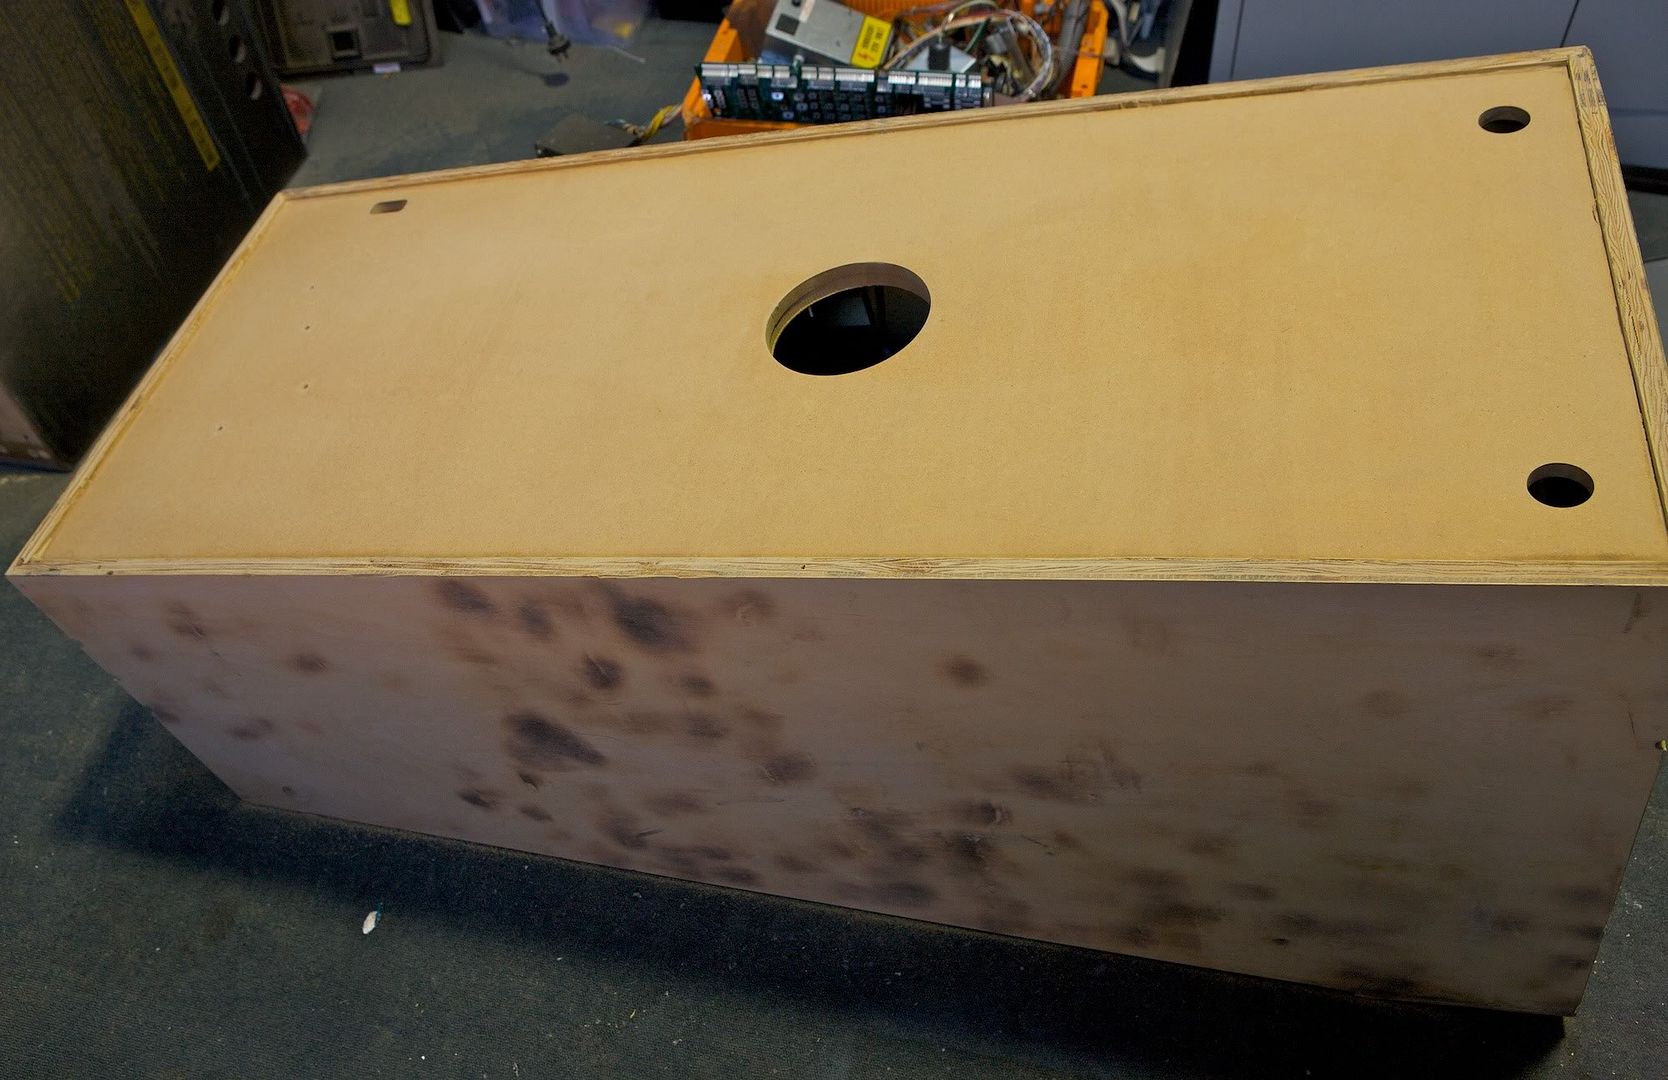
Sanded bottom with 80 grit to get all the poo off.


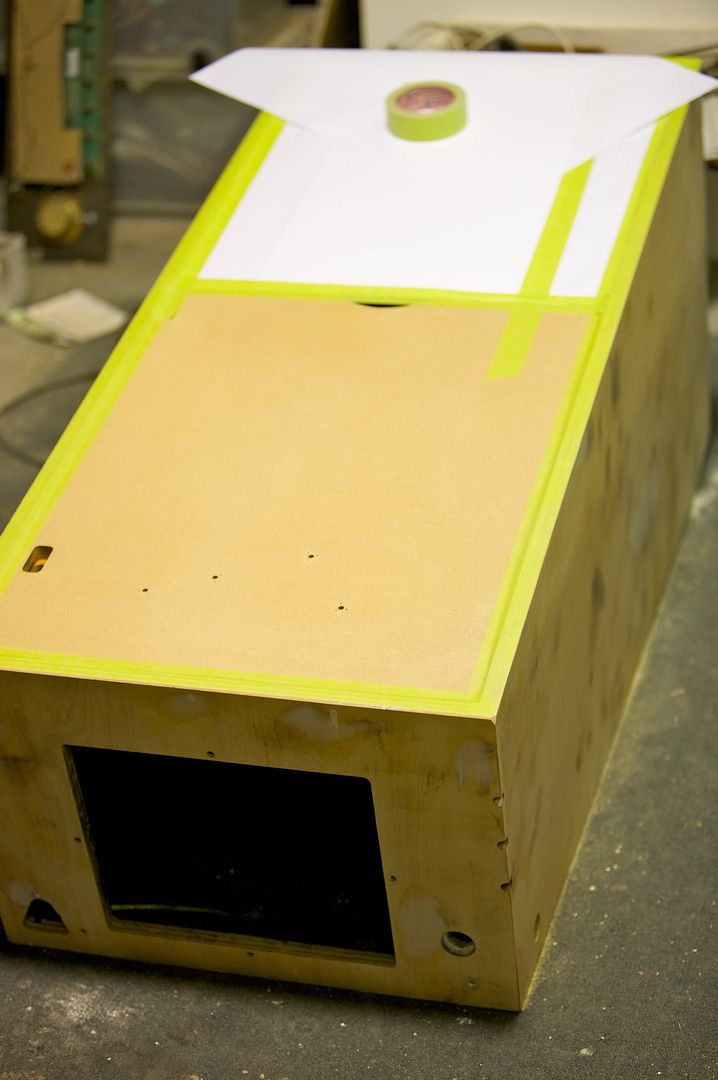
Carefully masked edges after sanding then we go on to the filling stage.


This is a common area for damage and was filled with two pac filler which sets like rock. Usually loose leg bolts or stripped bolt threads cause this damage. I'll be installing the newer style mounting plates which have longer thread nuts pressed into the mounting plate.


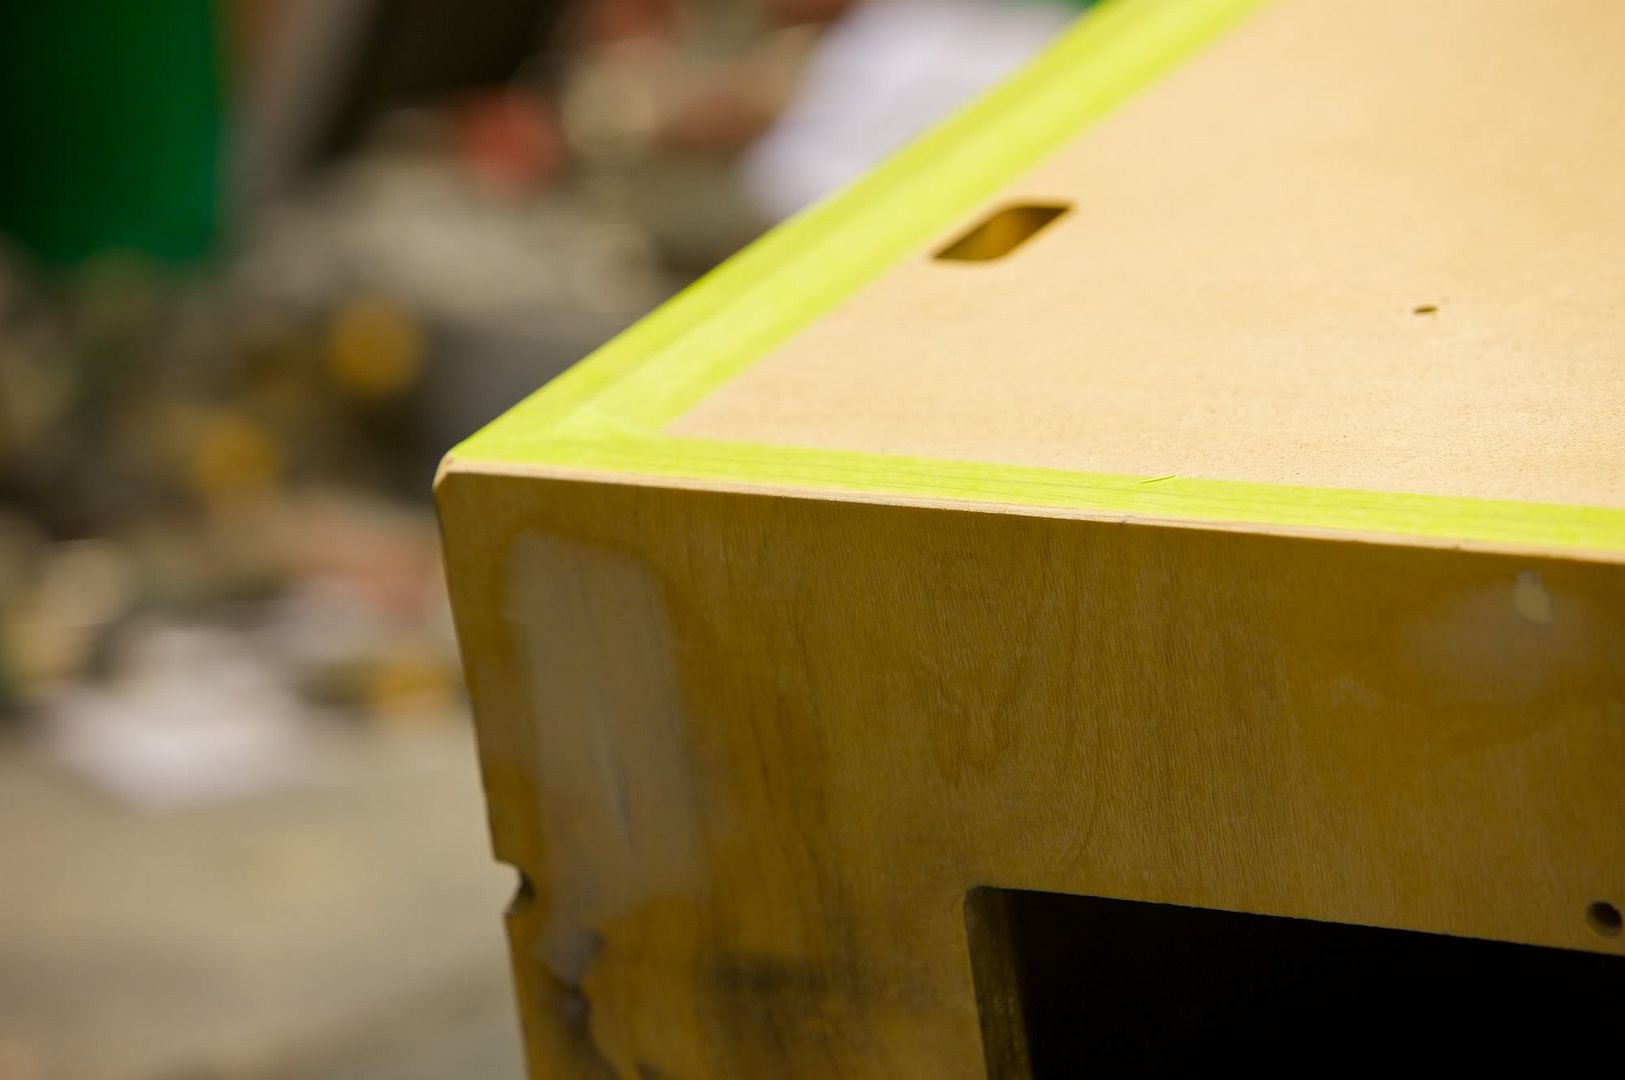
More filler here. Corners always cop it during commercial usage.


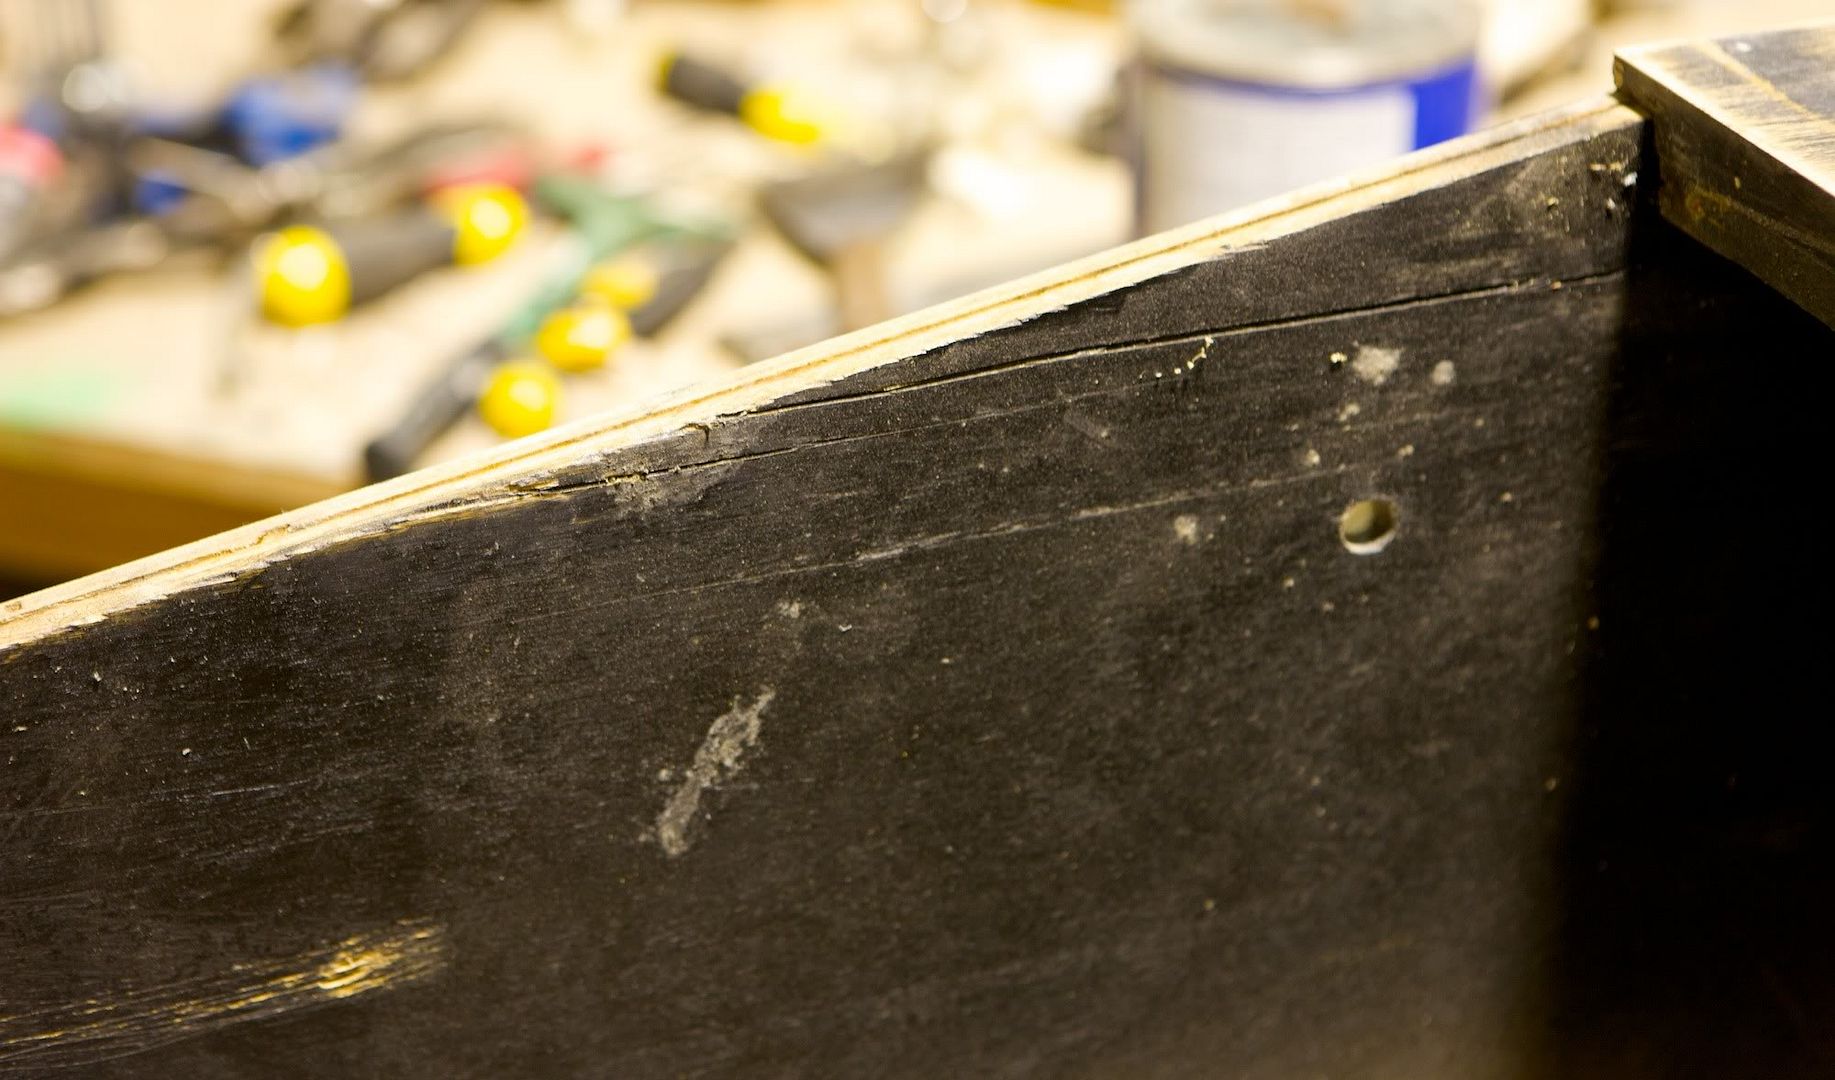
The back lower edge can become detached which can make an annoying vibration during play. This was screwed, glued with PVA and filled to prevent future separation.


Another common factory fault...


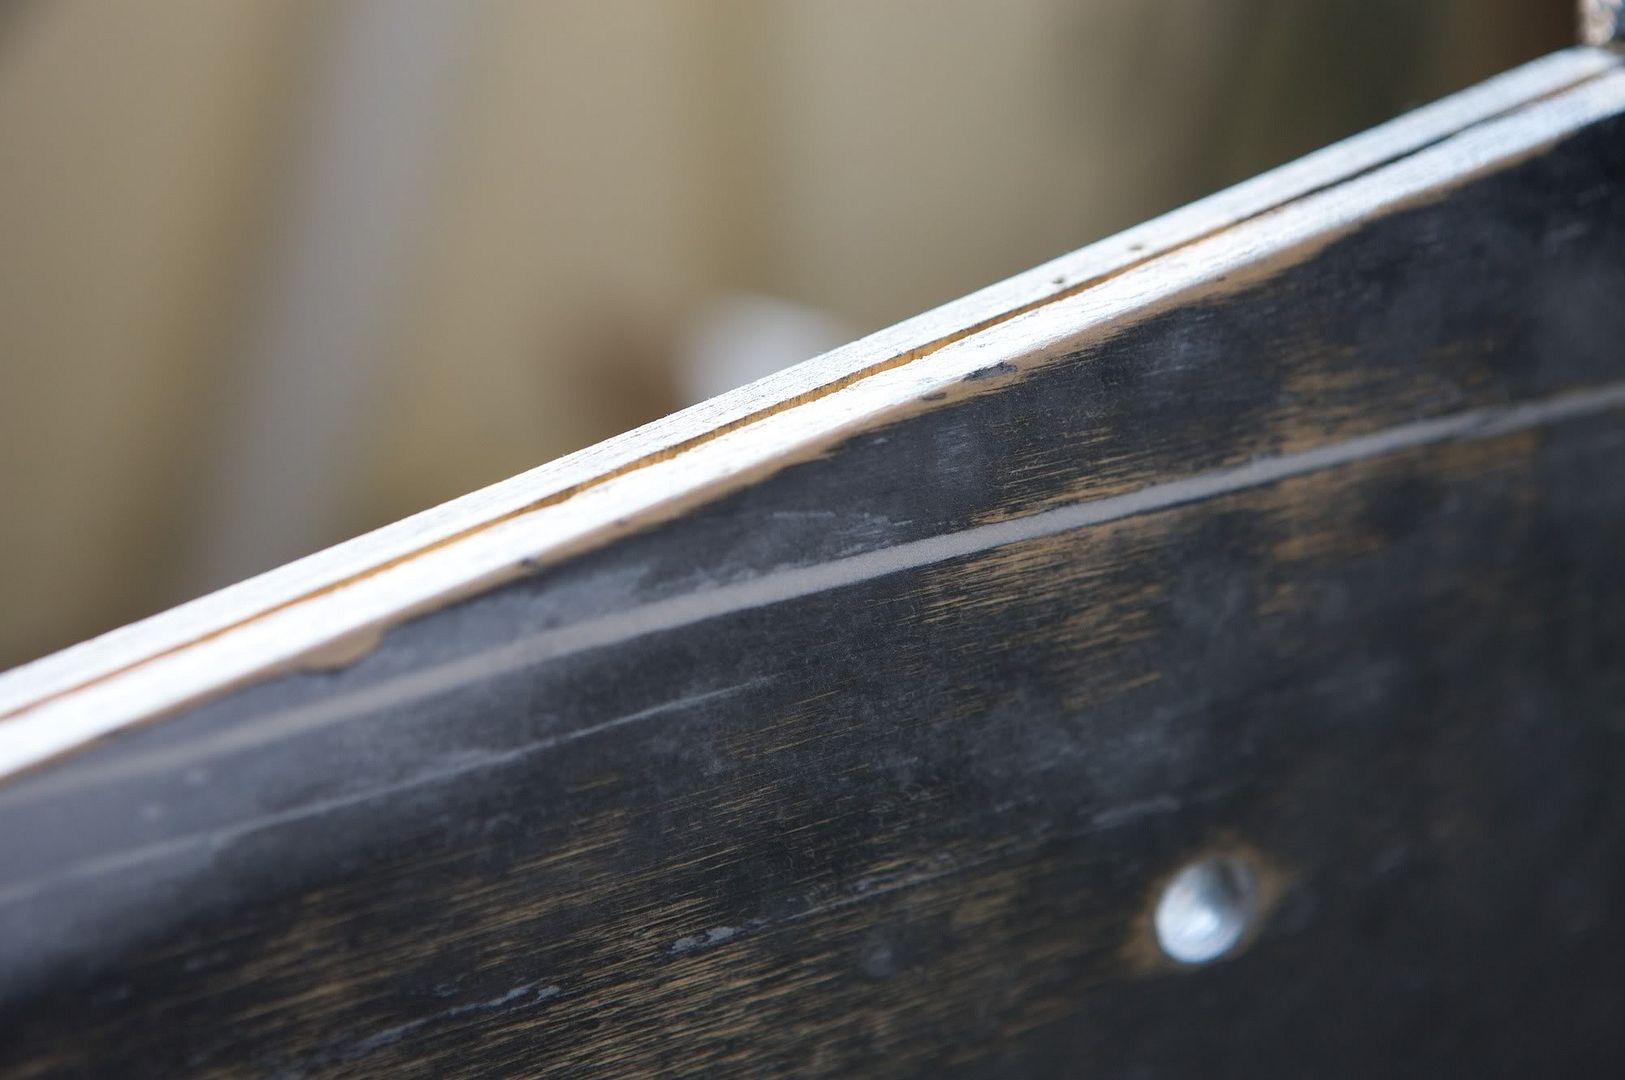
This was also filled.

Offline Finny

  • Trade Count: (0)
  • **
  • Forum Posts:
  • Melbourne Australia
  • Finnys Pinnys


Factory staple holes filled.


The Drac used slide out type hinges and the Addams uses the old fixed hinge type so the the original slide hinge holes were filled and new fixed hinge holes drilled.


A layer of acrylic white undercoat was applied which helps show up any other defects which are then filled and sanded.


Undercoating finished here then rubbed back smooth.


Same deal with the head shell.


Black acrylic applied... rubbed back then applied again... x 3.


Same here too...


Cabinet fit out done. Note new style power input.


Decals, feet and chrome trims added.


Getting there, nice and clean. Plunger not mounted here.


New door and lock down installed.


I wasn't happy with the new factory playfield as the clear coating was uneven so it was firstly cut back with 800 grit and then 1600 grit. It will get recoated with two pac then cut and coated until perfectly flat. Around six coats were done on this one,


You can see here how uneven the clear was applied by the factory.


Same here.


The cutout areas were masked as the clear will pool here. Its easy to remove later with a blade.

Offline Finny

  • Trade Count: (0)
  • **
  • Forum Posts:
  • Melbourne Australia
  • Finnys Pinnys


Final cut back...


This stuff is rock hard.


Sorry, wrong game... power ball with a power shine...


The shooter lane wasn't acceptable and will receive some cosmetic alteration.


After some airbrushing. I like that pool cue look.


The old...


The new...


Some drilling required to fit posts etc... This is a cool little rig that does the job accurately.


Now ready for assembly...


Sometimes you can come across some severely worn guides which need some extra horse power to get out those ball impressions. Firstly I use a high speed stainless steel wire wheel to chew the grain one way then finish off by hand with a scotch bright pad.


Finished... Ready for another 10 years of use.


I make sure these never come loose as I've seen plenty of playfields damaged around the flippers as a result of these little bolts coming loose. Just some cheep insurance.


Finished flipper ready for work.


Thing gets a makeover as well.


This is one of the reinforced aftermarket scoops that is made from thicker gauge steel and extra welding.

Offline Finny

  • Trade Count: (0)
  • **
  • Forum Posts:
  • Melbourne Australia
  • Finnys Pinnys


New micros on scoop.


Bookcase optics being replaced.


Rebuilt assembly.


LED Pop bumpers being installed.


Another view...


Scoop installed...


Assemblies added so far.


Re plated ball trough.


Pop bumper lighting stapled and soldered.


Refinished ball guides added.


Plastics and ramp next.


Another detail view.


New clear ramp assembly added.


Starting to get crowded in here...


Ready for wiring now.

Offline Finny

  • Trade Count: (0)
  • **
  • Forum Posts:
  • Melbourne Australia
  • Finnys Pinnys


Solenoid harness installed.


Here is a cheep cool mod to help stop the playfield frying. Just chuck in 3 fuses between the magnets and the driver board. If a transistor shorts the fuse will go instead of the art work.


Switches and lamp matrix added... All done ready for the cabinet install.


Yours truly with playfield installed. Just about to trim front decal...


This was striped and painted too.


Repainted and installed into head shell.


With LED's installed.


The translite looks good with warm and cool LED mix.


Black head shell was cut and polished with new lock catch added.


Double rubbers added with new switches.


The new LED general lighting. Cool white.


With glass and all lamps on.


Under the hood.


Very happy with the results. Lighting looks awesome in my opinion.


Same.

Offline Finny

  • Trade Count: (0)
  • **
  • Forum Posts:
  • Melbourne Australia
  • Finnys Pinnys


Same.


From this...


To this... All done, ready to go home to it's new owner.

Offline johnwartjr

  • Trade Count: (0)
  • ******
  • Forum Posts:
  • Columbus, Indiana USA
  • It's ALIVEEEEEE!
    • My Home Gameroom . com
Always nice to see another person restoring games. I learn something every time I look at another restoration. All the photos won't load after about 10 minutes and several refreshes :)

I liked the use of the later WPC cabinet with the modular power box, and when I do my Addams, I think I'm going to install a buy in button ala TAFG along with an 8 inch sub.

Offline tura67

  • Trade Count: (0)
  • ***
  • Forum Posts:
  • Holland / the Netherlands
Amazing  @@* Looks better than new.

Can you give an indication of the costs? I am curious....
Pins: SS, T2, LOTR           Gone: Dr Who

Offline StuartT

  • Trade Count: (+1)
  • ***
  • Forum Posts:
  • Melbourne
LEDs have added another dimension to the machine.

Truly outstanding and over the top work.

Are the rails and lockdown bar just polished or plated ?

Offline ajlaird

  • Trade Count: (0)
  • ******
  • Forum Posts:
  • Greensborough, Melbourne
  • Go Ahead, Make My Day
We are not worthy...

I am guessing this took around 100 hours or more, but maybe Finny is faster than that. It is all about attention to detail (in this case, every last one - who else isn't satisfied with the factory clear-coating on a new playfield and redoes it??) and patience and perseverance.

Also, Finny, you look younger than I thought you would be!


Offline ktm450

  • Trade Count: (+1)
  • ******
  • High Score Initials:
  • Forum Posts:
  • Geelong, Victoria
WOW!!! Another top job mate, you make it look easy!
Fantastic machine, keep up the great work
 $%$

Offline Strangeways

  • Pinball Restoration is my passion
  • Administrator
  • Trade Count: (+9)
  • *****
  • High Score Initials:
  • Forum Posts:
  • Melbourne
  • ABN 68 283 634 461
    • Ride The Boney Beast

Absolutely outstanding ! The LEDs give the playfield a warm look.

Thanks for posting such a brilliant restoration. Now if you excuse me, I need to pick my jaw up off the ground and do some work  %.% %.%

 ^^^
Aussie Pinball - Proud to be Australia's Premier Pinball Forum

http://www.australianpinballrestorations.com.au/

http://www.rtbb.com.au/catalog/

We carry the largest range of NEW Ramps in Australia

Offline ddstoys

  • Trade Count: (+23)
  • ******
  • High Score Initials:
  • Forum Posts:
  • Geelong
BRILLIANT WORK Finny....       Im glad the photos were so large or you would have lost all the great detail.    Redoing a new clearcoat is something ive never heard of you are definately a perfectionist  ^^^   And the mirror shine on the back of the backbox  ()

Offline yeehah

  • Trade Count: (0)
  • **
  • Forum Posts:
awesome work finny.  I wish I had the time and knowledge to do such a restore.  I hate my Addams now  !@# . Mine looks more like yours before restore.

Offline Finny

  • Trade Count: (0)
  • **
  • Forum Posts:
  • Melbourne Australia
  • Finnys Pinnys
Always nice to see another person restoring games. I learn something every time I look at another restoration. All the photos won't load after about 10 minutes and several refreshes :)

I liked the use of the later WPC cabinet with the modular power box, and when I do my Addams, I think I'm going to install a buy in button ala TAFG along with an 8 inch sub.

Ha Ha, funny you say that... Thats exactly how I learn, by watching others and picking up tips here and there...

Mods are great but the client wanted a fresh stock unit otherwise the sub and the buy-in would be in my mod priority department.


Amazing  @@* Looks better than new.

Can you give an indication of the costs? I am curious....

As is... 11k AUD. I sold a MB in the same condition last year for 12k AUD. Have seen other MB's recently but not as refined for extra coin. Its a highly relative market but as more collectors enter the laws of supply & demand kick in. If new 90's model machines were reproduced it may equalize the value to a respectable level. So hold on to those babies!

Machine + Parts + Labour... it all adds up I suppose...


LEDs have added another dimension to the machine.

Truly outstanding and over the top work.

Are the rails and lockdown bar just polished or plated ?

Re: LED's... The electric chair has two lamps positioned at 90º to the players view so one would think to use frosted or the 180º lensed type? No, both versions looked shithouse so this was my compromise... Greg from RTBB sold me a version with 3 leds arranged in a triangle pattern so I got this one and put a bulb condom on it and bingo! had the same light spread as a traditional incandescent. Check the photos. The frosted lens on the others pointing directly at the player looked the horn! It pays to mix and match to get the right result. Anyway, LED's look awesome on modern machines. I would love to see them installed in some of the early models. Would be interesting I reckon.

Legs, Leg bolts, Hand rail & Trim were all chromed. Other bits were Nickel and Zinc coated. I don't like to go nuts on chrome but just make it look smart. I've seen coin doors and flipper mecs etc... stuff that you never see chromed which I think go's a little to far but each to their own... of course, pending what the application is it may be necessary to go hard. My 2 cents...


awesome work finny.  I wish I had the time and knowledge to do such a restore.  I hate my Addams now  !@# . Mine looks more like yours before restore.

Bring it down and I'll do something about it... ;)


Thanks all for your complements and questions... it's good to know your work is appreciated!!!!! ^^^