Author Topic: Bally 1965 Aces High Restoration  (Read 15053 times)

0 Members and 1 Guest are viewing this topic.

Offline JD

  • Trade Count: (0)
  • ******
  • Forum Posts:
  • Maitland NSW
  • There's no law against having fun, just yet!
Re: Bally 1965 Aces High Restoration
« Reply #90 on: February 25, 2011, 07:49:01 PM »
Outstanding Nino.

As usual.

The quality of your restore job always amazes me.

Patience is a virtue


J.D.
There is no law against having fun just yet (but I am sure they are busy are drafting one!)

Offline Strangeways

  • Pinball Restoration is my passion
  • Administrator
  • Trade Count: (+9)
  • *****
  • High Score Initials:
  • Forum Posts:
  • Melbourne
  • ABN 68 283 634 461
    • Ride The Boney Beast
Re: Bally 1965 Aces High Restoration
« Reply #91 on: February 27, 2011, 12:06:26 AM »

Major Update  ^^^

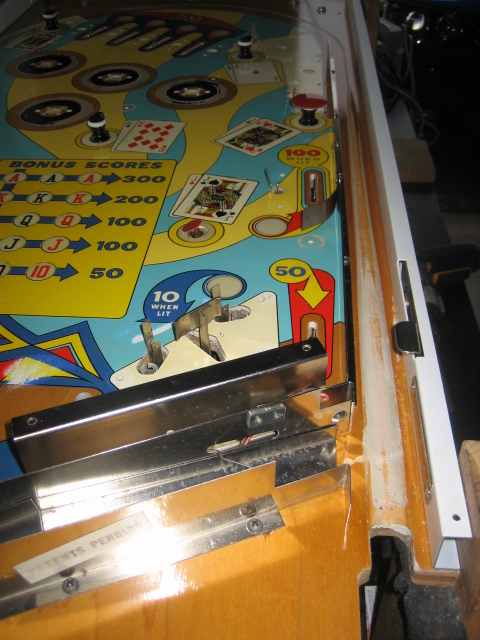
I usually dont bother too much with the playfield side rails, as they are easy to work with - being wood. But not on these Ballys. They are metal and in bad shape. There are "spider webs" of corrosion creeping up the side of them and I have to arrest this problem. Te problem became worse as the paint was flaking off as I was cleaning them, so I decided to remove the old paint, treat the corrosion and repaint. I would have to remove the rivets holding the guides - which is no problem as I have a rivet press and I can refit !

This picture does not highlight the problem, but you can feel the texture is "not right".
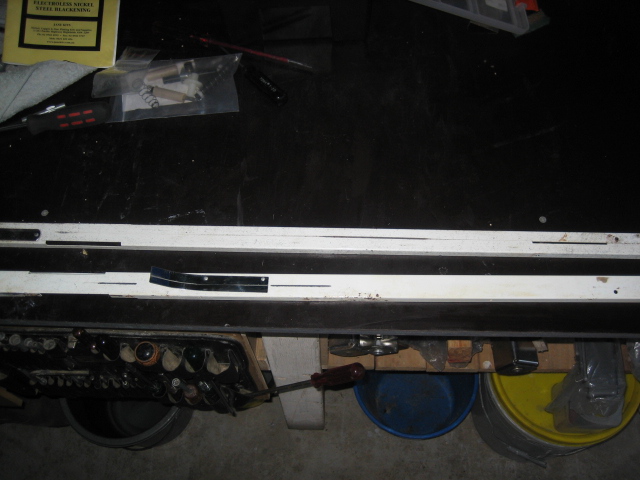


I use Citrus Strip from Bunnings. No smell and cleanup with water.  Took 20 minutes to remove the paint.
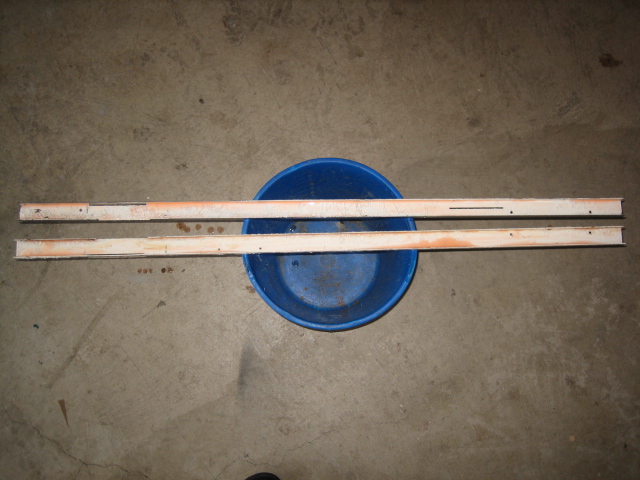


Metal parts removed for regraining, and the smaller piece will be polished as it is chrome plated.


Two coats of metal primer / undercoat
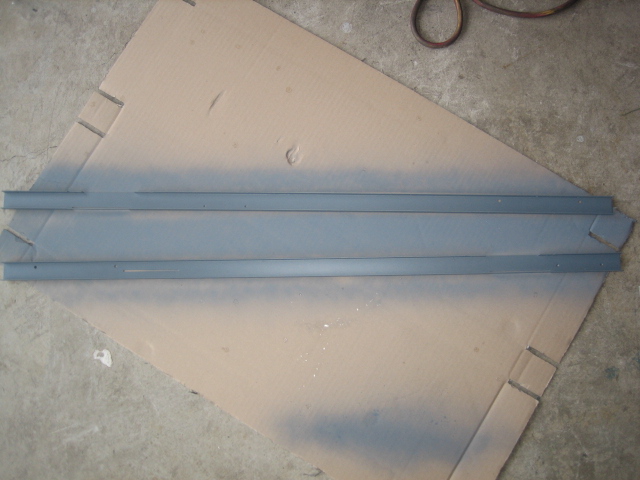


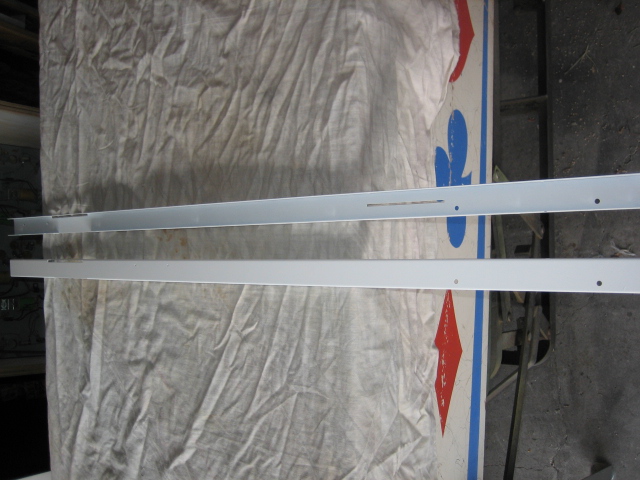
Repaint. Two coats of white that closely matched the old paint - as best as I could find !


Some upper ball arch bling  %.% These were chrome plated, so I simply polished them on the buffing wheel
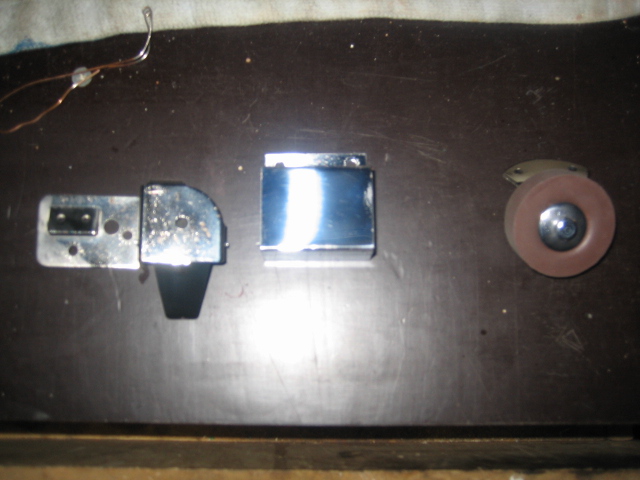


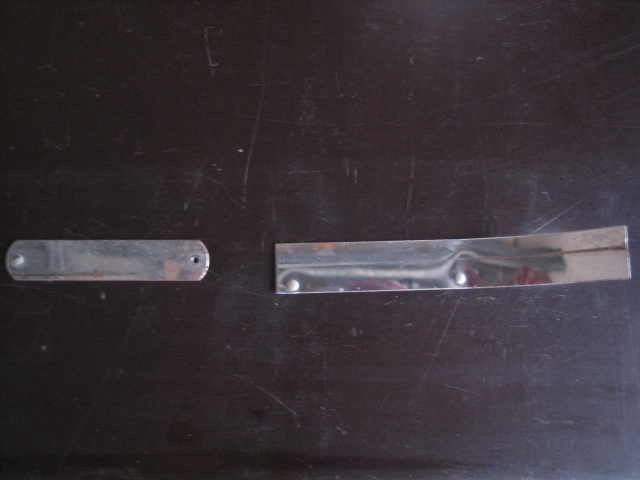
Rewind for a second to the lock down bar. I had a huge challenge with the corners. They were chrome plated (at a guess) and I cannot plate them. They have been "eaten away" and pitted in areas. Here the parts in the picture (below) ;
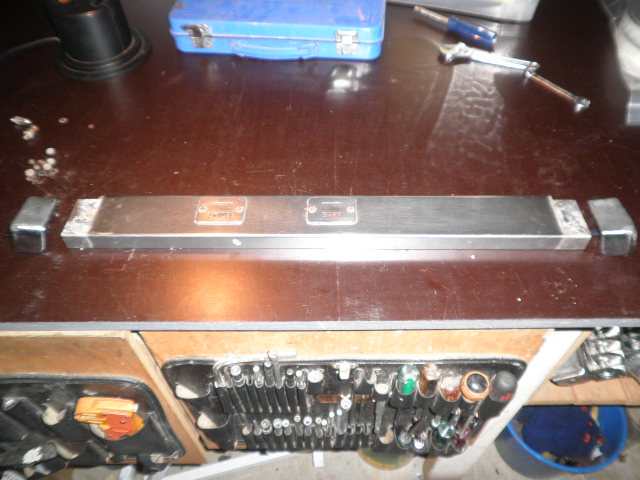


I TRIED to clean them with wire brushes etc and NOTHING worked. So I treid something "leftfield" - I GRINDED them on the grinder. Simply "attacked" them for a couple of hours and then tried buffing them. I had this result ;
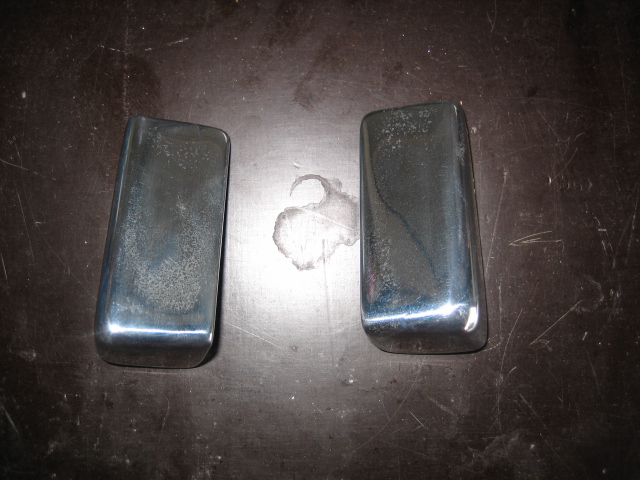


Not too bad - but I thought that if I spend more time.. .. .. .. .. The plan was to spend as much time as it needed to get them really shining. My persistence paid off. I grinded them further on my grinding wheel - effectively removing some of the metal. It was a little scary at first, but after removing the chrome plating and pitting, it was starting to look better. It took an hour or so on the grinder. I then took 180 Grit wet / Dry and started to improve the surface. Finally, using 800 Grit wet dry and windex, it looked 100 % better. The last step, was the buffing wheel.

HUGE Difference !
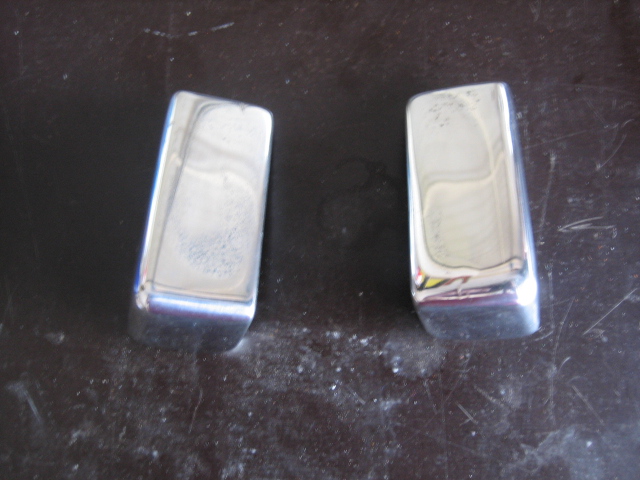


That's around THREE HOURS of work. Now the lockdown bar is complete and look much better !
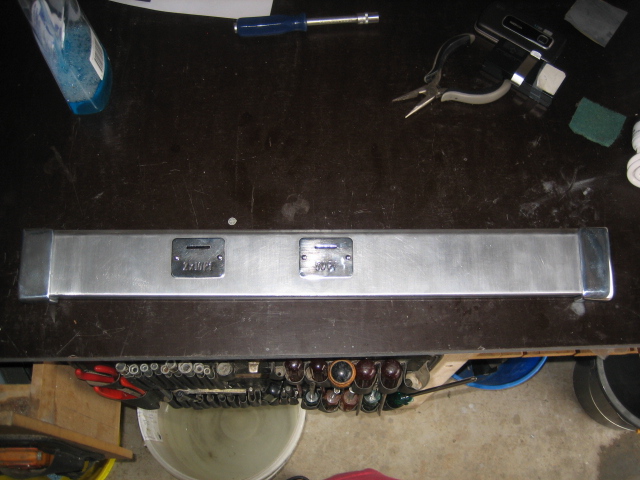


More Cabinet Bling !

While I was looking through boxes of NOS EM parts, I came across a pair of flipper buttons. The original buttons were worn and pitted. I tried polishing them, but they didn't meet the same standards as the rest of the game, so I was really pleased I found these ! I've given them a quick buff, just to see how they compare against the originals;
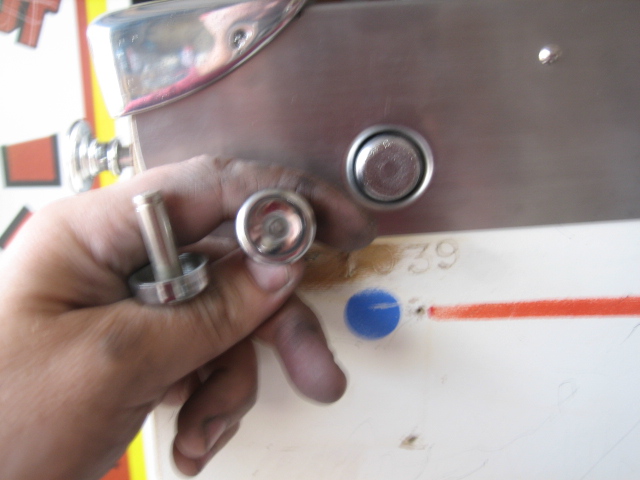


So, using the process that I had learnt with the lock down bar corners, I decided to grind the button faces down, sand with 180 grit wet/dry and windex, then 800 wet/dry and windex..

Here's the buttons after grinding them flat;
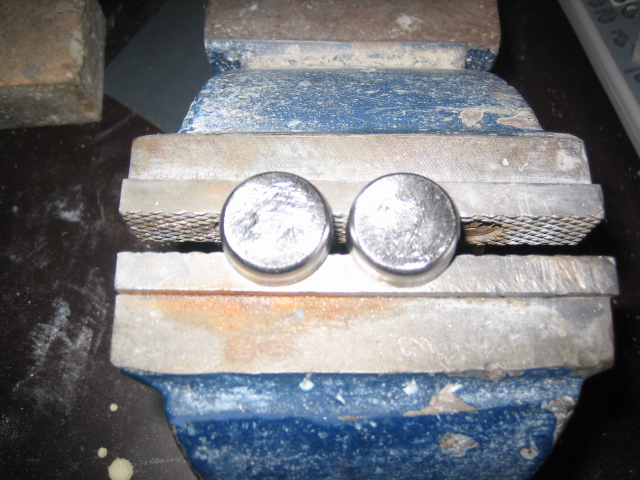


After the 800 Grit wet/dry
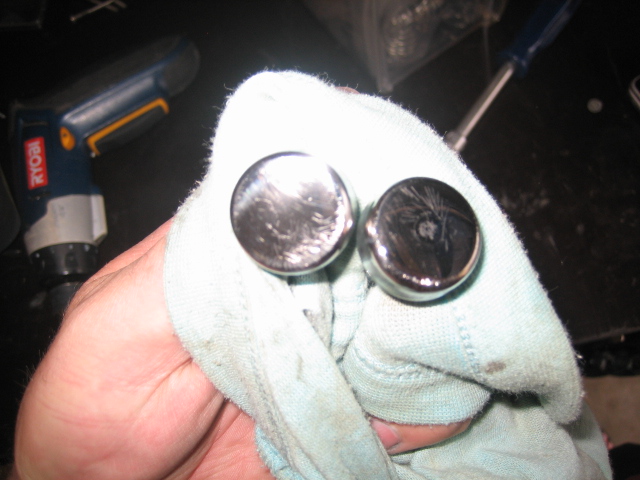


After Buffing


Back to the Playfield


Before I dropped in the playfield, I installed the playfield side rails, after rivetting on the metal parts. I also installed other chrome playfield hardware. I still hace to airbrush the black rings around the pop bumper - more on that later.
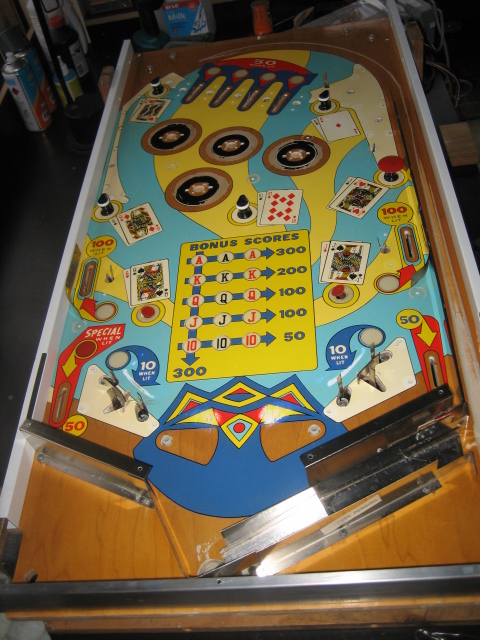


Need to clear some of this area ;
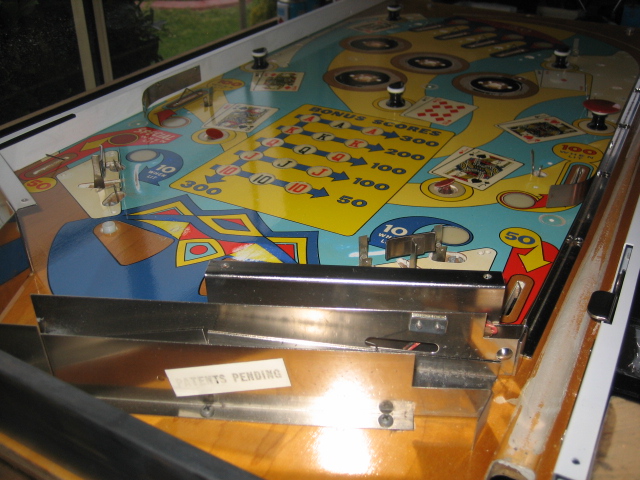


Other Pictures ;
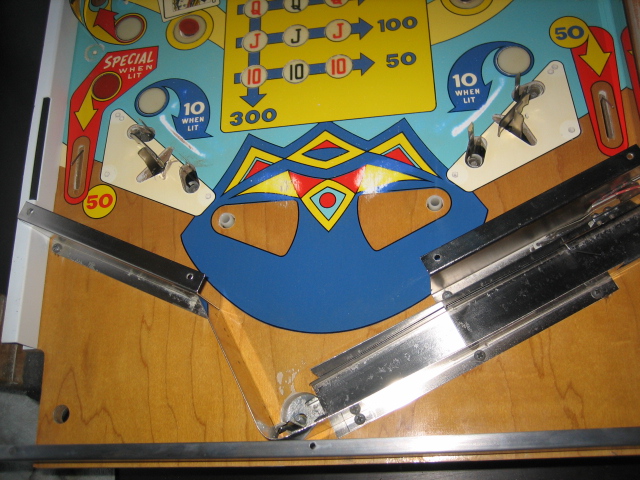


Each light socket is tested. All I do is connect a 5VDC power to the GI and test the GI globes. I do the same for feature lights
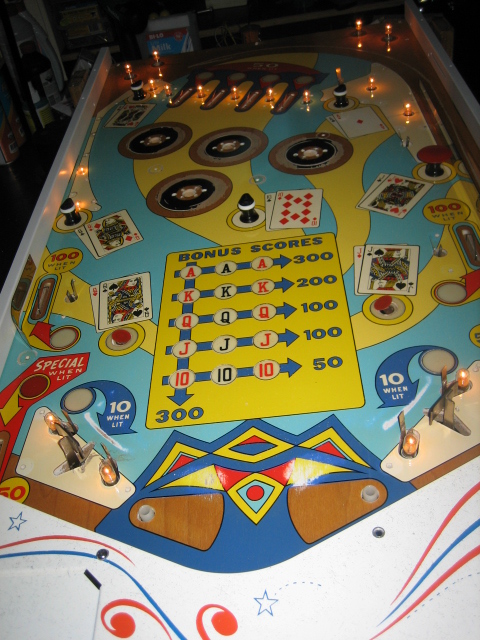
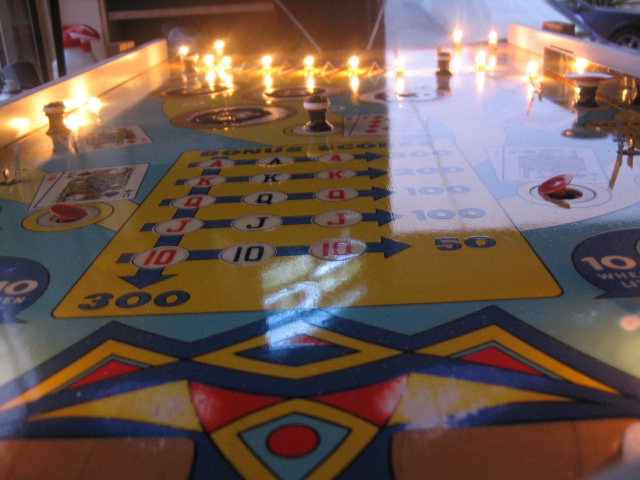


OK - The machine is almost done and I'm just waiting for some masks to turn up from Gavin to touch up the areas around the pop bumpers as well as an order from Pinball Resource to finish it off. Here are a couple of picture I took today of the machine in it's current form. I'm more than happy with it, although the amount of time I've spent is outrageous ! But I've enjoyed every minute !
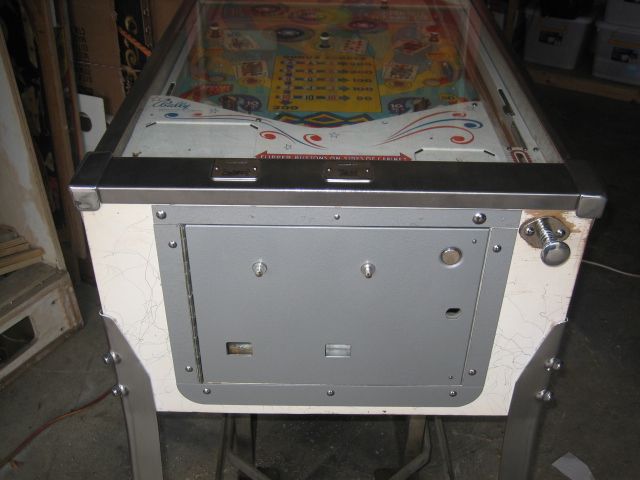
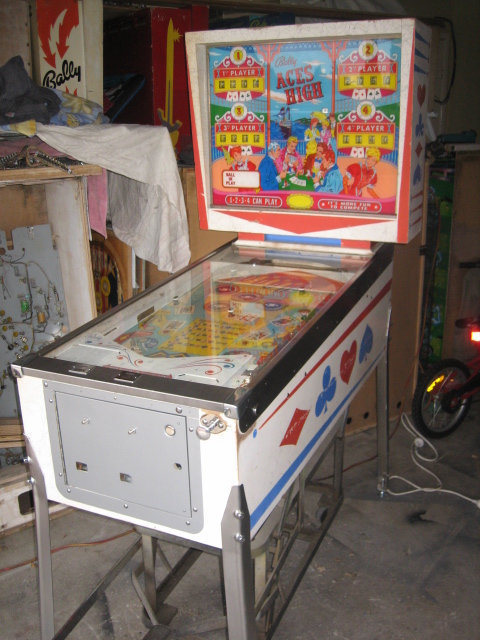


Not long to go now !!


Aussie Pinball - Proud to be Australia's Premier Pinball Forum

http://www.australianpinballrestorations.com.au/

http://www.rtbb.com.au/catalog/

We carry the largest range of NEW Ramps in Australia

Offline goodolddays

  • Trade Count: (0)
  • ******
  • Forum Posts:
  • Riverstone NSW
Re: Bally 1965 Aces High Restoration
« Reply #92 on: February 27, 2011, 08:37:09 AM »
Looking very Schmick now Nino  ^^^ . Wish I had your level of patience and attention to detail .
I need more room ! and more $$$

Offline ktm450

  • Trade Count: (+1)
  • ******
  • High Score Initials:
  • Forum Posts:
  • Geelong, Victoria
Re: Bally 1965 Aces High Restoration
« Reply #93 on: February 27, 2011, 12:09:48 PM »
Nice work Nino, looks great   ^^^

Offline Strangeways

  • Pinball Restoration is my passion
  • Administrator
  • Trade Count: (+9)
  • *****
  • High Score Initials:
  • Forum Posts:
  • Melbourne
  • ABN 68 283 634 461
    • Ride The Boney Beast
Re: Bally 1965 Aces High Restoration
« Reply #94 on: April 06, 2011, 11:16:10 PM »

Been a while !

I've been spending my time hassling Gavin and Timbo about the finer points of airbrushing. I've watched just about every Youtube vid on airbrushing and I've been practicing. My "stick figures" look better than ever. Rather than post my varied degrees of progress, I thought I'd post "the good, the bad and the ugly". It has been a steep learning curve, and I'm getting there. BIG thanks to Gav and timbo for helping out  ^^^

First step is to buy a dual action Airbrush with a quick-connect. I bought this on eBay and I've pulled it apart 100 times, cleaned it and learned it's secrets ! It set me back $86 inc postage ;


Next - the paints. General opinion was acrylic water based Jo Sonja paints and flow medium. I ordered frisket, but that has been on "back order" for 2 weeks  !!!. I bought it all online from artstore.com.au. In the background are the masks Gavin cut for me. I will use this to lay the primer, white, black and clearcoat. I'll cover the clearcoat later - it will only be a touchup. Gavin also sent me some neat vinyl stickers for the games I restore !


Masks installed ready for primer. Now I had divots in the area - The pop bumper skirts are metal, and they have cut right through the paint and into the wood. They are shaped like "half moons". I filled them with primer and sanded them back. There's so much wood exposed and worn. A light coat with a brush first, then the primer is sprayed on. This is just before the primer is airbrushed.


Straight after going a bit "overboard" with primer. Now this was a mistake, and part of the learning cycle for me. It only needs to be a little primer, not a heavy coat. I just "ran away" with the idea that I HAD to use primer to fill the divots. So here is the primer coat and the mask removed ;


It is no "big deal". I simply sanded back the primer, and it made a good "bond" to the exposed wood. This is just before re installing the masks, and I'm ready to airbrush the white background tomorrow.


A steep learning curve, but I'm enjoying it heaps !


Aussie Pinball - Proud to be Australia's Premier Pinball Forum

http://www.australianpinballrestorations.com.au/

http://www.rtbb.com.au/catalog/

We carry the largest range of NEW Ramps in Australia

Offline Retropin

  • Trade Count: (+4)
  • ******
  • Forum Posts:
Re: Bally 1965 Aces High Restoration
« Reply #95 on: April 06, 2011, 11:35:43 PM »
Cool- that primer is looking much nicer than before. far too easy to get carried away with airbrushing and lay too much paint.
Shes looking good mate - the prep work is all there. Looking forward to some really good results here.

LOL- had a feeling old Timbo was getting a barrage of emails!

Offline Strangeways

  • Pinball Restoration is my passion
  • Administrator
  • Trade Count: (+9)
  • *****
  • High Score Initials:
  • Forum Posts:
  • Melbourne
  • ABN 68 283 634 461
    • Ride The Boney Beast
Re: Bally 1965 Aces High Restoration
« Reply #96 on: April 06, 2011, 11:37:48 PM »
Cool- that primer is looking much nicer than before. far too easy to get carried away with airbrushing and lay too much paint.
Shes looking good mate - the prep work is all there. Looking forward to some really good results here.

LOL- had a feeling old Timbo was getting a barrage of emails!

Yep - I've certainly learnt a heap along the way from both yourself and Timbo. I'm painting the white tomorrow, then I'll wait a day or two and paint the black.
Aussie Pinball - Proud to be Australia's Premier Pinball Forum

http://www.australianpinballrestorations.com.au/

http://www.rtbb.com.au/catalog/

We carry the largest range of NEW Ramps in Australia

Offline deadlydave

  • Trade Count: (0)
  • *****
  • Forum Posts:
  • Gold Coast
Re: Bally 1965 Aces High Restoration
« Reply #97 on: April 07, 2011, 01:06:01 AM »
Great work Nino  @@*

Enjoying this thread
Cheers
Dave

Offline Steve2010

  • Trade Count: (+11)
  • *****
  • Forum Posts:
  • Sydney
Re: Bally 1965 Aces High Restoration
« Reply #98 on: April 07, 2011, 01:47:23 AM »
This is one sweet looking machine ..... almost there.

Offline Strangeways

  • Pinball Restoration is my passion
  • Administrator
  • Trade Count: (+9)
  • *****
  • High Score Initials:
  • Forum Posts:
  • Melbourne
  • ABN 68 283 634 461
    • Ride The Boney Beast
Re: Bally 1965 Aces High Restoration
« Reply #99 on: April 09, 2011, 12:21:06 AM »

OK - Now it is time to have a crack at the BLACK section. The masks are larger and overlap into the surrounding Bumpers, so I have to do this one bumper at a time. I figured I would have to test the application of the black mask and learn from the experience. I'm on a steep learning curve here !

The BLACK mask also incorporates the outer black ring, which really helps with the registration of the mask (clever guy that Gavin  &&). Here is the first bumper BLACK mask ;


Getting ready to paint - The paint is thinned using the flom medium and the airbrush is set to 35 PSI. I test the flow on a piece of paper and then I'm ready to start (fingers crossed)


First coat - just a "mist" coat. Nothing heavy. Takes 10 seconds !


Gone heavier on the next pass, and then a final coat. All done in around a minute. Remove the playfield masking and we are left with the mask itself. Notice the mask (yellow) is covering the surrounding bumpers. This creates a problem for me that can be addressed NOW, rather than AFTER I've painted in the Black section..


I removed the mask - and WOW - How good is that ! The BLACK is simply awesome. But removing the mask lifted the WHITE paint on the surrounding bumpers. This is something I was not expecting, but I think it is because I airbrushed the primer too heavy. Hopefully - one of the experts might be able to help out here ?


Here's a close-up of the lifted paint - pulled up the primer and white paint. Better now than after painting on the black !


But here is what I want to focus on - this is the achievement of HOURS of practice - Timbo's paints and Gavin's masks  $#$


Now to fix the problems and then prepare for the clearcoat of the area !
Aussie Pinball - Proud to be Australia's Premier Pinball Forum

http://www.australianpinballrestorations.com.au/

http://www.rtbb.com.au/catalog/

We carry the largest range of NEW Ramps in Australia

Offline Strangeways

  • Pinball Restoration is my passion
  • Administrator
  • Trade Count: (+9)
  • *****
  • High Score Initials:
  • Forum Posts:
  • Melbourne
  • ABN 68 283 634 461
    • Ride The Boney Beast
Re: Bally 1965 Aces High Restoration
« Reply #100 on: April 14, 2011, 11:12:12 PM »

I sanded the areas that were lifting. In hindsight, I should have sanded it all back to wood, but I kept going with the areas that lifted. I did a thin primer application to wood and used a brush to add the paint. I sanded the white areas as flat as I could. I reapplied the stencils and painted a thin coat of black, then worked in a couple of thicker coats. I left the paint dry for 5 minutes and then pulled up the stencils. Much better results except on area on one bumper - the far right.


The problem is on this bumper - but I'm not too concerned. I'll remove the white area with a scalpul and refill with white paint with a brush ( I think ! )


Looks HEAPS better. When it is dry, I will clearcoat the bumpers (Gav made masks for that as well) and finally apply mylar. Not only will it look good, but it will stay that way !


Next update will be the application of the clearcoat.

Aussie Pinball - Proud to be Australia's Premier Pinball Forum

http://www.australianpinballrestorations.com.au/

http://www.rtbb.com.au/catalog/

We carry the largest range of NEW Ramps in Australia

Offline Retropin

  • Trade Count: (+4)
  • ******
  • Forum Posts:
Re: Bally 1965 Aces High Restoration
« Reply #101 on: April 14, 2011, 11:33:46 PM »
How many clear coat stencils did i send you??
 If you have one extra then you can VERY lightly clear the far right bumper area... this will seal what you have done.
Then apply  stencil to the whiote area that needs touching up and very gently DAB some white into the divot.

The clear should prevent any further paint loss when you remove any mask... in fact your Tamiya tape is perfect for this... place a small strip over this litle are and carefully cut the groove where the white needs to be with a scalpel with a fresh blade... doesnt have to be all of the circle... just the bit thats missing and a little further.
Tamiya tape is the most gentle yet best line mask i have found.

This way you can "fill" and retain a clean edge.

Wait till you put the "lacquer" finish over the top and get the same semi gloss as the rest of the PF... this will look fantastic!

Offline Strangeways

  • Pinball Restoration is my passion
  • Administrator
  • Trade Count: (+9)
  • *****
  • High Score Initials:
  • Forum Posts:
  • Melbourne
  • ABN 68 283 634 461
    • Ride The Boney Beast
Re: Bally 1965 Aces High Restoration
« Reply #102 on: April 14, 2011, 11:48:09 PM »

Yes mate - I follow your logic. I think you game me "two of everything", so I have 8 clear masks !

Do you think 80 Gloss / 20 Satin will be "too shiny" ?

The clearcoat will be interesting, I've done a few practice runs on this paint and it worked perfectly !
Aussie Pinball - Proud to be Australia's Premier Pinball Forum

http://www.australianpinballrestorations.com.au/

http://www.rtbb.com.au/catalog/

We carry the largest range of NEW Ramps in Australia

Offline Retropin

  • Trade Count: (+4)
  • ******
  • Forum Posts:
Re: Bally 1965 Aces High Restoration
« Reply #103 on: April 15, 2011, 12:02:59 AM »
Do you think 80 Gloss / 20 Satin will be "too shiny" ?


Try it on a flat surface right up to the edge... let dry and compare the two together.
80/20 mix is only a slight gloss finish.

BTW - if you do touch up that white edge make sure you push your mask right down into the very inside edges of the groove.. need to get a really good seal for this

Offline Strangeways

  • Pinball Restoration is my passion
  • Administrator
  • Trade Count: (+9)
  • *****
  • High Score Initials:
  • Forum Posts:
  • Melbourne
  • ABN 68 283 634 461
    • Ride The Boney Beast
Re: Bally 1965 Aces High Restoration
« Reply #104 on: April 18, 2011, 11:16:57 PM »

Over the weekend I decided to do a "test run" on the clear. Results are AMAZING, and I KNOW I've taken FOREVER with this game, but a lot of this (nickel, Zinc plating and airbrushing) is learning "on the job".  This update really showed me how far I've come with this new Airbrush setup, and I can confidently attempt smaller jobs with great results (and friendly advice from Timbo and Gav  ^^^).

Right - I've applied the final stencil - the clear stencil. The product I'm using is a cabot's clear, and it is a joy to work with. Based on Gav's advice - 80% Gloss and 20% Low Sheen. so I bought one of each and mixed it as I needed it. Need to work a bit faster with the clear, as it gets "sticky" quickly, and you don't want it clogging the airbrush. Masked off the area ;

I quickly did the top pop bumper - a mist coat, and then three heavier coats, going around in circles. Then I moved to the bottom pop bumper. I did the same.


Remove the masks after 5 minutes (clean the airbrush first !) and here are the results - the two LEFTMOST pop bumpers are DONE - cleared ! I'll do the other two later, once I'm happy the clear has not reacted etc.


A day after, and it has not reacted or bled in any way. It is a THIN clear, so there is not much of an edge, but you can feel it. This will be covered with mylar later.

So before I move on - Do the gurus think I need to sand the two completed pop bumpers and shoot another coat ? Should I sand with 2000 / 1500 / 1200 grit prior to placing the mylar down ?

Anyway, I'm VERY pleased right now

 $#$
Aussie Pinball - Proud to be Australia's Premier Pinball Forum

http://www.australianpinballrestorations.com.au/

http://www.rtbb.com.au/catalog/

We carry the largest range of NEW Ramps in Australia