Author Topic: Bally Eight Ball Restoration  (Read 3245 times)

0 Members and 1 Guest are viewing this topic.

Offline Strangeways

  • Pinball Restoration is my passion
  • Administrator
  • Trade Count: (+9)
  • *****
  • High Score Initials:
  • Forum Posts:
  • Melbourne
  • ABN 68 283 634 461
    • Ride The Boney Beast
Bally Eight Ball Restoration
« on: July 02, 2012, 12:05:17 PM »

Bally Eight Ball is one of the iconic classic pinballs from Bally's Golden Era. One of the biggest selling games of all time, there's no shortage of these games in collections. Thanks to CPR, this title has all the cosmetic parts reproduced - Backglass, playfield and plastics set. This machine will be a full restoration for a member on AP. This will include a full cabinet restore and repaint. No expense will be spared on this title. The aim is to restore this machine as close to NIB that I can get it (NIB is a term I use - "Nearly In Box").. :lol

Condition Report

It is in a BAD way. Looks like it was stored for many years and quite possibly in a damp area. It does not work, and I'm not even going to try to fire it up at this stage. Cabinet will be repainted, the back panel replaced as it is swollen. The playfield will be swapped over with a CPR playfield and the backglass will be replaced as well. The only problem I see is the missing chime unit. The boards will need to be either repaired or replaced. The game is a perfect candidate for a full restoration.

"Before" Pictures


That's one furry MPU board that has no hope of booting !


The Teardown

First, all the boards are removed to be assessed. The MPU is VERY bad and would need hours spent on it to repair. This would be discarded at this point and either a Homepin or altek used as a replacement. The Solenoid Driver will need a rebuild - those Capacitors are over 35 years old and they have an operational life of 10 years. The displays will all be repaired and assessed. The power supply board will either be rebuilt or replaced with the new Homepin Board. Lamp Driver looks fine, but will be tested and repaired if necessary.


The playfield is not too bad, but would need work to raise it to the standard of the rest of the game. Since this will be a full restore, the CPR playfield is the best idea.


Missing Chimebox - If anyone has a spare - let me know !


The cabinet will be completely stripped and the lower cabinet will hold the key to the exact factory paint colors. You will find this behind the front door trim. I will take the entire lower cabinet to have the orange matched. For now, I will concentrate on the playfield teardown. Everything on top will be new, but I will retian the bulk of the mechanical and electrical parts from under the playfield. Everything has to be documented and labelled.


End of first update !


Aussie Pinball - Proud to be Australia's Premier Pinball Forum

http://www.australianpinballrestorations.com.au/

http://www.rtbb.com.au/catalog/

We carry the largest range of NEW Ramps in Australia

Offline Retropin

  • Trade Count: (+4)
  • ******
  • Forum Posts:
Re: Bally Eight Ball Restoration
« Reply #1 on: July 02, 2012, 02:11:16 PM »
The PF looks VERY restorable to me... send it up and ill make it like new again. Then youll have a spare for the next 8 Ball

Offline Caveoftreasures

  • Trade Count: (+16)
  • ******
  • Forum Posts:
Re: Bally Eight Ball Restoration
« Reply #2 on: July 02, 2012, 03:53:21 PM »
Looks good Nino. Certainly a very good variety of machines in your collection. The backglass looks excellent. The rest should come up very well with the Nino magic. Thanks for sharing another great resto.
 
Behind every garage door could be a pinball collectors
"Cave of Treasures" 55 in my collection

Into  Stern -JJP - Cars , Road Bikes- Jet Skis - Star Trek n Sci-Fi & Electronics    
Beware of Stalkers & Walkers when playing The Walking Dead

My 7yr old son Hunter is my best mate in the world !

Offline Strangeways

  • Pinball Restoration is my passion
  • Administrator
  • Trade Count: (+9)
  • *****
  • High Score Initials:
  • Forum Posts:
  • Melbourne
  • ABN 68 283 634 461
    • Ride The Boney Beast
Re: Bally Eight Ball Restoration
« Reply #3 on: July 24, 2012, 12:26:36 AM »

Cabinet repairs and preparation

The lower cabinet and head need to be stripped of all parts and prepared for repaint. Although the cabinet looks fine in the pictures, there's a lot of separation of the primer from the base. That's assuming primer was used because it was falling off in some sections.


The back panel is a complete disaster. It will be removed and replaced. Very common on these old games, and I'm taking steps to have the back panels reproduced on my restores.


The back panel removed. The wooden brackets will re used, or replaced.


Here's the replacement panel I prepared earlier  #@#. Not a simple task, but one I'm sure I'll be doing a lot of in the future !


The profile it a bit tricky to do without a CNC, but I tweaked it until I was happy.


Glued together and I used the same staples as originally used. The Nails are the same length, but a different head. Hard to describe the original nails. Suffice to say they are NLA !


I removed the original paint and started repairs to the rest of the cabinet.


The cabinet now waits for a warm day to apply the primer coat. I will have several other cabinets prepared in the same way and hit them all at once. Until then, I'll move on the boards. I spoke to the owner this evening and this will have an Altek and a Homepin Power Supply board for starters.


Aussie Pinball - Proud to be Australia's Premier Pinball Forum

http://www.australianpinballrestorations.com.au/

http://www.rtbb.com.au/catalog/

We carry the largest range of NEW Ramps in Australia

Offline howzat

  • Trade Count: (0)
  • *****
  • Forum Posts:
Re: Bally Eight Ball Restoration
« Reply #4 on: July 25, 2012, 11:15:19 PM »
Hi Nino
When you stripped the cab did you use paint stripper or just sanding   as you have taken it right back   

Also the back pannel you will have to drill holes for leg bolts     I  rember seeing a jig on another post for accurate  drilling    It would be handy for what you need   

                                                               Howzat

Offline Strangeways

  • Pinball Restoration is my passion
  • Administrator
  • Trade Count: (+9)
  • *****
  • High Score Initials:
  • Forum Posts:
  • Melbourne
  • ABN 68 283 634 461
    • Ride The Boney Beast
Re: Bally Eight Ball Restoration
« Reply #5 on: July 26, 2012, 09:30:34 AM »
Hi Nino
When you stripped the cab did you use paint stripper or just sanding   as you have taken it right back   

Also the back pannel you will have to drill holes for leg bolts     I  rember seeing a jig on another post for accurate  drilling    It would be handy for what you need   

                                                               Howzat

Bunnings don't stock "Citrus Strip" anymore. I used the "Diggers low odor", which is just as good. I use the stripper to remove the bulk of the paint, then I leave the cabinet in the sun for a day to ensure it is dry. I then use an orbital sander with 180 Grit to remove the paint that is left over. Once that is done, I tidy up any defects and then sand the cabinet again. I'll wait for the weather to improve before painting the primer / filler.

I vaguely remember a jig for doing the holes.
Aussie Pinball - Proud to be Australia's Premier Pinball Forum

http://www.australianpinballrestorations.com.au/

http://www.rtbb.com.au/catalog/

We carry the largest range of NEW Ramps in Australia

Offline Mr Pinbologist

  • Trade Count: (+5)
  • ******
  • High Score Initials:
  • Forum Posts:
  • Wauchope NSW
Re: Bally Eight Ball Restoration
« Reply #6 on: July 26, 2012, 09:39:24 AM »
Hi Nino
When you stripped the cab did you use paint stripper or just sanding   as you have taken it right back  

Also the back pannel you will have to drill holes for leg bolts     I  rember seeing a jig on another post for accurate  drilling    It would be handy for what you need  

                                                               Howzat

Bunnings don't stock "Citrus Strip" anymore. I used the "Diggers low odor", which is just as good. I use the stripper to remove the bulk of the paint, then I leave the cabinet in the sun for a day to ensure it is dry. I then use an orbital sander with 180 Grit to remove the paint that is left over. Once that is done, I tidy up any defects and then sand the cabinet again. I'll wait for the weather to improve before painting the primer / filler.

I vaguely remember a jig for doing the holes.

I can remember the thread for the hole jig, but cant remember who posted the thread.
Was really well made, and a brilliant idea  *%*

And great start so far Nino.
Eight Ball is a game i remember seeing in a pub in Wauchope where i was doing a band gig many years ago, it was turned off so i never got to play it.
And i never got another opportunity to see or play another... probably just as well i didnt or it would've yet another title on my wishlist  :lol
« Last Edit: July 26, 2012, 09:44:02 AM by Mr Pinbologist »

Offline GORGAR 1

  • Trade Count: (0)
  • ******
  • High Score Initials:
  • Forum Posts:
  • BROOKFIELD-MELBOURNE
Re: Bally Eight Ball Restoration
« Reply #7 on: July 26, 2012, 10:06:09 AM »
Awesome game this one and always remembered the RHS sling and BG as the girls are very well endowed %$% keep up the great work can't wait to see the finished product.

Peter

Offline Steevsee

  • Trade Count: (+1)
  • ******
  • High Score Initials:
  • Forum Posts:
  • Brisbane

Offline billstats

  • Trade Count: (0)
  • ***
  • Forum Posts:
  • sydney
Re: Bally Eight Ball Restoration
« Reply #9 on: July 26, 2012, 08:12:32 PM »
 <..>The cab is looking good,are u going to spray paint the cab or roller? ^.^
bill /sydney /pinballs

Offline Retropin

  • Trade Count: (+4)
  • ******
  • Forum Posts:
Re: Bally Eight Ball Restoration
« Reply #10 on: July 26, 2012, 08:21:11 PM »
<..>The cab is looking good,are u going to spray paint the cab or roller? ^.^


 :lol: :lol: :lol: good one


Offline Strangeways

  • Pinball Restoration is my passion
  • Administrator
  • Trade Count: (+9)
  • *****
  • High Score Initials:
  • Forum Posts:
  • Melbourne
  • ABN 68 283 634 461
    • Ride The Boney Beast
Re: Bally Eight Ball Restoration
« Reply #12 on: July 27, 2012, 12:22:07 AM »
<..>The cab is looking good,are u going to spray paint the cab or roller? ^.^

Whats a "roller"  !^!

Definitely using my compressor with Gavin's stencils !


The only problem I see is the missing chime unit.

Here's one in the USA
http://www.ebay.com.au/itm/BALLY-1974-EM-BOW-AND-ARROW-PINBALL-MACHINE-CHIMES-CHIME-UNIT-/160851880709?pt=LH_DefaultDomain_0&hash=item257384eb05

Thanks for that - This could be promising !
Aussie Pinball - Proud to be Australia's Premier Pinball Forum

http://www.australianpinballrestorations.com.au/

http://www.rtbb.com.au/catalog/

We carry the largest range of NEW Ramps in Australia

Offline Strangeways

  • Pinball Restoration is my passion
  • Administrator
  • Trade Count: (+9)
  • *****
  • High Score Initials:
  • Forum Posts:
  • Melbourne
  • ABN 68 283 634 461
    • Ride The Boney Beast
Re: Bally Eight Ball Restoration
« Reply #13 on: September 22, 2012, 11:59:07 PM »

Weather is starting to improve, and until I have a booth set up at the new premises, I have to rely on Mother Nature ! Today was a perfect day to paint the base coat. I painted the primer undercoat a couple of weeks ago and sanded it smooth and ready for the white base coat. Here's a few pics after sanding the cabinet.


I think this is the most crucial step of repainting a cabinet. If not done right, then all work done AFTER this step is a waste of time  :D The cabinet is sanded with 800 Grit - and the texture should feel as smooth as glass. All imperfections are removed prior to the base coat.


Here is the finished base after three coats. One mist coat and then two consecutive heavier coats. The paint dries in 10 minutes, and it is a beautiful finish. It is a semi gloss, matched by a professional (not me !).


I left the cabinet in the sun for an hour and then placed it in the garage until the stencils arrive. The finish is excellent. I'm very happy with the results.


 <.>

Aussie Pinball - Proud to be Australia's Premier Pinball Forum

http://www.australianpinballrestorations.com.au/

http://www.rtbb.com.au/catalog/

We carry the largest range of NEW Ramps in Australia

Offline Strangeways

  • Pinball Restoration is my passion
  • Administrator
  • Trade Count: (+9)
  • *****
  • High Score Initials:
  • Forum Posts:
  • Melbourne
  • ABN 68 283 634 461
    • Ride The Boney Beast
Re: Bally Eight Ball Restoration
« Reply #14 on: October 31, 2012, 09:53:06 PM »

The weather has improved and the stencils have arrived from Gavin  ^^^

The first color is orange, which was professionally matched. Again, I'm using automotive acrylics that are a touch less than semi gloss in finish. This is exactly the finish used in the factory. I mask the cabinet and leave only the paint areas exposed. That way, I only have to replace the stencils, and cover up any areas as I need to. This is an important step, as the paint is airbourne, and finds its way into areas you don't want it to go !

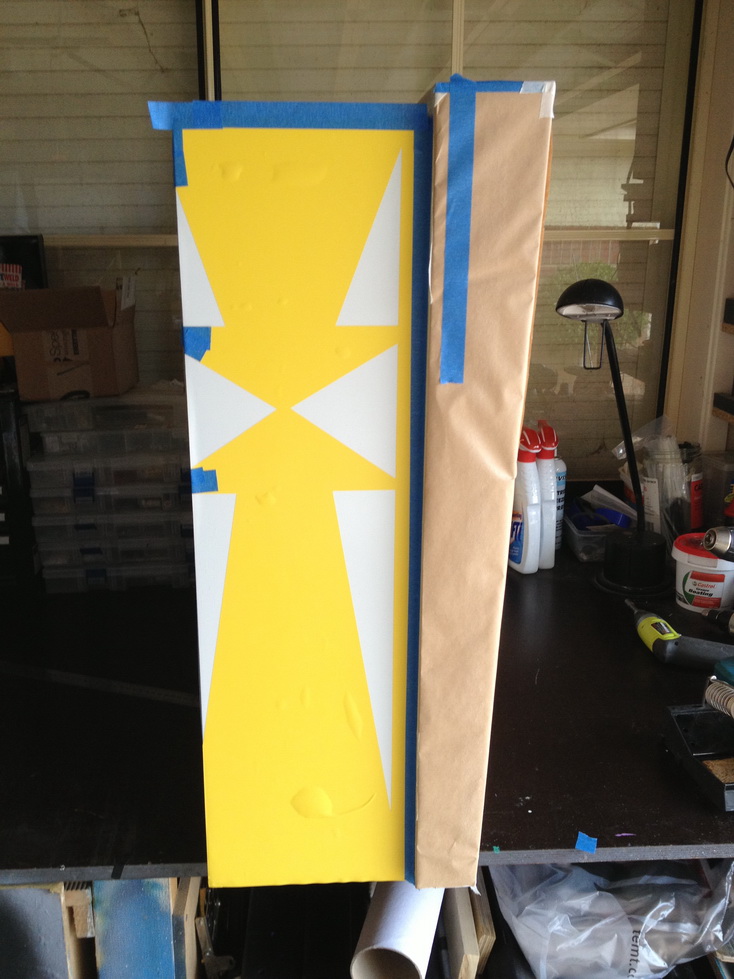
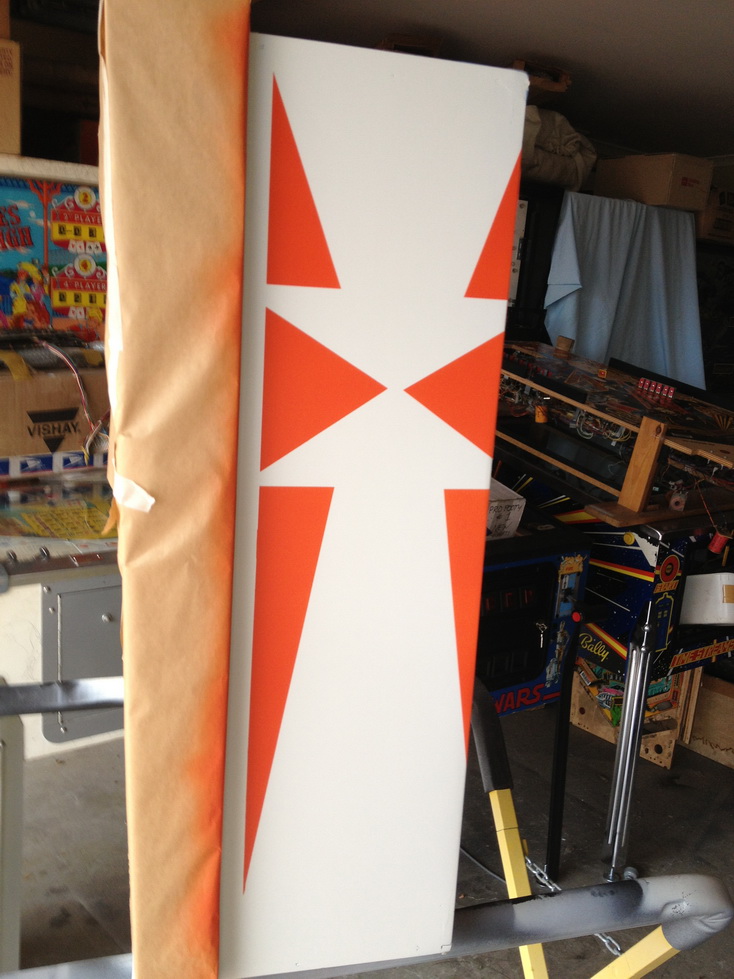
Here's the head orange stencil applied.


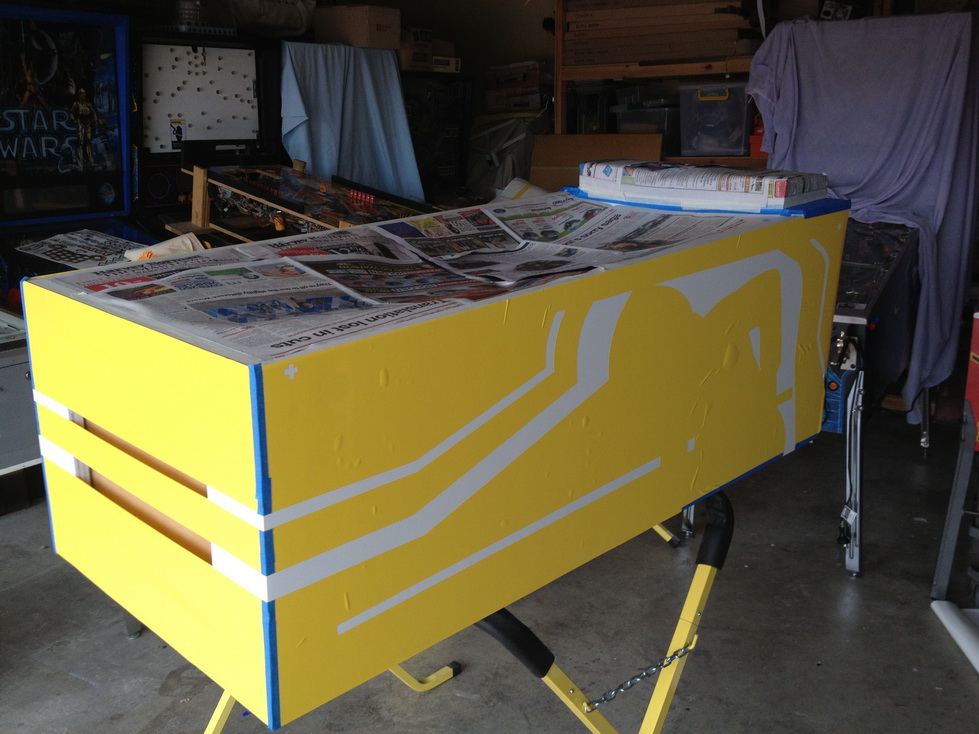
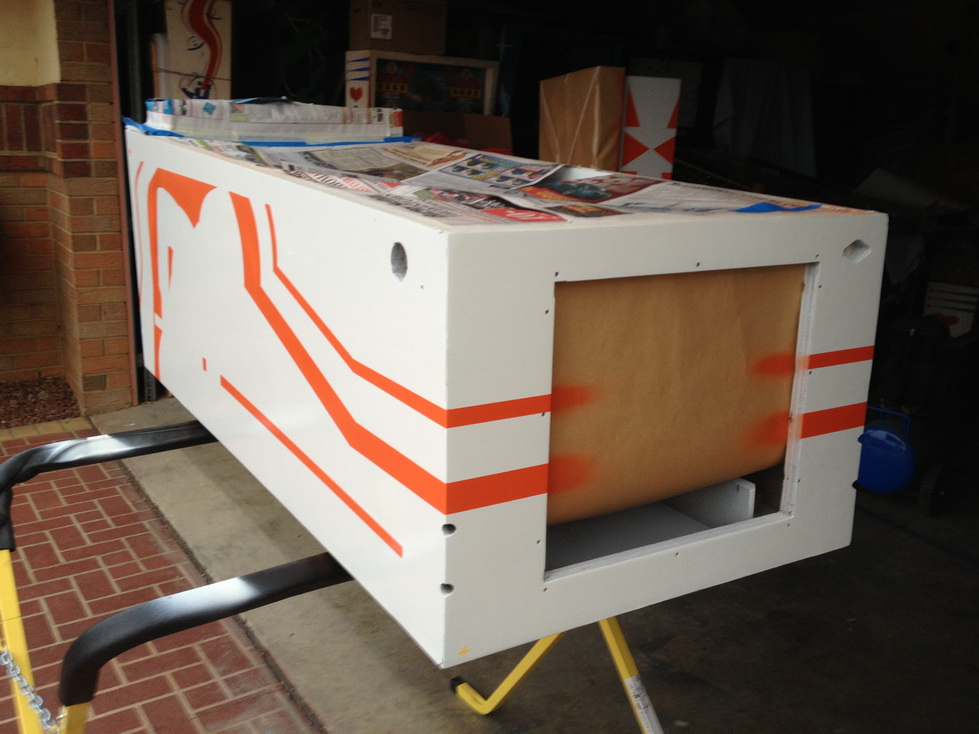
The left side of the cab. The backing was removed from top to bottom. Tricky part is that the front of the cabinet has two horizontal sections that have to match up the sides. This step is CRUCIAL. I've left the transfer tape over the stencil in case I make any mistakes as I go along.


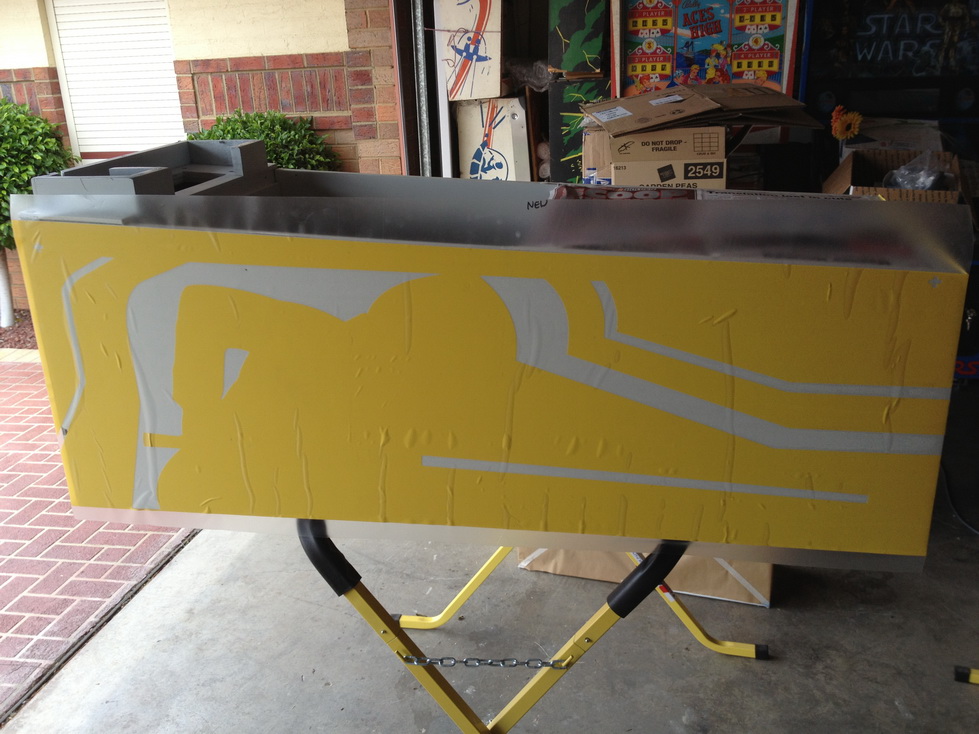
The right side - note the lines all match up. The registration "+" marks are there as a reference point for the next color. Gav once told me that some people "complained" that they were unnecessary - I think they should be mandatory !


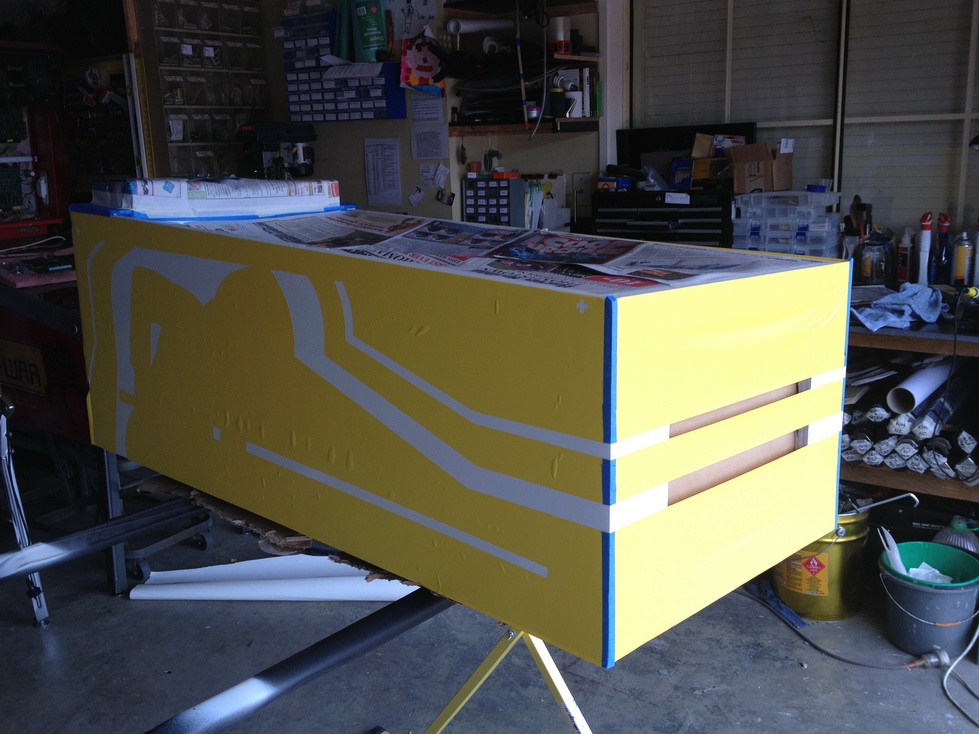
The left side - Blue low tack tape is used to cover up edges etc. Paint WILL find a way into the smallest exposed area. One less thing to worry about !


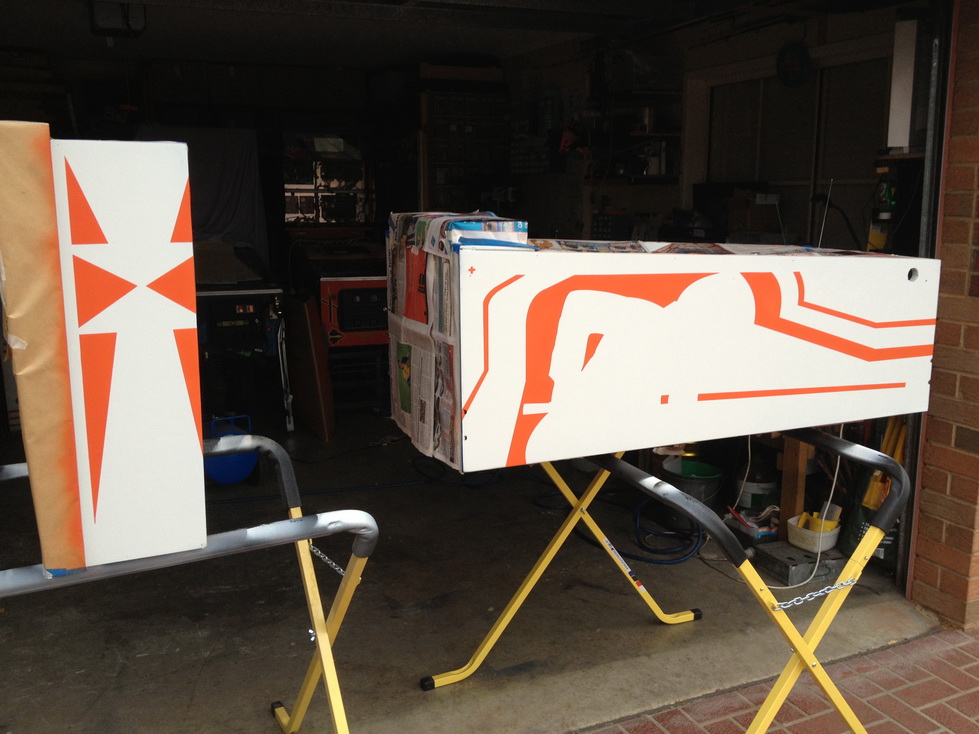
One light mist coat, then two or three fine coats. Nothing too heavy. Stencil removed and the finish is perfect. My only gripe is I like overspray and underspray. But these stencils are absolutely dead accurate and finely cut.


Lines meet perfectly


Note registration mark in the top left hand corner. I sprayed the cross as it is not seen anyway, and it is permanent.


Black stencil will most likely be done on Monday !

Special thanks to Gav for his help on this stencil - Really worked out well in the end  *%*


Aussie Pinball - Proud to be Australia's Premier Pinball Forum

http://www.australianpinballrestorations.com.au/

http://www.rtbb.com.au/catalog/

We carry the largest range of NEW Ramps in Australia