Author Topic: Gottlieb High Hand Restoration  (Read 29254 times)

0 Members and 2 Guests are viewing this topic.

Offline Strangeways

  • Pinball Restoration is my passion
  • Administrator
  • Trade Count: (+9)
  • *****
  • High Score Initials:
  • Forum Posts:
  • Melbourne
  • ABN 68 283 634 461
    • Ride The Boney Beast
Re: Gottlieb High Hand Restoration
« Reply #15 on: January 21, 2015, 09:45:26 AM »
Well look at that........

Good things come to those that wait.

Nice stuff Nino...sent a shiver down my spine when I saw it

Thrilled to hear that Andy. I can't wait until you see it in the flesh.
Aussie Pinball - Proud to be Australia's Premier Pinball Forum

http://www.australianpinballrestorations.com.au/

http://www.rtbb.com.au/catalog/

We carry the largest range of NEW Ramps in Australia

Offline goodolddays

  • Trade Count: (0)
  • ******
  • Forum Posts:
  • Riverstone NSW
Re: Gottlieb High Hand Restoration
« Reply #16 on: January 21, 2015, 12:23:18 PM »
Cab looks great Nino  ^^^

I must remember about the tip regarding Cream basecoat .. I will probably repaint my El Dorado at some stage which will be my 1st Gottlieb EM repaint.
I need more room ! and more $$$

Offline Strangeways

  • Pinball Restoration is my passion
  • Administrator
  • Trade Count: (+9)
  • *****
  • High Score Initials:
  • Forum Posts:
  • Melbourne
  • ABN 68 283 634 461
    • Ride The Boney Beast
Re: Gottlieb High Hand Restoration
« Reply #17 on: August 23, 2016, 12:10:50 AM »
This restoration and I have a "love / hate" relationship. I love looking at the restored cabinet, and I hate that it is still HERE and not in it's new home.

A decision was made to remove the mylar, and the job of restoring the playfield would be undertaken (earlier updates). The playfield has had it's first clear to lock in the work done and ensure no further deterioration. I can now work with a blank canvas and attack each section in isolation. If you look at the entire job, it becomes too difficult. so I break it down. There will be "sealing clearcoats" as I did with Genie. That way, the hours of work are locked it, and if i make a mistake later on, I can just remove that work.

Looking at the playfield, I chose to start with red. It is easy, and will help me get back into the groove quickly.

Here's the starting point ;
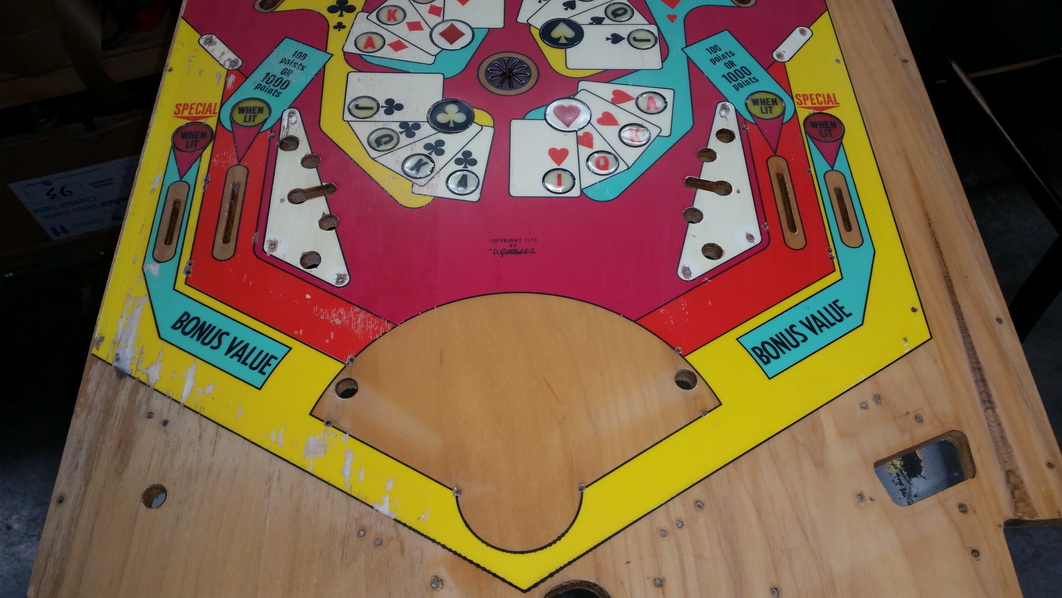


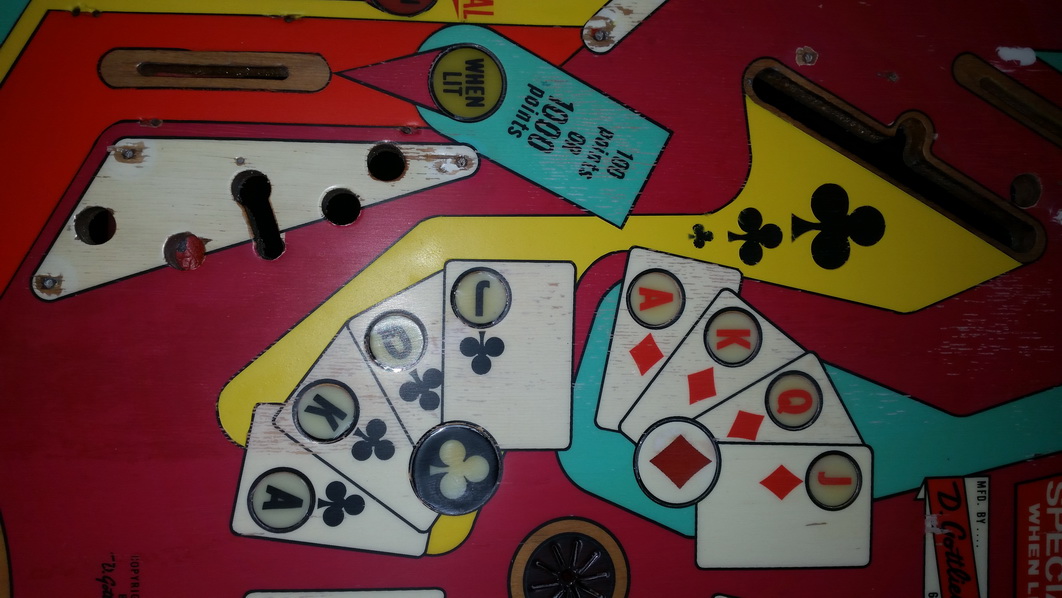
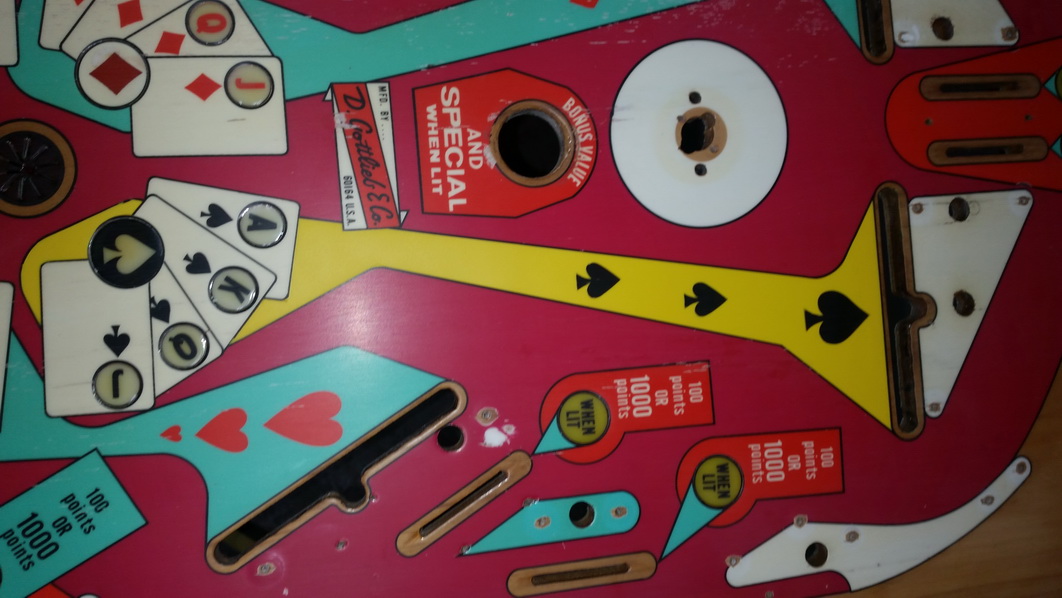
The left side of the lower playfield is where the planking is out of control. The clear has locked in the playfield.
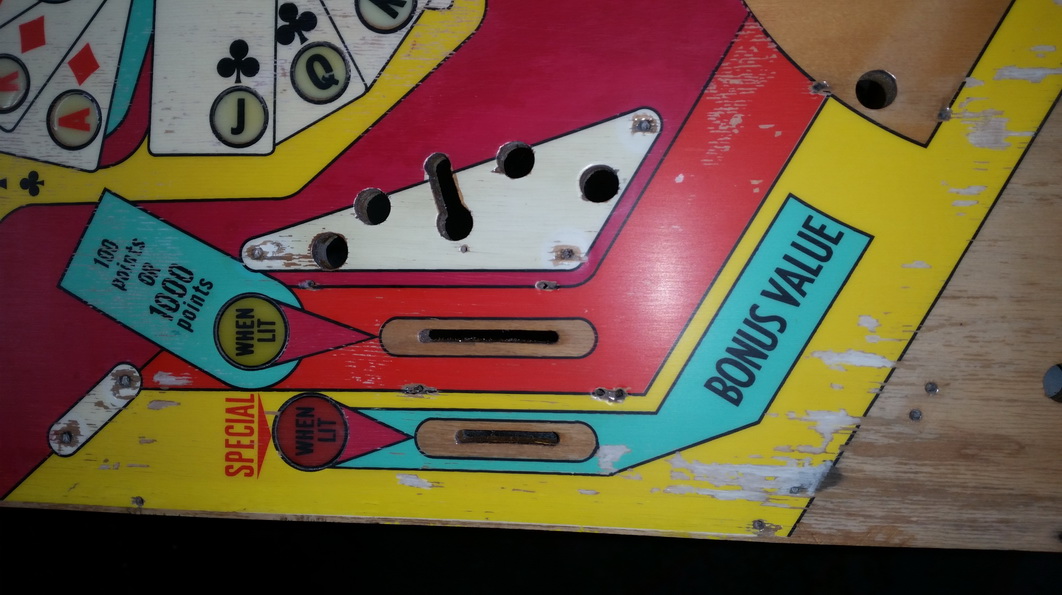


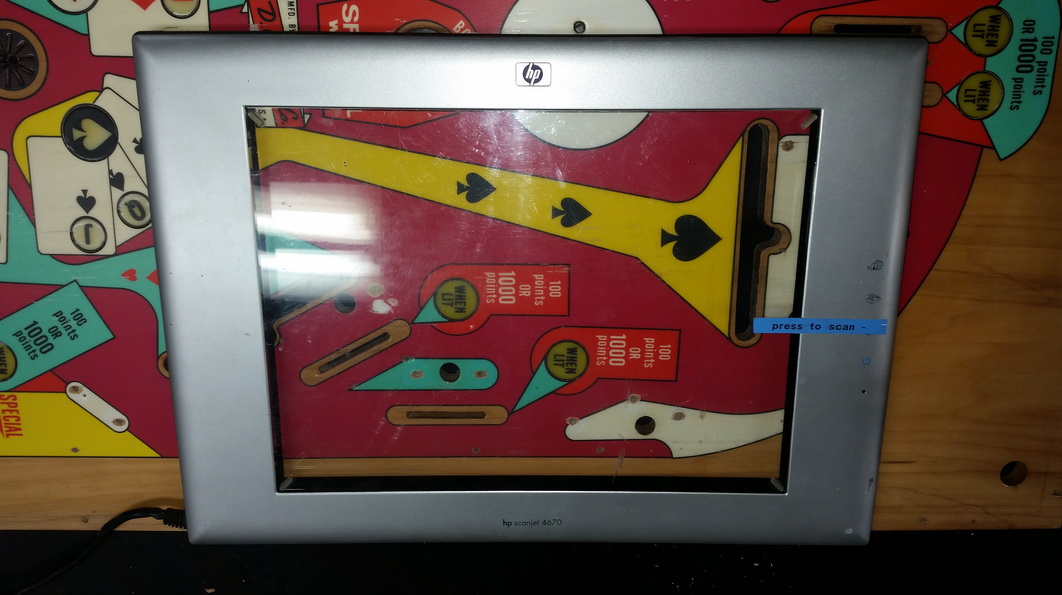
Before I start, I scan areas I will need to go back to later on. I might have Gavin make some lettering stencils for these areas.


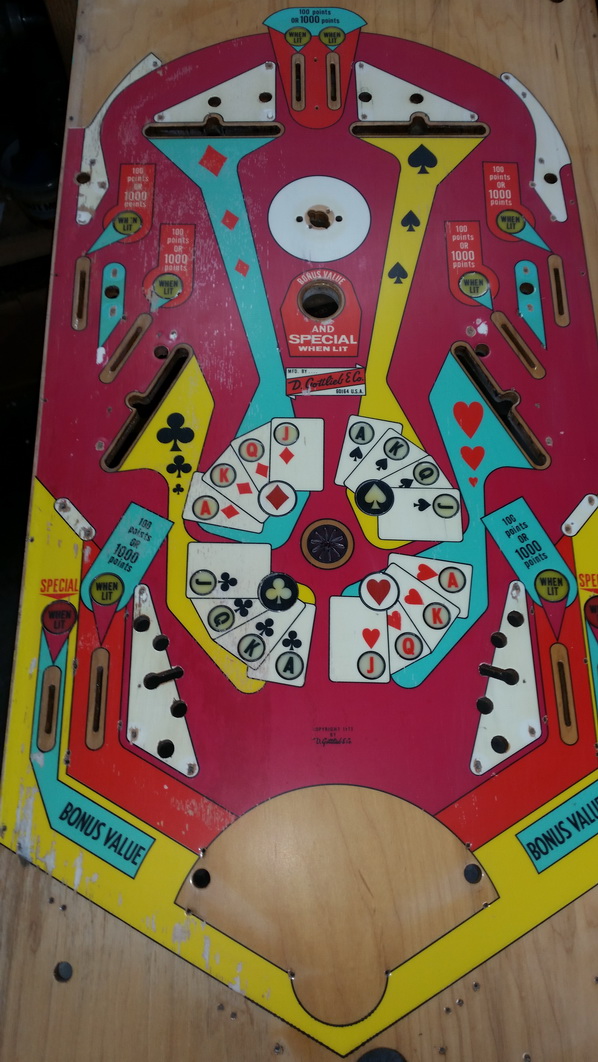
I'm going to do both inlanes. In fact, 90% of this playfield will be repainted. So here is the starting point ;


I use Tamiya modelling tape and frisket. Tape off the areas I don't want to paint. Then with light coats of thin paint, I airbrush the areas ;
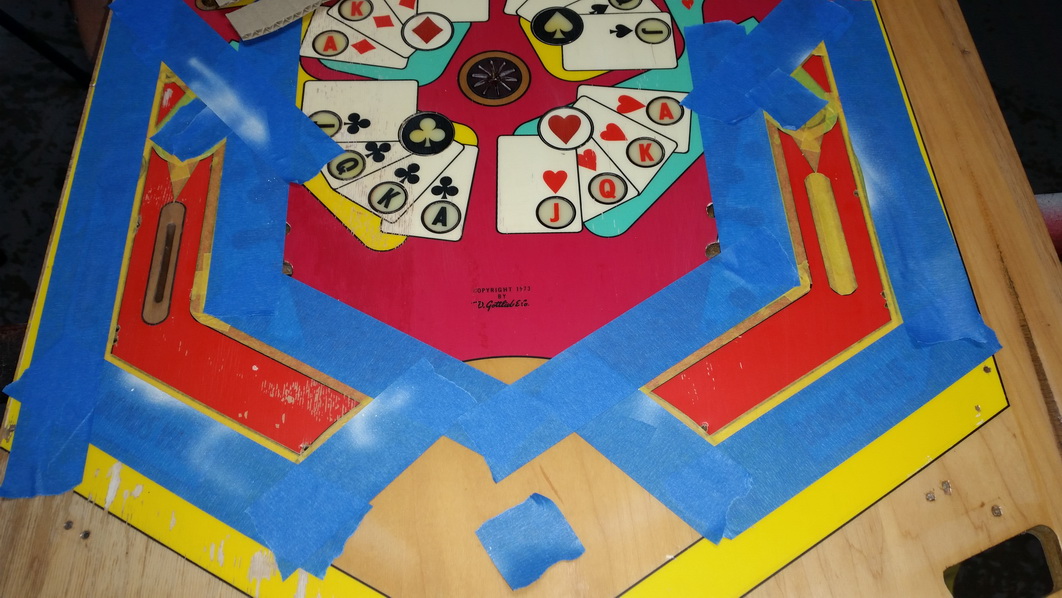
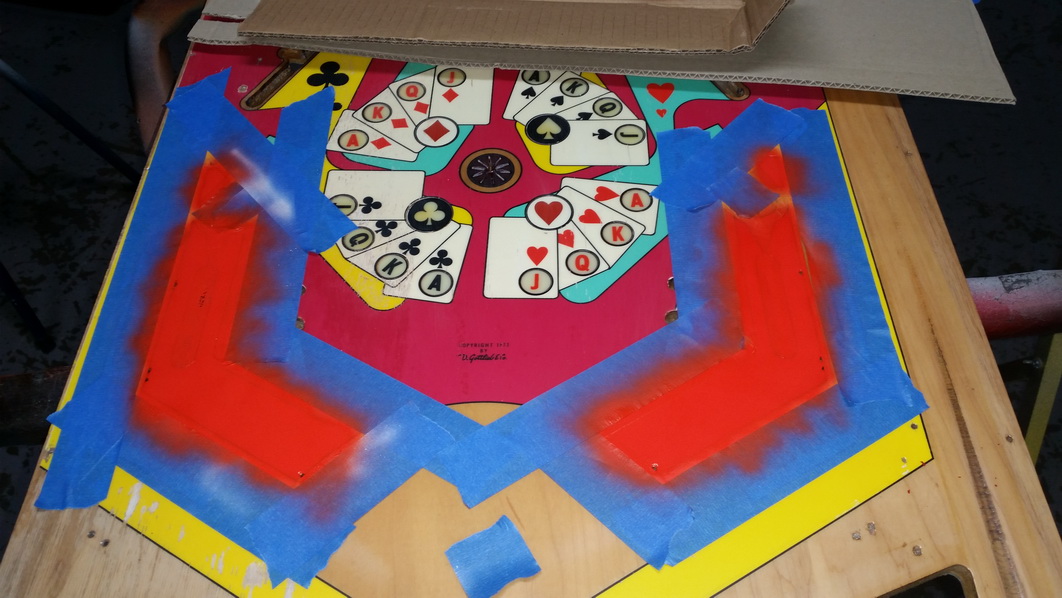


Remove the masking, and the area is completed (except the lines which will be done after a clearcoat
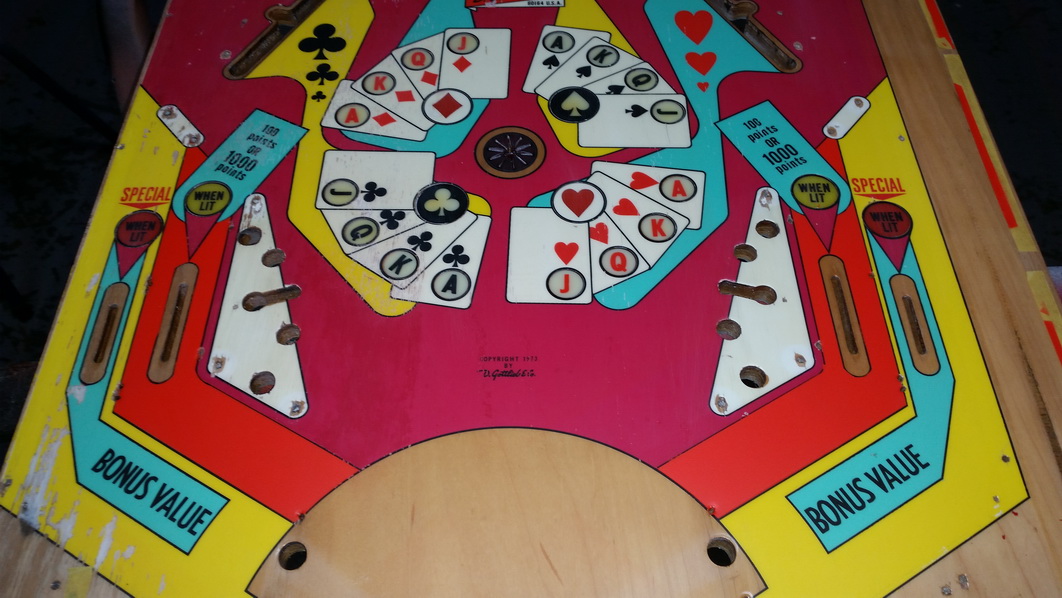


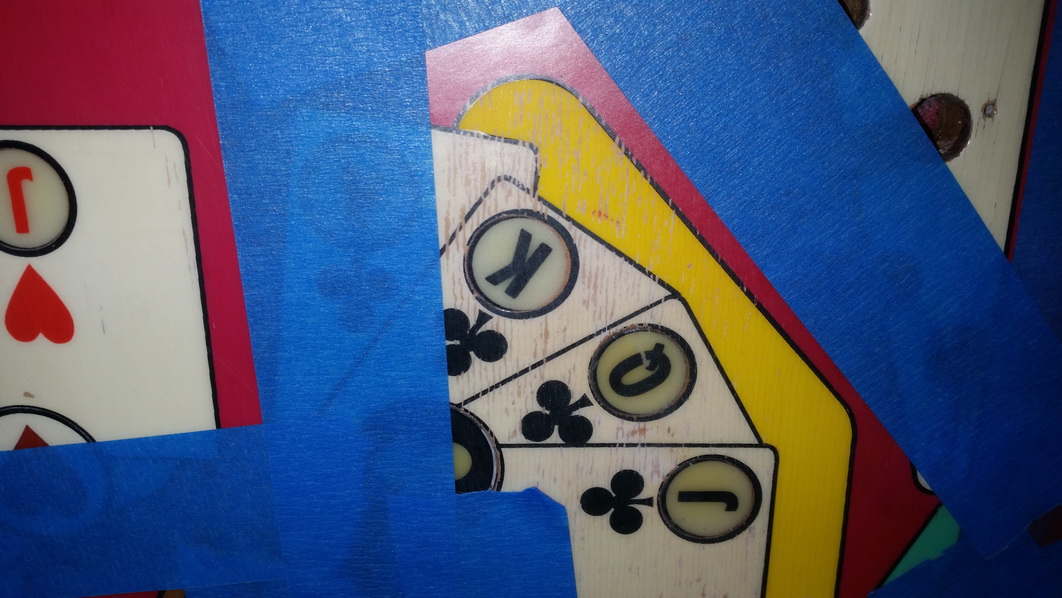
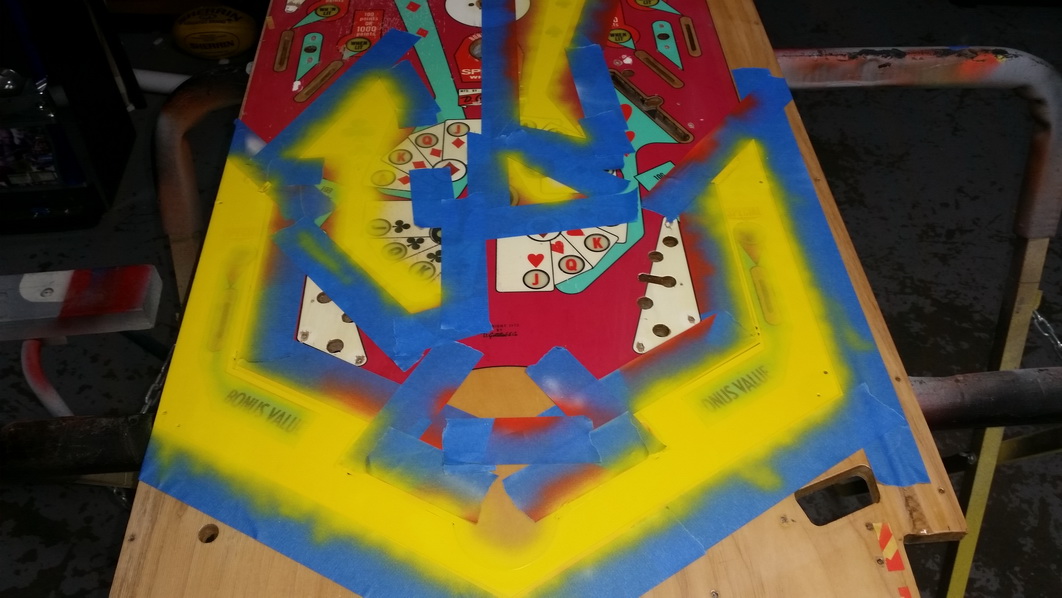
Moving on to the Yellow sections. Again, an easy colour on the playfield. I masked out some of the artwork. My wife matched the yellow, as I'm completely useless at colour matching.


The lower damage ;
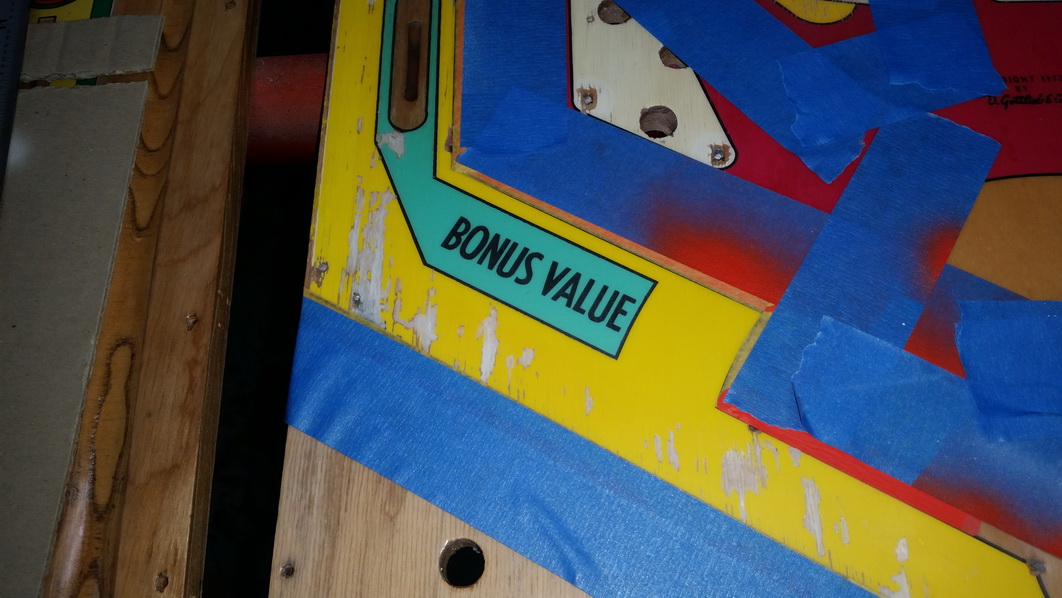


Masked and ready to airbrush the new paint
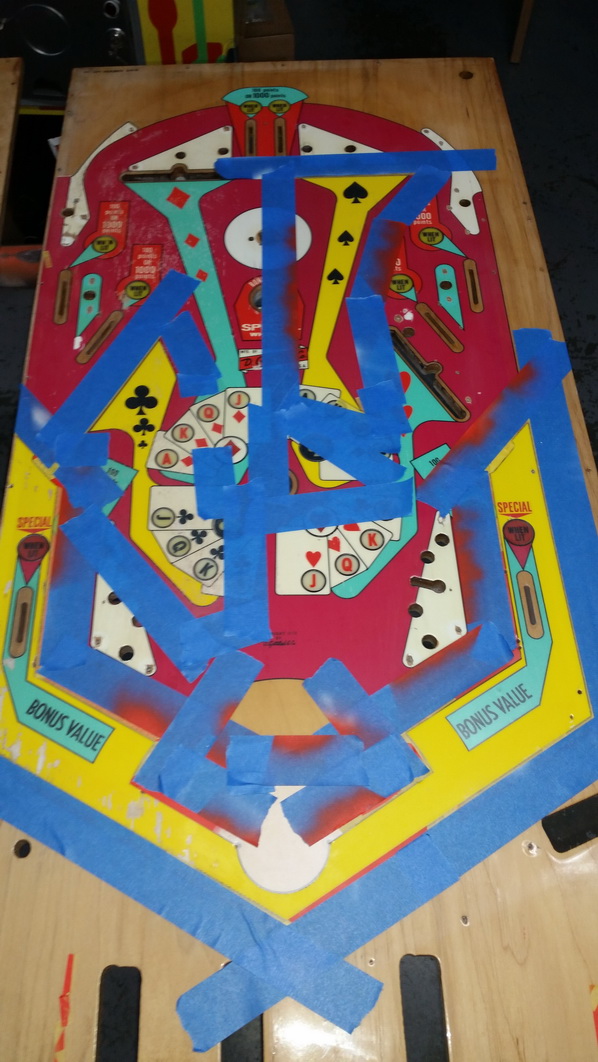


Paint applied. Had to go 3 coats in damaged areas. All thin coats - don't go overboard !
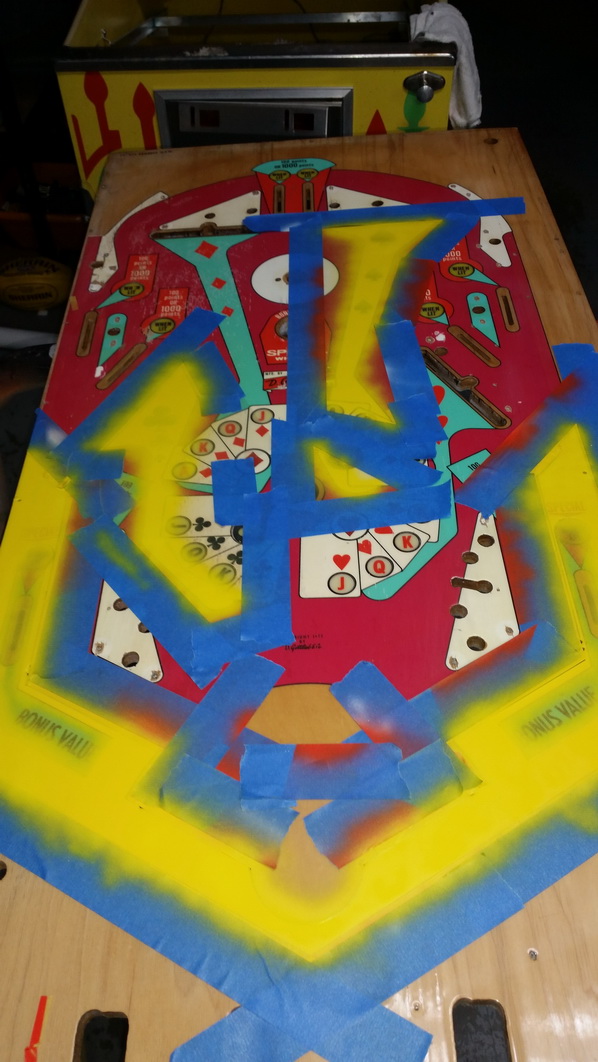


Masking removed. That's an improvement !
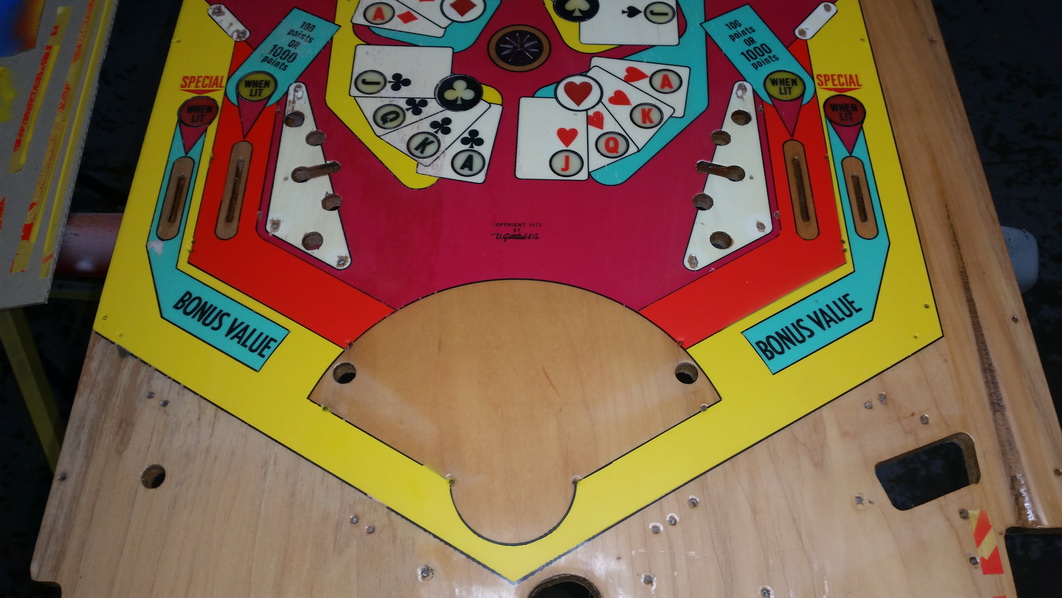


Happy with the improvement. Next - Cyan !
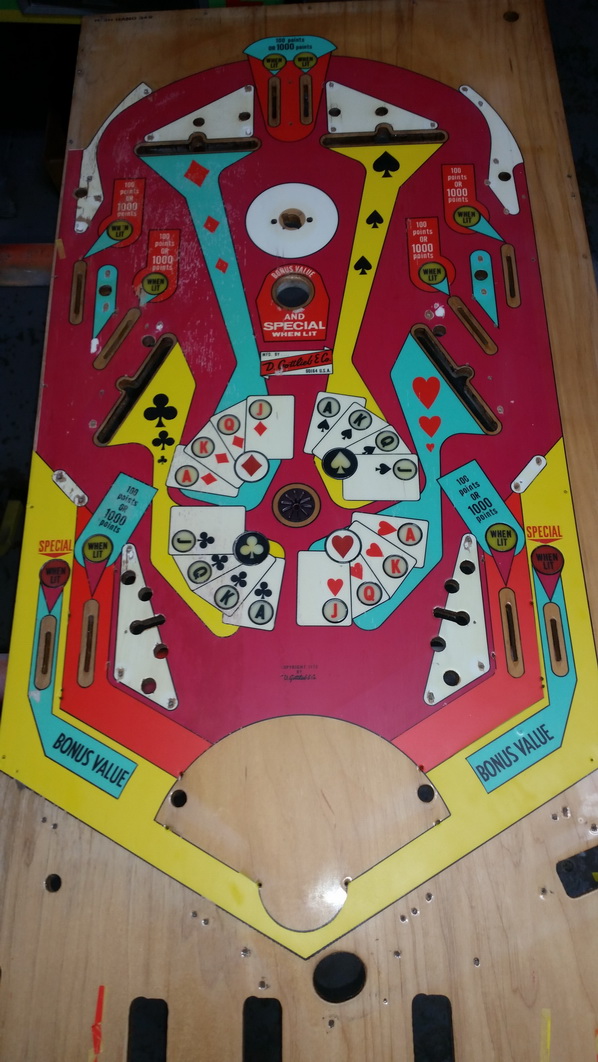


 :D
Aussie Pinball - Proud to be Australia's Premier Pinball Forum

http://www.australianpinballrestorations.com.au/

http://www.rtbb.com.au/catalog/

We carry the largest range of NEW Ramps in Australia

Offline Mr Pinbologist

  • Trade Count: (+5)
  • ******
  • High Score Initials:
  • Forum Posts:
  • Wauchope NSW
Re: Gottlieb High Hand Restoration
« Reply #18 on: August 23, 2016, 12:52:17 AM »
Thats coming along nicely so far Nino  ^^^ ^^^

Offline Brettski

  • Trade Count: (0)
  • *****
  • Forum Posts:
  • Gold Coast, Queensland
  • Since I Was A Young Boy I Played The Silver Ball!
    • Strikes and Spares Restoration
Re: Gottlieb High Hand Restoration
« Reply #19 on: August 23, 2016, 01:22:28 AM »
Great job on the cabinet and playfield, love your work Nino. following this with great interest. :)

Cheers: Brettski... :)

Offline goodolddays

  • Trade Count: (0)
  • ******
  • Forum Posts:
  • Riverstone NSW
Re: Gottlieb High Hand Restoration
« Reply #20 on: August 23, 2016, 02:31:14 PM »
it looks like its going really well Nino .

What sort of paint are you using ?

Cheers
Dave
I need more room ! and more $$$

Offline big dog

  • Trade Count: (0)
  • *****
  • Forum Posts:
  • Grafton
Re: Gottlieb High Hand Restoration
« Reply #21 on: August 23, 2016, 03:45:31 PM »
that's great, the skill you blokes have got amazes me. that cabinet looks A1 @@*

Offline Crashramp

  • Trade Count: (+3)
  • ******
  • High Score Initials:
  • Forum Posts:
  • Albury
Re: Gottlieb High Hand Restoration
« Reply #22 on: August 23, 2016, 07:29:16 PM »
Looking very nice Nino.  ^^^

Offline Strangeways

  • Pinball Restoration is my passion
  • Administrator
  • Trade Count: (+9)
  • *****
  • High Score Initials:
  • Forum Posts:
  • Melbourne
  • ABN 68 283 634 461
    • Ride The Boney Beast
Re: Gottlieb High Hand Restoration
« Reply #23 on: August 24, 2016, 09:58:46 PM »
it looks like its going really well Nino .

What sort of paint are you using ?

Cheers
Dave

Jo Sonja - Spotlight stock them at $5 a tube.
Aussie Pinball - Proud to be Australia's Premier Pinball Forum

http://www.australianpinballrestorations.com.au/

http://www.rtbb.com.au/catalog/

We carry the largest range of NEW Ramps in Australia

Offline Brettski

  • Trade Count: (0)
  • *****
  • Forum Posts:
  • Gold Coast, Queensland
  • Since I Was A Young Boy I Played The Silver Ball!
    • Strikes and Spares Restoration
Re: Gottlieb High Hand Restoration
« Reply #24 on: August 24, 2016, 11:56:01 PM »
it looks like its going really well Nino .

What sort of paint are you using ?

Cheers
Dave

Jo Sonja - Spotlight stock them at $5 a tube.

Do you then thin it to use with an air gun?

Offline Steve2010

  • Trade Count: (+11)
  • *****
  • Forum Posts:
  • Sydney
Re: Gottlieb High Hand Restoration
« Reply #25 on: August 25, 2016, 01:53:17 PM »
Coming along very nicely Nino, a significant improvement on what you started with.  Well done ^^^

Offline Strangeways

  • Pinball Restoration is my passion
  • Administrator
  • Trade Count: (+9)
  • *****
  • High Score Initials:
  • Forum Posts:
  • Melbourne
  • ABN 68 283 634 461
    • Ride The Boney Beast
Re: Gottlieb High Hand Restoration
« Reply #26 on: August 25, 2016, 09:52:56 PM »
it looks like its going really well Nino .

What sort of paint are you using ?

Cheers
Dave

Jo Sonja - Spotlight stock them at $5 a tube.

Do you then thin it to use with an air gun?

Yes - I use the Jo Sonja Flow Medium - you have to use this medium with an airbrush. I thin it out completely, as you really don't need too much paint to cover an entire area once you get the hang of it. Thin coats work much better than a heavy / thick coat.
Aussie Pinball - Proud to be Australia's Premier Pinball Forum

http://www.australianpinballrestorations.com.au/

http://www.rtbb.com.au/catalog/

We carry the largest range of NEW Ramps in Australia

Offline Strangeways

  • Pinball Restoration is my passion
  • Administrator
  • Trade Count: (+9)
  • *****
  • High Score Initials:
  • Forum Posts:
  • Melbourne
  • ABN 68 283 634 461
    • Ride The Boney Beast
Re: Gottlieb High Hand Restoration
« Reply #27 on: August 26, 2016, 11:32:16 PM »
Moving on to the large maroon section. I was going to do the Cyan areas, but I thought I'd go the larger section. This was a tedious and long process to mask the areas, so I did it in four sections across 2 days. Three light coats. The key is not to rush the areas.

Mask the badly planked area on the LHS (sealed with a Clearcoat previously).


You can see the top section is already drying after the second (heavier) coat. You can tell were I've gone a bit heavier in the dried area (still wet). This all blends in - but it should dry uniform.


The RHS ;


The original maroon colour was under the ball guide, and slightly darker than the playfield which had faded over time. So the top LHS and RHS are the correct "darker" colour.


Central and lower section are done a day later. I allow at least 24 hours as I need to mask over painted areas and I don't want any paint lifting.


Main areas completed.


The only downside is that the "Gottlieb" logo is painted over. I don't like waterslide decals, so it will be left as is. A huge improvement from what it was.


I will let the playfield settle and revisit it with a view to either leaving it for it's next clear, or possibly doing some of the white areas (not the cards yet). Linework is always left until last.

 :D
Aussie Pinball - Proud to be Australia's Premier Pinball Forum

http://www.australianpinballrestorations.com.au/

http://www.rtbb.com.au/catalog/

We carry the largest range of NEW Ramps in Australia

Offline Brettski

  • Trade Count: (0)
  • *****
  • Forum Posts:
  • Gold Coast, Queensland
  • Since I Was A Young Boy I Played The Silver Ball!
    • Strikes and Spares Restoration
Re: Gottlieb High Hand Restoration
« Reply #28 on: August 27, 2016, 01:44:49 PM »
This is awesome work Nino, Thank you for sharing your process and details.
This has inspired me to look at an airbrush for future playfield work.
I just bought a plotter for making cabinet stencils and I can see it being handy for making playfield lettering stencils also.

Everytime I read one of your restoration posts I seem to learn something which is brilliant!

Cheers: Brettski... :)

Offline ddstoys

  • Trade Count: (+23)
  • ******
  • High Score Initials:
  • Forum Posts:
  • Geelong
Re: Gottlieb High Hand Restoration
« Reply #29 on: August 28, 2016, 05:39:27 AM »
Looking amazing great to see an old girl getting some love