I wanted to start on the lower PF first; since it was smaller and had less componets to remove on the top side. It also has the most insert lifting but nearly no PF wear. So I pulled the lower playfield out of the machine and pulled off the dirty plastics.
The first thing I learned is I H-A-T-E those GTB press-on acorn "nuts". They are nearly impossible to remove (or I don't know the trick) without damaging the platics. Those press-on standoffs would be the first to go when reinstalling the PF parts. Terry at PinballLife.com sold me a set of the newer standoffs which have #6-32 threads on top; those will be used in combination with some stainless steel acorn nuts with make removing PF plastics easy-peazy.
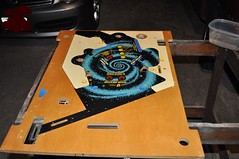
Here's the very dirty Lower PF with plastics removed.

Yeap - very dirty. And yes; there is some rust on some peices.
Take another angle shot; so you can remember where to return the parts on the PF:

Next step is to remove all the top side componets, screws, rails, bulbs, etc... and clean it well. For this I used mean green and a melamine foam sponge as was done in the Bally Star Trek worklog. This time the underlying PF was not flaking or signifigantly worn - and I took care not to be agressive with the cleaning.
I made sure to tape off the drop target holes as I did not remove them from the under the PF. I also taped off the filpper holes to prevent build up of soot and/or auto clear coat.
Next I used a heat gun, a rubber mallet, and a steel ruler to "level" the three captive hole blue inserts:
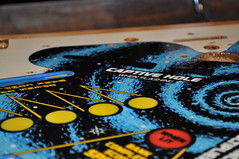
Now it's time to put the one light and one heavy coat of clear on the PF. Why? The clear coat to protect the PF from wear from the ball. Unsure if GTB had any protection on these early machines; but I'm guessing that like the Bally's of this era the only protection is "wax" put on over the painted PF.
Apply two coats of Dupont ChromaClear G2-7779S clear coat w/ 7785S Activator-Reducer. These two are mixed at a 4:1 ratio and allow for a flash of 20-40minutes between coats. Apply in thin light coats; don't go overboard of the clear coat won't cure.
I applied the coats using a HarborFreight HVLP Gravity Feed Spray Gun. Set the pressure dial to 20PSI so I got ~10psi when trigger is depressed.
Allow the two coats to cure overnight.

The next evening after work; It was ready for the orbital sander with 100grit discs. This was done to level any remain Playfield areas such as center dipping or ball wear. It's also done to remove the inital orange peel seen in the previous clear coat.

I then wiped away the sander dust to verify the inserts are flat:
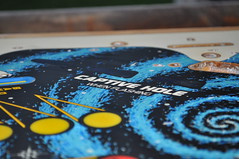
TAKE CARE; do not blow through the clear coat and destroy your original paint! (I learned that lesson in the Bally ST worklog)
I then applied one lite and one heavy clear coat as a final protection. Again; at least 20minute flashes between coats and an overnight cure.
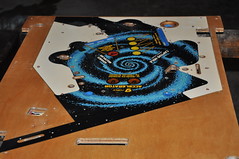
Then like the bally; the final sanding begins to remove the orange peel and restore that PF shine. Orbital Sander @ 150grit and the 220grit. Hand sand with wet/dry (wet) with 320grit, 500grit, 800grit, 1000grit, 1500grit. Then use the buffing wheel to apply two rounds each of rubbing compound, polishing compound, and carnuba wax.
Nice, shiney, and smooth:
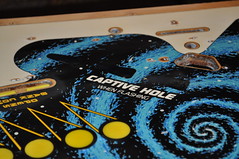
Sandblast away the rust, Polish the visible metal peices, and return the parts and plastics to the lower playfield:


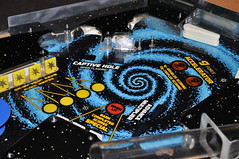
With that; The mechanical work on the lower PF is complete... however, the electronics will need some fixes per marvin's suggestions.... I'll tackle that later when I get a digikey order created and purchased.