Author Topic: Stern Galaxy Restore  (Read 4827 times)

0 Members and 1 Guest are viewing this topic.

Offline Strangeways

  • Pinball Restoration is my passion
  • Administrator
  • Trade Count: (+9)
  • *****
  • High Score Initials:
  • Forum Posts:
  • Melbourne
  • ABN 68 283 634 461
    • Ride The Boney Beast
Stern Galaxy Restore
« on: April 17, 2009, 12:13:25 AM »
Another machine I've just started for a member on AP ! (See, being a member does have it's benefits -  %.%)

Background

This machine is was brought into the country by Childs in the infamous 80's Container, and it was bought by a member here. While accessing the machine on his behalf, I noticed that the playfield was protected by a layer of dirt and mylar. Under that dirt would have to be a really great playfield. The boards were EXTRA clean. I have retored TWO Galaxy machines before and they are FAST and FUN pinballs. Having a Galaxy next to a Meteor for a short time was great fun !

Condition

Playfield - 8/10 - No wear ! Looks FILTHY - But it will come up nice. One of the signs for me that this machine was well looked after and had low plays was the two return lanes (plastics) were intact. They are ALWAYS broken.

Cabinet - 7/10 - A couple of scuff marks, and some areas that will need attention, but as with all Stern's - NO FADE !

Backglass - 7/10 - Typical Stern backglass - the ink layer is TOO THIN, which leads to the cracking effect. Better than the two backglasses on the machines I owned.

Electronics - 10/10 - Cleanest set of boards I've ever seen on a pinball. No corrosion, no repairs.


Objectve

To have fun ! To restore this machine to the best condition possible. Parts are hard to get, but I think I have enough to work with !
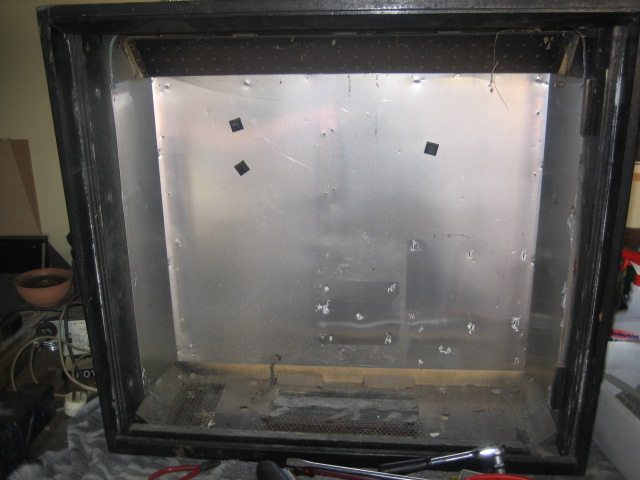

The Beginning

The cabinet is waaaay up the back of the garage, behind some other pins - But the head is easily accessible over the other side of the garage. So I will start there. As I go along, I'll remove the lower cabinet from it's hiding spot.
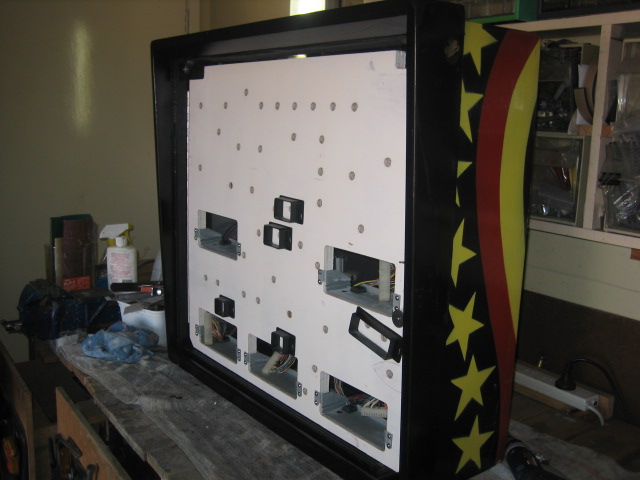
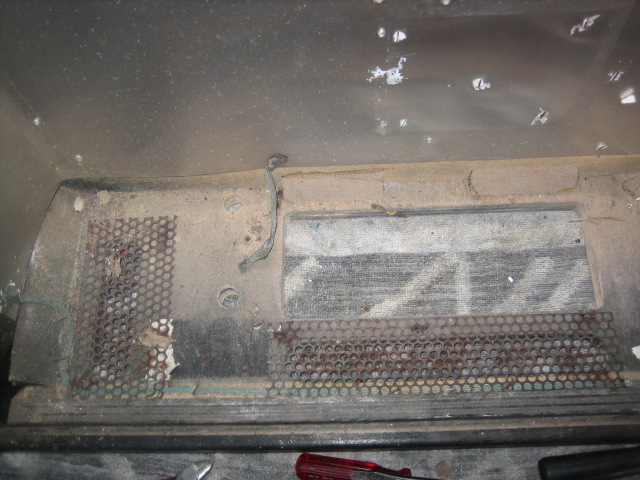
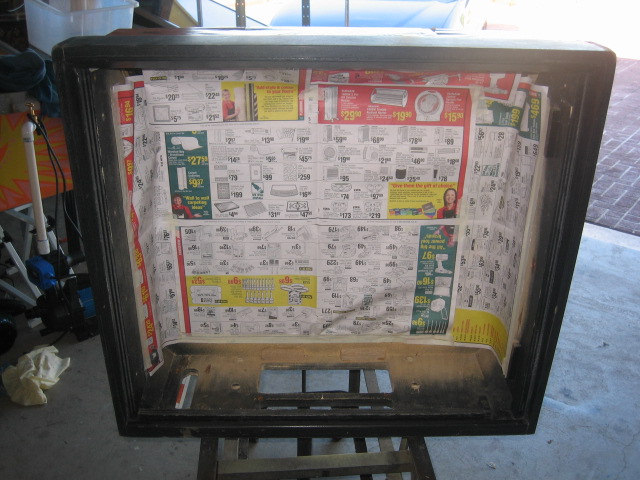

The Head


Easily accessible in the garage, so I started on it. I previously removed the soldenoid Driver and the displays for repair and upgrades. I found the key to the head stuck to the dirt on the bottom of the head - good start. The paintwork was excellent - colors vibrant, and they will come up really nice. A couple of nasty scratches caught my attention.


Some filth, and a little bit of corrosion. amazingly, the battery did not leak !


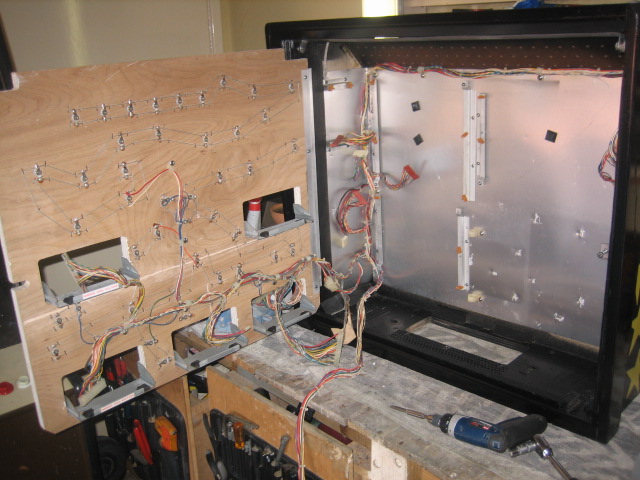
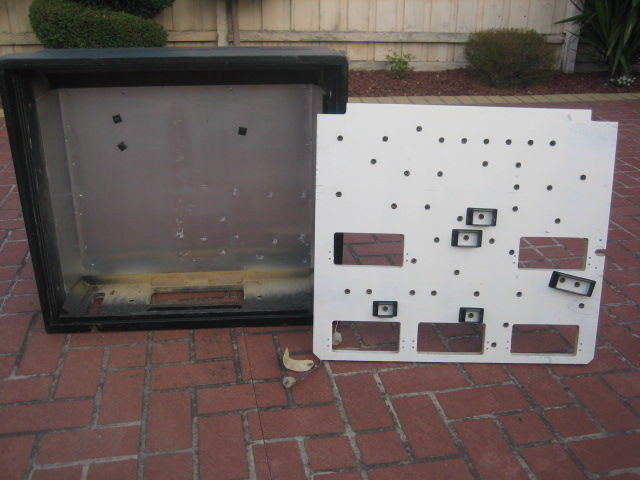
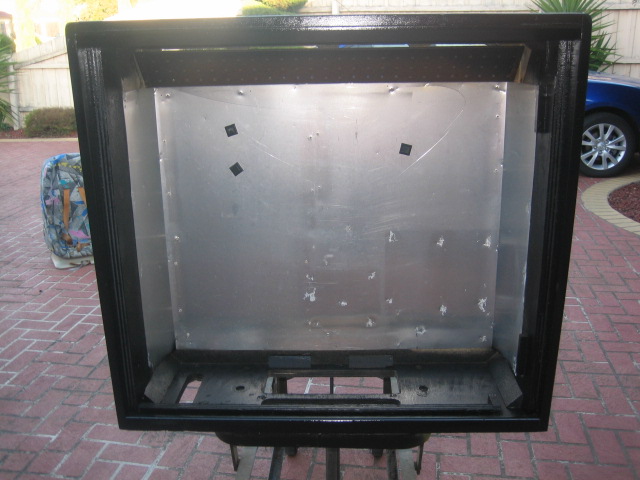
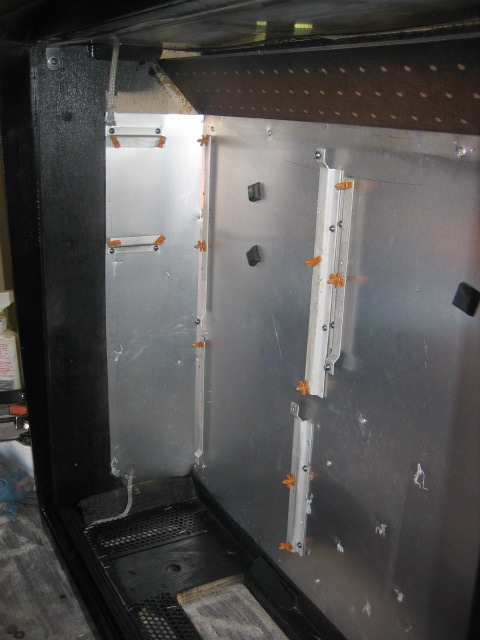
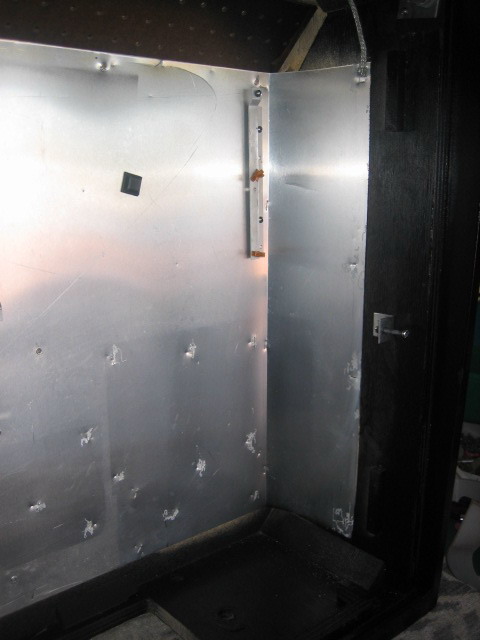
Stripped - Everything out ! In the end, I removed the grills and groundstraps. There had some signs of corrosion,


A quick vacuum, and then some compressed air, and we can see things starting to look better. Then, I clean with Nifti, and I left it out in the sun for a few hours.


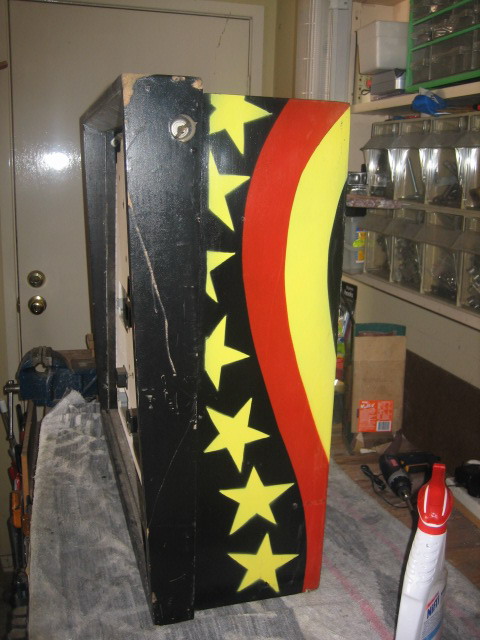
The top corner was shaved off. I looked terrible, and even though it was not totally visible from the player's point of view - I didn't want to leave it like that. To makes things hard, it is chipboard - a smooth surface, and very weak underneath. This wood expands when wet. The idea of replacing the wood was to big a job just for the corner - but I did think about it.


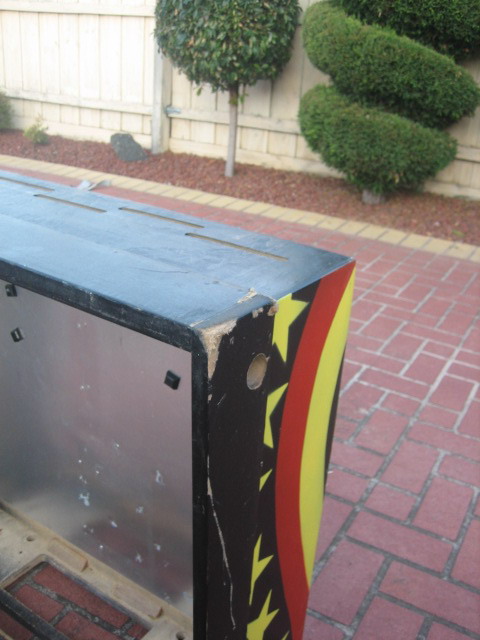
But in the end - I thought I would try painting over it. Like I said - it is not really noticeable from eye level, and I would have to repaint the entire head if I replaced the wood. Time to mask up the parts I don't want to paint.


After two coats of paint - it looks MUCH better.


All the hardware was bathed in Ranex, and the screws were buffed. No stone unturned. All the old staples were removed. Everything was cleaned and refitted. The grills were cleaned with a wire brush, undercoated and painted black. Even the braid was cleaned with Ranex, and re stapled


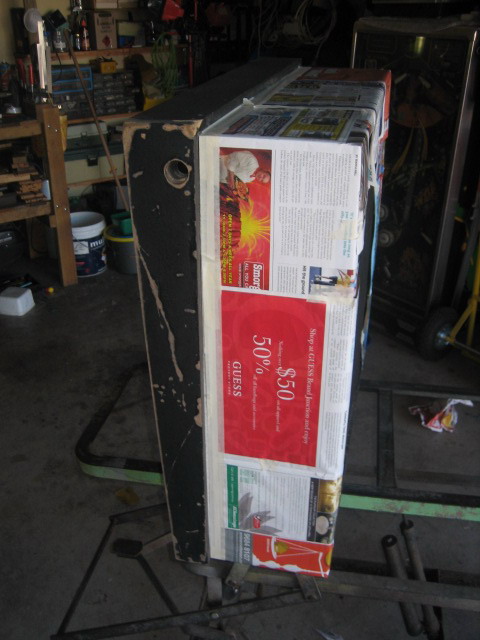
The wiring was washed in a bucket of warm water with nifti and then rinsed and left on the fence (in the sun for an hour). I then used to compressor to remove any water from the connectors. All the wire clips were cleaned and refitted.


After all that work, the head is done and put aside until needed. It looks much better !


 ^^^

Aussie Pinball - Proud to be Australia's Premier Pinball Forum

http://www.australianpinballrestorations.com.au/

http://www.rtbb.com.au/catalog/

We carry the largest range of NEW Ramps in Australia

Offline Creech

  • Forum Founder
  • Trade Count: (0)
  • *****
  • Forum Posts:
  • Adelaide
Re: Stern Galaxy Restore
« Reply #1 on: April 17, 2009, 12:18:20 AM »
Looking good mate - as usual!

Offline ajlaird

  • Trade Count: (0)
  • ******
  • Forum Posts:
  • Greensborough, Melbourne
  • Go Ahead, Make My Day
Re: Stern Galaxy Restore
« Reply #2 on: April 17, 2009, 12:33:34 AM »
Attention to detail, amazing results - we are accustomed to this now and would expect nothing less!

A pleasure to view your work, Nino.

Offline Strangeways

  • Pinball Restoration is my passion
  • Administrator
  • Trade Count: (+9)
  • *****
  • High Score Initials:
  • Forum Posts:
  • Melbourne
  • ABN 68 283 634 461
    • Ride The Boney Beast
Re: Stern Galaxy Restore
« Reply #3 on: April 17, 2009, 12:51:20 AM »

Playfield disassembly

I had previously taken out the playfield just to have a sticky beak - so it was next ! It has mylar, that was placed on after the game had been played. Sections of it had shrunk, and lifted only small sections of paint. There was a fair bit of corrosion, but nowhere nearly as bad as the Sinbad. Probably because Stern didn't use chrome assemblies ?

Apron is really good as well


Before pictures - Well they don't look that pleasant - but they never do ! Some parts will simply need replacement, other will have to be treated. Plastics are fine though, and the playfield itself is really good (just does not look that way right now)


Playfield stripped, and you can see the mylared sections. No considerable wear - thanks to the mylar


Here's a test section after the mylar was removed - just some Nifti, follwed by Novus 2. The mylar removal tool about 2 hours, and there was hardly any paint lift at all !


Here's the adhesive residue leftover from the mylar removal


Post Mylar removal is always the fun bit ! All the adhesive residue is removed, and now we need to just clean up the playfield with some Isocol and Magic Eraser. Looks a bit strange, but some controlled elbow grease and patience will give you some really nice results.


Now you can still see the area where the mylar meets the bare playfield. This will be buffed out a bit later. These pictures were taken after two sessions of cleaning with Novus 2


Here's the future of Pinball !

My 4 year old - Zac, Complete with his own toolkit, at work disassembling the underside of the playfield. He has his own "Ben 10" watch in case of emergencies. He loves working on the machines with me.


 $#$
Aussie Pinball - Proud to be Australia's Premier Pinball Forum

http://www.australianpinballrestorations.com.au/

http://www.rtbb.com.au/catalog/

We carry the largest range of NEW Ramps in Australia

Offline Mr Pinbologist

  • Trade Count: (+5)
  • ******
  • High Score Initials:
  • Forum Posts:
  • Wauchope NSW
Re: Stern Galaxy Restore
« Reply #4 on: April 17, 2009, 07:46:14 AM »
Wow that playfield came up a treat!! Galaxy is yet another old favourite of mine. I used to play one in Port Macquarie years ago and it got quite a workout from me!!

Looking forward the the rest of the updates ^^^ ^^^

Offline ajlaird

  • Trade Count: (0)
  • ******
  • Forum Posts:
  • Greensborough, Melbourne
  • Go Ahead, Make My Day
Re: Stern Galaxy Restore
« Reply #5 on: April 17, 2009, 08:17:42 AM »
That playfield is in great condition - amazing the difference a good clean can make. Obviously the mylar helped preserve this one, but as you mentioned earlier, it certainly hasn't been over-used.

Offline Creech

  • Forum Founder
  • Trade Count: (0)
  • *****
  • Forum Posts:
  • Adelaide
Re: Stern Galaxy Restore
« Reply #6 on: April 17, 2009, 08:51:32 AM »
That's a very nice playfield. Came up a treat.  ^^^

Offline Extra Ball

  • Read-Only
  • Trade Count: (0)
  • *
  • Forum Posts:
  • Newcastle
Re: Stern Galaxy Restore
« Reply #7 on: April 17, 2009, 09:46:07 AM »
I dont let my 5yrold disassemble my pins, but hopefully oneday! PF looks great Nino  @@*

Offline Pinfan

  • Trade Count: (+2)
  • ******
  • Forum Posts:
  • Melbourne
Re: Stern Galaxy Restore
« Reply #8 on: April 17, 2009, 12:03:06 PM »
I see Zac has been promoted Nino !  ^^^  @@*
Some people have big HEADS !

Offline Strangeways

  • Pinball Restoration is my passion
  • Administrator
  • Trade Count: (+9)
  • *****
  • High Score Initials:
  • Forum Posts:
  • Melbourne
  • ABN 68 283 634 461
    • Ride The Boney Beast
Re: Stern Galaxy Restore
« Reply #9 on: April 17, 2009, 12:06:49 PM »
I see Zac has been promoted Nino !  ^^^  @@*

Yes he has - but only under supervision. I don't let him in the garage or near a machine without being supervised. I try not to upset him, otherwise he changes into one of the Ben 10 characters and things get messy.

 %.%
Aussie Pinball - Proud to be Australia's Premier Pinball Forum

http://www.australianpinballrestorations.com.au/

http://www.rtbb.com.au/catalog/

We carry the largest range of NEW Ramps in Australia

Offline Extra Ball

  • Read-Only
  • Trade Count: (0)
  • *
  • Forum Posts:
  • Newcastle
Re: Stern Galaxy Restore
« Reply #10 on: April 17, 2009, 02:20:51 PM »
Nino in the 13th photo it best shows what I would called "cracking" of the paint. My Flash has this also, is there anything much that can done with it? I magic erasered the PF, and got really great color and shine, but would love for that cracking look to be gone. Or am I wanting the impossible without a re-spray?

Offline MartyJ

  • Trade Count: (+4)
  • ******
  • High Score Initials:
  • Forum Posts:
  • Melbourne
Re: Stern Galaxy Restore
« Reply #11 on: April 17, 2009, 03:04:30 PM »
Looks great Nino - as always.

The receiving member will have a very nice machine.

Offline Strangeways

  • Pinball Restoration is my passion
  • Administrator
  • Trade Count: (+9)
  • *****
  • High Score Initials:
  • Forum Posts:
  • Melbourne
  • ABN 68 283 634 461
    • Ride The Boney Beast
Re: Stern Galaxy Restore
« Reply #12 on: April 17, 2009, 03:08:34 PM »
The cracking is "Ball swirl" - and usually, removing the dirt in other colors is easy, as the dirt is black. The Magic Eraser removes the black dirt from the clearcoat or varnish. The color behind it "highlights" the dirt in the minuscule cracks. When the "ball swirl" is evident on black art, then there is the problem as highlighted in picture 13. The "ball swirl" cracks are present, but there is no dirt in them - just the cracks themselves. There is no way other than sanding off the clearcoat, to remove the cracks - this is true for all "ball swirl" - you are NOT removing the cracks, just the dirt deposited in them.

Black just highlights the cracks.

By applying paste wax and buffing, the cracks are less predominant - the wax is "soaked" into the cracks - but it does not completely fix the issue.

I hope that makes sense.

Aussie Pinball - Proud to be Australia's Premier Pinball Forum

http://www.australianpinballrestorations.com.au/

http://www.rtbb.com.au/catalog/

We carry the largest range of NEW Ramps in Australia

Offline Extra Ball

  • Read-Only
  • Trade Count: (0)
  • *
  • Forum Posts:
  • Newcastle
Re: Stern Galaxy Restore
« Reply #13 on: April 17, 2009, 04:31:38 PM »
Yep made sense, I may try buffing it oneday and see how much better it looks.
Ty
« Last Edit: April 17, 2009, 05:14:46 PM by Sinbad »

Offline Creech

  • Forum Founder
  • Trade Count: (0)
  • *****
  • Forum Posts:
  • Adelaide
Re: Stern Galaxy Restore
« Reply #14 on: April 17, 2009, 04:39:24 PM »
Yep maded sense, I may try buffing it oneday and see how much better it looks.
Ty
How about trying some of that coloured polish you can get from auto shops. That stuff is meant to cover up scratches on cars so it should do the same thing on a playfield.