I've been busy the last few weeks on other tasks including some PCBs for the project. I submitted another set of 4 PCBs to the china fab house last night so was able to spend some time on the apron.
Early last week I had a few minutes after work; so I went to Techshop and waterjetted some apron pieces out of some mild steel sourced from lowes. After cutting; I sandblasted them and This weekend I put them under some 220grit sandpaper to remove the coarseness added by the sandblasting. Once I had a smooth surface; I powdercoated them with some "Mirror chrome".
A few months ago I sourced some "
SinglePrint (tm) Multi Surface Laser "no weed" " paper from them during a sale. The idea here is that using a heat press; I'd be able to "bond" laser printed graphics to the powder coated surface. Then be able to apply the needed clear powder coat over the label to give it a single resilient surface.
With the label printed using my color laser jet; I proceeded to bond the label to the substrate. I didn't have a heat press and I really didn't have the room for one anyway... so I thought I'd use a household iron. Once I received the paper; the included instructions said in italics "do not use a home iron". :(
Then I remembered I had a hot laminator which I used in attempting to make homebrew PCBs using laser paper. The laminator claimed it did 300F max... and would apply some pressure; so I figured what the hell. worth a shot.
I preheated the substrate in the toaster oven to 300F and then applied the mirrored SinglePrint to the it and ran it thru the laminator about a dozen times. When removing the paper; it hadn't bonded to the surface. Humm. However, it was in place so I ran it thru twice to re-flatten the paper to the substrate... at this point I had nothing to really lose; so I put the substrate+paper back in the toaster oven set to ~325F. I let it bake there for about 2minutes; then quickly transferred it to the at temp Laminator. Running it thru 3 times. The returned the combo back to the oven for another heat session. I did this for about 4 times then let it cool for about 30seconds before peeling the paper from the substrate.
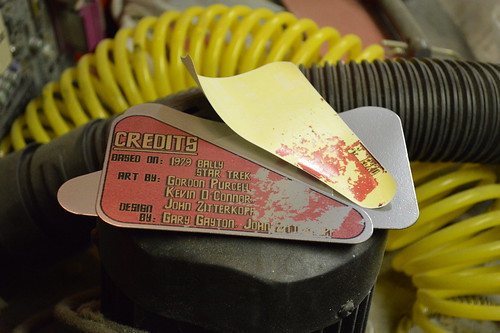
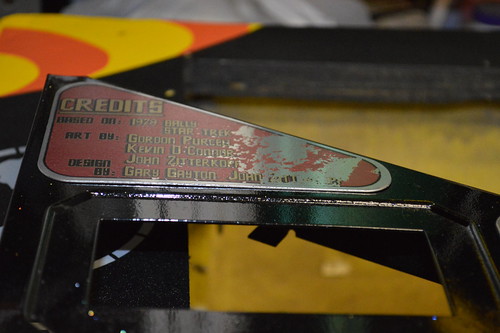
This time it was better; but not perfect.

:( As you can see; some of the label stayed with the paper.
I could "erase the label" and try again; but the label isn't really "solid enough" for my tastes. The toner is somewhat transparent which leads to muddled colors against the metallic background. It's probably be perfect on a white powercoated substrate.
I may try to source some vinyl labels in order to get the look I think I want.
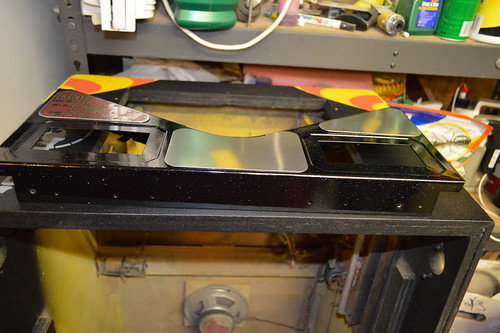
Here's the other apron pieces positioned on the apron:

