Author Topic: Stern Stars Reconditioning  (Read 2019 times)

0 Members and 1 Guest are viewing this topic.

Offline Strangeways

  • Pinball Restoration is my passion
  • Administrator
  • Trade Count: (+9)
  • *****
  • High Score Initials:
  • Forum Posts:
  • Melbourne
  • ABN 68 283 634 461
    • Ride The Boney Beast
Stern Stars Reconditioning
« on: November 23, 2013, 06:32:48 PM »

It has been a long time since I've even worked on a classic Stern, the last one was Tony's Galaxy 3-4 years ago ! The story behind this is that the Customer that I'm restoring the FATHOM for picked this up on eBay in Victoria and I picked it up for him. So it needs to be ready at the same time as the Fathom to save two interstate trips. Anyway, the game looks amazing, but the boards need work and it does not fire up.

Condition

Cabinet - 7/10 - Needs a good clean. Most of the original artwork is ok, but there is some touch ups and worn areas that won't be addressed for this project.
Backglass - 9/10 - some lifting, but not too much to worry about
Playfield - 9/10 - Contact was installed after the game was routed. No wear except for one small section.
Electronics - 5/10 - MPU  has grass growing on it. Other boards will need to be checked over.

Objective is to recondition the game and ensure it plays as it should and is reliable. Not a restoration, but almost one.

Before pictures

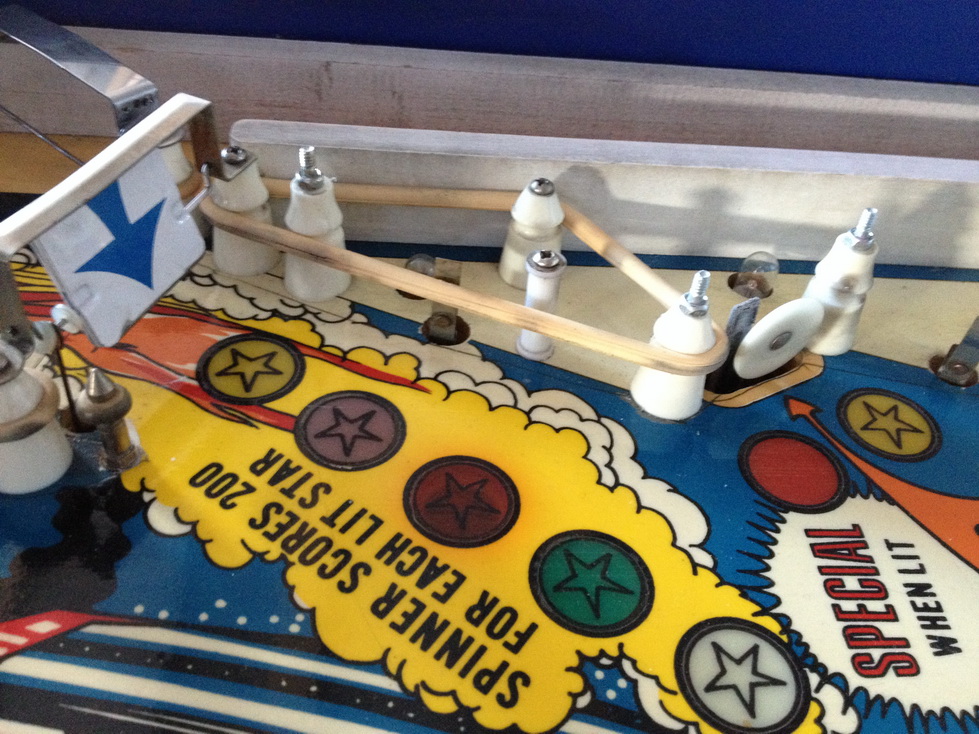
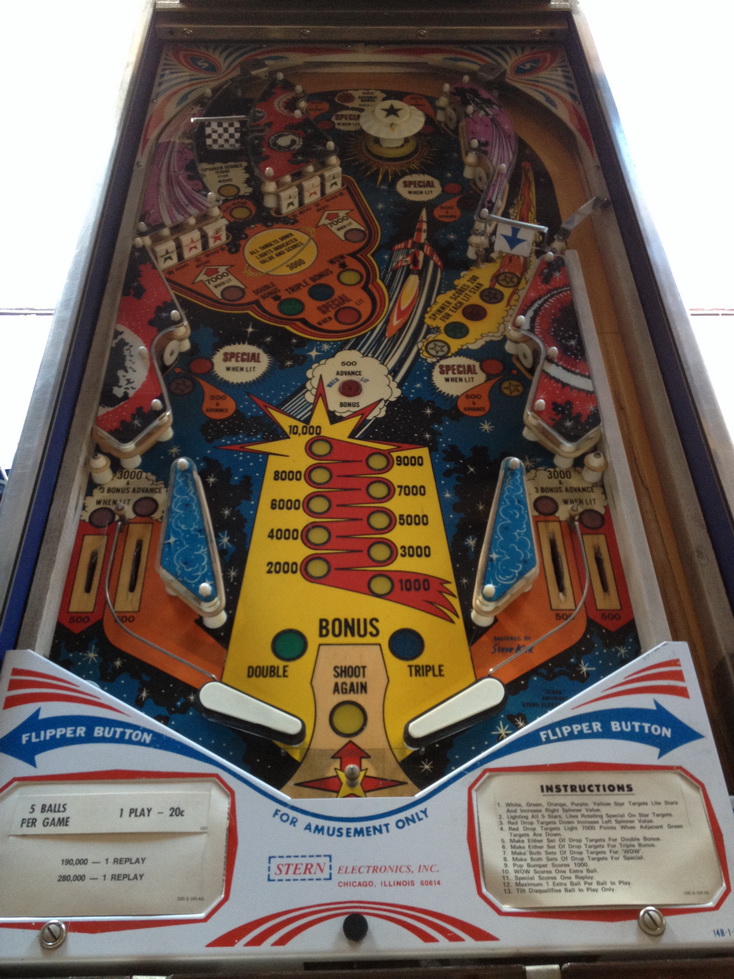
Didn't take too many because I didn't think to write up a thread, but there are some pictures of the playfield and boards.


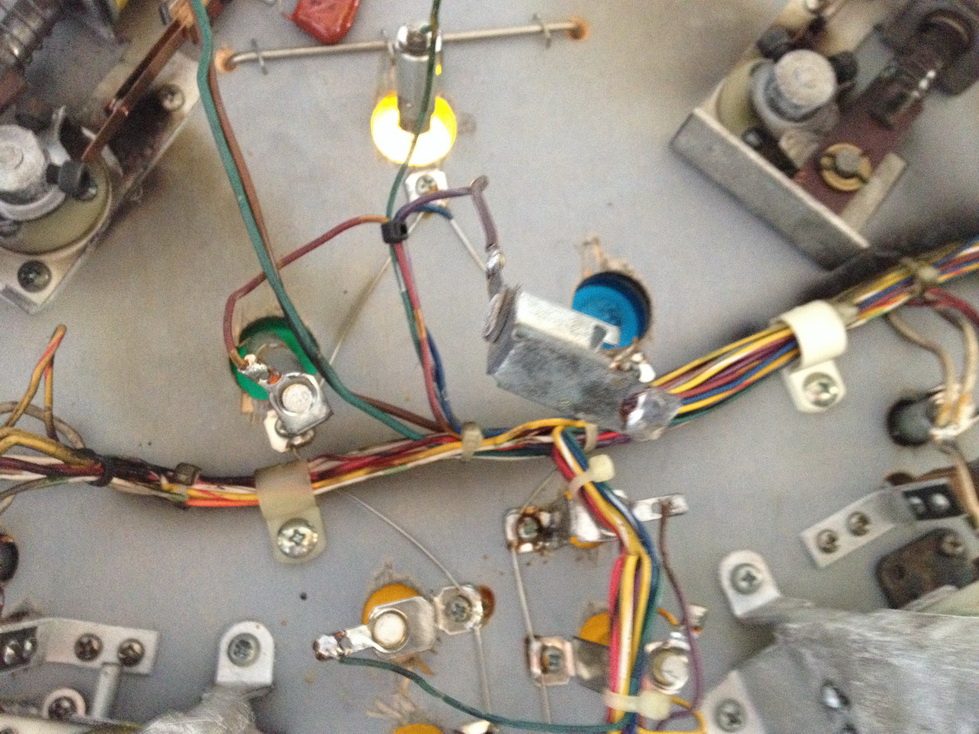
MPU is really bad


Sockets have fallen off. Many were ready to break, so I replaced most of them in the end.


Targets are worn and one is replaced


Off comes the apron !


Contact was easily removed using the hair dryer. Not much heat, it came off in a couple of large sheets with no paint lift.


Here is where the lazy installer cut the contact edges to heavily.
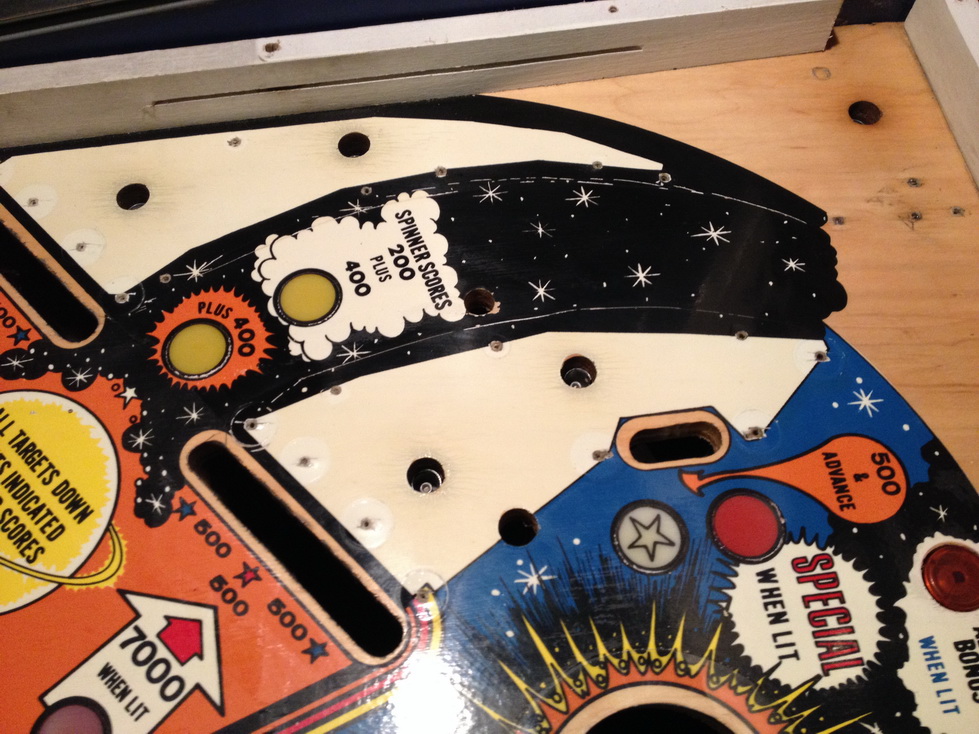


Bonus area looks good. Zero wear except around the inserts which is easily fixed.


Several sections have ball swirl. The orange area had ball swirl PRIOR to the contact installation. The two white areas and inbetween the flippers was never covered. The decision to remove the contact was made once I removed it from an area not seen on the playfield and also after I tested removing the ball swirl in an exposed area. No paint lift during ball swirl removal is a great sign.
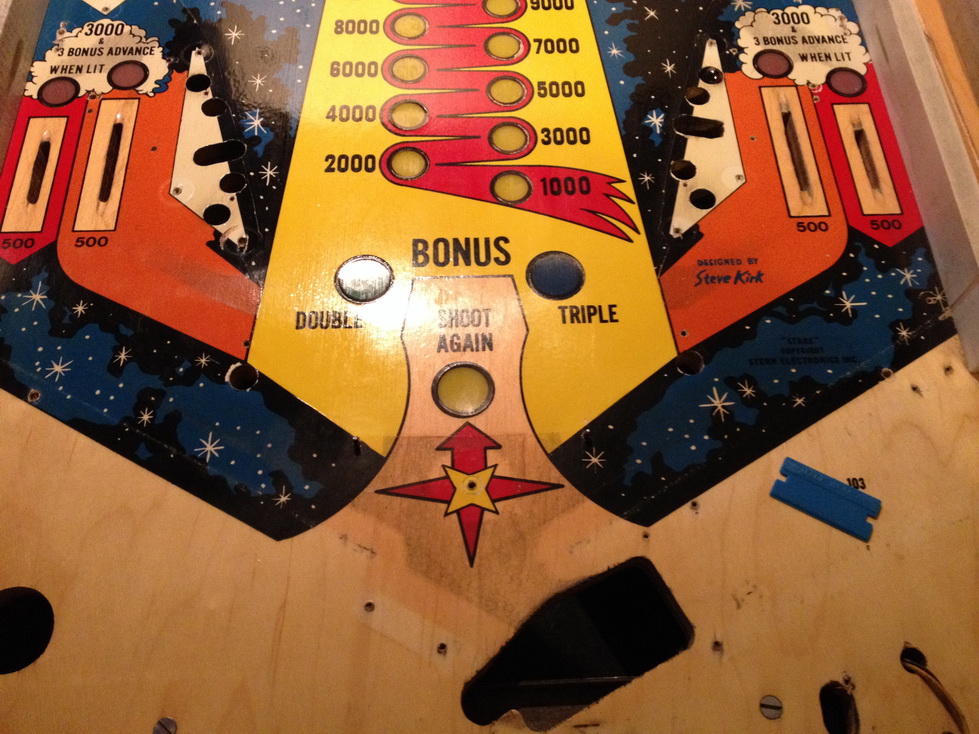


The picture below shows the adhesive from the contact still stuck on the orange areas. Was easily removed with de-solv-it and a rag.
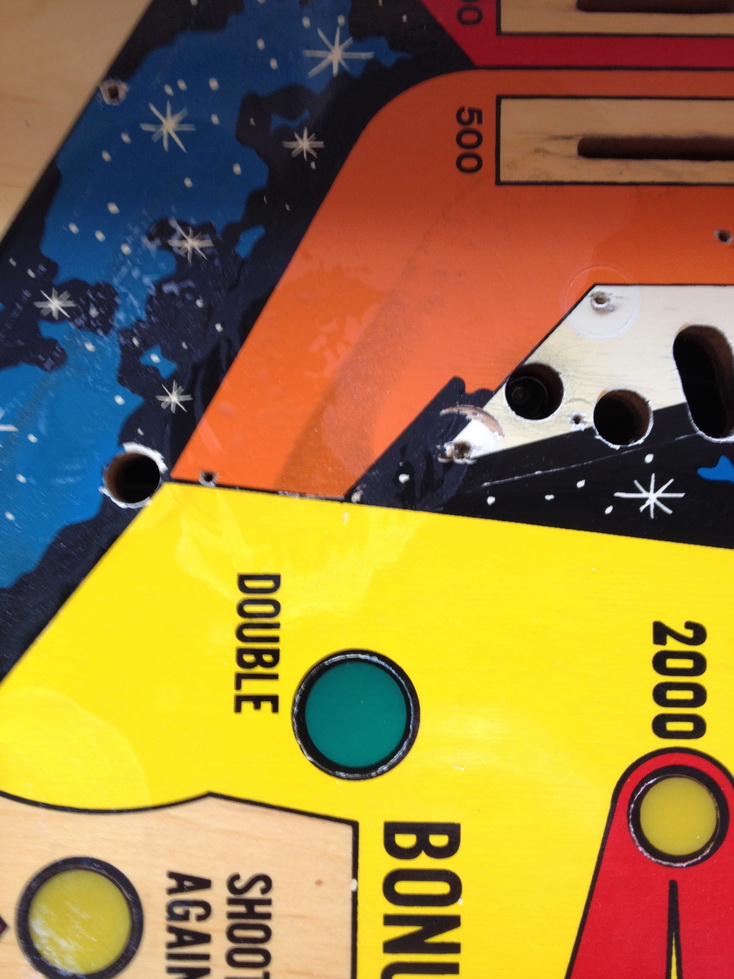


Ball swirl in the white areas near the drain lanes
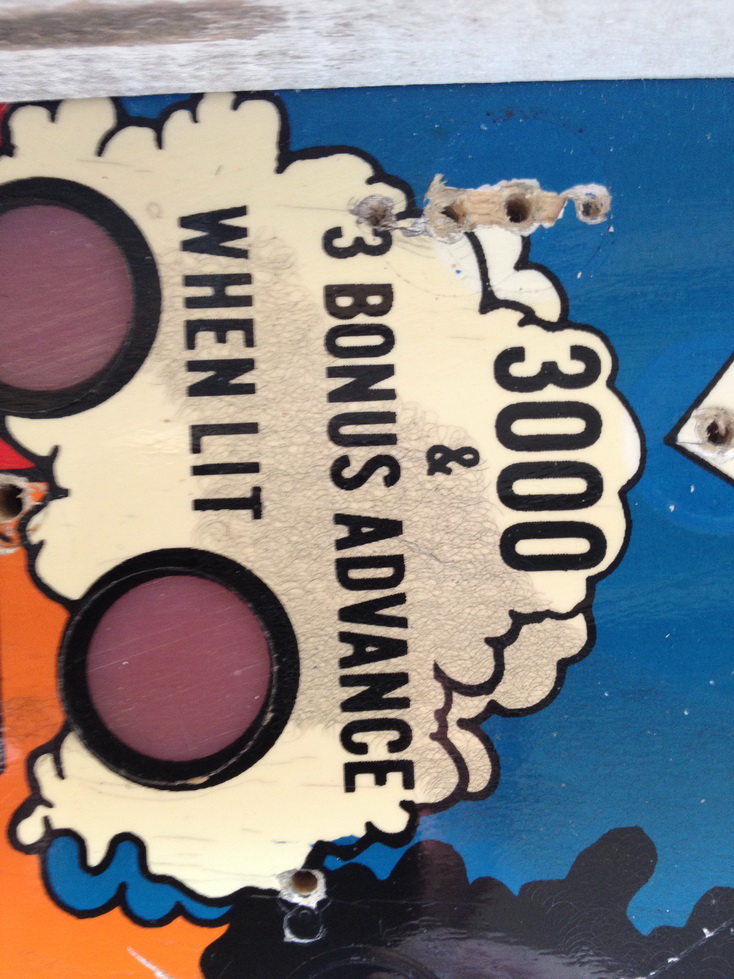


Ball swirl removed and the inserts repainted with a paint pen


Left side bonus inserts untouched. Right side repainted


Most of the playfield is done. Just waiting on flipper kit, targets and other parts.


Next update - Cabinet.
Aussie Pinball - Proud to be Australia's Premier Pinball Forum

http://www.australianpinballrestorations.com.au/

http://www.rtbb.com.au/catalog/

We carry the largest range of NEW Ramps in Australia

Offline Freiherr

  • Trade Count: (+1)
  • ******
  • High Score Initials:
  • Forum Posts:
  • The Oaks, NSW
  • Amongst clouds
Re: Stern Stars Reconditioning
« Reply #1 on: November 23, 2013, 06:48:16 PM »
Nice progress. Are those cupped double and triple bonus inserts?  The reason I ask is because my Flash has similar deformed inserts which need to be worked on. Do you use a clear resin to fill and level?
If you don't remember the 70s then you were on drugs.
If you remember playing pinball in the 70s you were having a good time.
If you don't remember anything,  then read about it here,

Offline oldskool1969

  • Trade Count: (0)
  • ******
  • High Score Initials:
  • Forum Posts:
  • perth
Re: Stern Stars Reconditioning
« Reply #2 on: November 23, 2013, 09:06:42 PM »
These classic STERNS are a blast to play/ oldskool style, where high score rules stuff the wizard modes of DMD's !!!!!!!!!!!!!
I know a bloke who has a few and it is awesome to play
will follow this clean up with enthusiasm.
If it isn't broke, it isn't pinball.

Offline pinball god

  • Trade Count: (+1)
  • ******
  • High Score Initials:
  • Forum Posts:
  • Melbourne
  • Metallica is here to stay
Re: Stern Stars Reconditioning
« Reply #3 on: November 24, 2013, 12:39:13 AM »
Nice progress. Are those cupped double and triple bonus inserts?  The reason I ask is because my Flash has similar deformed inserts which need to be worked on. Do you use a clear resin to fill and level?
I have don this on a test pf and seemed to work ok. I removed the inserts, and swirled them on various grades of wet and dry sand paper until the were flat again. Then buff with novice etc and reinstall. Others might have differing opinions on this so wait before trying, but I think its the way to go. Obviously any decals would b removed in the sanding if present, but none in this case.
Still loving my Metallica Premium

Offline pinnies4me

  • Administrator
  • Trade Count: (+5)
  • *****
  • High Score Initials:
  • Forum Posts:
  • Victoria
Re: Stern Stars Reconditioning
« Reply #4 on: November 24, 2013, 08:55:45 AM »


Looking good!  ^^^

I also like these era Sterns. Fixed one for a mate a few weeks ago (Galaxy) and had a blast playing it afterwards.
“If you wanna escape, go up to a pinball machine. There’s a magic button on the front that takes you to a world under the glass and makes the the rest of the universe disappear.”

Offline Strangeways

  • Pinball Restoration is my passion
  • Administrator
  • Trade Count: (+9)
  • *****
  • High Score Initials:
  • Forum Posts:
  • Melbourne
  • ABN 68 283 634 461
    • Ride The Boney Beast
Re: Stern Stars Reconditioning
« Reply #5 on: November 24, 2013, 12:01:20 PM »
Nice progress. Are those cupped double and triple bonus inserts?  The reason I ask is because my Flash has similar deformed inserts which need to be worked on. Do you use a clear resin to fill and level?

The scope of this project is not to spend too much $ on the work. Initially, it was a case of "getting it going", but it needed so much work that it became a full recondition. If I was restoring the game, some inserts would be removed and flattened using 240, 400, 800, 1200 Grit Wet / Dry and then Novus 2. This game was a few inserts that have art on them, and therefore more time needs to be spent if all were to be removed and levelled.

I don't use the clear resin solution. I always remove and flatten.
Aussie Pinball - Proud to be Australia's Premier Pinball Forum

http://www.australianpinballrestorations.com.au/

http://www.rtbb.com.au/catalog/

We carry the largest range of NEW Ramps in Australia

Offline Ballywannabe

  • Trade Count: (0)
  • *****
  • Forum Posts:
  • Perth
Re: Stern Stars Reconditioning
« Reply #6 on: November 24, 2013, 12:19:40 PM »
Looking good Nino!

Steve Kirk made three games for Stern: Stars, Meteor and Nine Ball.  I still have the latter two, and fixed and sold a Stars.  All three are highly addictive games with a single pop bumper.

Those lamp sockets were the worst design ever, with the two notches on the bend making the perfect place to break once they have been bent a few times to replace lamps ^&^

Hope you are going to rebuild that CPU - no cheating %$%

cheers
Ian

Offline flippnaussie

  • Trade Count: (0)
  • ****
  • High Score Initials:
  • Forum Posts:
Re: Stern Stars Reconditioning
« Reply #7 on: November 24, 2013, 05:54:26 PM »
Did you clear coat the playfield? or is it just cleaned and waxed?

Simon.

Offline pinball god

  • Trade Count: (+1)
  • ******
  • High Score Initials:
  • Forum Posts:
  • Melbourne
  • Metallica is here to stay
Re: Stern Stars Reconditioning
« Reply #8 on: November 24, 2013, 06:51:08 PM »
Just noticed in between spluttering with the second round of the flu, is that solder wire connecting the globes? Are you replacing it with braid?
Still loving my Metallica Premium

Offline Strangeways

  • Pinball Restoration is my passion
  • Administrator
  • Trade Count: (+9)
  • *****
  • High Score Initials:
  • Forum Posts:
  • Melbourne
  • ABN 68 283 634 461
    • Ride The Boney Beast
Re: Stern Stars Reconditioning
« Reply #9 on: November 24, 2013, 07:12:25 PM »
Looking good Nino!

Steve Kirk made three games for Stern: Stars, Meteor and Nine Ball.  I still have the latter two, and fixed and sold a Stars.  All three are highly addictive games with a single pop bumper.

Those lamp sockets were the worst design ever, with the two notches on the bend making the perfect place to break once they have been bent a few times to replace lamps ^&^

Hope you are going to rebuild that CPU - no cheating %$%

cheers
Ian

I knew you would like this game, Ian. I think "Stars" and "Magic" are two underrated Sterns from this era. The CPU is certainly repairable, but by the time I address the corrosion zone and replace the 40 pin and 28 pin sockets, the labour cost alone would be more than half the cost of an Altek from PBR. Altek's have a lifetime warranty, and I've seen many Bally -35 and Stern 200 have a lot of work put into them and then potential issues surface. Not worth the risk.

Did you clear coat the playfield? or is it just cleaned and waxed?

Simon.

Cleaned and waxed. But I was fortunate that the operator was smart enough to install contact to protect the playfield.

Just noticed in between spluttering with the second round of the flu, is that solder wire connecting the globes? Are you replacing it with braid?


The GI return braid is soldered to the bases of the globes. The individual wires from the lamp drivers are soldered to the tab of the globe socket. I might replace some sections if I think they are compromised.
Aussie Pinball - Proud to be Australia's Premier Pinball Forum

http://www.australianpinballrestorations.com.au/

http://www.rtbb.com.au/catalog/

We carry the largest range of NEW Ramps in Australia

Offline Strangeways

  • Pinball Restoration is my passion
  • Administrator
  • Trade Count: (+9)
  • *****
  • High Score Initials:
  • Forum Posts:
  • Melbourne
  • ABN 68 283 634 461
    • Ride The Boney Beast
Re: Stern Stars Reconditioning
« Reply #10 on: November 24, 2013, 07:34:30 PM »

It's the small things that make the difference. Chimes sound like CRAP if they are not working right. This machines has very COOL chimes (4 bars in fact), so they need to be cleaned and rebuilt. The coils were the right value, but did not measure, so I replaced 2-3 of them.

Here's the "before" picture ;


After rebuild ;


The legs and door are repainted. Here's the first coat on a bright sunny day !


 :D
Aussie Pinball - Proud to be Australia's Premier Pinball Forum

http://www.australianpinballrestorations.com.au/

http://www.rtbb.com.au/catalog/

We carry the largest range of NEW Ramps in Australia

Offline Strangeways

  • Pinball Restoration is my passion
  • Administrator
  • Trade Count: (+9)
  • *****
  • High Score Initials:
  • Forum Posts:
  • Melbourne
  • ABN 68 283 634 461
    • Ride The Boney Beast
Re: Stern Stars Reconditioning
« Reply #11 on: December 20, 2013, 12:23:14 AM »
Still on the cabinet. The idea is to give it a clean and check that everything is working. The Power Cord and EMI filter are mandatory replacements. The door does not need too much attention, but I thought I'd freshen it up a bit with a repaint.


The beehive plunger assembly will be replaced


The inside of the cabinet will be cleaned and the ground braid checked. The lock down bar assembly was broken, and I had to come up with the fix for that to work properly.


Credit Knocker was nicely cooked !


This was interesting - There was a "spider web", or fluff all over every metal part. Initially I thought it was a thin film of corrosion as it was attracted to the metal parts only. Really strange to see this. I ended up rebuilding all the mechs anyway, but it was something I'd not seen before.


The playfield was starting to come together. I was very pleased with the results of the contact removal and clean up !


Here's the door repainted with a new lock


All the mechs are rebuilt. New Drop Targets and Pop Bumper parts. The knocker assembly has a new coil !


Full flipper kits installed. New coils as well as the old coils were generic Hankin and a dead coil. Everything is basically replaced.


The mechs are installed. Most of the lamp sockets are replaced as they were either frail or broken.


The apron and shooter lane gauge have been refinished and a Pinball Rescue Stern decal installed. Looks so much better. Fantastic product !


Next Update - Electronics !
Aussie Pinball - Proud to be Australia's Premier Pinball Forum

http://www.australianpinballrestorations.com.au/

http://www.rtbb.com.au/catalog/

We carry the largest range of NEW Ramps in Australia

Offline Slash

  • Trade Count: (+1)
  • *****
  • Forum Posts:
Re: Stern Stars Reconditioning
« Reply #12 on: December 20, 2013, 01:01:52 AM »
Looks great, that playfield really looks in good nick!

I had a question on the apron decals, once you put then on do you seal them with clear or anything over the top, or is that not necessary (or could even stuff them)?

Offline Strangeways

  • Pinball Restoration is my passion
  • Administrator
  • Trade Count: (+9)
  • *****
  • High Score Initials:
  • Forum Posts:
  • Melbourne
  • ABN 68 283 634 461
    • Ride The Boney Beast
Re: Stern Stars Reconditioning
« Reply #13 on: December 20, 2013, 01:42:30 PM »
Looks great, that playfield really looks in good nick!

I had a question on the apron decals, once you put then on do you seal them with clear or anything over the top, or is that not necessary (or could even stuff them)?

In this case, I've repainted the apron and then given it two coats of clear and then applied the decal without a clear on top of the decal. It is really not needed, but on Gottlieb Aprons, I do like a shot of clear over the decal to add depth. I do place a strip of mylar where the ball makes contact with the apron from the outlanes.
Aussie Pinball - Proud to be Australia's Premier Pinball Forum

http://www.australianpinballrestorations.com.au/

http://www.rtbb.com.au/catalog/

We carry the largest range of NEW Ramps in Australia

Offline Slash

  • Trade Count: (+1)
  • *****
  • Forum Posts:
Re: Stern Stars Reconditioning
« Reply #14 on: December 20, 2013, 03:08:58 PM »
Ahh I wondered about the wear on the apron from the ball down the outlanes.  I was thinking of just putting on a heap of layers of paint to prevent/delay wear in that area, but mylar would probably do the trick.