Author Topic: Williams Pinbot Restoration  (Read 2532 times)

0 Members and 1 Guest are viewing this topic.

Offline Strangeways

  • Pinball Restoration is my passion
  • Administrator
  • Trade Count: (+9)
  • *****
  • High Score Initials:
  • Forum Posts:
  • Melbourne
  • ABN 68 283 634 461
    • Ride The Boney Beast
Williams Pinbot Restoration
« on: October 31, 2009, 11:27:58 PM »

The second machine from the dream container up for a rebuild is Williams PINBOT


Objective

From the initial pictures, you may be fooled into thinking that this game is already "shopped". Could very well be - but not to my standards! The game almost worked on initial power up - but the coil on the LHS flipper was a dead short. Fixed that and we have a working pin. I want to recondition this machine to my standards, and I think that it will be quite a job!

Condition

Playfield - 8/10 - Factory mylar. Wear spots at all three outholes, but the rest of the playfield shows no signs of wear. I'm not removing the mylar on this game, as it is in excellent condition. One plastic is broken.

Cabinet - 8/10 - Scruff marks - normal "wear and tear". It has the two Pinbot stickers on the front panel.

Electronics - 8/10 - Not too bad - wrong fuses on the power supply. One display not working.

Let's Begin

Here are some pictures of the machine afer I put the legs on and started tinkering. It is a good base for a potentially very nice machine.


Playfield Teardown


Here's the fun part. I took around 100 pictures of the playfield as I was removing parts. It is a good "snapshot" of the playfield and it also highlights some mistakes made by previous techs - shortcuts etc ! One question I was asked a while ago was in reference to how I can remember where parts go. That's where the camera and a caliper come in handy. The caliper I use for this is a cheap $5 job from any electronics store. Simply use the caliper to determine the size of the part - whether it be a post etc.. In this example - it is one of the posts that holds up the ramp ;


I will refer back to this picture during re assembly. A simple yet effective tip.


More teardown pictures and some wear spots ;


I'm thinking of decals or touchups in these areas.


Playfield stripped prior to cleaning


This area is almost always worn - but this playfield is very good !


 <.>
Aussie Pinball - Proud to be Australia's Premier Pinball Forum

http://www.australianpinballrestorations.com.au/

http://www.rtbb.com.au/catalog/

We carry the largest range of NEW Ramps in Australia

Offline MartyJ

  • Trade Count: (+4)
  • ******
  • High Score Initials:
  • Forum Posts:
  • Melbourne
Re: Williams Pinbot Restoration
« Reply #1 on: October 31, 2009, 11:35:26 PM »
Great looking machine Nino.

Wow.  If thats all the original dirt under the apron area then this will turn out like new.

What are your plans for the very minor wear?  The grey areas look pretty easy..

Offline Strangeways

  • Pinball Restoration is my passion
  • Administrator
  • Trade Count: (+9)
  • *****
  • High Score Initials:
  • Forum Posts:
  • Melbourne
  • ABN 68 283 634 461
    • Ride The Boney Beast
Re: Williams Pinbot Restoration
« Reply #2 on: October 31, 2009, 11:40:09 PM »
Great looking machine Nino.

Wow.  If thats all the original dirt under the apron area then this will turn out like new.

What are your plans for the very minor wear?  The grey areas look pretty easy..

Wotto is waiting for some more detailed pictures and measurements. I' leaning towards using my airbrush for the first time for the gray in front of the two outholes. The upper left hand outhole has some detailed artwork that may require a decal.

I'm quite happy to hear anyone's opinion on how to tackle these touch ups.
Aussie Pinball - Proud to be Australia's Premier Pinball Forum

http://www.australianpinballrestorations.com.au/

http://www.rtbb.com.au/catalog/

We carry the largest range of NEW Ramps in Australia

Offline johnwartjr

  • Trade Count: (0)
  • ******
  • Forum Posts:
  • Columbus, Indiana USA
  • It's ALIVEEEEEE!
    • My Home Gameroom . com
Re: Williams Pinbot Restoration
« Reply #3 on: November 01, 2009, 02:48:08 AM »
That's a very nice Pinbot to start with! I've never seen the stickers actually on the game, although I've seen them sold separately a few times.

I'm always impressed when someone can do their own artwork restorations, I lack skills in that area.

Don't forget to fuse the 2 bridges in the backbox, the last Pinbot to come through my shop didn't have the bridges fused, and I had to rewire from the transformer to the bridges because one of them shorted.


Offline Strangeways

  • Pinball Restoration is my passion
  • Administrator
  • Trade Count: (+9)
  • *****
  • High Score Initials:
  • Forum Posts:
  • Melbourne
  • ABN 68 283 634 461
    • Ride The Boney Beast
Re: Williams Pinbot Restoration
« Reply #4 on: November 01, 2009, 10:25:48 AM »
That's a very nice Pinbot to start with! I've never seen the stickers actually on the game, although I've seen them sold separately a few times.

I'm always impressed when someone can do their own artwork restorations, I lack skills in that area.

Don't forget to fuse the 2 bridges in the backbox, the last Pinbot to come through my shop didn't have the bridges fused, and I had to rewire from the transformer to the bridges because one of them shorted.


I'm hopeless as touch up work - but I might give this a try, as it does not look that difficult, and the sections are hidden from view. I will go through the process of checking boards etc and I will fuse the BRs - I always follow this step on all WMS machines.

Aussie Pinball - Proud to be Australia's Premier Pinball Forum

http://www.australianpinballrestorations.com.au/

http://www.rtbb.com.au/catalog/

We carry the largest range of NEW Ramps in Australia

Offline MartyJ

  • Trade Count: (+4)
  • ******
  • High Score Initials:
  • Forum Posts:
  • Melbourne
Re: Williams Pinbot Restoration
« Reply #5 on: November 01, 2009, 11:05:19 AM »
Nino - are you planning to leave the mylar on?  If so - again my offer is still there for you to borrow the treasure cove kit so see what you think (on mylar)....As long as the playfield is coming out and being stripped.

Offline Strangeways

  • Pinball Restoration is my passion
  • Administrator
  • Trade Count: (+9)
  • *****
  • High Score Initials:
  • Forum Posts:
  • Melbourne
  • ABN 68 283 634 461
    • Ride The Boney Beast
Re: Williams Pinbot Restoration
« Reply #6 on: November 01, 2009, 11:40:35 AM »
Nino - are you planning to leave the mylar on?  If so - again my offer is still there for you to borrow the treasure cove kit so see what you think (on mylar)....As long as the playfield is coming out and being stripped.

Mylar is staying on Marty. Maybe we can organize a time to polish the PF ? It is already stripped.
Aussie Pinball - Proud to be Australia's Premier Pinball Forum

http://www.australianpinballrestorations.com.au/

http://www.rtbb.com.au/catalog/

We carry the largest range of NEW Ramps in Australia

Offline MartyJ

  • Trade Count: (+4)
  • ******
  • High Score Initials:
  • Forum Posts:
  • Melbourne
Re: Williams Pinbot Restoration
« Reply #7 on: November 01, 2009, 11:52:52 AM »
Nino - are you planning to leave the mylar on?  If so - again my offer is still there for you to borrow the treasure cove kit so see what you think (on mylar)....As long as the playfield is coming out and being stripped.

Mylar is staying on Marty. Maybe we can organize a time to polish the PF ? It is already stripped.

I'll bring the kit with me when I pop in next Sat - if thats not too late?

Offline Strangeways

  • Pinball Restoration is my passion
  • Administrator
  • Trade Count: (+9)
  • *****
  • High Score Initials:
  • Forum Posts:
  • Melbourne
  • ABN 68 283 634 461
    • Ride The Boney Beast
Re: Williams Pinbot Restoration
« Reply #8 on: November 02, 2009, 11:49:03 AM »
Nino - are you planning to leave the mylar on?  If so - again my offer is still there for you to borrow the treasure cove kit so see what you think (on mylar)....As long as the playfield is coming out and being stripped.

Mylar is staying on Marty. Maybe we can organize a time to polish the PF ? It is already stripped.

I'll bring the kit with me when I pop in next Sat - if thats not too late?


No worries Marty - I'll wait until then !
Aussie Pinball - Proud to be Australia's Premier Pinball Forum

http://www.australianpinballrestorations.com.au/

http://www.rtbb.com.au/catalog/

We carry the largest range of NEW Ramps in Australia

Offline Strangeways

  • Pinball Restoration is my passion
  • Administrator
  • Trade Count: (+9)
  • *****
  • High Score Initials:
  • Forum Posts:
  • Melbourne
  • ABN 68 283 634 461
    • Ride The Boney Beast
Re: Williams Pinbot Restoration
« Reply #9 on: November 02, 2009, 12:33:52 PM »

Here is a mini guide to my cleaning process for playfield parts. I use this method for all machines. The purpose of going through this process is simply to have all the dirt off the parts you want to put into the tumbler. It is preferable to put CLEAN parts into the polisher -after all - the tumber is a polisher - not a cleaner.

All you need is a couple of old containers, tooth brushes, paint brush, green scotchbrite pads and windex. Don't use the cheap window cleaners - they just don't work. I use recyled water out of the tank.

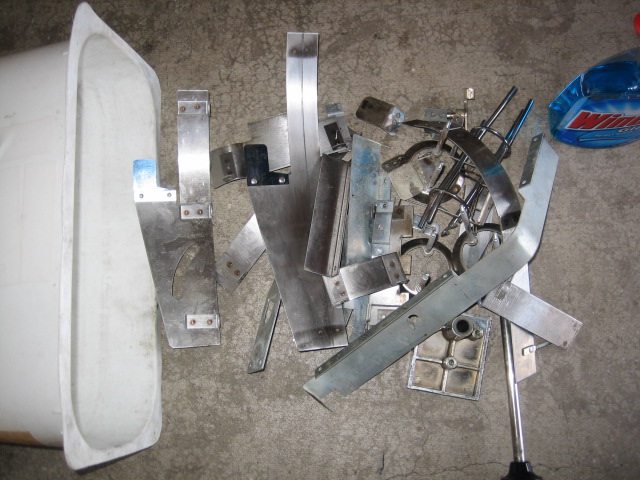
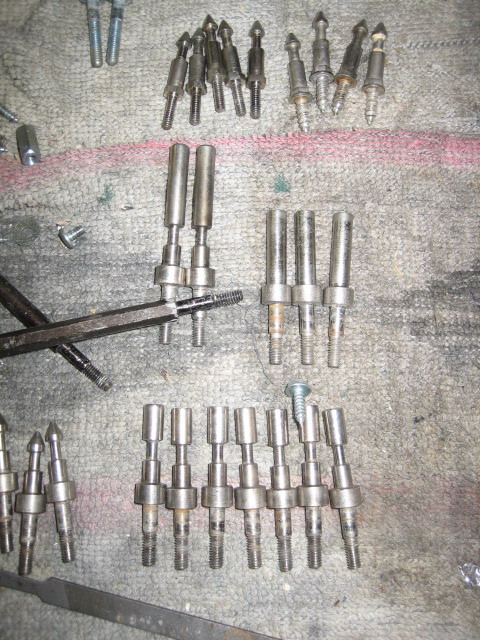
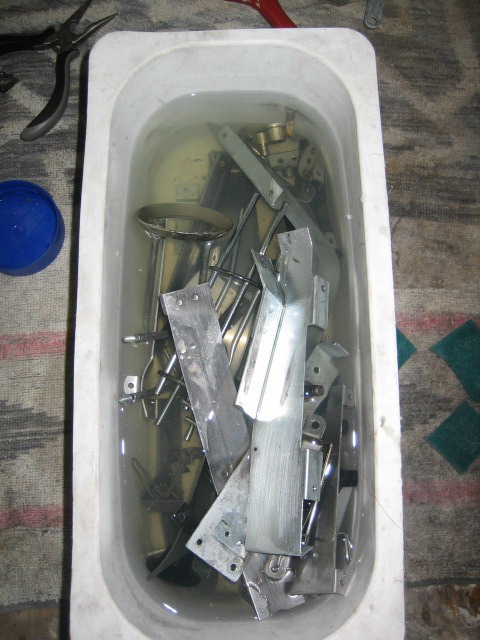
Here's all the playfield parts with no hardware attacked - straight off the playfield


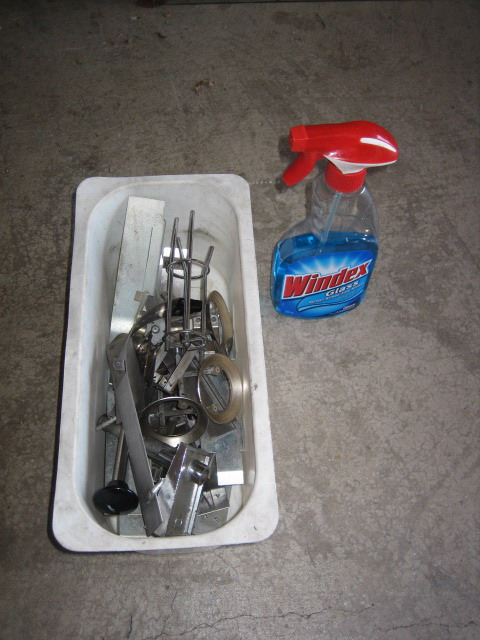
Windex - I started using windex for cleaning metal parts after I ran out of Nifti one day. Found Windex to do a far better job. Spray the windex into the container - around a dozen squirts !


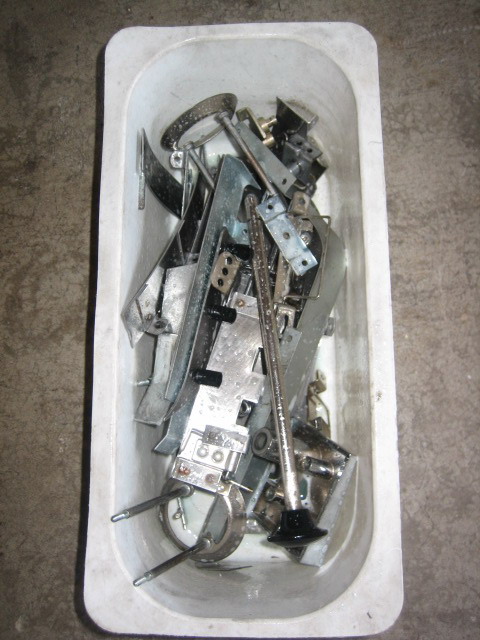
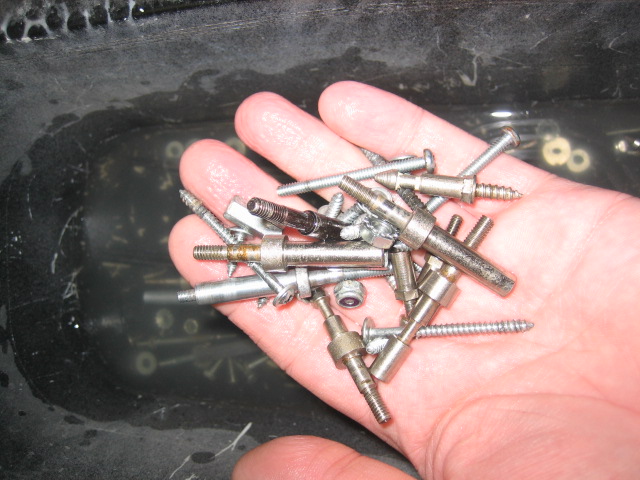
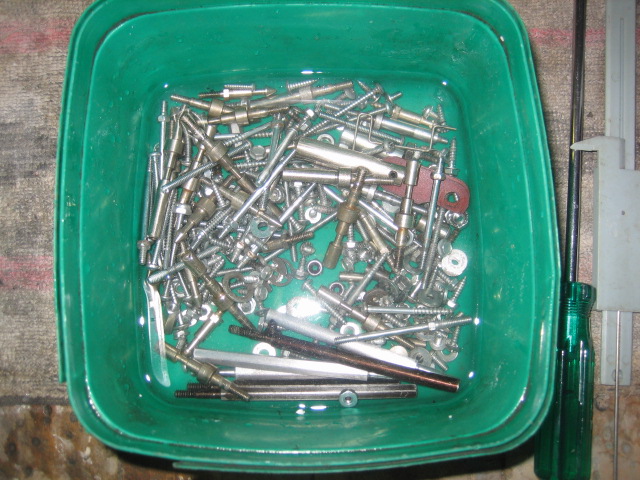
Here's the playfield hardware. FILTHY.


Same deal for the hardware - a dozen squirts of Windex.


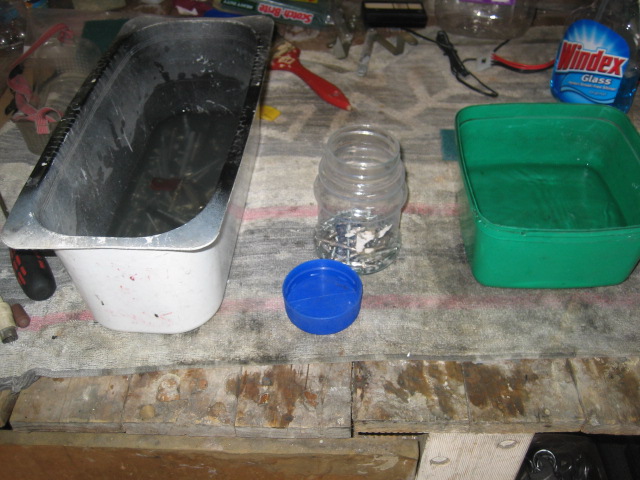
Boil the kettle and pour over both the containers. Just enought to cover all the parts. Put these two containers aside. The bucket on the right has COLD water and a couple of sprays of nifti. Throw the plastics in the bucket and clean them with an old paintbrush. Rinse them in a clean bucket of water and leave on a towel in the sun !


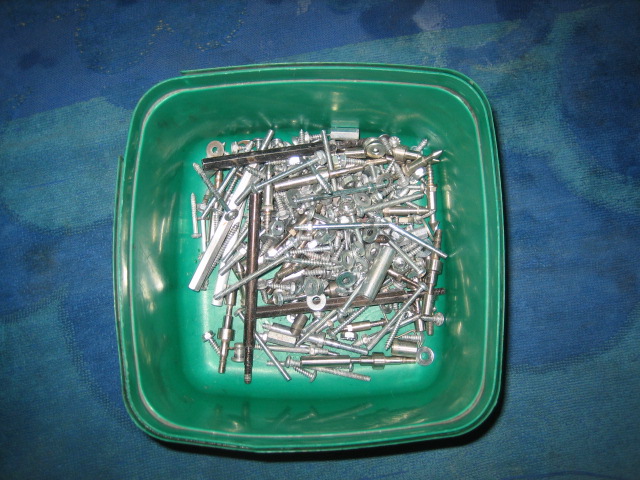
You can leave the metal parts overnight - but I removed them after 3 hours. Notice the water is very dirty, but the parts are still a little dirty. It is more the bottom of the parts where the threads are.


So we take the hardware up onto the bench. I have a smaller container that will help remove all the dirt. Grab a handful of hardware and drop it into the small container with the blue top. spray windex in the container - two of three sprays. Close the lid and shake for a minute. Take the top off and then scoop a capful of clean water and pour it into the container. Close and shake for another minute.


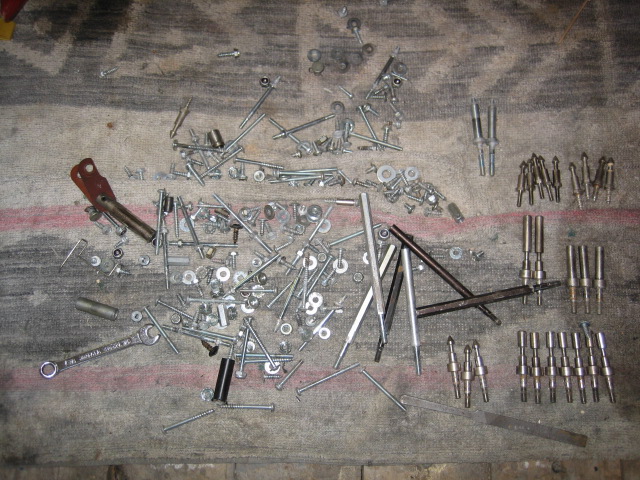
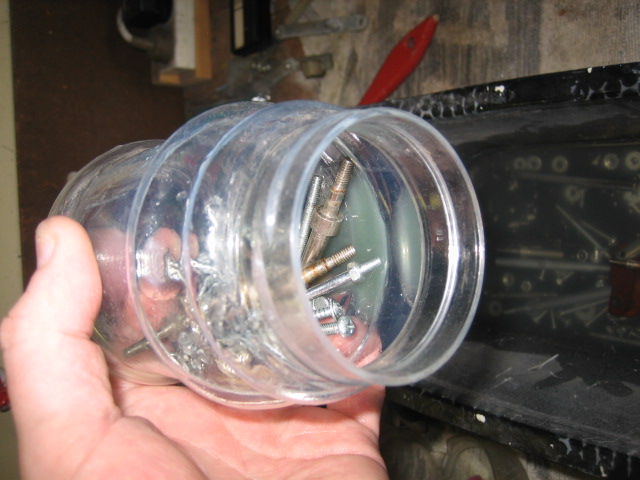
This is where the really bad filth is removed - this is the filth after 2 minutes;


Keep going for the rest of the hardware


Still a bit dull - but clean enough to go into the tumber.


On to the playfield parts. While they are still in the solution of Windex and filth, use an old toothbrush and green scotchbrite (cut into smaller pieces). Just clean the dirt off - as the boiling water and Windex displaces the dirt, but you have to remove it using the toothbrush or scotchbrite. Regrain the metal lane guides with the scotchbrite pads.


When done - the water looks like this !


Back to the hardware - Just use a small piece of scotchbrite, and wrap it around the end of the posts, and turn in your hand - like chalking a billiard cue !


Rinse and dry - parts are ready for the tumbler !!


It reads like a long process - but it is quite easy after a few machines.
Aussie Pinball - Proud to be Australia's Premier Pinball Forum

http://www.australianpinballrestorations.com.au/

http://www.rtbb.com.au/catalog/

We carry the largest range of NEW Ramps in Australia

Offline beaky

  • Trade Count: (+7)
  • ******
  • Forum Posts:
  • Melbourne, Vic
Re: Williams Pinbot Restoration
« Reply #10 on: November 02, 2009, 01:09:42 PM »
My pinbot has some wear near the top left out hole also.
it's not as bad as yours but it sticks out like dogs balls. if it didn't i would have scanned it for you.

i will be giving my pinbot an overhall eventually so i will be watching this thread with interest.

keep up the great work  ^^^
On site pinball repairs in MELBOURNE NTH SUBURBS  : Circuit board repairs and refurbishing Australia wide (via Aust post)

Offline Strangeways

  • Pinball Restoration is my passion
  • Administrator
  • Trade Count: (+9)
  • *****
  • High Score Initials:
  • Forum Posts:
  • Melbourne
  • ABN 68 283 634 461
    • Ride The Boney Beast
Re: Williams Pinbot Restoration
« Reply #11 on: November 02, 2009, 01:46:21 PM »
My pinbot has some wear near the top left out hole also.
it's not as bad as yours but it sticks out like dogs balls. if it didn't i would have scanned it for you.

i will be giving my pinbot an overhall eventually so i will be watching this thread with interest.

keep up the great work  ^^^

There some good scans on IPDB.org - and I have commissioned a resident artist to assist  #@#

I might try airbrushing the two outholes.
Aussie Pinball - Proud to be Australia's Premier Pinball Forum

http://www.australianpinballrestorations.com.au/

http://www.rtbb.com.au/catalog/

We carry the largest range of NEW Ramps in Australia

Offline johnwartjr

  • Trade Count: (0)
  • ******
  • Forum Posts:
  • Columbus, Indiana USA
  • It's ALIVEEEEEE!
    • My Home Gameroom . com
Re: Williams Pinbot Restoration
« Reply #12 on: November 02, 2009, 04:50:16 PM »
Thanks for documenting your process. Helps me understand it a bit better. Couple questions..

Recycled water from what tank?

And what exactly is Nifti? Some products, like Windex, are available on multiple continents, but I've never heard of Nifti. Wood cleaner? Bathroom cleaner? General purpose cleaner?


Offline Strangeways

  • Pinball Restoration is my passion
  • Administrator
  • Trade Count: (+9)
  • *****
  • High Score Initials:
  • Forum Posts:
  • Melbourne
  • ABN 68 283 634 461
    • Ride The Boney Beast
Re: Williams Pinbot Restoration
« Reply #13 on: November 02, 2009, 04:56:52 PM »
Thanks for documenting your process. Helps me understand it a bit better. Couple questions..

Recycled water from what tank?

And what exactly is Nifti? Some products, like Windex, are available on multiple continents, but I've never heard of Nifti. Wood cleaner? Bathroom cleaner? General purpose cleaner?


no worries John - It is a method I've used a few times and I'm very pleased with the results. I'm keen to see / hear of other methods.

Recycled water is from a water tank I installed a while ago - just rainwater !

Nifti - General purpose cleaner we have here in Australia - used for just about everything - plastics, playfield, posts etc..
Aussie Pinball - Proud to be Australia's Premier Pinball Forum

http://www.australianpinballrestorations.com.au/

http://www.rtbb.com.au/catalog/

We carry the largest range of NEW Ramps in Australia

Offline Strangeways

  • Pinball Restoration is my passion
  • Administrator
  • Trade Count: (+9)
  • *****
  • High Score Initials:
  • Forum Posts:
  • Melbourne
  • ABN 68 283 634 461
    • Ride The Boney Beast
Re: Williams Pinbot Restoration
« Reply #14 on: November 14, 2009, 11:43:16 PM »

Time for an update !

I have been slowly "chipping" away at this machine, and as usual, I find things that I just CANNOT leave alone. The playfield hardware has been tumbled and the resident AP artist has been commissioned to do a little bit of decal work in a wear area, I've been working on the cabinet.

Cabinet

Standard Nifti job here - just strip the hardware and wash. Since the weather has been REALLY warm, it has been easier to get out into the garage and spend some hours getting dirty..

Little bit out of focus, but you get the idea !


Stripped cabinet ;


After a good clean - looks like this ;


Front Door


Inspired by John's CFTBL thread, I decided to have a go at repainting the door. It was in reasonable condition, but it did need some "straightening" as during the machine's lifetime, it must have been broken into. First step was to strip the door, and give it a quick clean and sand ;


A quick spray with a can of Flat Black ;


I painted the door in a Flat Black, but the bolts were painted in a gloss black. After Reassembling the door - I installed it and I was pleasantly surprised !
I cleaned the legs with Windex and 0000 steelwool. After drying in the sun, I buffed with Brasso. New Leg Protectors and legbolts were installed.


The Lockdown Bar was in bad shape - so I used Ranex and green scotchbrite pads - finishing with Windex. The inside of the cabinet is completed ;


 ^^^


Aussie Pinball - Proud to be Australia's Premier Pinball Forum

http://www.australianpinballrestorations.com.au/

http://www.rtbb.com.au/catalog/

We carry the largest range of NEW Ramps in Australia