Author Topic: Gottlieb Jacks Open  (Read 4691 times)

0 Members and 1 Guest are viewing this topic.

Offline Strangeways

  • Pinball Restoration is my passion
  • Administrator
  • Trade Count: (+9)
  • *****
  • High Score Initials:
  • Forum Posts:
  • Melbourne
  • ABN 68 283 634 461
    • Ride The Boney Beast
Gottlieb Jacks Open
« on: February 16, 2009, 02:40:05 PM »
This restore was documented on InventForums, so I thought I'd bring it across to AP just as a reference. Most of you have seen this before, but I'm sure someone will benefit from some of the aspects of the work done.


Jacks Open is a game a decided deserved a full restore. I started the restore about 3 years ago and it took me a year to restore. It used all the skills I had learn and some new techniques I pickup up along the way.


Background


I bought the cheap from a guy who wanted to sell the game with a Juke Box - a package deal. I had no interest in the juke box, but I wanted the pinball. So I drove over and picked it up. I set it up in my games room that night, and of course, like most EMs - It just worked.


Condition


Well - it worked ! The playfield was filthy, the cabinet was terrible - someone tried a repaint with house paint (why do people do this?), the backglass was very good, except a scratch on the outside of the glass.. What impressed me was the condition of the mechanics. The steppers, relays and score motor were "as new". The only really bad thing was that there was a coil the must of burnt the score reel at some time, as it was melted out of shape


Starting Point


After the excitement of getting it home had settled, I had this idea to restore the game as best I could. After a couple of days, and after some thought - I took it a step further and decided it needed a repaint.. Not satisfied - I then wanted the machine to be restored "Nearly In Box" (NIB)

... So there's the challenge ...


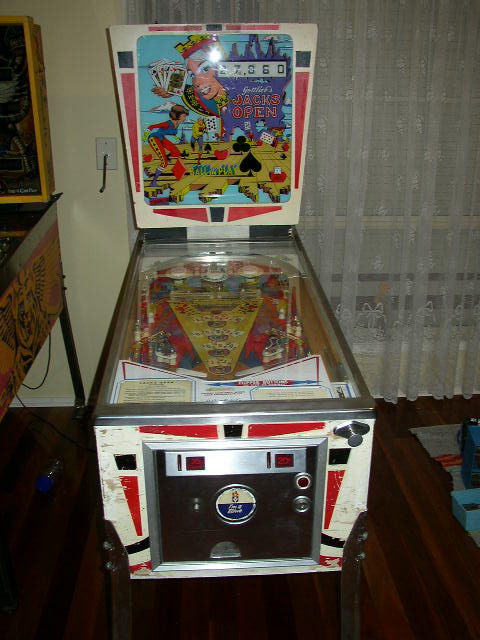
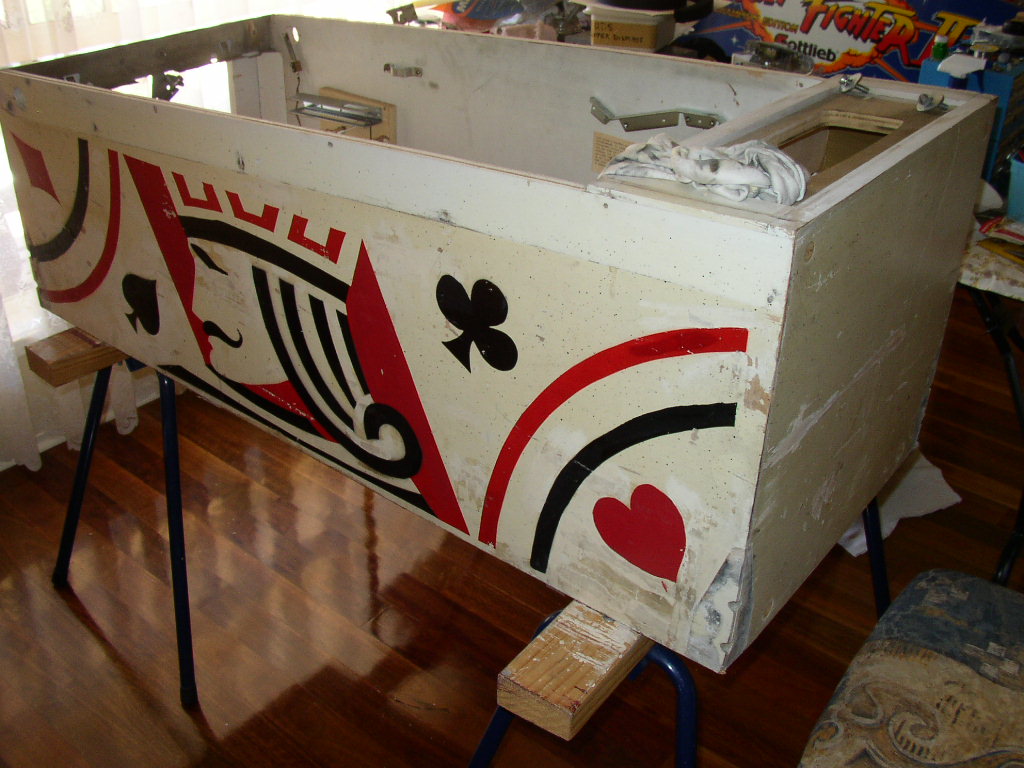
Here's the game the day I bought it.. A bit sad looking, and it needed some attention ;


End Point


So where does the journey stop ? Fast forward 12 months...


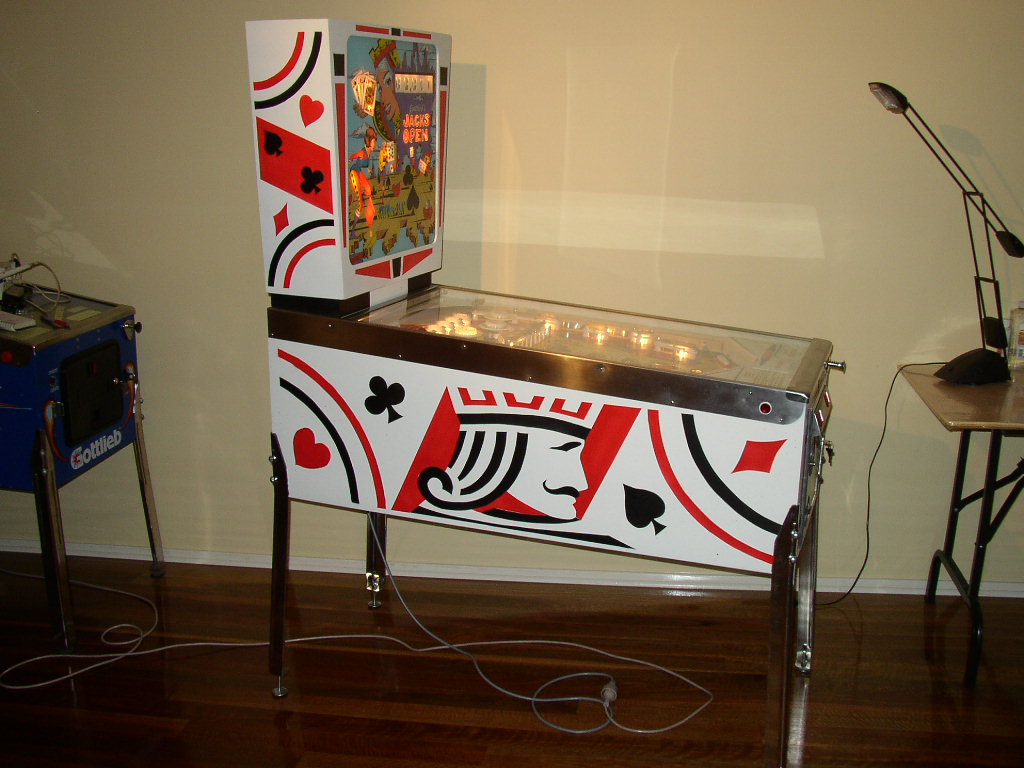
This is the end product ;


The Journey


Since this game is finished, I'd like to post progress pictures from the first day, right up to the end result.. Kind of a journal..


First step was to remove the legs & head and have a good look around the structure of the cabinet and the paint work. Structure was ok - no repairs needed. But the paint work was CRAP.. Looked like crayons were used and a dry brush and crap paint were applied. On top of that - Some of the wood under the housepaint had reacted in some way and it looked more like bark off a tree. Nope... I'm painting this...


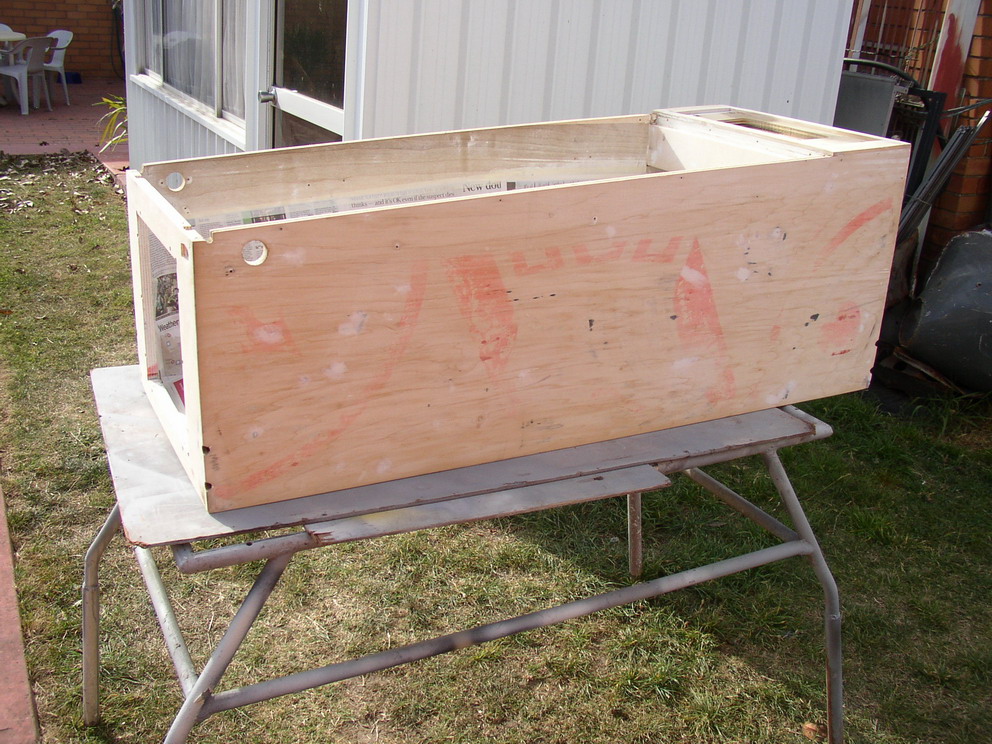
I used Citrus Strip from Bunnings to strip the cabinet. No fumes, no mess and it washes off in water. I used two scrapers, one wide scraper to remove the paint, and other to scrape the residue off the wide scraper. I had to do it twice in some sections as the red paint was really deep into the wood. It took 3 hours and I left the game in the sun for a few hours and waited a week before prepping it.


I tried a few different wood fillers on this cabinet, none that I was pleased with.. But I did fix most of the dints etc... Sanded with 150, 180, 320 then 600 before the first undercoat


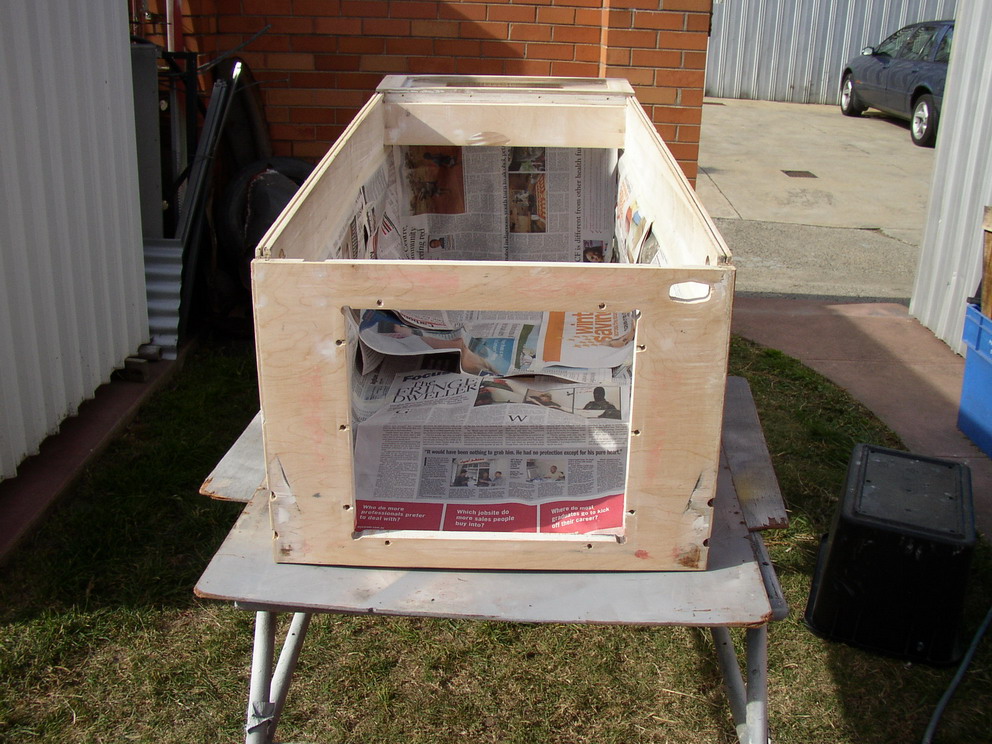
I masked off the insides of the cabinet from the undercoat.


OK - I don't recall the number of undercoats, but I think it was four. We used 600 grit wet / dry between coats, and waited about 20 minutes between coats. I used Dad's compressor and paint guns - he has been doing this for years (spray painting) - so it was easy for him - and me !


The cabinet was left out in the sun for two hours, and then placed in storage for a week...


Whilst the cabinet was getting a make over.. the playfield strip commenced. Everything was removed from topside. Boy was it dirty. First clean was with a wet rag, then nifti (sprayed on the wet rag). I spent the next 3 Days removing the ball swirl. I used ISOCOL from a chemist with 3 packets of chux magic erasers. Lots of care needs to be taken while doing this. There are sections that wore away the lacquer, and sections where the paint just lifted. Care needs top be taken here. I think to took 20 hours to get it perfect.


Before Pictures


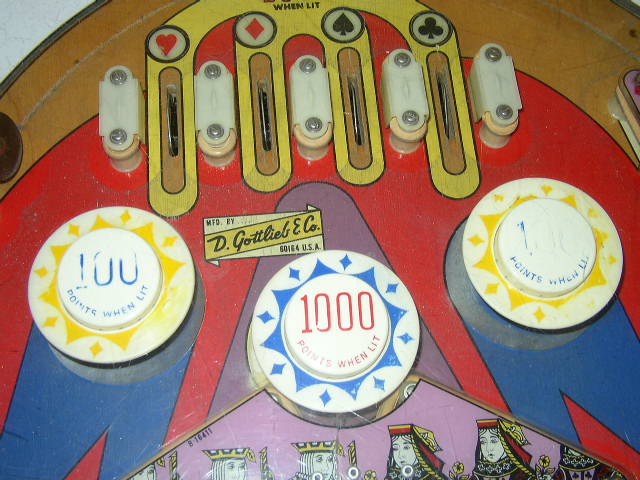
Progress pictures - post cleanup with ISOCOL and MAGIC ERASER


While this was happening, I ordered EVERYTHING topside From Pinball Resource.

Bumper bodies, skirts, caps, flipper, posts, acorn caps, rubbers, nails, coils, rebuild kits, side rail nails, flipper buttons and housings, pincushions, legbolts... and heaps of other bits..

Sidenote - I PESTERED steve to remake the plastics set, and midway through the playfield clean, he emailed me with a release date.. So I ordered them as well !!


This is the hardest part of the resto imho. LOTS of time and patience required. Unfortunately, I don't have detailed pictures of these steps, as I just forgot. The white base color was sprayed on in one long session. I think it has 3 coats - first was thin, then two thicker. The entire cabinet was painted and left to dry in the sun, then left for 2 weeks to dry. During the two weeks, I made the stencils. Here's how I did it;

Bought a roll of tracing paper, .005 Acetate sheets, black thin permanent marker, and an exacto knife.

Prior to the resto, I traced the entire cabinet onto tracing paper and I took heaps of pictures. Initially with pencil on the tracing paper and then thin perm marker. When it was time to create the stencils, you use the tracing paper image on the bottom, and secure it to the acetate sheet on top. Trace the section that you need to be cut out of the stencil to allow the paint to pass on to the cabinet. That's a BLACK stencil for the sides of the body, head, front of the body and head. The the same for RED. So that's 12 stencils in all..Time consuming, and you need to be accurate. Then all the stencils need to be labeled and store them under a rug or the carpet so they stay flat....

The "Splatter effect"...

This is easy - but you need to test on a piece of cardboard.. All Gottliebs of this era had little specs of black paint all over the cabinet - The story is that the specks detract the eye from the lack of registration of the stencils and the over spray and under spray. When researching the way the original cabinet was painted, a thin sheet of brass was held against the cab and then the color was sprayed through the brass stencil. Then the next color was sprayed. So stenciling a cabinet from the factory in the old days took minutes, not hours. But there was always overspray and underspray. The "splatter" was there to distract from these problems. So in faithfully restoring a cabinet, I wanted it as authentic and accurate as possible.

All that's needed is a toothbrush and thick black paint, although I thinned mine out and "flicked" the paint while the side I was "flicking the paint" was flat (horizontal) - that way, paint does not run. Dipping the brush into the paint than running your finger from away from you towards you along the brush "flicks" the paint randomly on the cab.. easy..

Once "splatter" is done, the RED is applied. I started on the sides. The cab must be on a flat surface with the side to be painted horizontal. The RED stencil is registered (important) on the side to be painted and then some 3M blue tape used to hold the stencil down. Mask off everything else around the stencil. Here's the secret - use large nuts, bolts, steel offcuts and anything heavy (get creative), and lay them on the stencil - this creates pressure around the edges - BUT - It keeps the end product faithful to the original, as there WILL BE overspray - because the stencil will not be completely flat..So it will look natural - not like the perfectly laser cut stencils...

Then, using a smaller volume spray gun, spray the red paint - thin coat first, then wait 5 minutes, another thin coat, than a thicker coat. All over in 10 minutes.. BEFORE the paint dries - remove the metal parts holding the stencil and carefully remove the stencil...It should come off nicely..

Repeat for all RED parts of the game...

Fast forward a week..

Repeat the process for BLACK...

Very time consuming - you need patience and a willing helper. After a week of storage..It was ready to come home. Here are the results ;
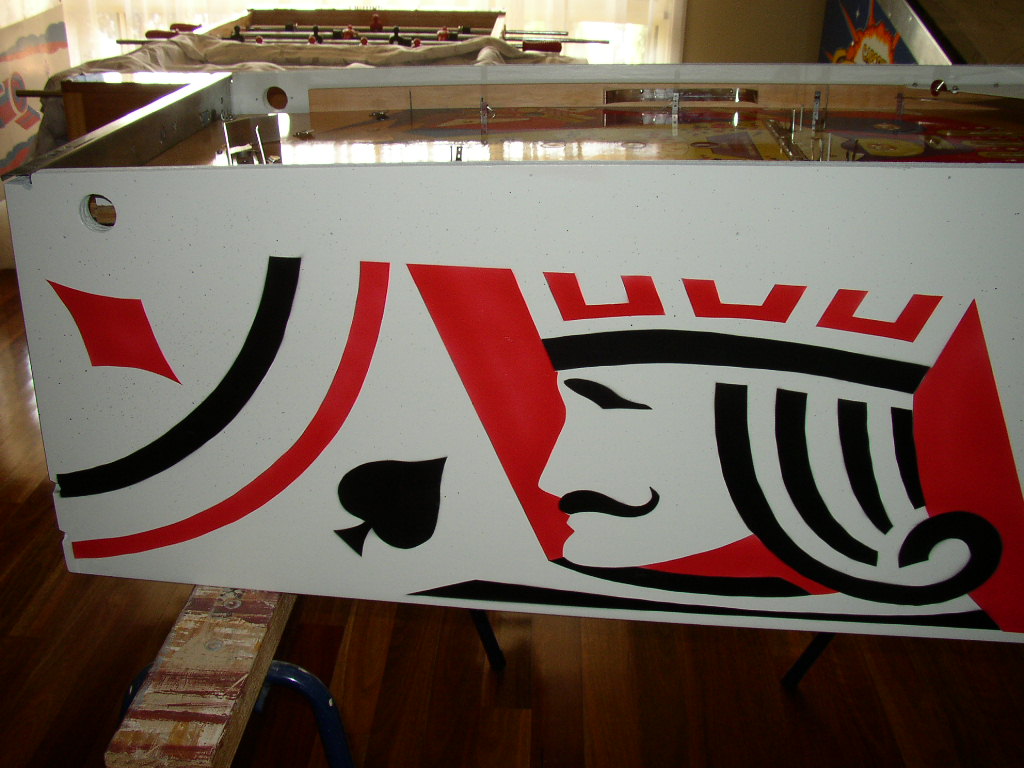

Side of the Cabinet


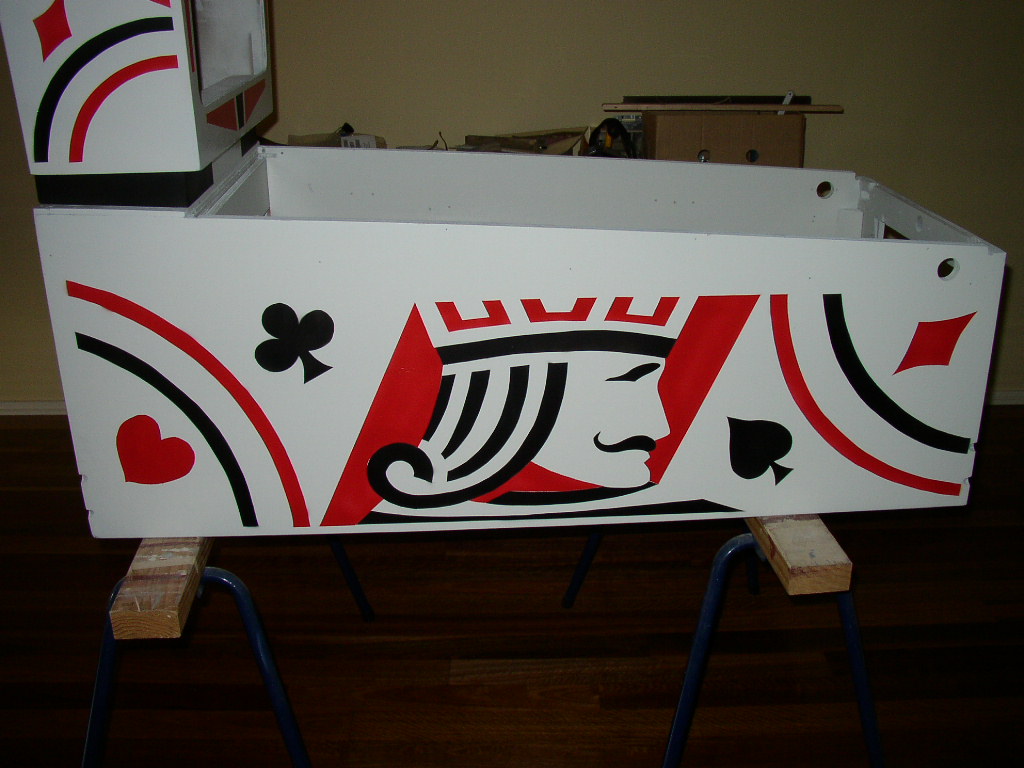
Front of the Cabinet
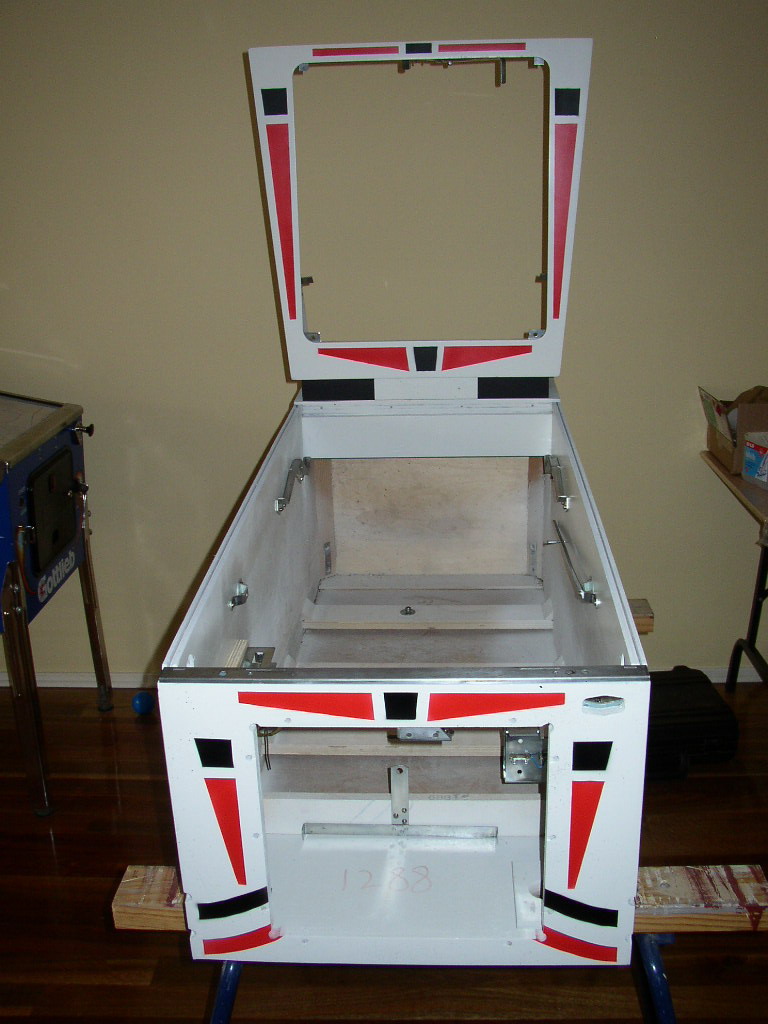
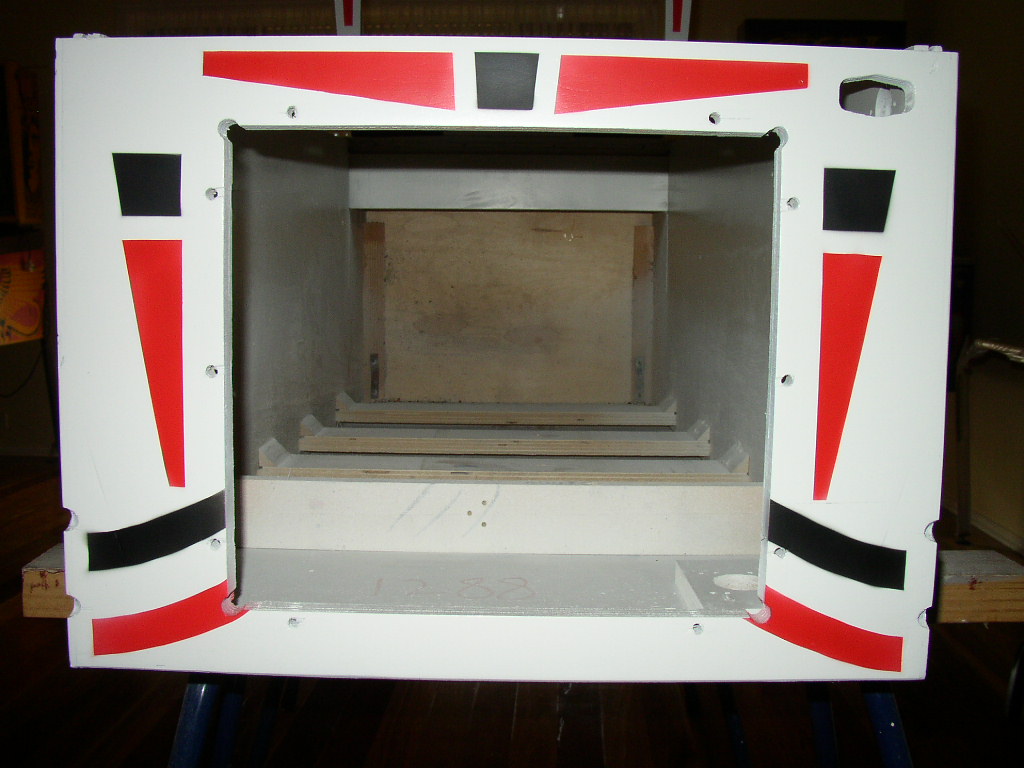


Front View - including the installation of polished parts


Side view with "splatter" !


Side view of the Head


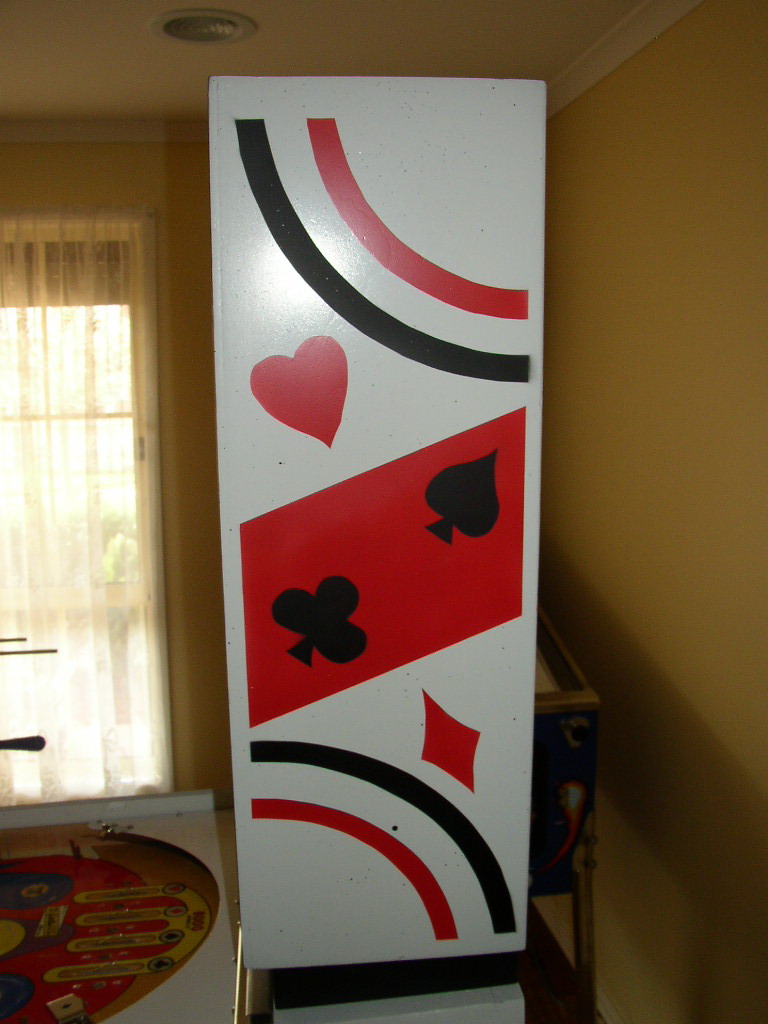
Now it's just a matter of polishing and cleaning EVERY single part and installing them back on to the game...


The cleaning of the playfield took a lot of time and elbow grease. While the cabinet was drying, I started on the underside of the playfield. I replaced playfield contact switches where necessary, rebuilt the flippers using new coils, stripped and rebuilt the stepper units (bonus etc), rebuilt the bumper assemblies and tidied up any wiring.


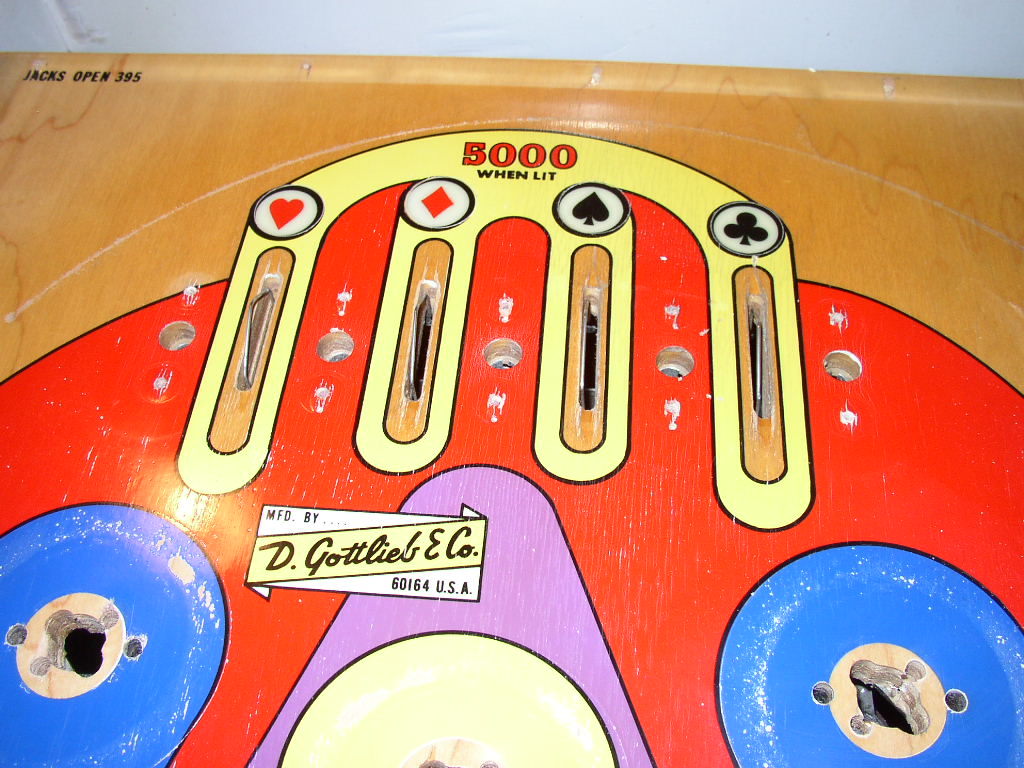
The next part was easy - installing the new playfield parts. I think just about everything is new here except the ball arch and metal guides . The wooden siderails were sanded right down.


Here's a picture inbetween waxing the playfield before intstalling the playfield parts ;


Notice the "flipper drag" - The only downside to this playfield. Not much that can be done about this without touchup and clearcoat. I never touchup or clearcoat EMs.


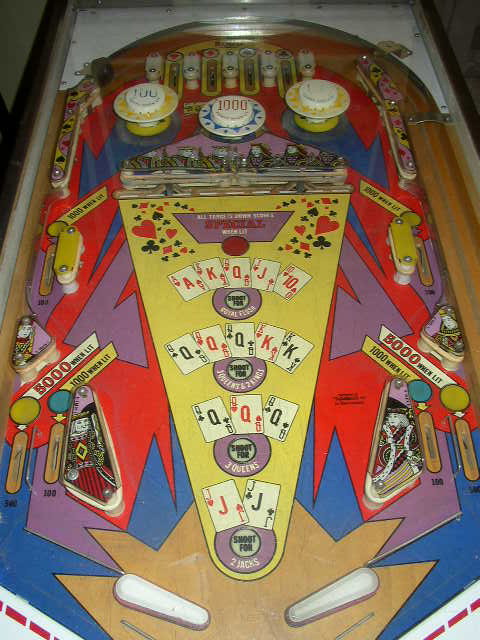
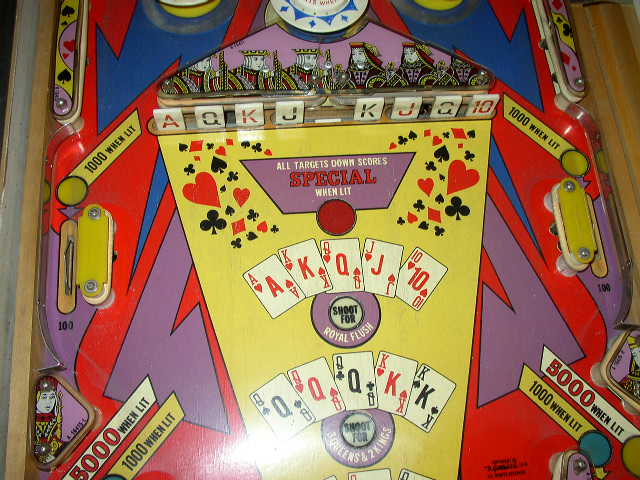
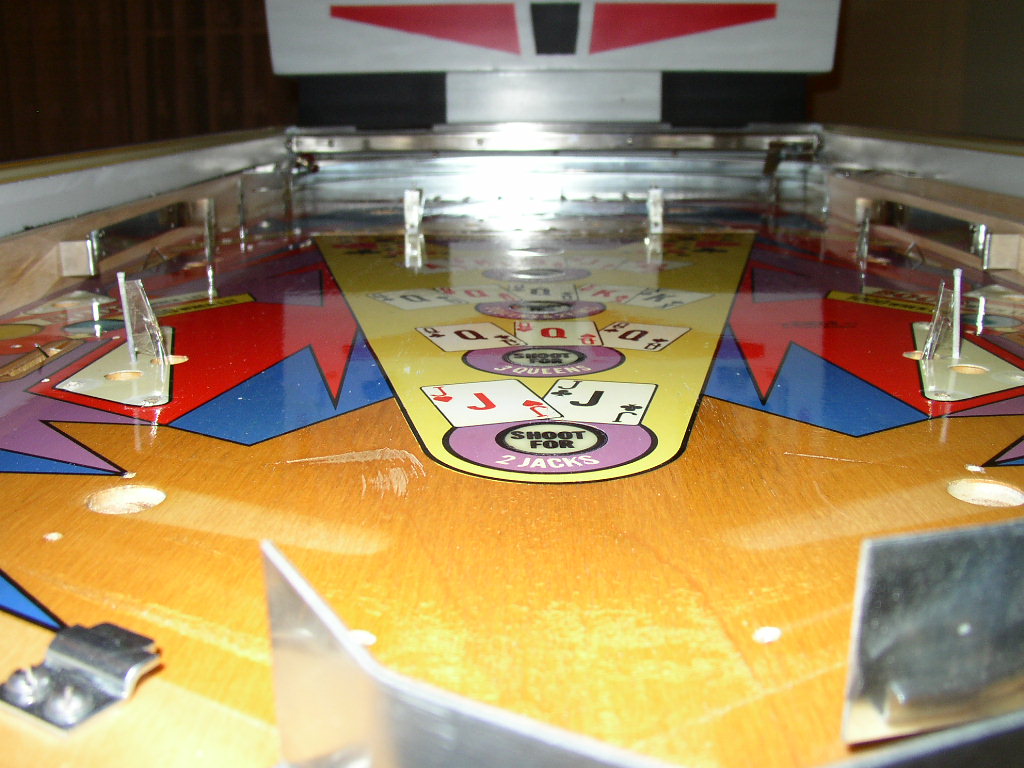
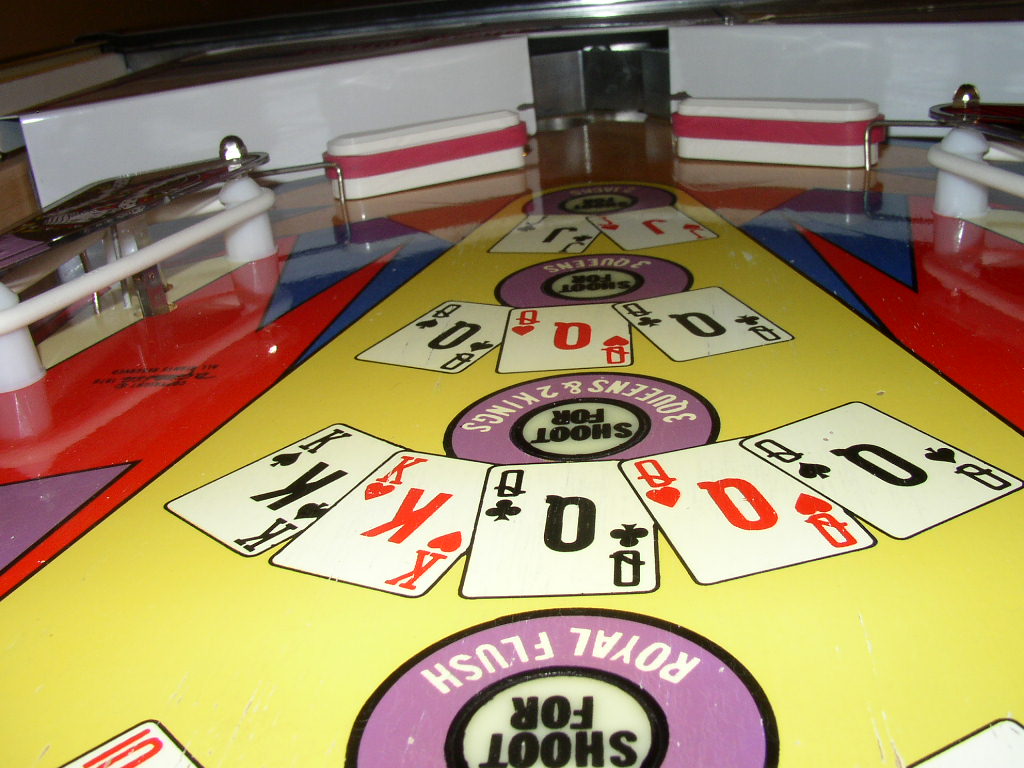
The YELLOW area under the targets is always a high traffic / wear area. After a good clean, it has come up really well. I used a sharpie to color the black circles around the inserts. This area was plagued with "ball swirl" - I'd say at least half the time was spent cleaning this area !


The Target Bank was completely rebuilt - eve to the point of polishing the mechanism. I works perfectly. Here's a progress picture of the palyfield;


You can see the lines (very thin) where the paint raised and peeled off. Especially in the LHS topmost "heart" in the yellow section. There are also other areas in this picture that have raised paint ;


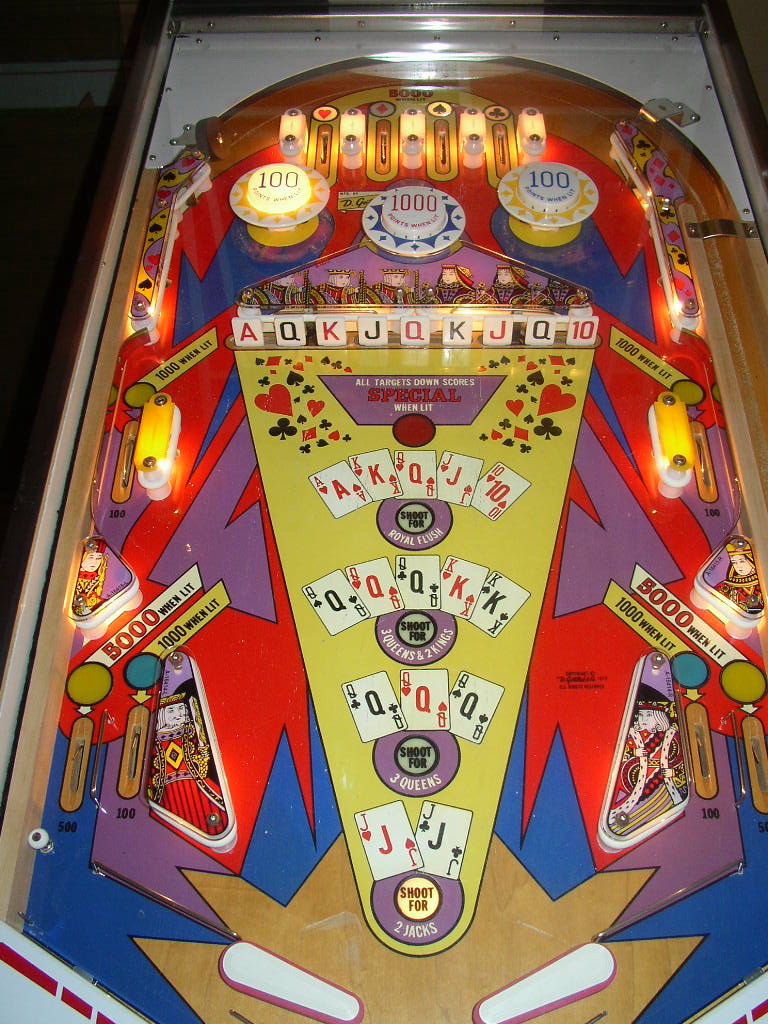
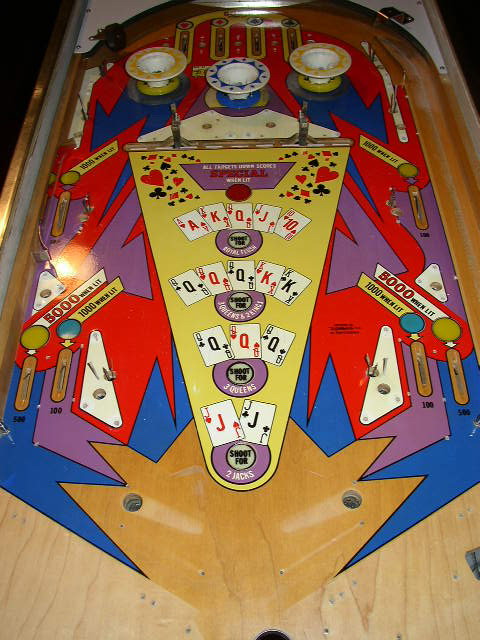
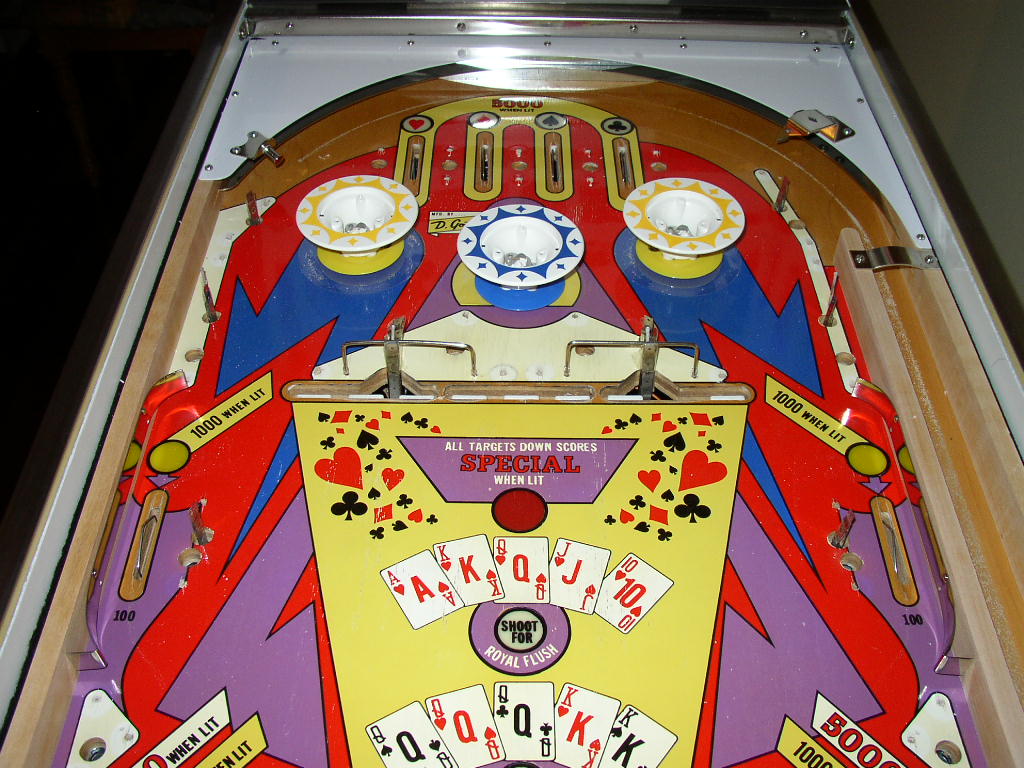
Lower Playfield and the NEW Plastics Set installed !! I BEGGED Steve from Pinball Resource to remake these plastics as the plastic above the target bank is ALWAYS broken. Cost US$76 at the time. There's some nice "shine" just below the target bank.


Here's what 4 coats of paste wax and buffing can do to a playfield. It's no clearcoat, but it is so smooth and shiney, it does give the impression that is is a clearcoat. Just hard work...


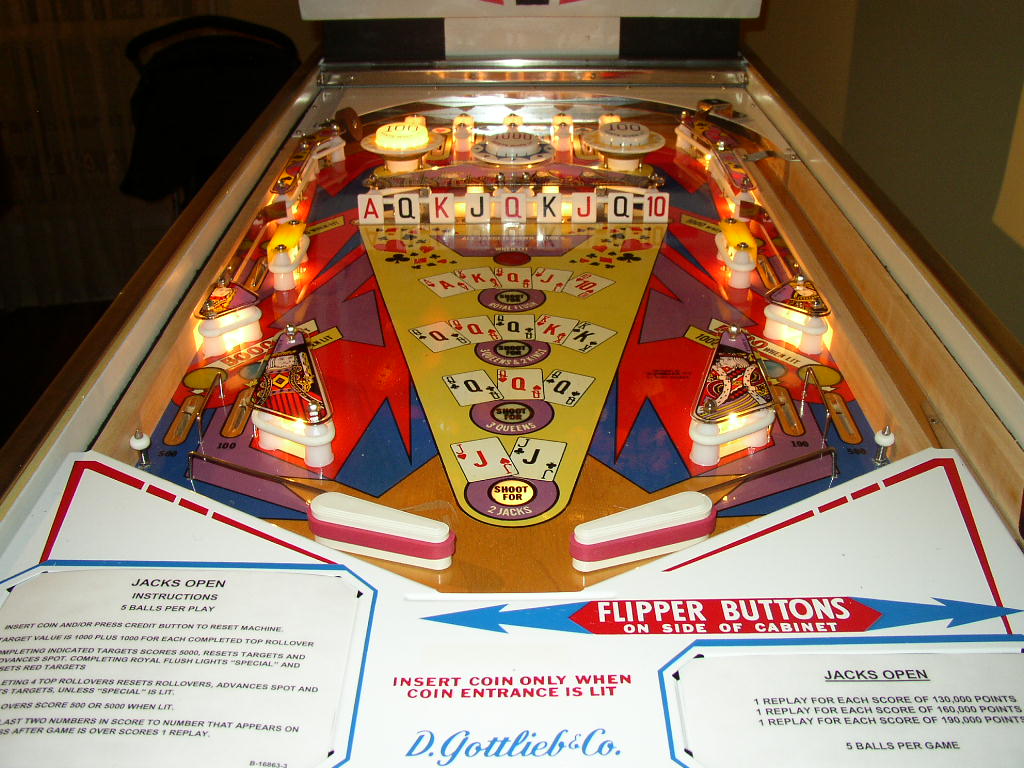
Finished Playfield - With the apron installed and instruction cards. I scanned the cards, printed them on high quality paper and then laminated them. I've cheated for this shot as the game is actually turned on - but it is a great picture to showcase the results that can be achieved with hard work and some great new parts !


End of Part 1


« Last Edit: February 16, 2009, 02:42:59 PM by Strangeways »
Aussie Pinball - Proud to be Australia's Premier Pinball Forum

http://www.australianpinballrestorations.com.au/

http://www.rtbb.com.au/catalog/

We carry the largest range of NEW Ramps in Australia

Offline Strangeways

  • Pinball Restoration is my passion
  • Administrator
  • Trade Count: (+9)
  • *****
  • High Score Initials:
  • Forum Posts:
  • Melbourne
  • ABN 68 283 634 461
    • Ride The Boney Beast
Re: Gottlieb Jacks Open Part 2
« Reply #1 on: February 16, 2009, 02:45:29 PM »

Part 2

Back on to the cabinet


I restored this game before I bought a tumbler. So every metal part, from assemblies to screws were hand polished and buffed where possible. Putting it back together meant checking 100's of photos I'd taken, and constant reference to other EM's I had access to at home. The lock down bar assembly was washed, scrubbed and buffed. It took almost a day to get it to shine - and it's a part that should never bee seen ! Chimes DO sound different when they are buffed and the rubber grommets are replaced.


The score motor is even polished !!!! All relays and switches were cleaned. A new power cable was installed. Every connector was painstakingly cleaned with 320 grit and a wire brush. All these little things ensured that when I switched the game on - it would work and be reliable.


Chimes and inside of the cabinet 


Under the bonnet... EVERYTHING rebuilt !!!


Early shot of the insides of the front door;


Legs are NOS and polished along with leg bolts etc... Front door is regrained with windex and 320 wet/dry. Siderails are also regrained using a straight edge, sanding block and 320 wet / dry with windex. New siderail nails were used as well.


Playfield is completely re assembled. New post, plastics set, rubbers, globes, acorn nuts, nails, flipper bats, lanes guides, targets, bumper skirts / bodies / caps. No stone unturned.


Stepper Units

A vital part of any restoration is to make sure the game works ! Rebuilding stepper units, target banks and any moving part is important is having a trouble free game. Steppers are important and are nearly always over looked. Ball count, bonus, player select etc.. all work together and you only need one small problem to throw out the whole game.

The process is simple. Remove the coil(s), take plenty of "before" pictures and check the tension on any winding springs. Count the number of turns, so that the same tension is returned when you re assemble. I strip every part off a stepper unit. Soak in alcohol, clean with a toothbrush and allow to dry. A drop of machine oil on the shaft, and then reassemble. Test the unit before placing back into the machine. Make sure it is behaving as it should. Then install the coil(s) and you're done. It takes about 1 hour per stepper unit - depending on whether it is full of grease and old oil !

Here's a picture of the credit unit - nice and clean.. and a bit polished


Head / Rear of the machine

Credit unit is installed back in the game, as well as the ball count unit. both cleaned and ready to work without problems for the next 30 years.. Notice the 4 Gliders on the rear of the machine - just a small item that can make the machine look great - but who looks at the back of the game anyway ? Shocked

Leg protectors are a must on a repainted cabinet. I had the old instruction and localization cards relaminated and stapled to the inside of the head. Pity I forgot to take a picture..


Playfield protectors / noise reduction strips

Because I painted the inside of the cabinet, I didnt want the paint to be scratched every time the playfield was raised. So I went to bunnings and found a roll of felt strip with adhesive backing. I placed it on both sides of the playfield. This serves two purposes - The inside of the pin does not have the paint scratched AND the noise of the score motor and chimes are a little lower in volume ! Small touch - but it cost a couple of dollars.


I just wrapped it around the top corners, and it made life easier while I was still working on the game;


I lost track of the hours and the expenses on this game. It just had to meet my objective, and I'm pleased that I think I achieved that. This is my first attempt at a "Nearly In Box" restore at this level. I plan on replicating a similar process on a Pro Football, Volley and Spirit of 76.

Final pictures ;

The Rear of the Game

Often neglected.. The back door is polished, even though its still dull, that's the way it should look. New Gliders - for such a cheap part, they offer protection in case the game has to be stored.


Lock Down Bar

Why take a picture of a lock down bar - This is my favorite picture ( I have 400 ).. The lock down bar took HOURS to clean and regrain - but it makes all the difference. A rewarding picture, and a reminder of the level of attention you can give to have an original look;


The Head


The biggest problem other than the flipper drag - was the swirl marks on the outside of the backglass.. That just could not be fixed... The backglass was fine other than that...


Finale


Game finished. All done - Very pleased. It was purchased by one of the first pinheads that played it. It's had one problem in 3 years, that took 5 minutes to fix. The owner is very happy, and I get to start the next big project !!!


Cheers and thanks for looking !! Glad to answer any questions

 :D
Aussie Pinball - Proud to be Australia's Premier Pinball Forum

http://www.australianpinballrestorations.com.au/

http://www.rtbb.com.au/catalog/

We carry the largest range of NEW Ramps in Australia

Offline pinnies4me

  • Administrator
  • Trade Count: (+5)
  • *****
  • High Score Initials:
  • Forum Posts:
  • Victoria
Re: Gottlieb Jacks Open Part 2
« Reply #2 on: February 16, 2009, 03:00:09 PM »
Glad to answer any questions

OK - where do I get me one of these? I gotta have one! :)
“If you wanna escape, go up to a pinball machine. There’s a magic button on the front that takes you to a world under the glass and makes the the rest of the universe disappear.”

Offline Strangeways

  • Pinball Restoration is my passion
  • Administrator
  • Trade Count: (+9)
  • *****
  • High Score Initials:
  • Forum Posts:
  • Melbourne
  • ABN 68 283 634 461
    • Ride The Boney Beast
Re: Gottlieb Jacks Open
« Reply #3 on: February 16, 2009, 03:07:22 PM »

Pro Football (X2) and a Volley are next.

Buccaneer will be the next EM I do, but it does not require a full repaint.
Aussie Pinball - Proud to be Australia's Premier Pinball Forum

http://www.australianpinballrestorations.com.au/

http://www.rtbb.com.au/catalog/

We carry the largest range of NEW Ramps in Australia

Offline ktm450

  • Trade Count: (+1)
  • ******
  • High Score Initials:
  • Forum Posts:
  • Geelong, Victoria
Re: Gottlieb Jacks Open
« Reply #4 on: February 16, 2009, 04:28:25 PM »
 $$(  Fantastic work again Nino, it must be hard for you to sell your restored pins after all the hard work that goes into them

Offline Strangeways

  • Pinball Restoration is my passion
  • Administrator
  • Trade Count: (+9)
  • *****
  • High Score Initials:
  • Forum Posts:
  • Melbourne
  • ABN 68 283 634 461
    • Ride The Boney Beast
Re: Gottlieb Jacks Open
« Reply #5 on: February 16, 2009, 04:31:03 PM »
$$(  Fantastic work again Nino, it must be hard for you to sell your restored pins after all the hard work that goes into them


To be quite honest - I'm very pleased to let them go, as it enables me buy more projects. It is always about the "journey" for me. The end result is always pleasing, but I'm sometimes relieved to see them go into good homes.
Aussie Pinball - Proud to be Australia's Premier Pinball Forum

http://www.australianpinballrestorations.com.au/

http://www.rtbb.com.au/catalog/

We carry the largest range of NEW Ramps in Australia

stuba

  • Guest
  • Trade Count: (0)
Re: Gottlieb Jacks Open
« Reply #6 on: February 16, 2009, 06:45:51 PM »
wow. this is suddenly very relevant to me  %$%

did i read too fast or did you not mention what you did to the apron. was it that clean to start or did you spray it or buy a new one?

amazing resto btw.  #*#


Offline Strangeways

  • Pinball Restoration is my passion
  • Administrator
  • Trade Count: (+9)
  • *****
  • High Score Initials:
  • Forum Posts:
  • Melbourne
  • ABN 68 283 634 461
    • Ride The Boney Beast
Re: Gottlieb Jacks Open
« Reply #7 on: February 16, 2009, 06:49:26 PM »
wow. this is suddenly very relevant to me  %$%

did i read too fast or did you not mention what you did to the apron. was it that clean to start or did you spray it or buy a new one?

amazing resto btw.  #*#


The apron was that good to start with.  ^^^
Aussie Pinball - Proud to be Australia's Premier Pinball Forum

http://www.australianpinballrestorations.com.au/

http://www.rtbb.com.au/catalog/

We carry the largest range of NEW Ramps in Australia

Offline humpalot

  • Trade Count: (0)
  • *****
  • Forum Posts:
  • NSW
Re: Gottlieb Jacks Open
« Reply #8 on: February 16, 2009, 07:00:46 PM »
Love the detail that you go into with your restro's.  Obviously a great number of hours/days/months go into it them, does your sale price of these pins reflect the time and effort that goes into them? 

Offline Strangeways

  • Pinball Restoration is my passion
  • Administrator
  • Trade Count: (+9)
  • *****
  • High Score Initials:
  • Forum Posts:
  • Melbourne
  • ABN 68 283 634 461
    • Ride The Boney Beast
Re: Gottlieb Jacks Open
« Reply #9 on: February 16, 2009, 07:49:18 PM »
Love the detail that you go into with your restro's.  Obviously a great number of hours/days/months go into it them, does your sale price of these pins reflect the time and effort that goes into them? 

Mick - The collector who saw this machine valued it at exactly what I valued it at - I got exactly what I wanted - which was over $3K. It does take a lot of effort, but it is worth it both financially and it provided me with a great level of satisfaction.

If I charged a minimum of $35 per hour, the game would not be affordable.

I will do more games at this level in the future.
Aussie Pinball - Proud to be Australia's Premier Pinball Forum

http://www.australianpinballrestorations.com.au/

http://www.rtbb.com.au/catalog/

We carry the largest range of NEW Ramps in Australia

Offline Creech

  • Forum Founder
  • Trade Count: (0)
  • *****
  • Forum Posts:
  • Adelaide
Re: Gottlieb Jacks Open
« Reply #10 on: February 16, 2009, 08:15:10 PM »
That is simply spectacular - as usual.  ^^^

Offline Ford Fairlane

  • Trade Count: (+1)
  • ******
  • Forum Posts:
  • Yass
Re: Gottlieb Jacks Open
« Reply #11 on: February 16, 2009, 08:52:08 PM »
Fantastic work mate. Well done! Really looking forward to your upcoming projects.  $#$

Offline ajlaird

  • Trade Count: (0)
  • ******
  • Forum Posts:
  • Greensborough, Melbourne
  • Go Ahead, Make My Day
Re: Gottlieb Jacks Open
« Reply #12 on: February 16, 2009, 11:37:25 PM »
Awesome attention to detail. I am not sure whether this is inspiring or simply overwhelming.

Offline Mr Pinbologist

  • Trade Count: (+5)
  • ******
  • High Score Initials:
  • Forum Posts:
  • Wauchope NSW
Re: Gottlieb Jacks Open
« Reply #13 on: February 17, 2009, 12:25:39 PM »
Bloody awesome job ^^^ i cant believe how good he score mechs and stepper units etc look. And thats a top idea using the felt strip in the sides of the PF to protect the paint. i dont know why  i never thought of that myself!

Looks absolutely amazing #*#

Offline Extra Ball

  • Read-Only
  • Trade Count: (0)
  • *
  • Forum Posts:
  • Newcastle
Re: Gottlieb Jacks Open
« Reply #14 on: February 17, 2009, 02:36:28 PM »
Very nice. Hey Spurr get your sweet EM resto on here for the guys to drool over as well.
:)