Author Topic: Bally Dr Who High End Restoration  (Read 20903 times)

0 Members and 1 Guest are viewing this topic.

Offline Strangeways

  • Pinball Restoration is my passion
  • Administrator
  • Trade Count: (+9)
  • *****
  • High Score Initials:
  • Forum Posts:
  • Melbourne
  • ABN 68 283 634 461
    • Ride The Boney Beast
Bally Dr Who High End Restoration
« on: December 31, 2017, 10:55:20 PM »
A collector that I've done a couple machines - just standard restorations, has taken the plunge with his "Holy Grail" - The Bally Dr Who. Much underrated title. Similar to the Addams I'm doing, this is a "NIB" (Nearly In Box) Restoration.

Condition report

Cabinet - Not too bad, but we are using the skills of Tim and Stu to make a new cabinet.
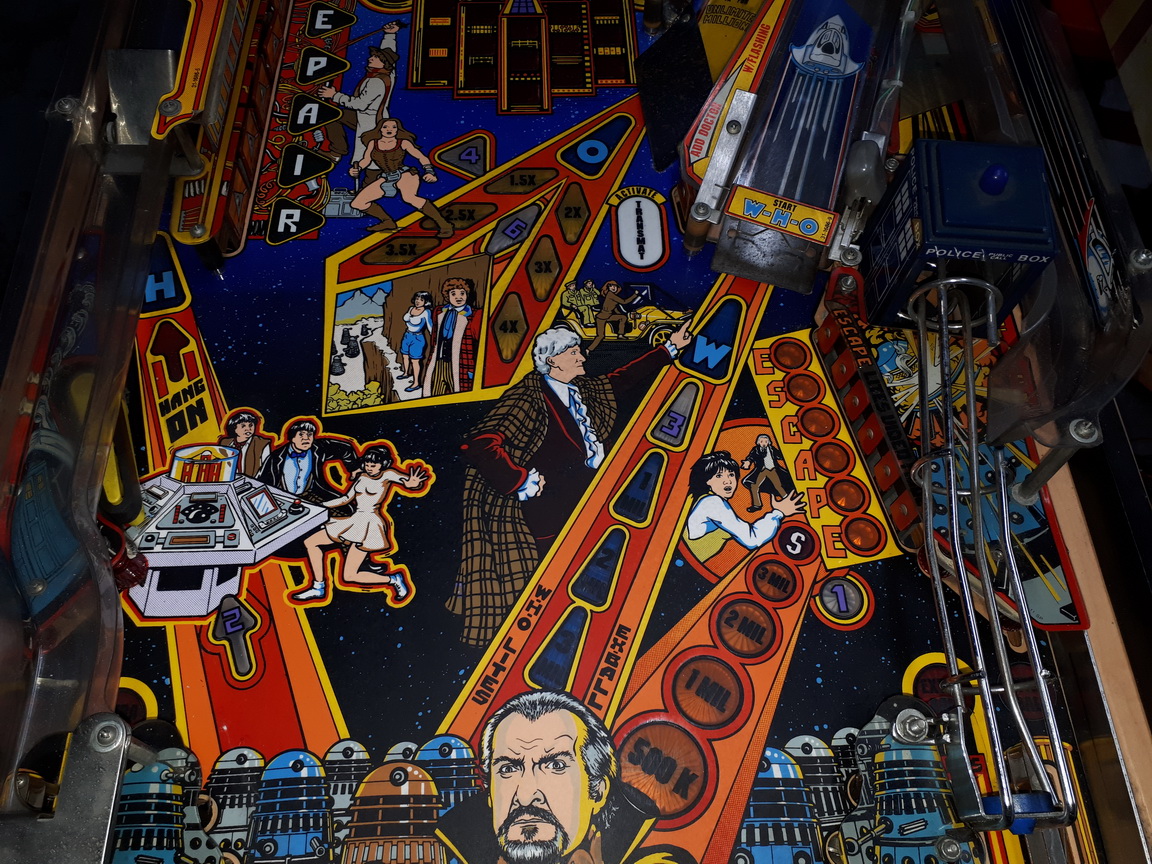
Playfield - 8/10 - A VERY nice example. Again, off to Tim for a Clearcoat.
Electronics - 8/10 - Honest boardset. No major dramas.

This is another long term project that has taken quite some time to gather all the necessary components to ensure the NIB standard we pride ourselves on. The ramps will be replaced with the Starship Fantasy Ramp Set. Colour DMD will be used and some more additional items as we progress.

Before pictures and teardown


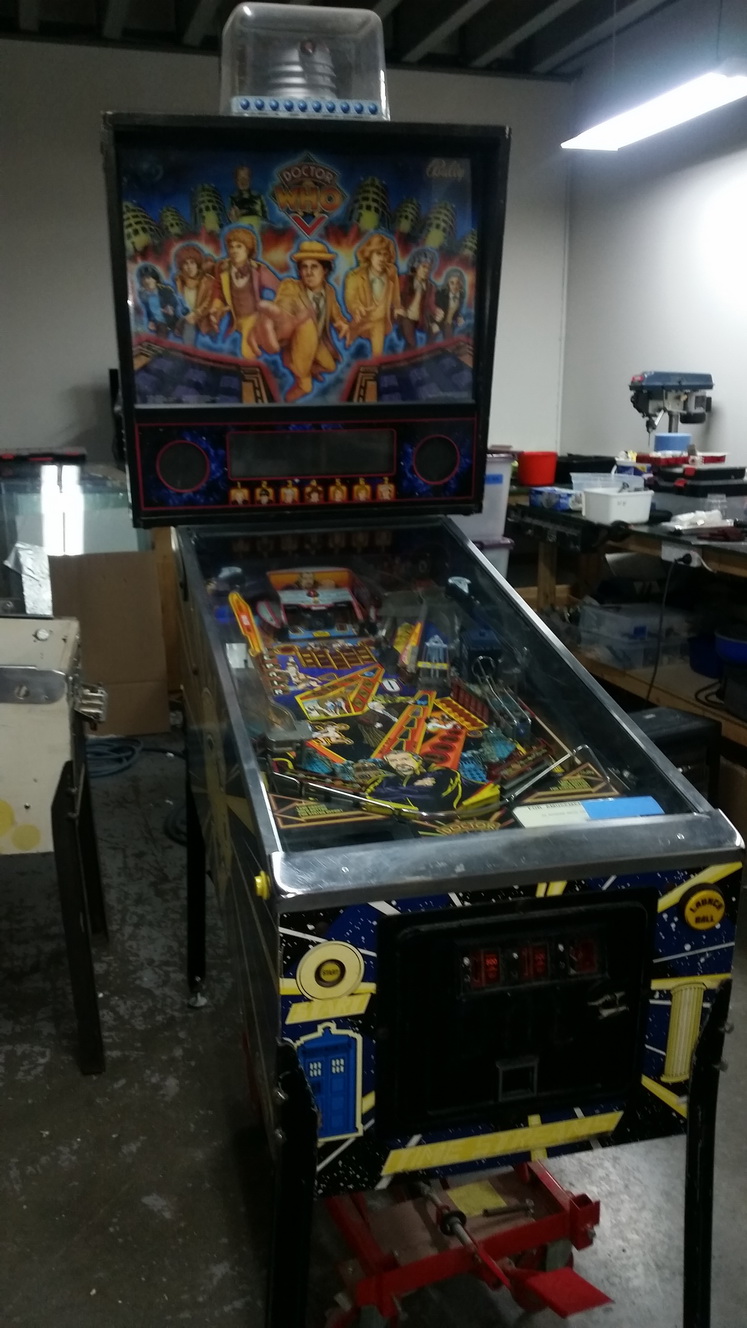
OK Cabinet - But we are having a new one made for this restoration. But we will re purpose this cabinet for another project..


Playfield is removed as the cabinet had to be sent to Tim for final measurements on the new cabinet. So I have a bit of time to strip the playfield. Given I lost all my teardown pictures of the other Dr Who games I've done, I needed to document the process again.


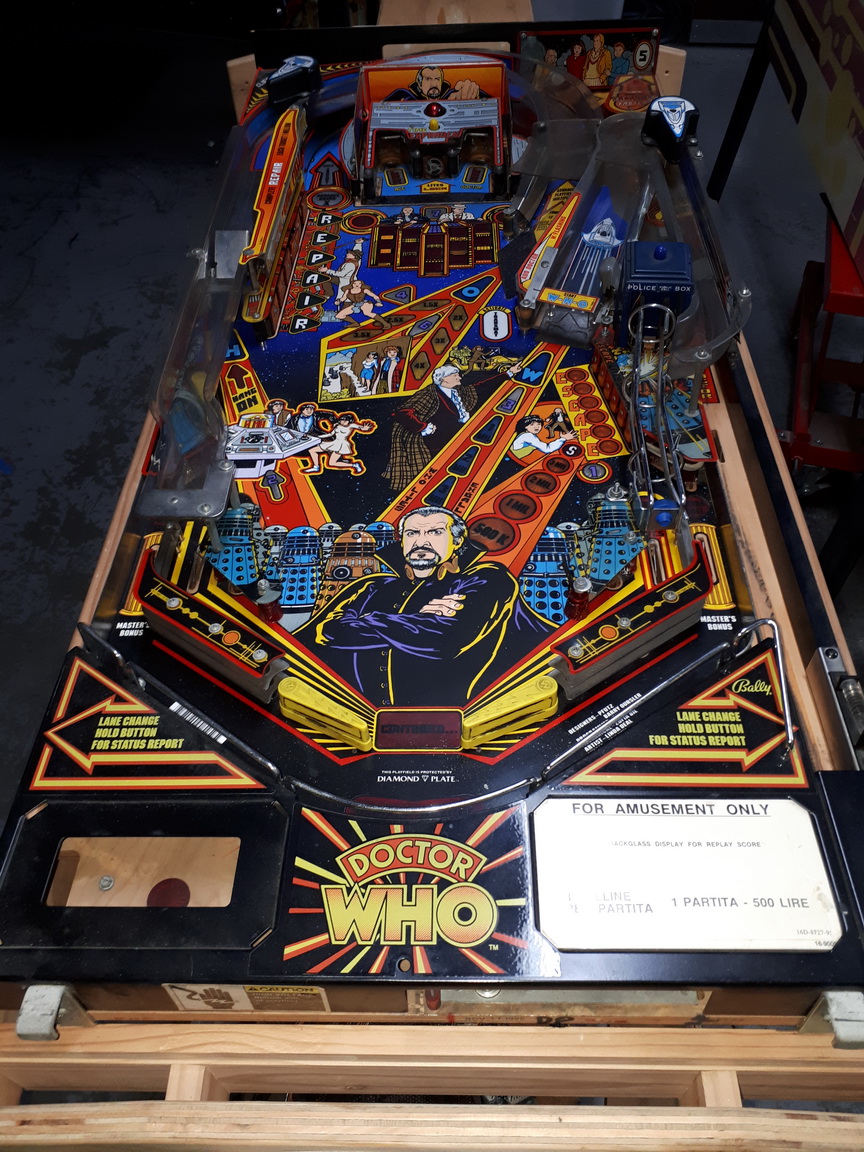
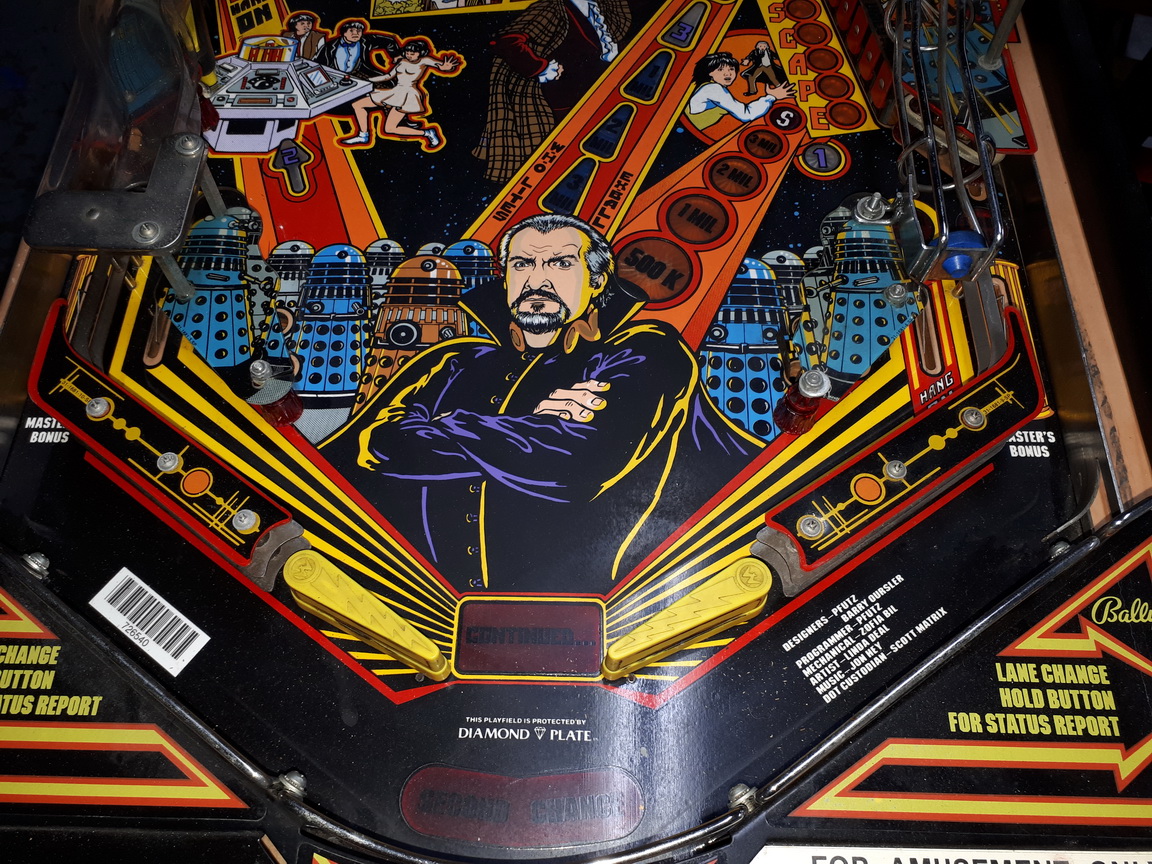
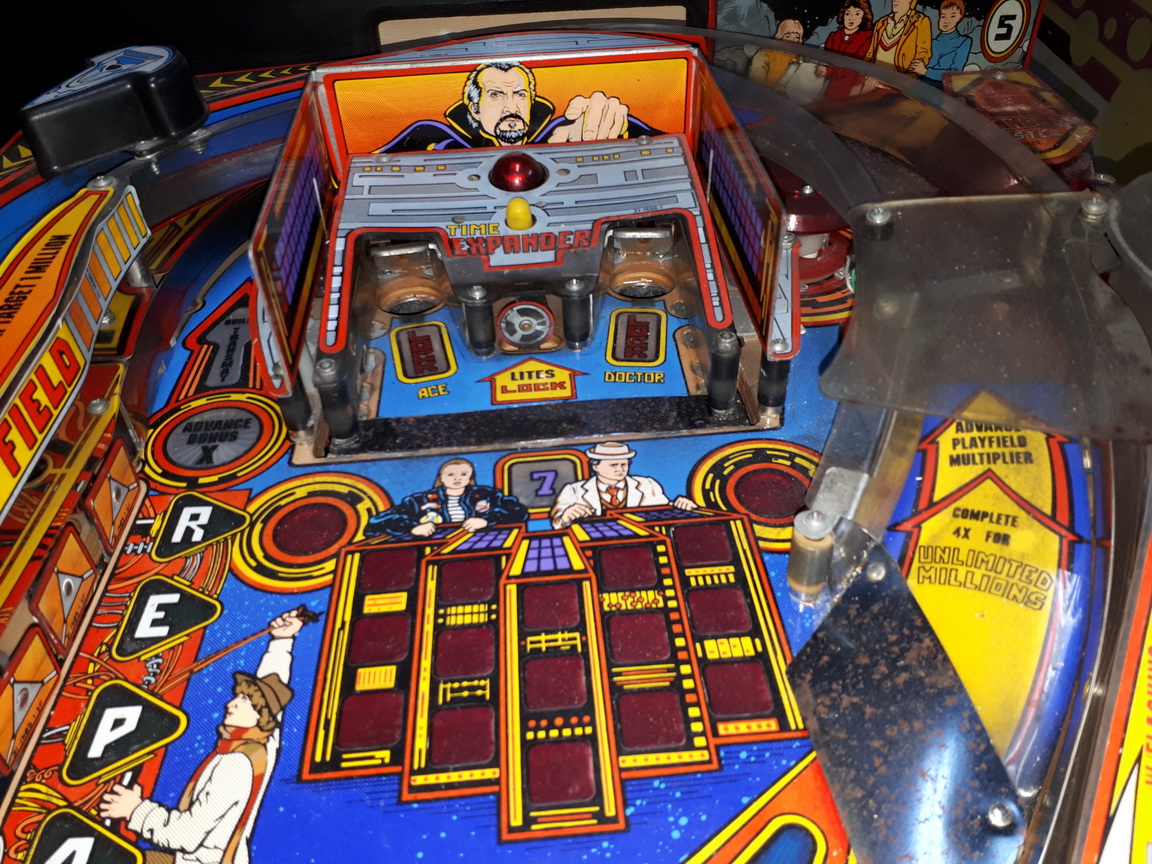
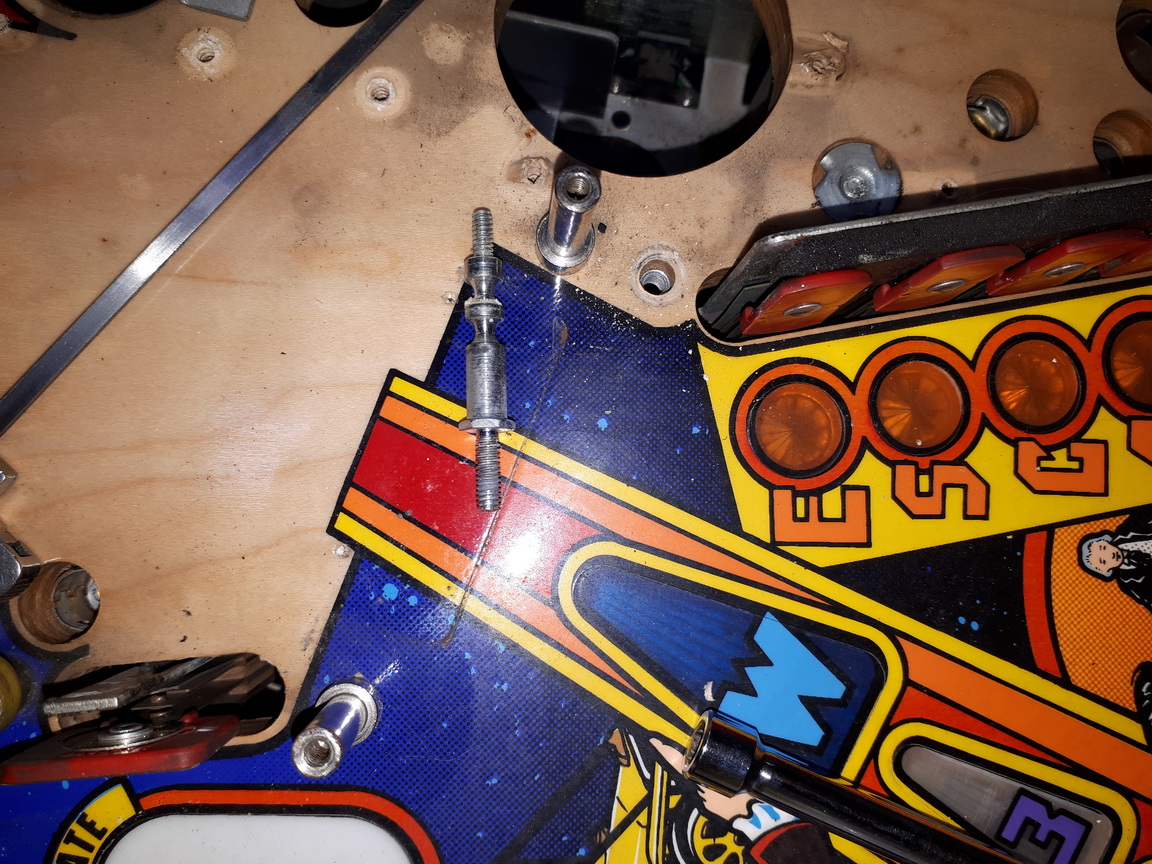
The inserts in front of the time expander are ALWAYS a problem with significant wear. They are often sunken, or have the clear completely chipped out. Not this game. The playfield is excellent.


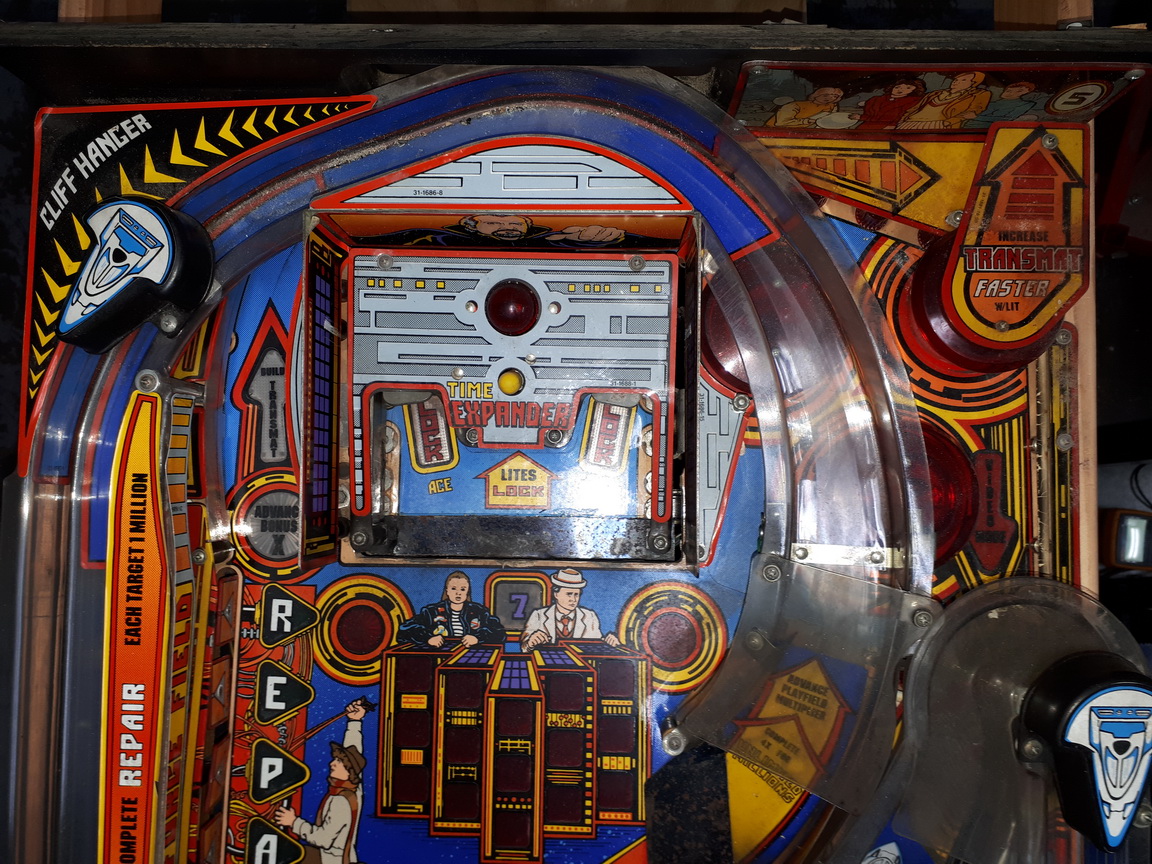
Time Expander mini pf is in really good shape.
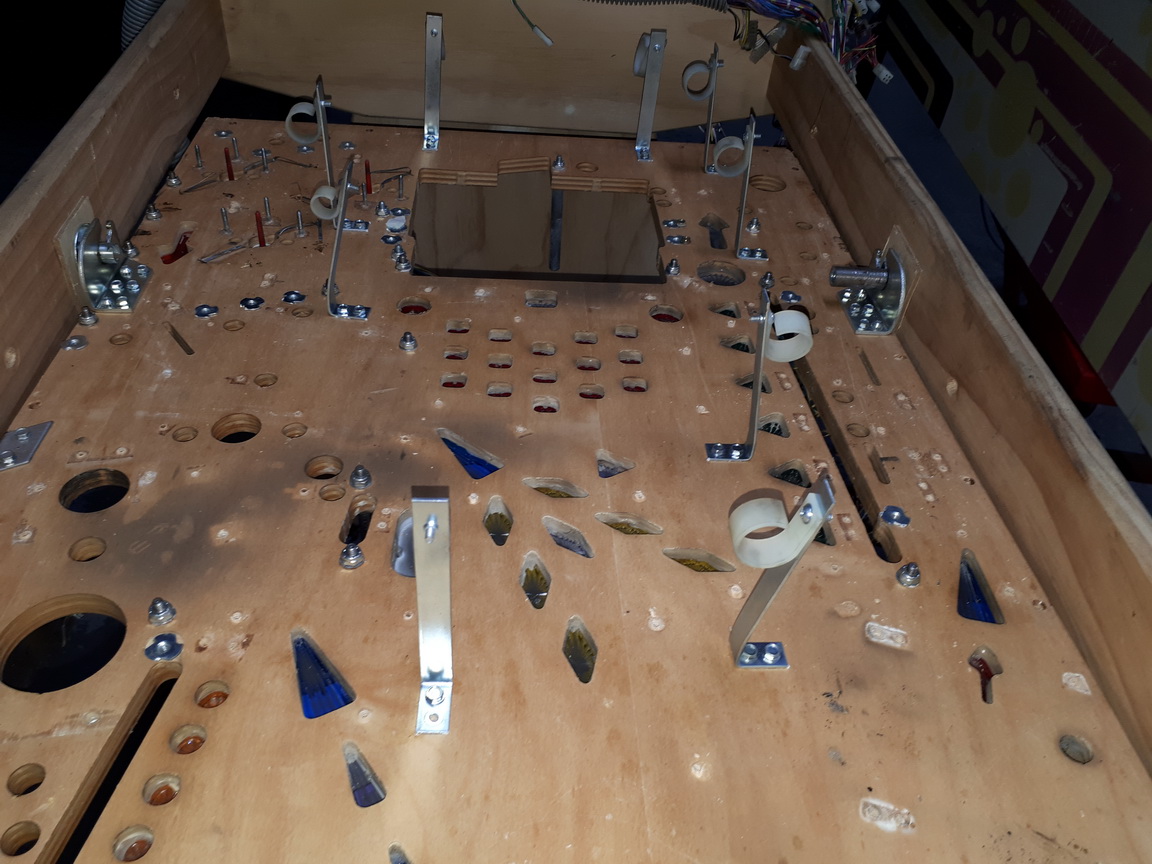


Filthy !


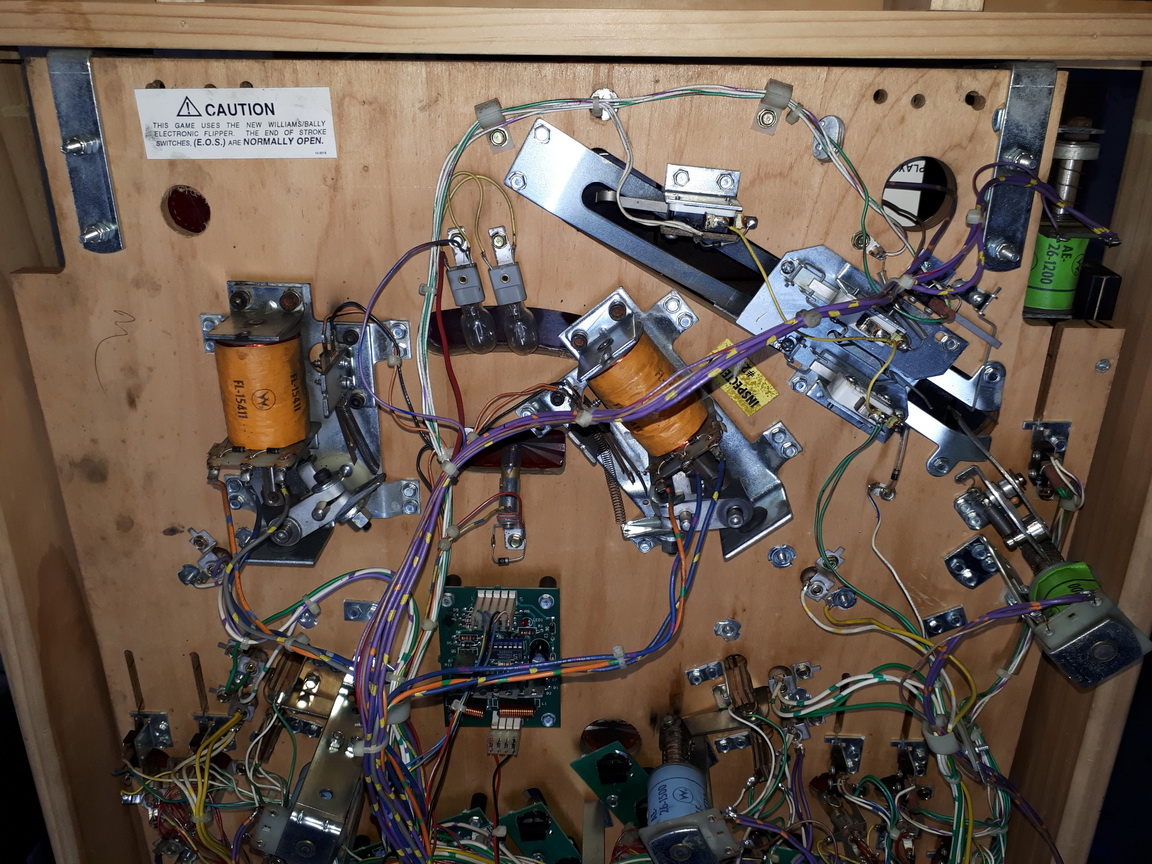
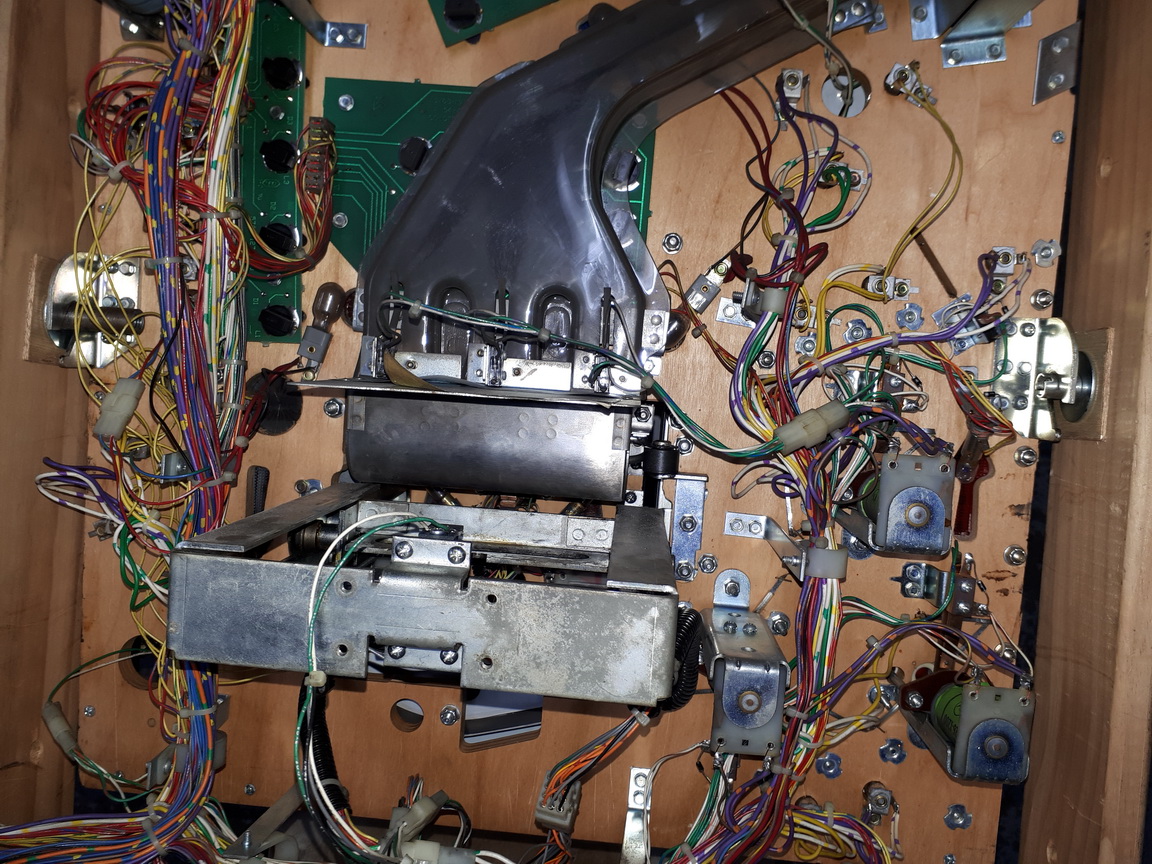
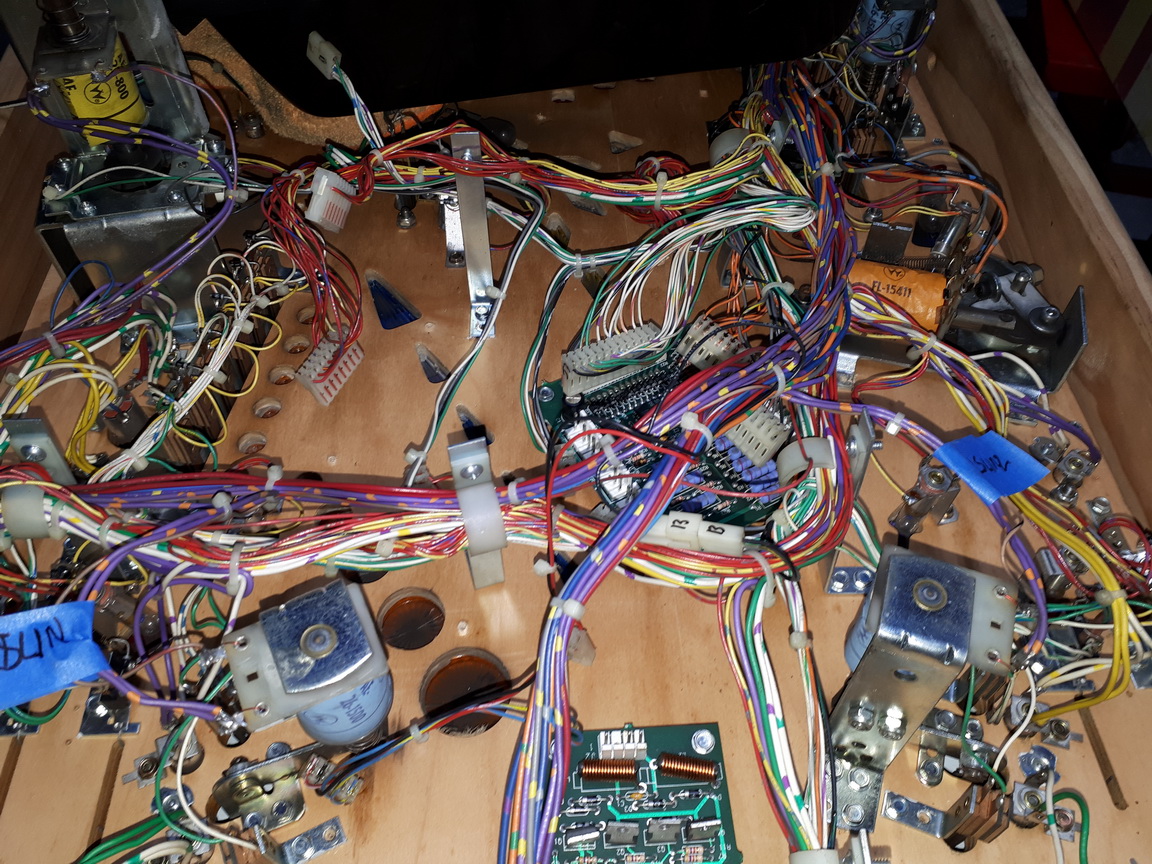
Under the playfield - REALLY good condition.


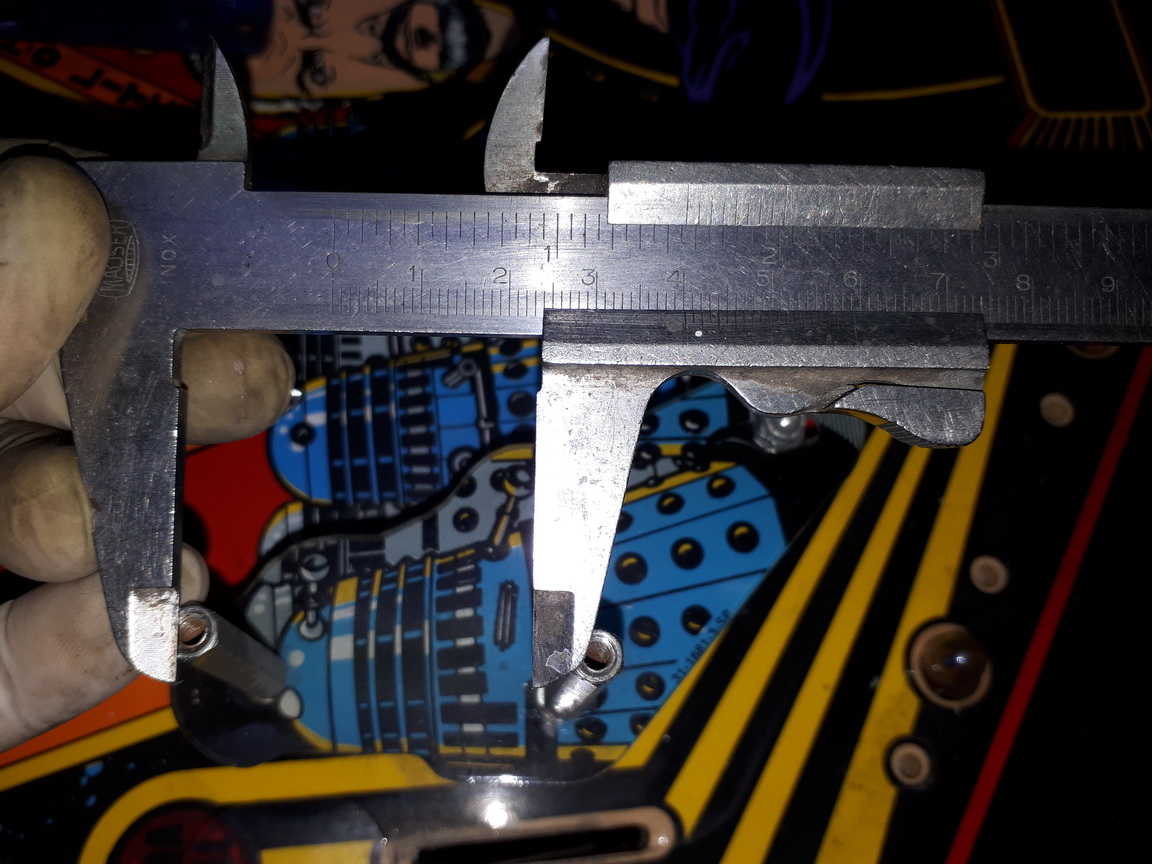
I get asked this question A LOT - "how do you know where things go when you reassemble ? " - I take HUNDREDS of photos, of every angle, and measure out all the spacers etc.. The caliper comes in handy for this process. Patience and good record keeping provides a good reference. The only exception is Addams Family. I've done that many, I know where everything goes without photos !


Here is my left handed screwdriver, next to my right handed screwdriver..

One for 1/4 hex heads and the other is a phillips head.


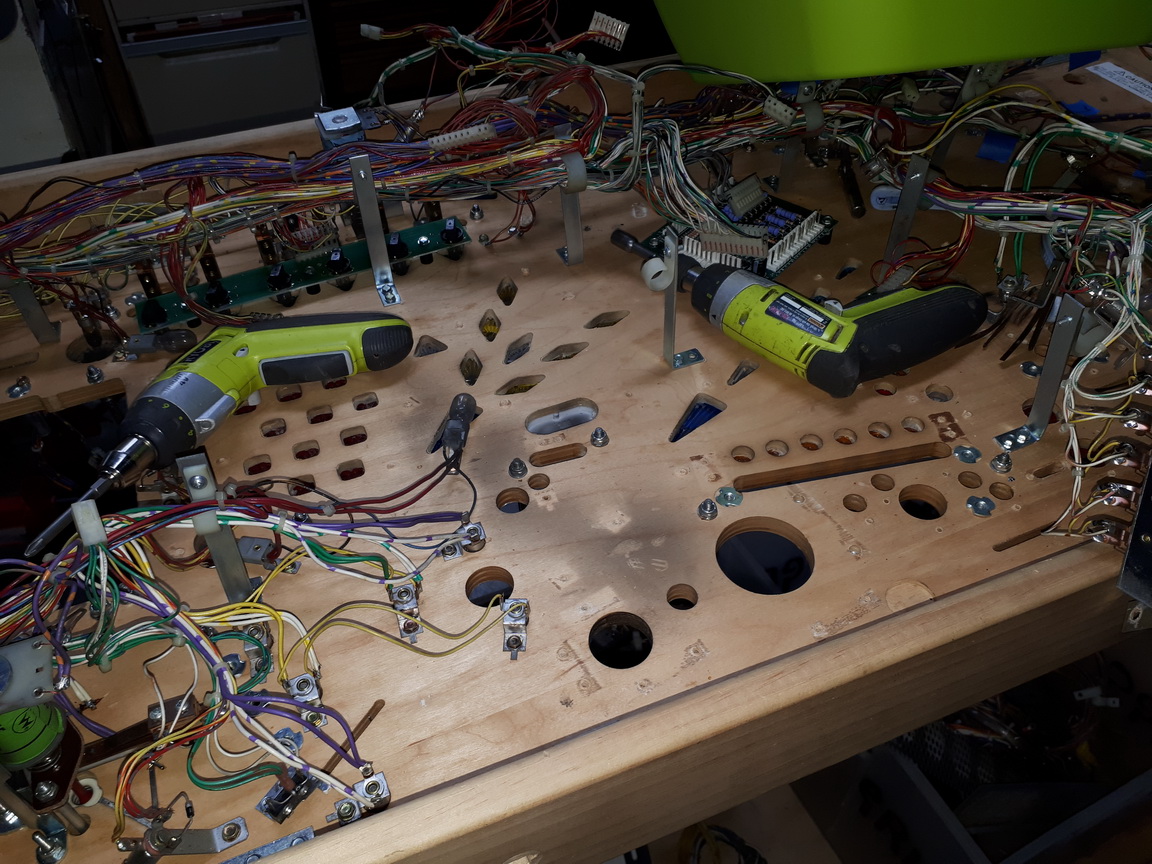
Just the cable management parts left to remove.


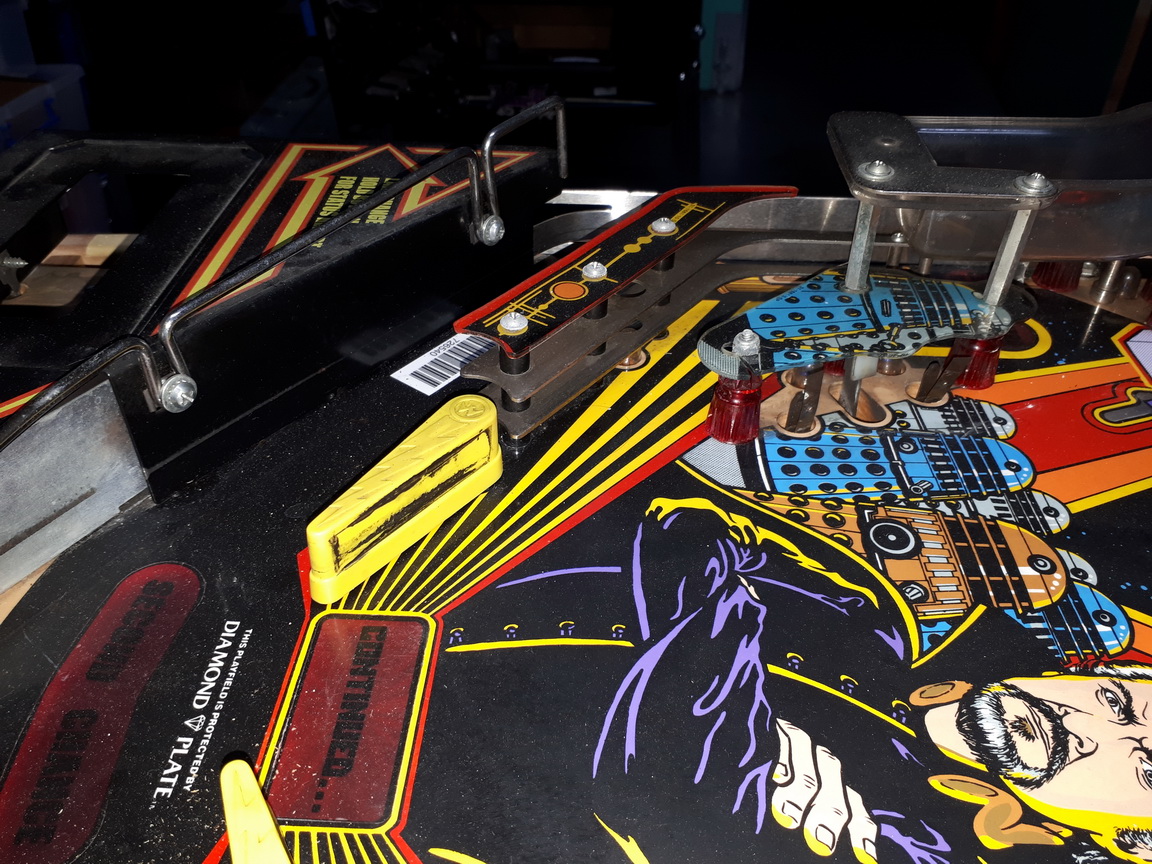
Every single mech is reordered, rebuilt and then refitted.


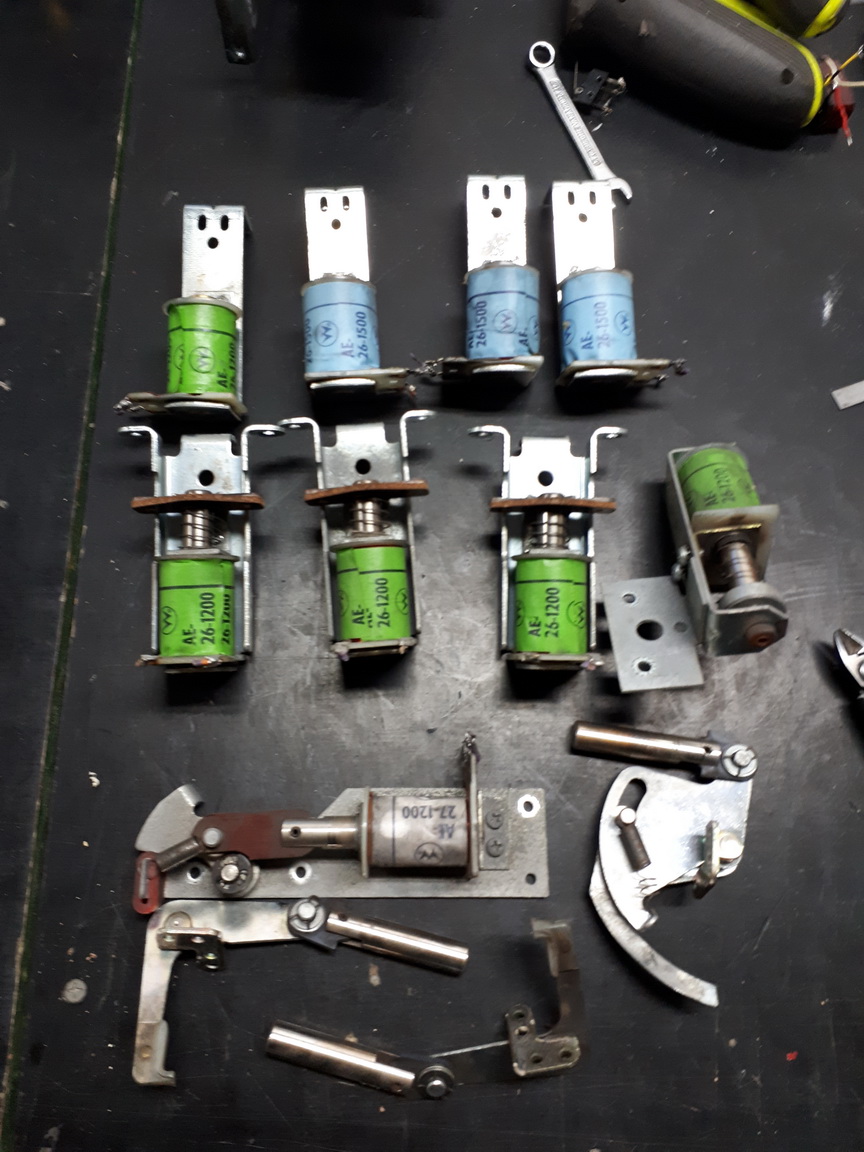
All the parts are cleaned in the ultrasonic, and then tumbled first in a rough media tumbler and then for a final polish in a finer grade media tumbler. Anything worn or broken, is replaced.

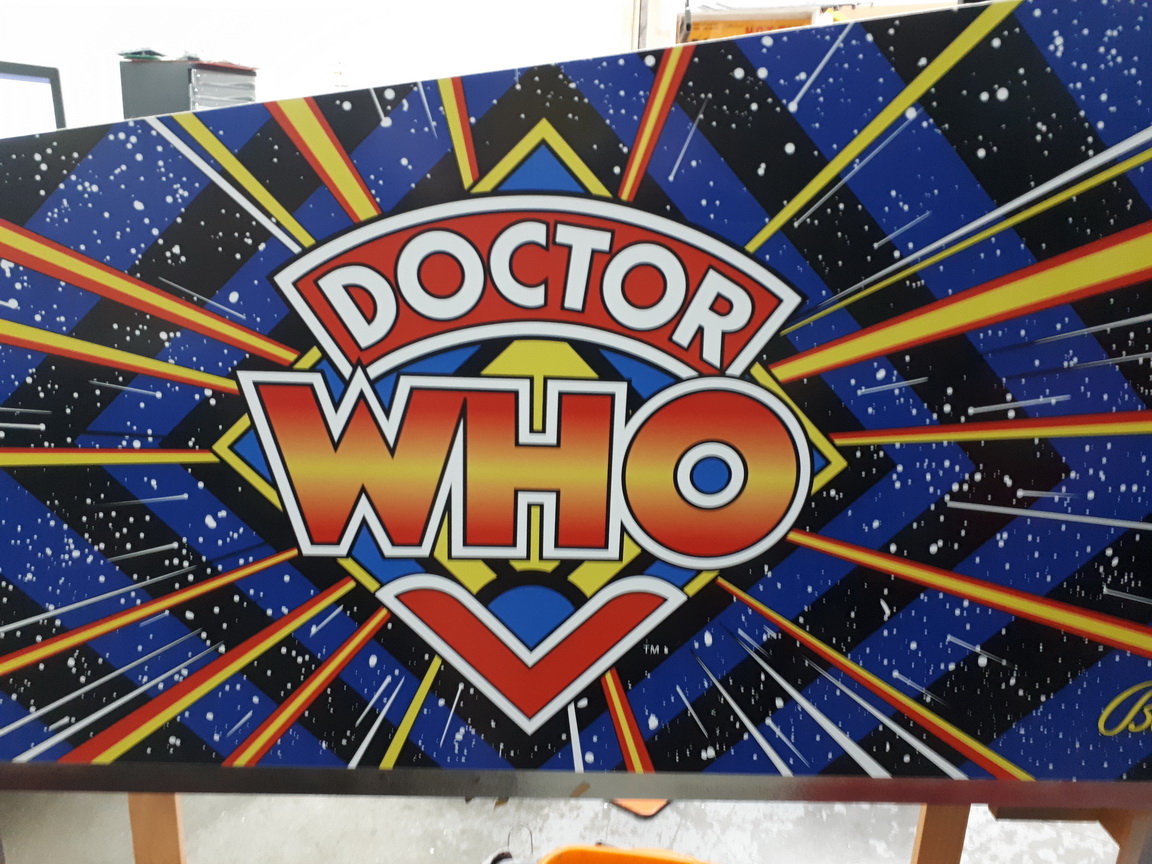
While this is happening, look what arrives - The new cabinet, courtesy of Tim and Stu..


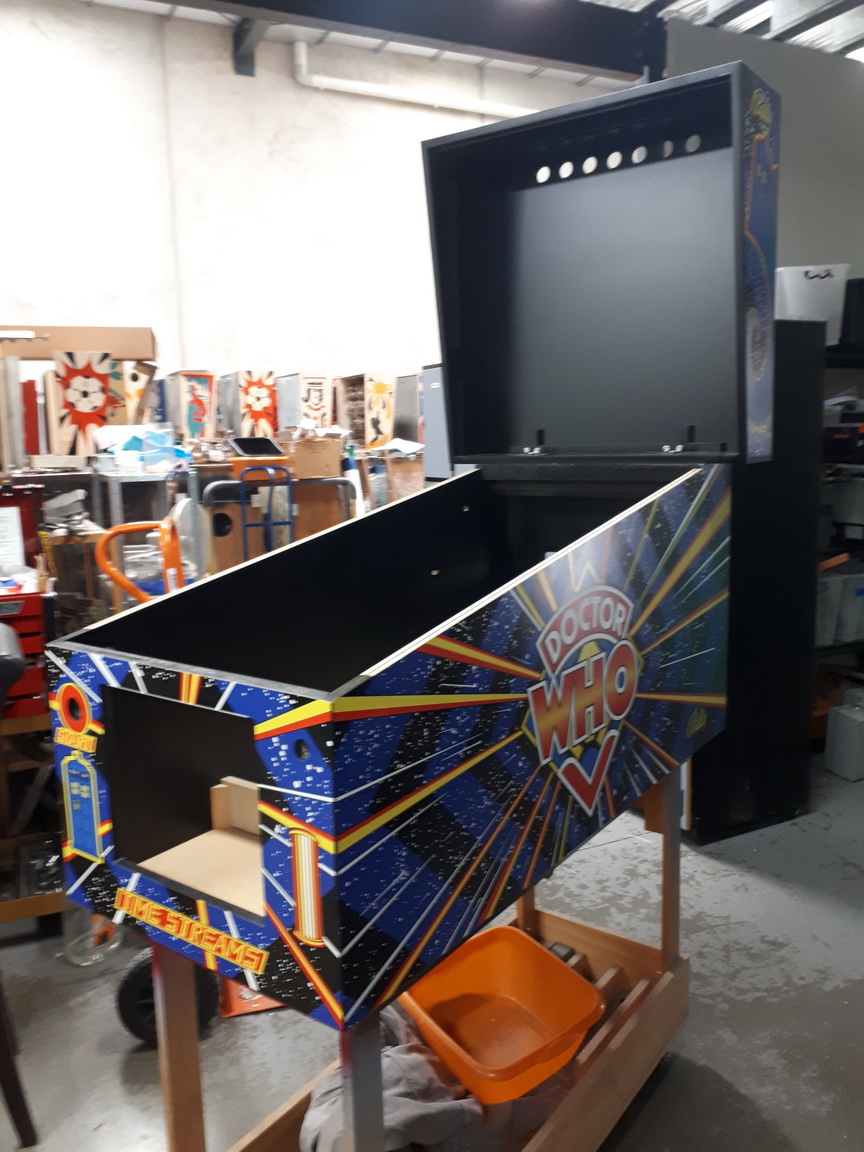
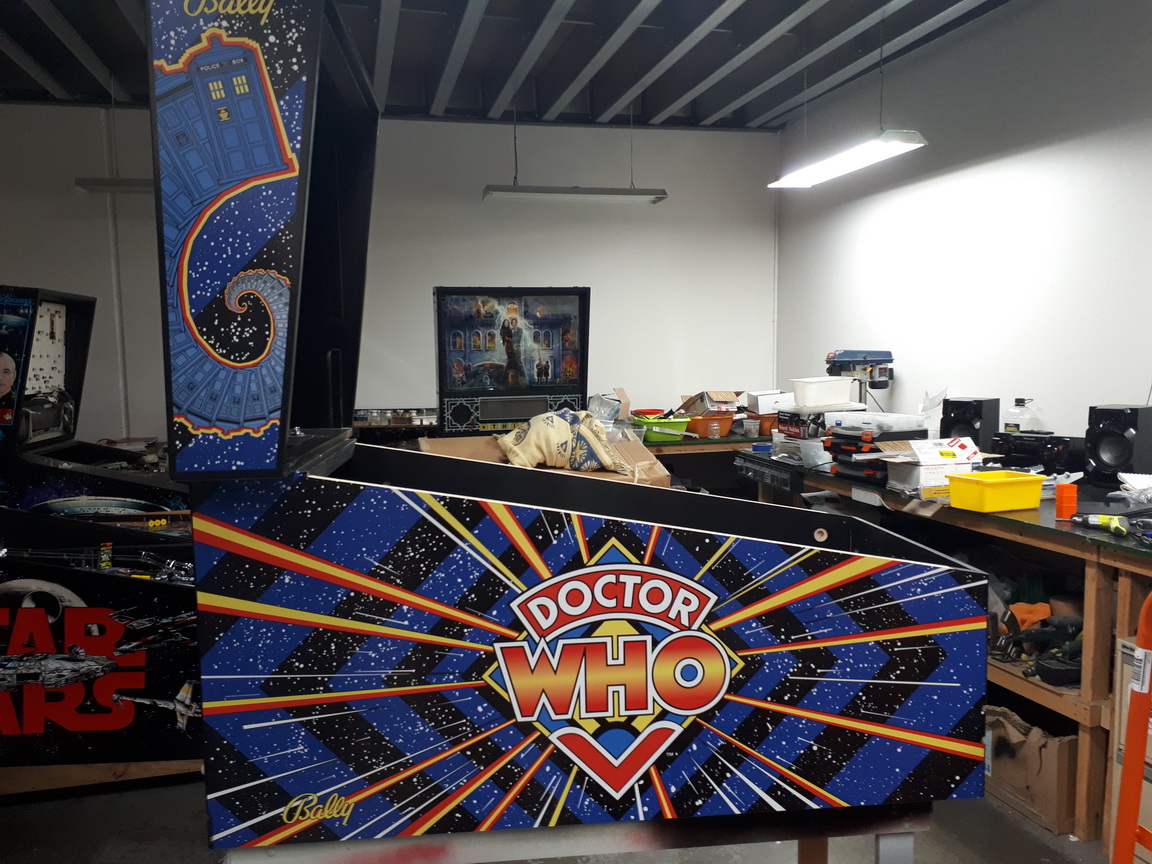
Just LOOK at those colours !


Stay tuned !


« Last Edit: December 31, 2017, 11:29:08 PM by Strangeways »
Aussie Pinball - Proud to be Australia's Premier Pinball Forum

http://www.australianpinballrestorations.com.au/

http://www.rtbb.com.au/catalog/

We carry the largest range of NEW Ramps in Australia

Offline coon82

  • Trade Count: (0)
  • *****
  • Forum Posts:
  • Melbourne
Re: Bally Dr Who High End Restoration
« Reply #1 on: January 01, 2018, 12:25:07 AM »
 Maybe my comment in as conflict of interest  &&  but I'm really looking forward to this thread unfold. The pictures of the cabinet don't do it justice *.* () ^^^


 :pinball:
Wanted:   Black Hole (1981Gottlieb)

Offline Strangeways

  • Pinball Restoration is my passion
  • Administrator
  • Trade Count: (+9)
  • *****
  • High Score Initials:
  • Forum Posts:
  • Melbourne
  • ABN 68 283 634 461
    • Ride The Boney Beast
Re: Bally Dr Who High End Restoration
« Reply #2 on: August 29, 2018, 10:21:15 PM »
Way behind updates on this restoration.

I need to finish off the cabinet so I can concentrate on the playfield returned from @el_timbo86 . The decision was made to install the Mantis Cabinet protectors, which are the recommended cabinet protectors I use for High End Games. Nothing wrong with alternatives, but these are exceptional in quality. First, I want to install the Ground braid. I've covered this in the Addams Family thread, so here is this cabinet completed ;


I decided to that the ground braid should go behind the brackets, even though this is not what they did in the factory, I've seen enough broken braid to suggest this is a better method.


Ground braid and leg brackets done.
Aussie Pinball - Proud to be Australia's Premier Pinball Forum

http://www.australianpinballrestorations.com.au/

http://www.rtbb.com.au/catalog/

We carry the largest range of NEW Ramps in Australia

Offline Strangeways

  • Pinball Restoration is my passion
  • Administrator
  • Trade Count: (+9)
  • *****
  • High Score Initials:
  • Forum Posts:
  • Melbourne
  • ABN 68 283 634 461
    • Ride The Boney Beast
Re: Bally Dr Who High End Restoration
« Reply #3 on: August 29, 2018, 10:45:14 PM »
Here are some of the new cabinet parts installed, or are about to be installed. I don't muck around with the original parts on some restorations, opting to use new parts and use my time in other aspects of the restoration.


A more recent development is the use of metal cabinet protectors. They effectively can replace Pincabs or felt leg protectors. The idea here is to protect the Cabinet - not the legs. I've used most metal protectors on the market, but I much prefer the Mantis version, as it is thicker and has four mounting holes. The other advantage is that they have a polished edge.


3mm Thick. The thickest protector I've seen.


They are EASY to install. First - position them with clearance through the cabinet leg bolt holes.


Pre Drill the first hole ;


Screw the first wood screw in position, but do not tighten


Ensure both bolts are easily installed and removed by hand.


Drill one hole on the opposite side of the protector and tighten both screws into the cabinet. Once everything is set up correctly, measure the distance between the bottom of the cabinet and the metal protector.


Transfer that to the other side..


Follow the same procedure as the first protector..


Then follow the same procedure as the rear - although the distance from the bottom of the cabinet will be different.


Next update - playfield..


Aussie Pinball - Proud to be Australia's Premier Pinball Forum

http://www.australianpinballrestorations.com.au/

http://www.rtbb.com.au/catalog/

We carry the largest range of NEW Ramps in Australia

Offline Strangeways

  • Pinball Restoration is my passion
  • Administrator
  • Trade Count: (+9)
  • *****
  • High Score Initials:
  • Forum Posts:
  • Melbourne
  • ABN 68 283 634 461
    • Ride The Boney Beast
Re: Bally Dr Who High End Restoration
« Reply #4 on: September 26, 2018, 09:58:44 PM »
Overdue update.

I like to be working on several restorations so I can do work in batches. This time, this update will concentrate on the finer details of the playfield underside - in particular the Zinc Plating that I've been doing in-house for years with success.


The power box has a zinc plated galvanized finished which is practical but looks out of place on a High End Restoration. I thought I'd try something new and attempt to plate the power box and also the power cable box located on the rear panel. So here is the starting point ;


The two items are put aside and prepped with a lot of other parts for different games that I will Zinc Plate. Here is the 30 Liter tub of magical solution busy at work in mt chemical laboratory..


After plating, here are the results ;


Re assembly ;


More plating during this session ;


The DR Who VUK Assembly ;


The "Time Expander" assembly looks completely different after plating ;


Aussie Pinball - Proud to be Australia's Premier Pinball Forum

http://www.australianpinballrestorations.com.au/

http://www.rtbb.com.au/catalog/

We carry the largest range of NEW Ramps in Australia

Offline Strangeways

  • Pinball Restoration is my passion
  • Administrator
  • Trade Count: (+9)
  • *****
  • High Score Initials:
  • Forum Posts:
  • Melbourne
  • ABN 68 283 634 461
    • Ride The Boney Beast
Re: Bally Dr Who High End Restoration
« Reply #5 on: September 26, 2018, 10:03:52 PM »
Moving on to the FIRST job on the upper playfield - while it is still completely blank - installing the Pop Bumper screws ;


Then all the underside plated parts are installed ;


The cable clamps and even the screws are new.


Underside is coming together nicely ;


All of the lamp sockets are replaced - They Look great after a session in the ultrasonic cleaner, but I'm still not happy, so they are all replaced. The loom itslef looks brand new.


Apologies for slow updates - more coming in the next day or two !
Aussie Pinball - Proud to be Australia's Premier Pinball Forum

http://www.australianpinballrestorations.com.au/

http://www.rtbb.com.au/catalog/

We carry the largest range of NEW Ramps in Australia

Offline Crashramp

  • Trade Count: (+3)
  • ******
  • High Score Initials:
  • Forum Posts:
  • Albury
Re: Bally Dr Who High End Restoration
« Reply #6 on: September 27, 2018, 07:03:47 PM »
Wow, that is coming up really nicely Nino. Finished product is going to be very special.

Offline DSB

  • Trade Count: (0)
  • ******
  • High Score Initials:
  • Forum Posts:
  • Gold Coast
    • OMNI Electrical & Data
Re: Bally Dr Who High End Restoration
« Reply #7 on: September 27, 2018, 08:14:52 PM »
Very Nice!

Offline Strangeways

  • Pinball Restoration is my passion
  • Administrator
  • Trade Count: (+9)
  • *****
  • High Score Initials:
  • Forum Posts:
  • Melbourne
  • ABN 68 283 634 461
    • Ride The Boney Beast
Re: Bally Dr Who High End Restoration
« Reply #8 on: October 10, 2018, 10:29:31 PM »
Updates are well behind progress.. *%*


Even though the ultrasonic did really well to clean the lamp sockets, it was always the plan to replace them. I install the #47 sockets temporarily so I can route the GI wiring loom into correct position. No matter what the condition, I like to replace them. Here's why ;


Fair enough - it is a close up photo - but you can see the corrosion is more than superficial, and if you look closely, it is almost a short..

They are CHEAP and will save you hassles in the future !


.. and they look neater !


Digressing to the mini playfield - it is time to assemble the top of the Time Expander with the plated, re-grained or replacement parts ;


Cliffy's installed - which are MANDATORY for the Time Expander.


The VUK's are placed into position.


.. and we are done for the moment !


 :D
Aussie Pinball - Proud to be Australia's Premier Pinball Forum

http://www.australianpinballrestorations.com.au/

http://www.rtbb.com.au/catalog/

We carry the largest range of NEW Ramps in Australia

Offline Strangeways

  • Pinball Restoration is my passion
  • Administrator
  • Trade Count: (+9)
  • *****
  • High Score Initials:
  • Forum Posts:
  • Melbourne
  • ABN 68 283 634 461
    • Ride The Boney Beast
Re: Bally Dr Who High End Restoration
« Reply #9 on: October 10, 2018, 10:50:30 PM »
I continually find things I'm not happy with. If I'm not happy, then it is simply not good enough.. I don't like the target bank on the RHS - it looks "tacky" with the beer seal behind the targets.. So time to disassemble and this was justified as the rear of the bracket was corroded ! How ? I have no idea..


Removed from the switch matrix harness..


Replated - looks HEAPS better ;


Re-assembled with machine screws - not rivets. So if for some reason one target leans like the Tower of Pisa, it can be adjusted.. Also, that ugly beer seal is gone and I've used the singular target pads as it looks HEAPS better.


Now I can move on with installing more plated parts within the switch matrix loom..


Even the Pop Bumper switch brackets are re-plated. Why ? They look better and if I need to order new ones I have to wait. So I plate them in the morning, installed by the afternoon.. The one on the RHS is plated the one the LHS is corroded..


But this is "time consuming".. I don't like "furry" metal. Heavy Metal ? Yes - loud in the background !


The trough switch plate. Re-plated..


Even the switch assemblies !


That's all for this update !
Aussie Pinball - Proud to be Australia's Premier Pinball Forum

http://www.australianpinballrestorations.com.au/

http://www.rtbb.com.au/catalog/

We carry the largest range of NEW Ramps in Australia

Offline McKie1

  • Trade Count: (0)
  • ****
  • Forum Posts:
Re: Bally Dr Who High End Restoration
« Reply #10 on: October 10, 2018, 11:21:26 PM »
Looks amazing Nino. Wish ours was that nice.

Offline Pinballer

  • Trade Count: (0)
  • *****
  • Forum Posts:
Re: Bally Dr Who High End Restoration
« Reply #11 on: October 11, 2018, 07:33:02 AM »
Excellent work Nino.  You seem to have the plating process down to a fine art.

Offline DSB

  • Trade Count: (0)
  • ******
  • High Score Initials:
  • Forum Posts:
  • Gold Coast
    • OMNI Electrical & Data
Re: Bally Dr Who High End Restoration
« Reply #12 on: October 11, 2018, 10:57:27 PM »
Awesome plating work. Its almost a hobby on its own from my experience.

Offline Strangeways

  • Pinball Restoration is my passion
  • Administrator
  • Trade Count: (+9)
  • *****
  • High Score Initials:
  • Forum Posts:
  • Melbourne
  • ABN 68 283 634 461
    • Ride The Boney Beast
Re: Bally Dr Who High End Restoration
« Reply #13 on: October 12, 2018, 03:37:40 PM »
Awesome plating work. Its almost a hobby on its own from my experience.

I've been using the same process for 10 years or more, and now I can plate just about anything. Given commercial platers don't use Zinc baths any longer in favor on Nickel, I like to keep the process authentic. It is still a buzz to remove an old part from the bath looking better than the day it was manufactured. That's in line with my way of thinking when doing high end jobs.
Aussie Pinball - Proud to be Australia's Premier Pinball Forum

http://www.australianpinballrestorations.com.au/

http://www.rtbb.com.au/catalog/

We carry the largest range of NEW Ramps in Australia

Offline skywalker

  • Trade Count: (+2)
  • ******
  • High Score Initials:
  • Forum Posts:
  • melbourne
Re: Bally Dr Who High End Restoration
« Reply #14 on: October 18, 2018, 07:42:03 PM »
Wow that metal plating looks super impressive, Awesome resto.